some of you may have seen my pics on the Facebook page. but I wanted to do a little write up in case someone wants to do something similar with a vent, cowl, etc and show how easy it was. I bought a project 2010 GT500 and the original hood was bowed from a light front end wreck. Since we currently live in Hawaii, I wasn't willing to pay $1,500+ for a stock one to get shipped down here. So this was my choice of how to move forward and keep the stock look
Cliff notes: cut out hole in the hood, rough up the edges with 36 grit sandpaper, spread adhesive and clamp new panel in place. body work the top to your liking.
you're basically bonding panels with adhesive. doesn't get much simpler than that. like most things cosmetic, it's all in the preparation.
I used Valvoline Pliogrip "Panel 60" adhesive. 3M and Fusor also make similar products. Valvoline was available locally with the application gun, so that's what was used.
the hood used was a 2013 v6 base hood since it doesn't have the dual vents like the GT. I originally had a GT hood, but the proper location for the GT500 vent put it within an inch of the other two vents and could have messed with the hoods strength. So I swapped it out for a v6 one.
On to the process:
I measured where the vent was on the stock hood which was 12" from the front edge of the hood to the opening part of the vent. That gave me a constant to use when placing it on the new hood.

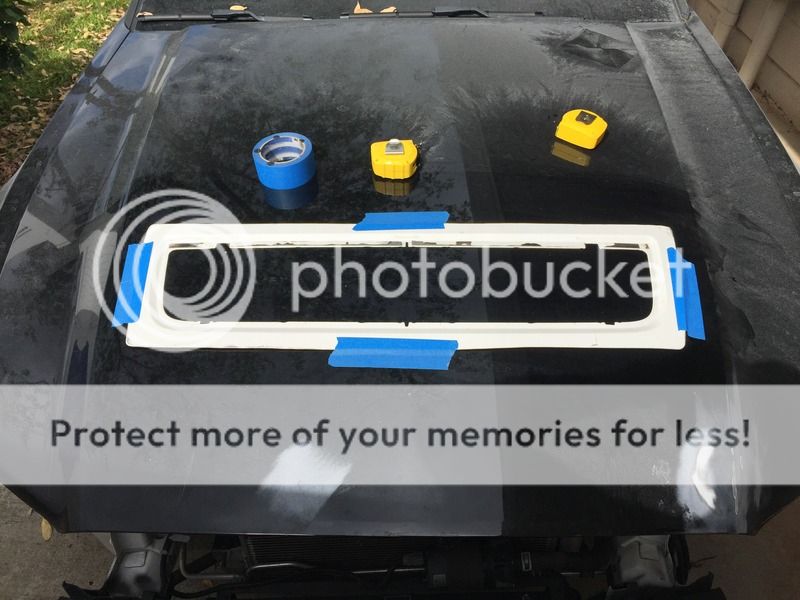
then I cut the vent surround out leaving just over an inch of material to bond with the new hood. measure as many times as you see fit and tape it to the new hood
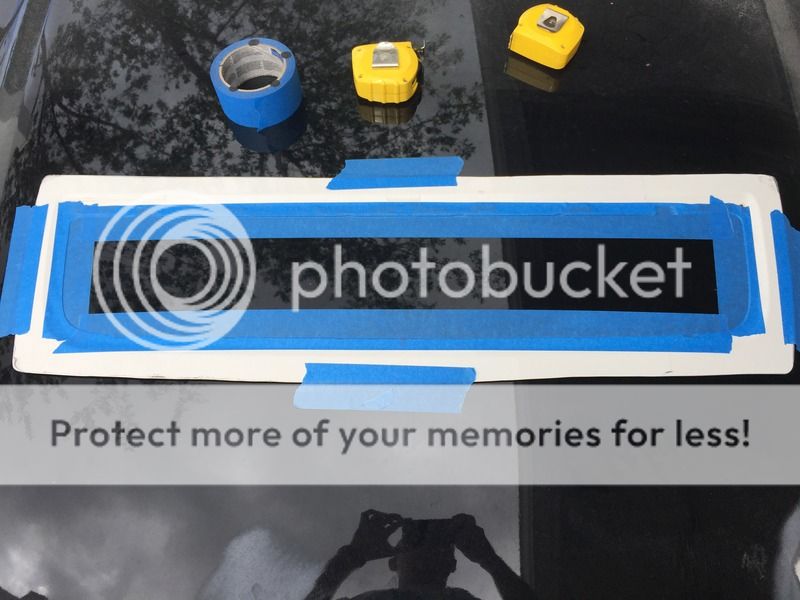
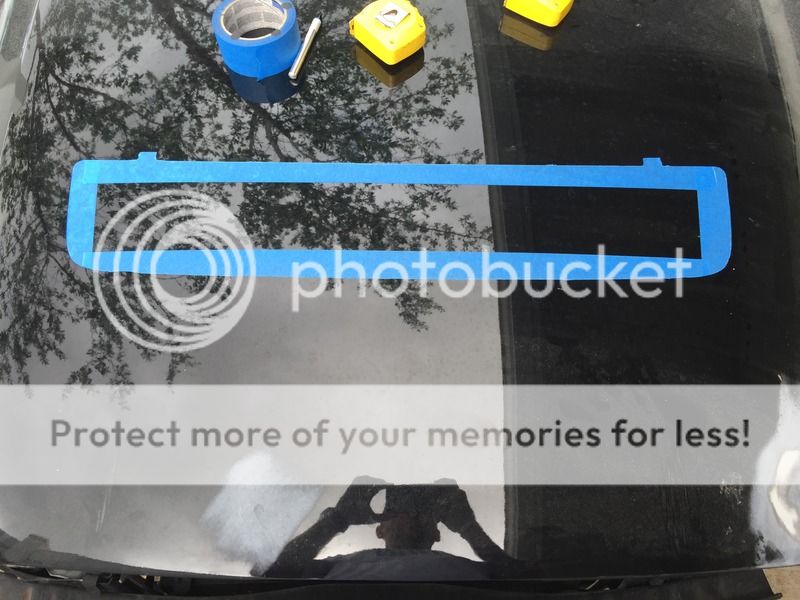
Then it's a process transferring the outline of the vent surround for the hole you need to cut. I laid tape on the inside of the piece because it was straight and true all around. Then I ran an exacto knife around the edge to cut out the shape. You're left with an exact outline of the inner portion of the vent. But it is recessed and you have to cut the hole bigger than this. So I measured the the distance of the recess towards the outside on each side. Then made marks and taped that off which became my cutline
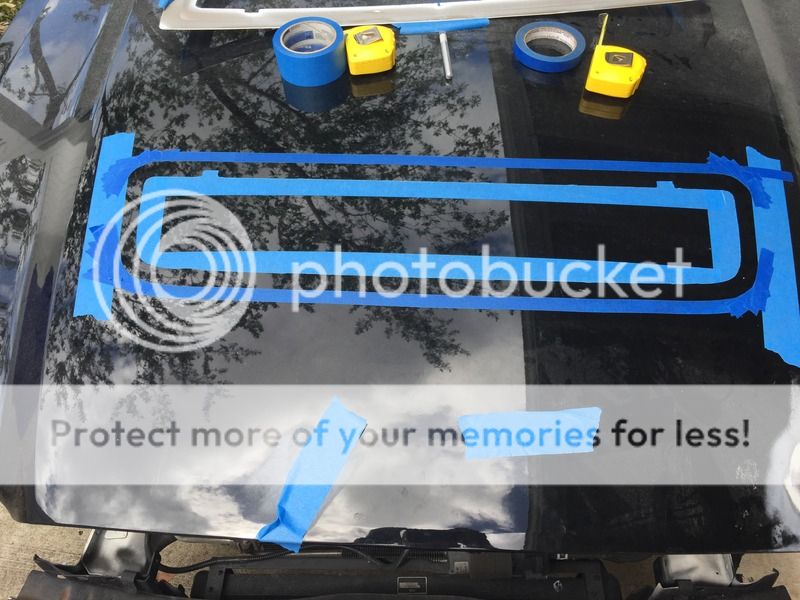
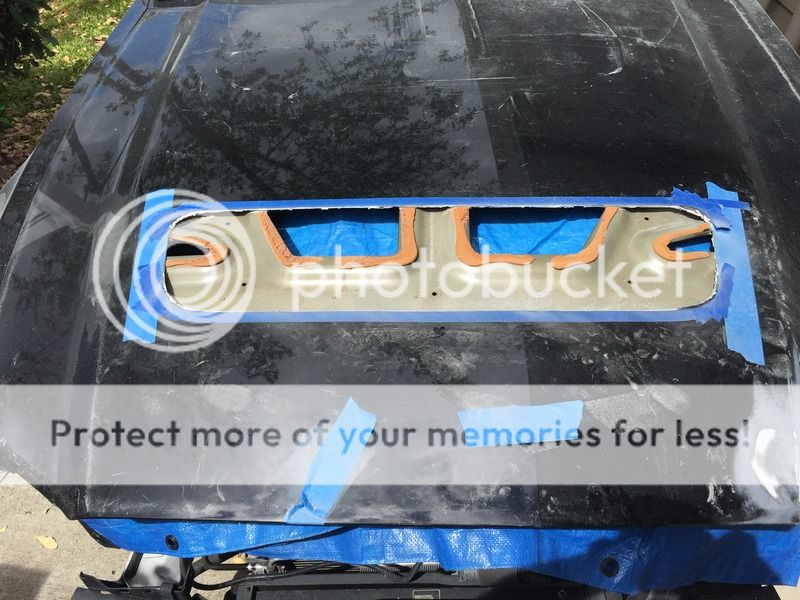

test fit your pice and trim any areas that are shallow. Now the whole piece drops down in there and the vent will sit flush with the hood, instead of sitting on top
Now you can do all your final trimming and edge cleanup. I ran a 6" sander on all the straight edges, a small grinder in the corners, and a file on the tight edges. Don't forget to clean up the underside as well
Next prep the surfaces to bond them with 36-40 grit sandpaper. Someone recommended with aluminum to go over it again with 80 grit to knock down the ridges, which I did. Run a bead of adhesive on both sealing edges and clamp into place. Using a clamp wasn't feasible for this application, so self tapping screws did the job
here's a shot at the underside

Now you're on the home stretch. let the adhesive cure for 4 hours or accelerate with heat. Then I blended the edges with a flap disc followed by the DA sander. Finally, apply a strong body filler. Fiber Tech by Evercoat is what I used and recommend. It's a body filler with strands of fiberglass to reinforce it.
Sand this down to get a working and even surface. Followed by a top coat of regular plastic filler. Block sand until you're happy with the results. I'll post up a pick when it's done and painted. Might be able to get the top coat on tomorrow and prime for a pic


Cliff notes: cut out hole in the hood, rough up the edges with 36 grit sandpaper, spread adhesive and clamp new panel in place. body work the top to your liking.
you're basically bonding panels with adhesive. doesn't get much simpler than that. like most things cosmetic, it's all in the preparation.
I used Valvoline Pliogrip "Panel 60" adhesive. 3M and Fusor also make similar products. Valvoline was available locally with the application gun, so that's what was used.
the hood used was a 2013 v6 base hood since it doesn't have the dual vents like the GT. I originally had a GT hood, but the proper location for the GT500 vent put it within an inch of the other two vents and could have messed with the hoods strength. So I swapped it out for a v6 one.
On to the process:
I measured where the vent was on the stock hood which was 12" from the front edge of the hood to the opening part of the vent. That gave me a constant to use when placing it on the new hood.

then I cut the vent surround out leaving just over an inch of material to bond with the new hood. measure as many times as you see fit and tape it to the new hood

Then it's a process transferring the outline of the vent surround for the hole you need to cut. I laid tape on the inside of the piece because it was straight and true all around. Then I ran an exacto knife around the edge to cut out the shape. You're left with an exact outline of the inner portion of the vent. But it is recessed and you have to cut the hole bigger than this. So I measured the the distance of the recess towards the outside on each side. Then made marks and taped that off which became my cutline


test fit your pice and trim any areas that are shallow. Now the whole piece drops down in there and the vent will sit flush with the hood, instead of sitting on top


Now you can do all your final trimming and edge cleanup. I ran a 6" sander on all the straight edges, a small grinder in the corners, and a file on the tight edges. Don't forget to clean up the underside as well
Next prep the surfaces to bond them with 36-40 grit sandpaper. Someone recommended with aluminum to go over it again with 80 grit to knock down the ridges, which I did. Run a bead of adhesive on both sealing edges and clamp into place. Using a clamp wasn't feasible for this application, so self tapping screws did the job
here's a shot at the underside


Now you're on the home stretch. let the adhesive cure for 4 hours or accelerate with heat. Then I blended the edges with a flap disc followed by the DA sander. Finally, apply a strong body filler. Fiber Tech by Evercoat is what I used and recommend. It's a body filler with strands of fiberglass to reinforce it.
Sand this down to get a working and even surface. Followed by a top coat of regular plastic filler. Block sand until you're happy with the results. I'll post up a pick when it's done and painted. Might be able to get the top coat on tomorrow and prime for a pic


Last edited: