3650 tear down/install

BeachMonkey100

forum member
Joined
Oct 6, 2013
Posts
1,092
Reaction score
2
Location
Myrtle Beach, SC
does anyone have any links or pictures of the 3650 tear down and installation of parts. I have the tr-3650 manual and words of advice from a few transmission people I know, but that's about it. I do however plan to do a full blown write up with pictures during this process for anyone that needs it later on and my struggles through out the tear down and reassembly.
 

BeachMonkey100

forum member
Joined
Oct 6, 2013
Posts
1,092
Reaction score
2
Location
Myrtle Beach, SC
Yeah I did, and I've read both of those threads. Sort of why I said if I can't find anything I plan to do a write up on it. But thanks for posting those man
 
Last edited:

BeachMonkey100

forum member
Joined
Oct 6, 2013
Posts
1,092
Reaction score
2
Location
Myrtle Beach, SC
Alright went ahead and started tearing into the trans, flange is off, everything is off to pull the tailshaft housing, I removed the 12 bolts, but does anyone know if anything else needs to be removed before I pull the housing completely off? The service manual is for the tr3650, not the t 3650 so it's vague in this area.
 

07 procharger

Addicted to modding
Joined
Apr 23, 2009
Posts
701
Reaction score
2
Location
Red Deer Alberta
There is a bolt on the side with a ford specific head on it that holds a gear if I remember correctly. It stopped me from tearing mine completely down.
 

fdjizm

Drag Queen
Joined
Nov 29, 2009
Posts
19,536
Reaction score
341
Location
NY/NJ
^I sat there and stared at mine for a few mins wondering what I am going to do with that star shit on the reverse gear part.
If you drop the reverse shaft and it's bearing it makes room for the case to slide off around the guts.
I didn't have to touch that bolt luckily, of course this is after you get the bell housing off completely.

http://s197forum.com/forum/showpost.php?p=2025371&postcount=154
 
Last edited:

BeachMonkey100

forum member
Joined
Oct 6, 2013
Posts
1,092
Reaction score
2
Location
Myrtle Beach, SC
lol I literally just did the same thing, I stared at it for a few minutes and then called Stan from Pro Performance and he gave me some vital info for what to look for and what not to do.

So far everyone I have pulled the flange, shifter accessories and finally the tailshaft housing.

To remove the housing you'll need a 10mm socket and a strong arm, I fear stripping aluminum that has a steel bolt in it with stuff like this. so I prefer not to use the impact if I don't have too. Their are (12) bolts all together, pop the housing up, and slowly pull it off and straight up and it will come off

tyha5agu.jpg


6y5u4e7y.jpg


This is as far as I have gotten tonight and probably will stop and head home, being up since 4:30 this morning and still going will take it's toll sooner or later and would rather be home when it does lol.
 

justinsstang

forum member
Joined
Oct 26, 2013
Posts
730
Reaction score
2
You changing a clutch? If so do a super awesome write up for us :thumb2:
 

BeachMonkey100

forum member
Joined
Oct 6, 2013
Posts
1,092
Reaction score
2
Location
Myrtle Beach, SC
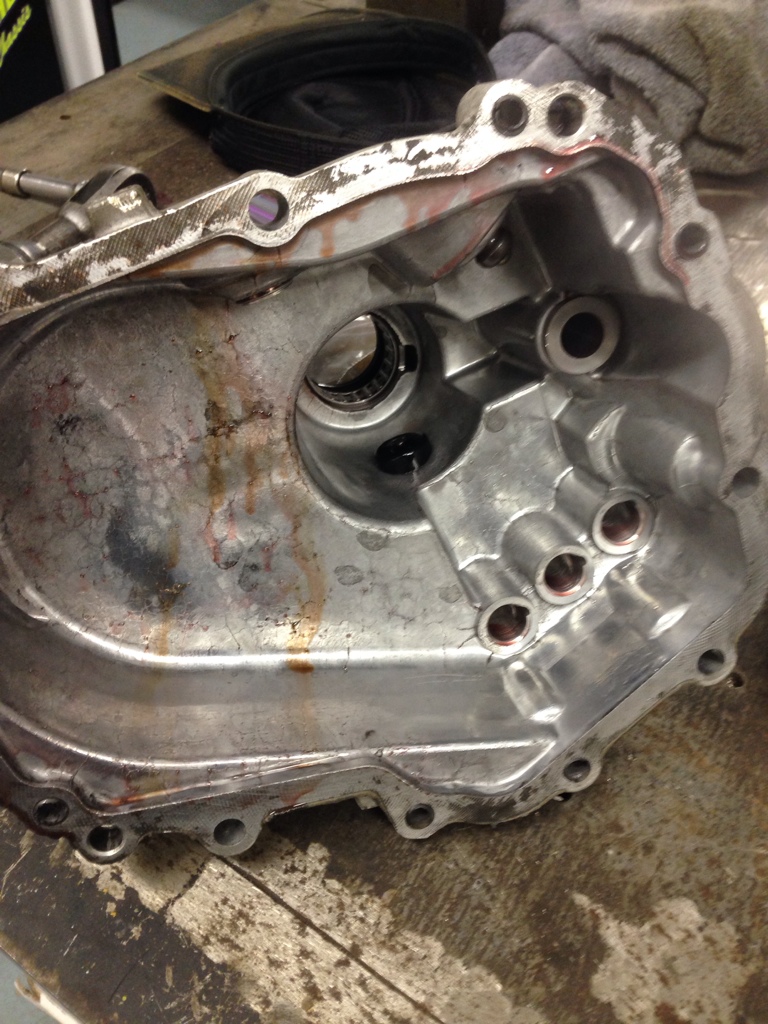
I started the main tear down today and was going good until I couldn't find my torx plus set. One cannot be located anywhere near me at the moment so I am at a stopping point for right now until I find a t45 torx plus bit, I am not even going to try to attempt to take it off with a regular torx, there is just way to much slop.

But as far as continuing with the teardown..

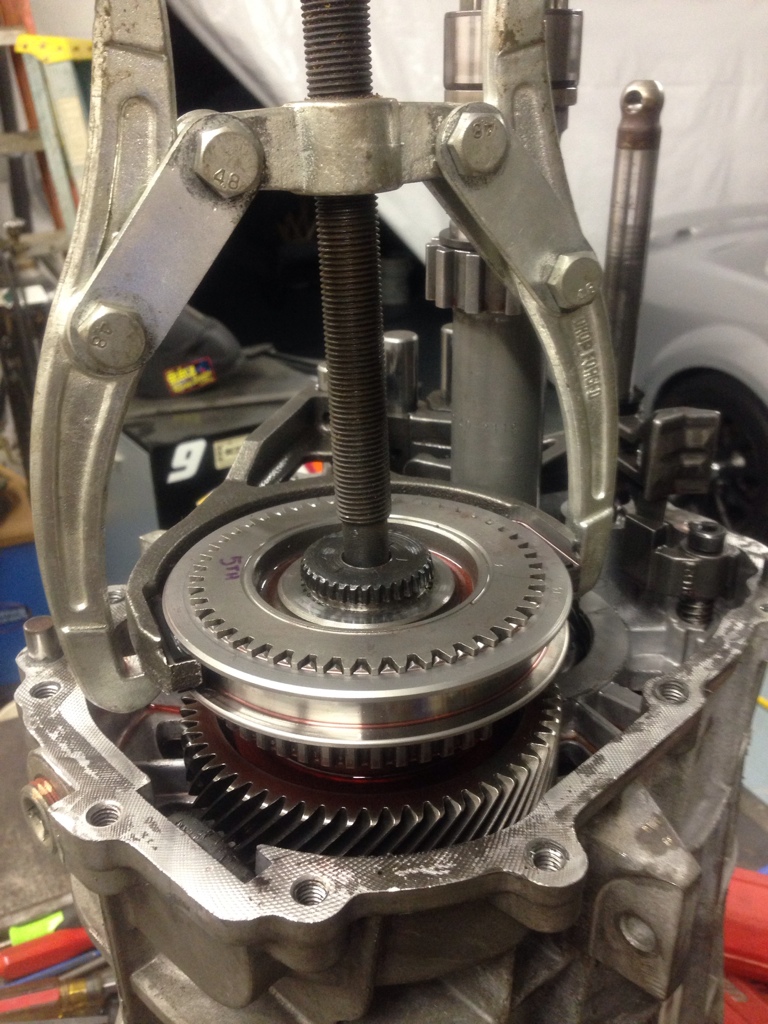
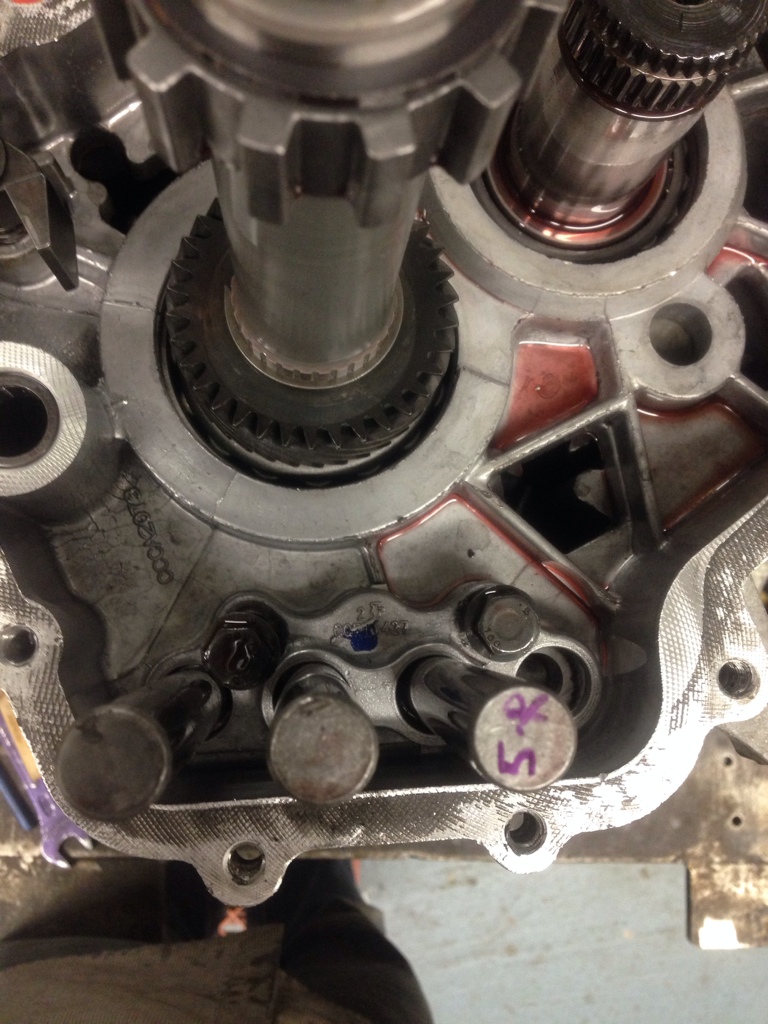
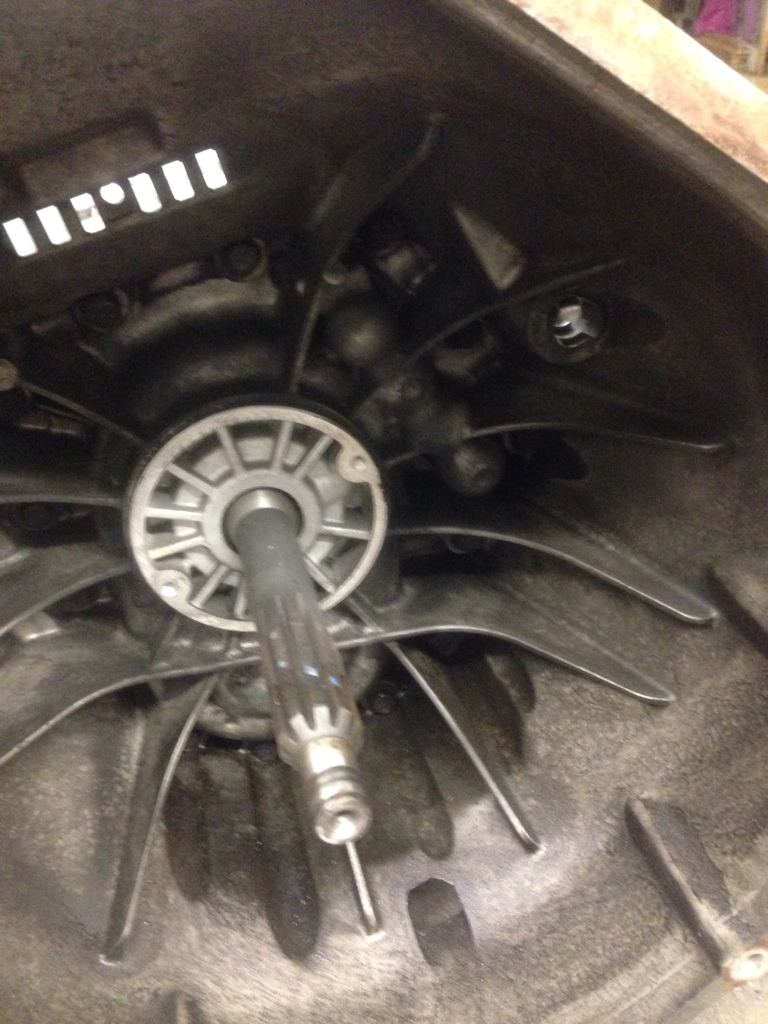
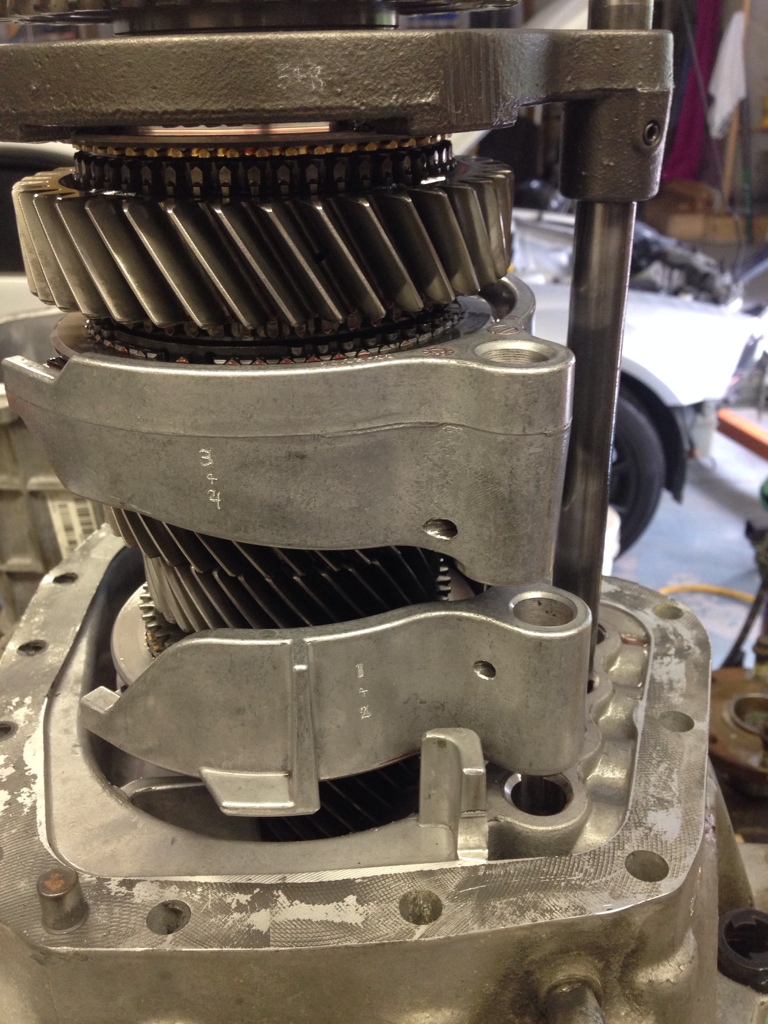
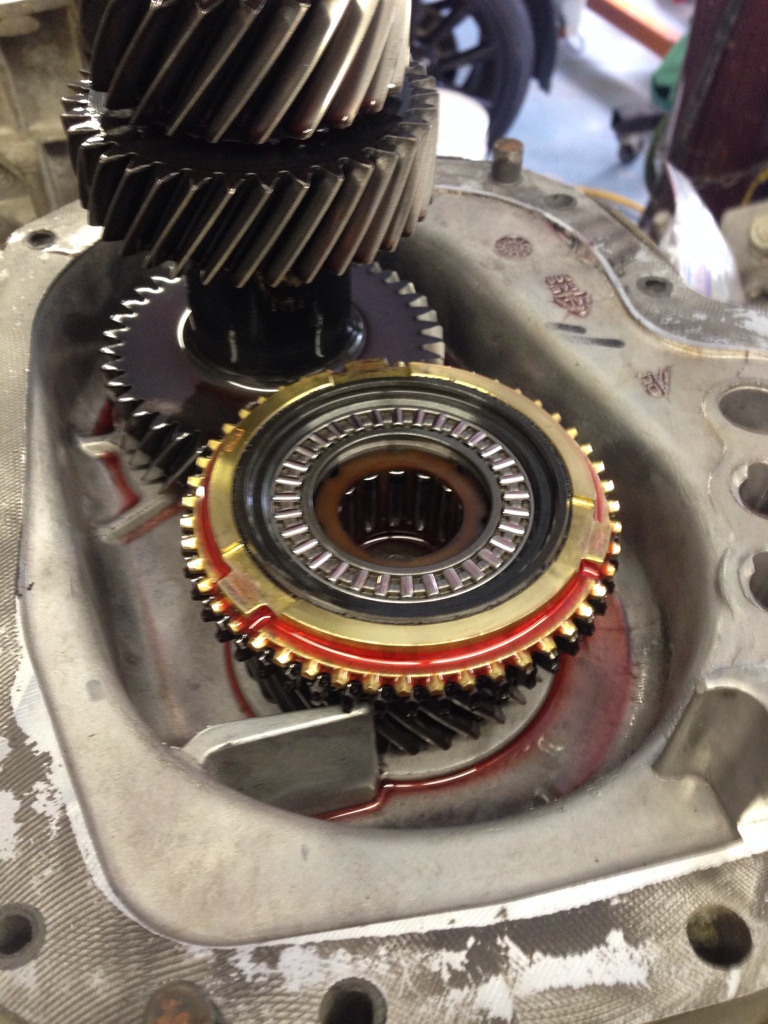
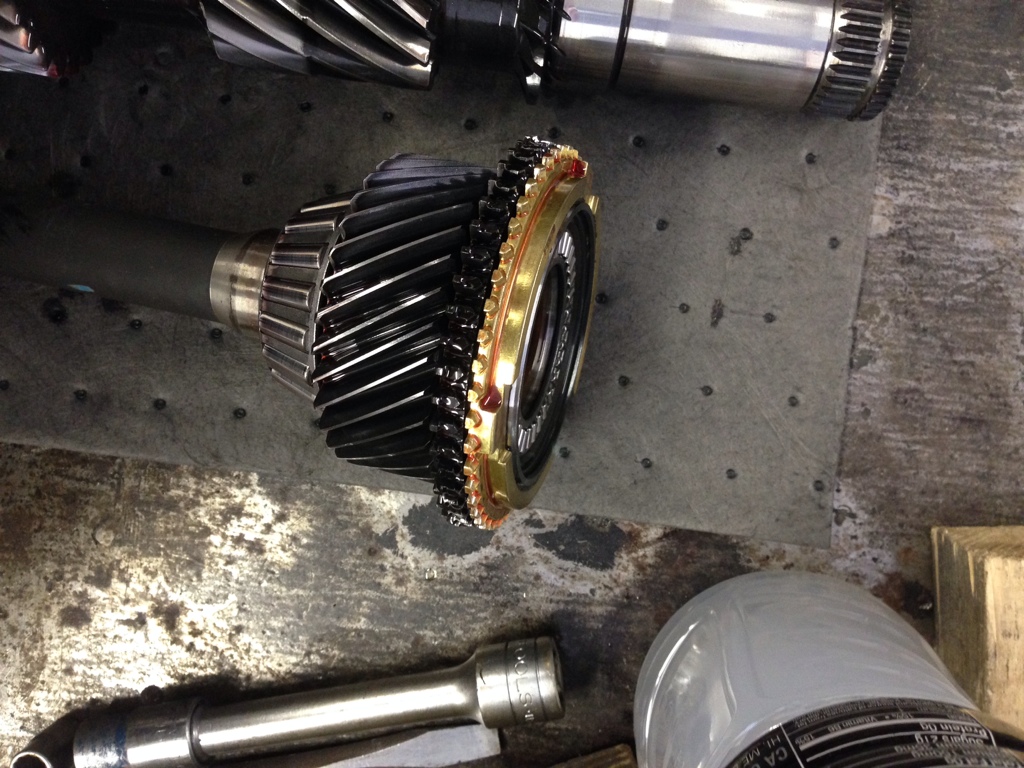
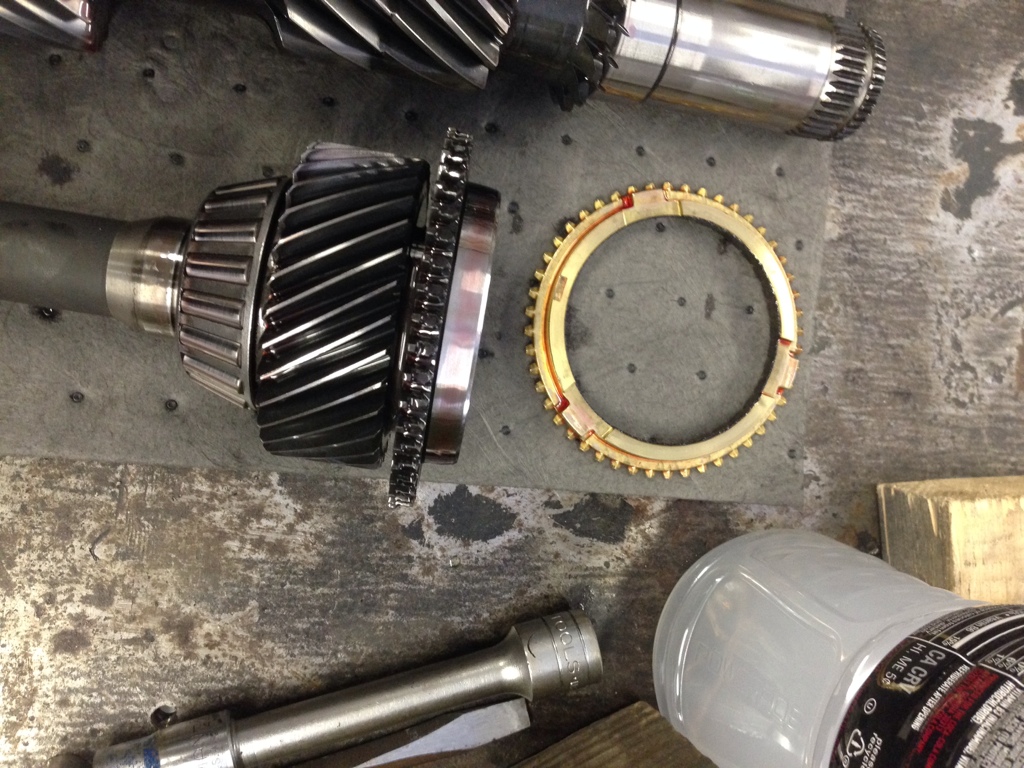
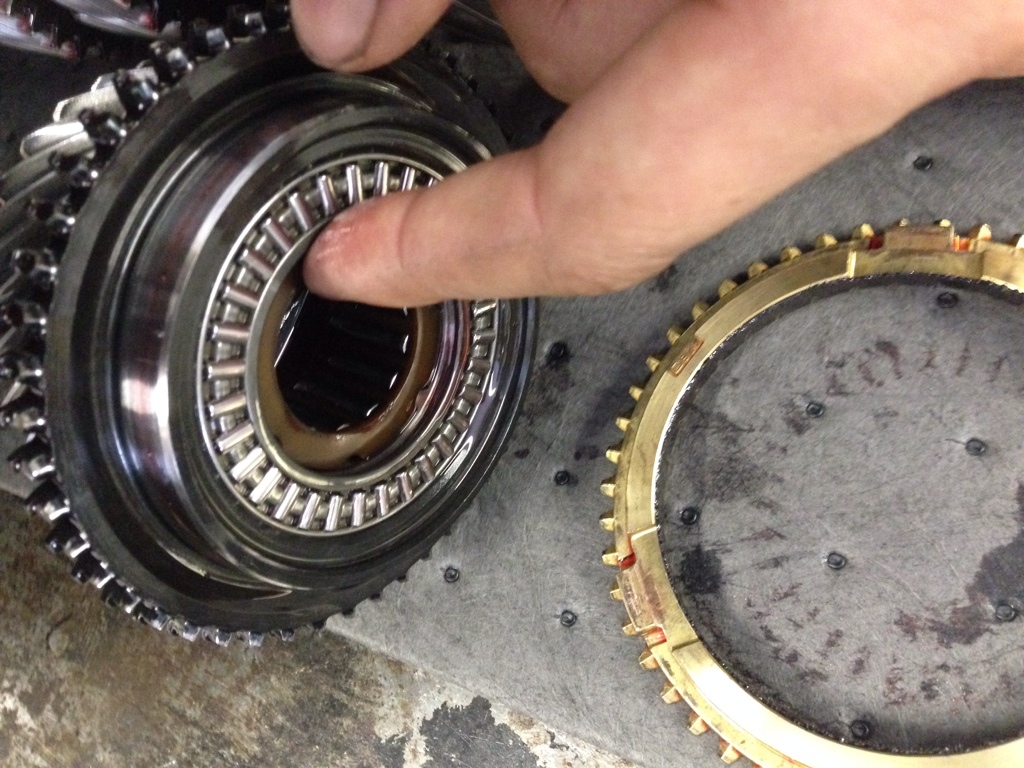
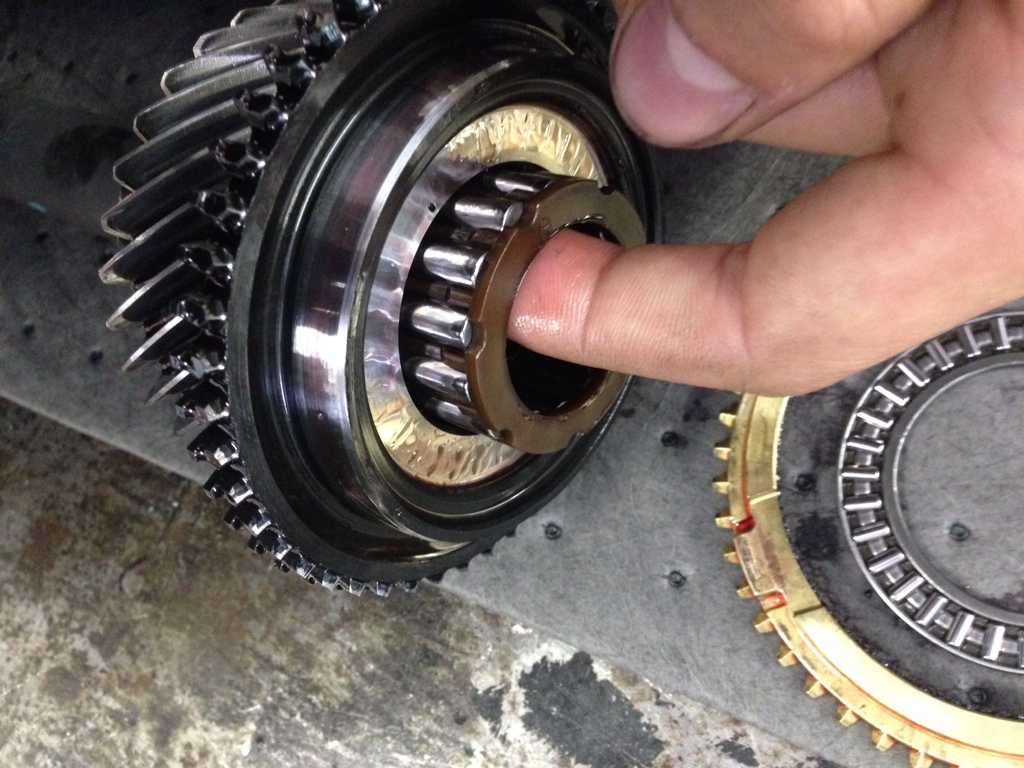
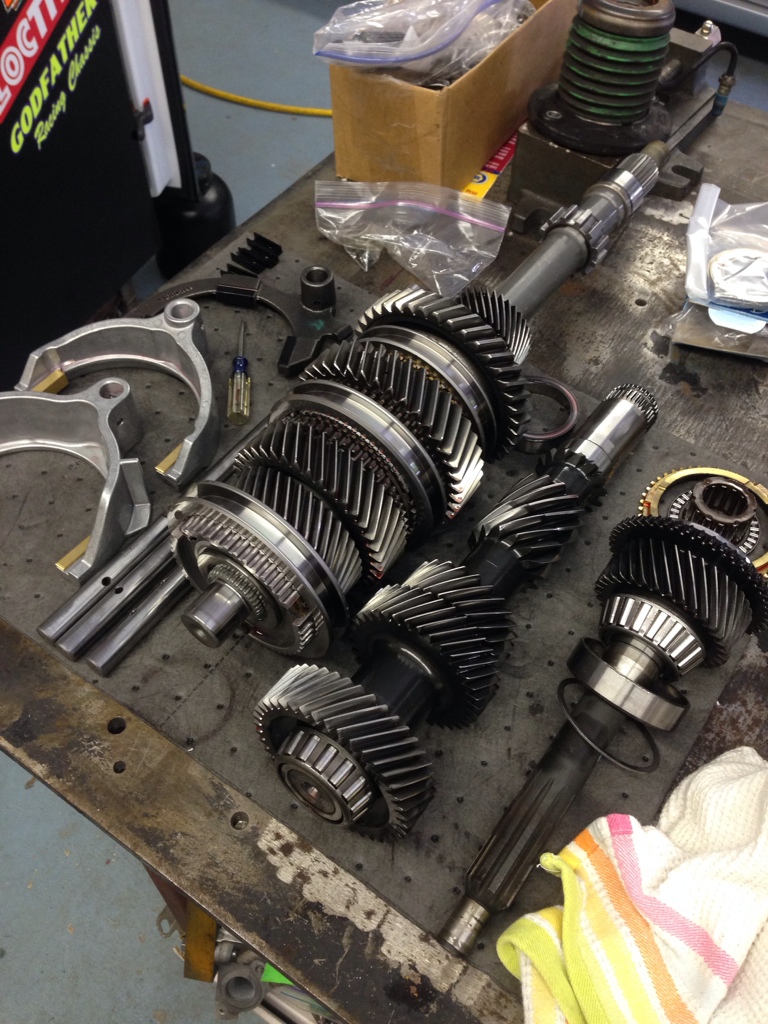
After the tailshaft housing off you have to remove the 5th gear synchronizer cone and assembly off. To do this you will need a 2 lever puller, place one arm on each side of the fork, I didn't want to mess up the threading of the counter shaft so I stuck a bolt and that's what the puller pried on as I tightened it up. While doing this be sure to lift the fork arm at the rail or you will bend a rail while removing this.

7yjuny9y.jpg


ga6ubene.jpg


After the assembly is off 5th will slide right off and out of your way with the synchro.
2ase4ety.jpg


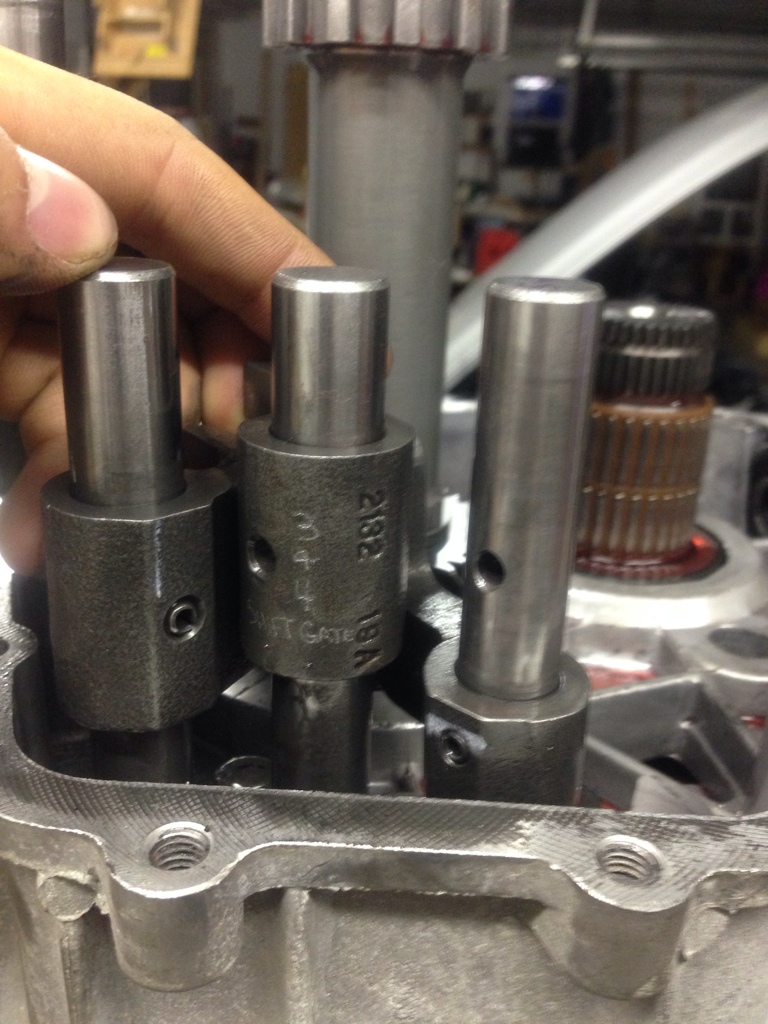
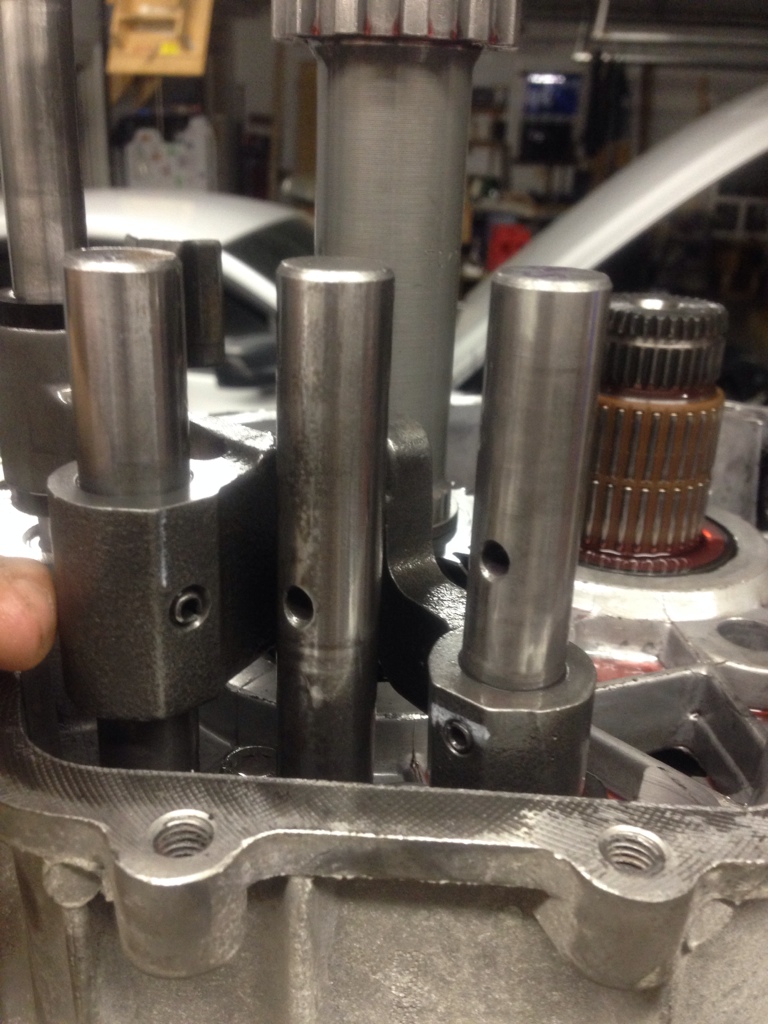
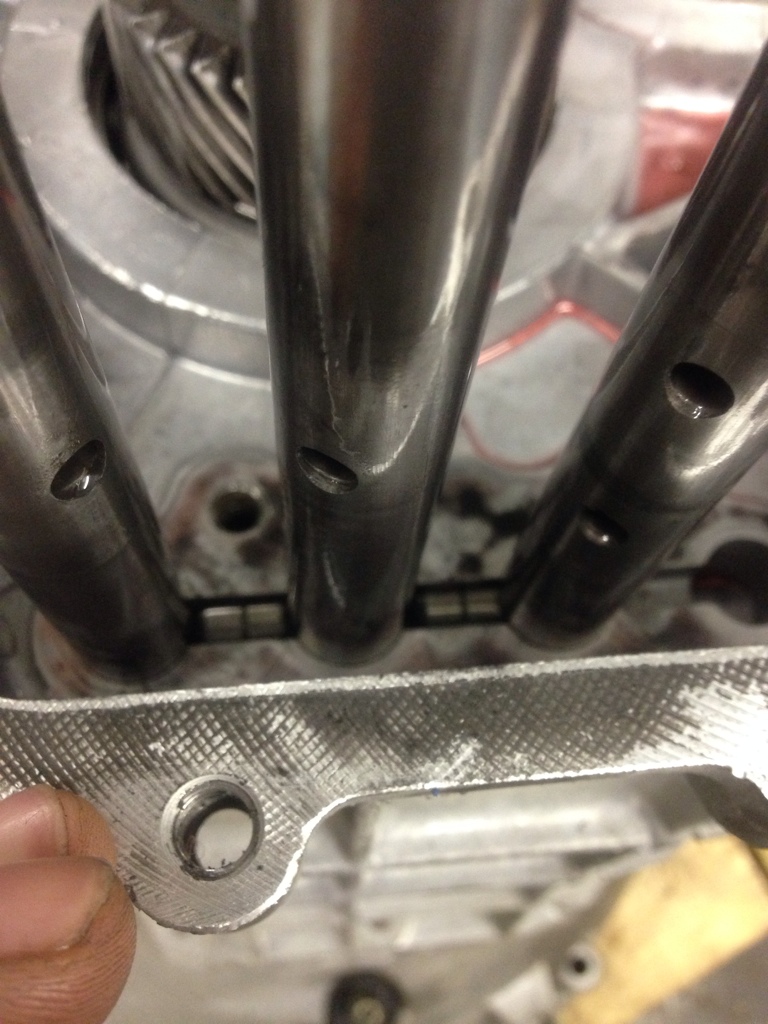
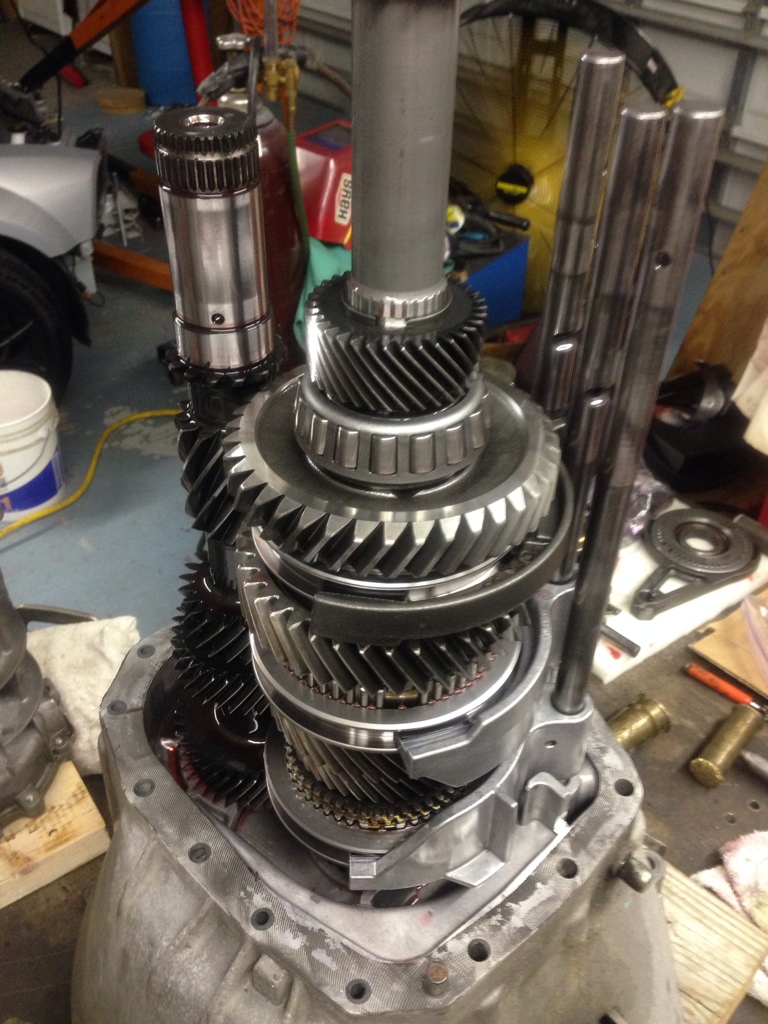
Next is to use a drift/punch to remove the pins holding the shift gates on the rails, remove 5th, 3rd & 4th, 1st & 2nd and then I went back and got the bottom gate off of reverse last.

6e5a2eze.jpg


y3uju9a6.jpg


a6u4y4em.jpg


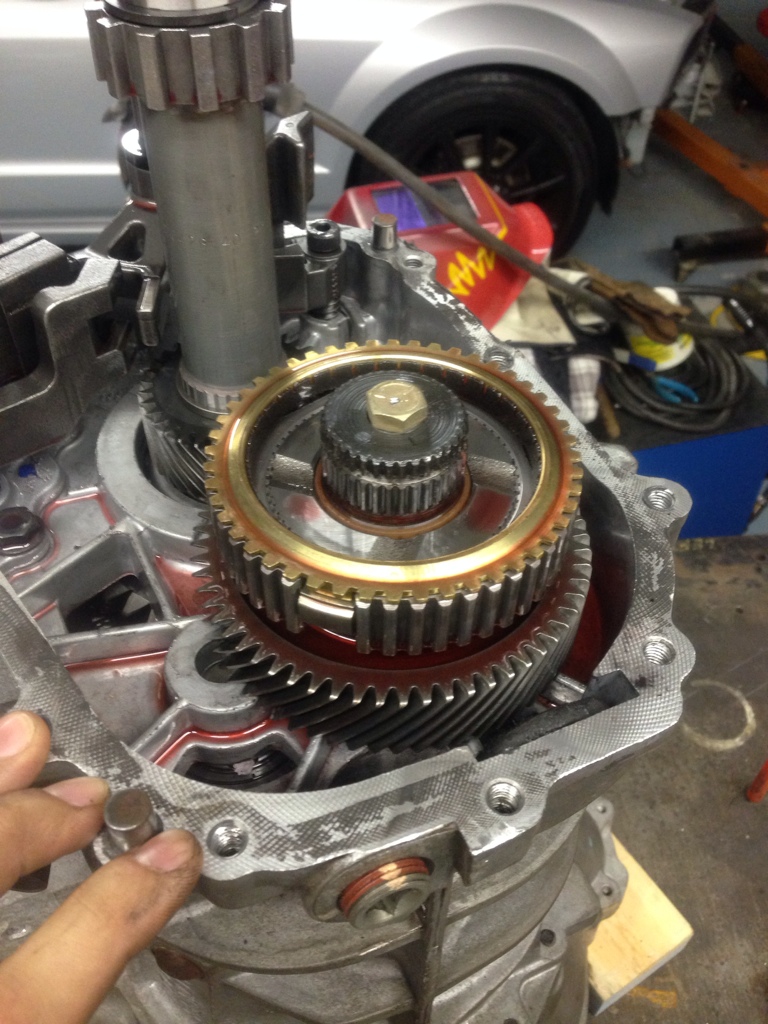
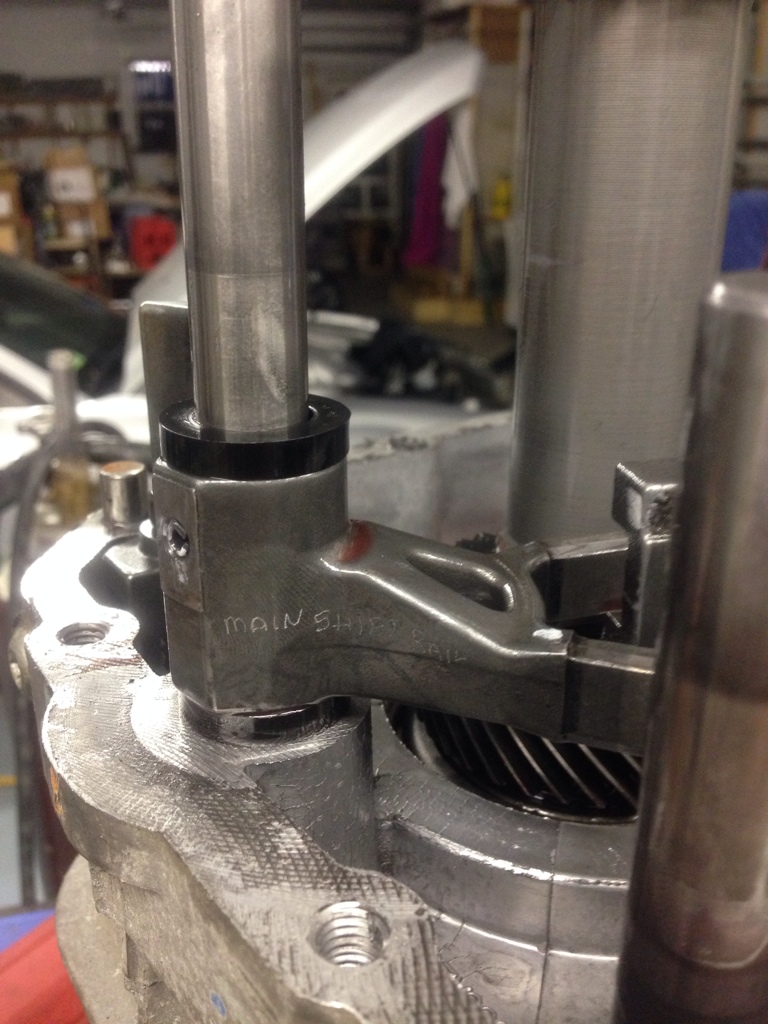
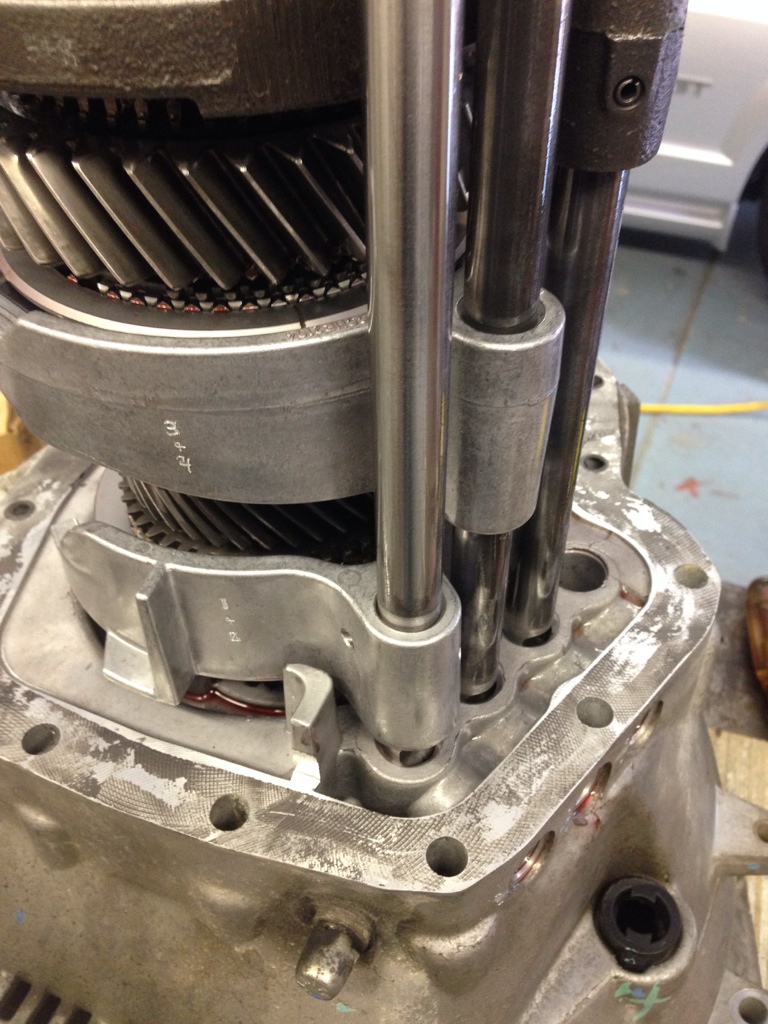
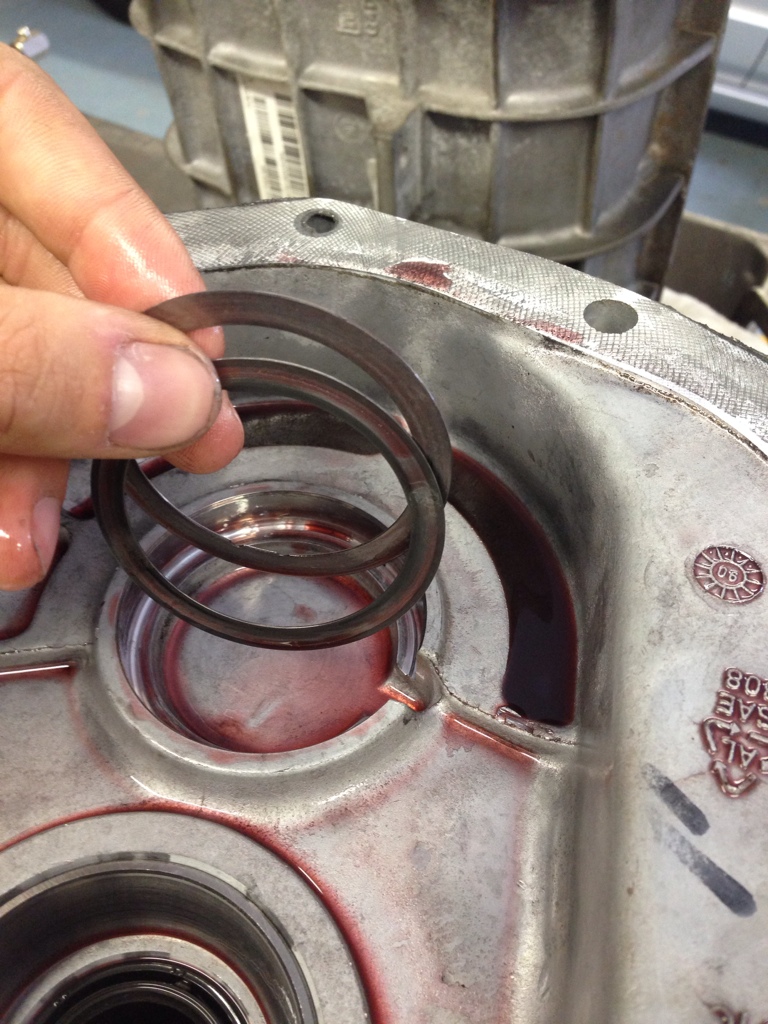
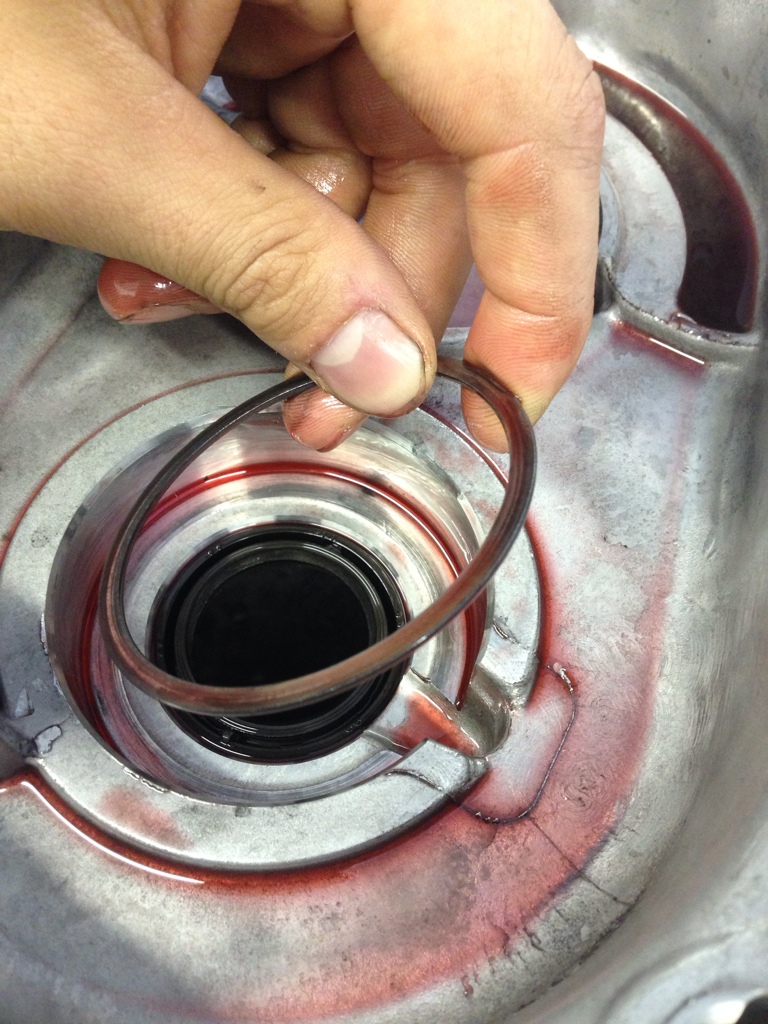
After the gates are removed, remove the main shift gate, it will slide right out and there will be a plastic spacer/washer on each side as pictured.

2ygysuhu.jpg


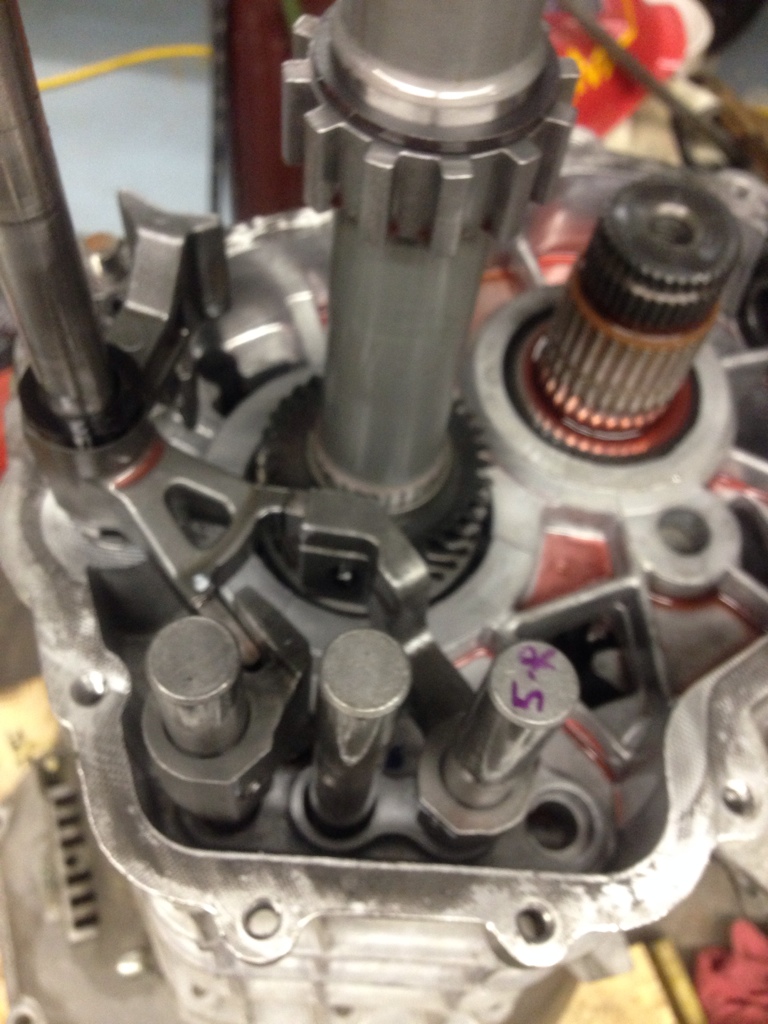
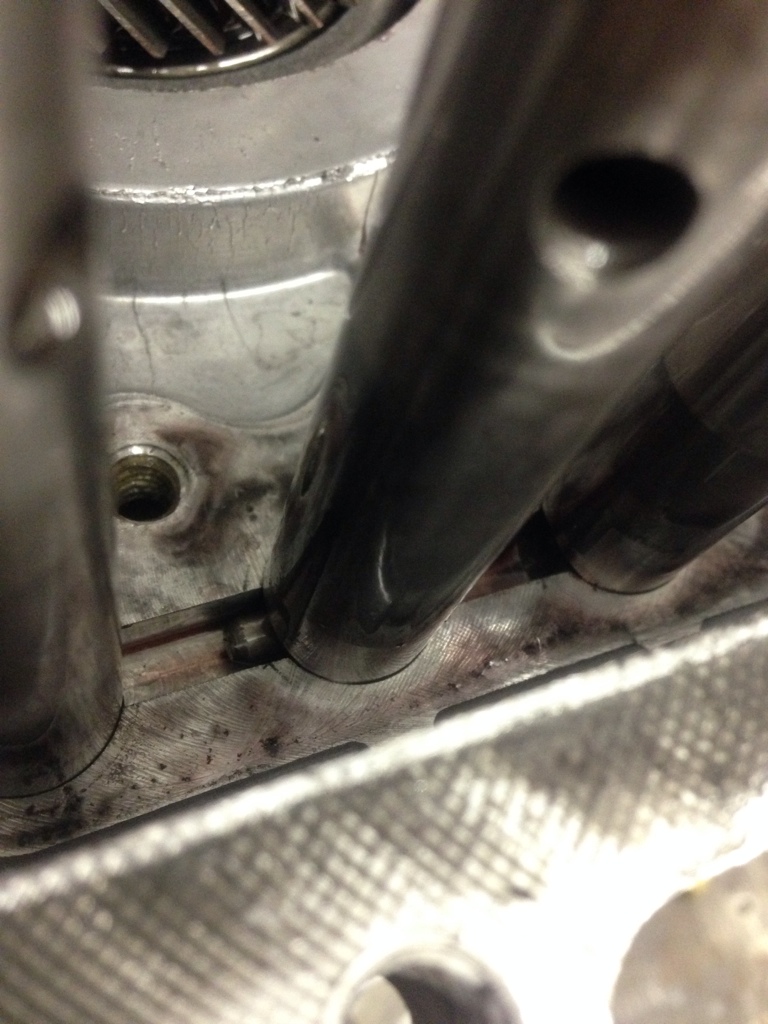
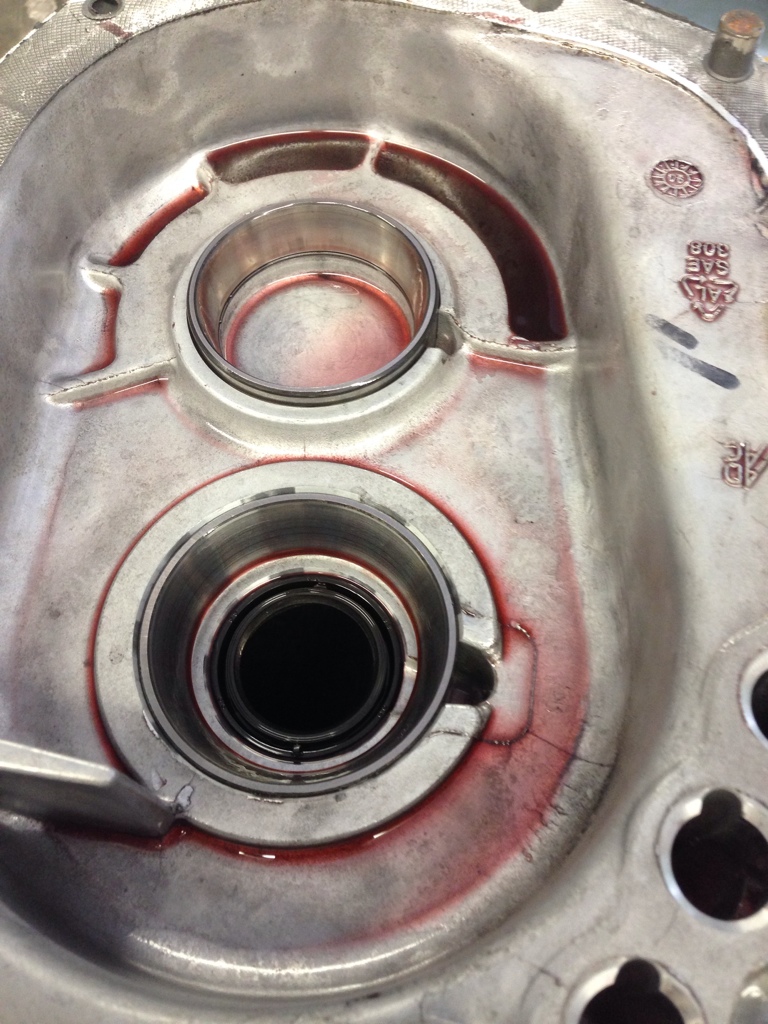
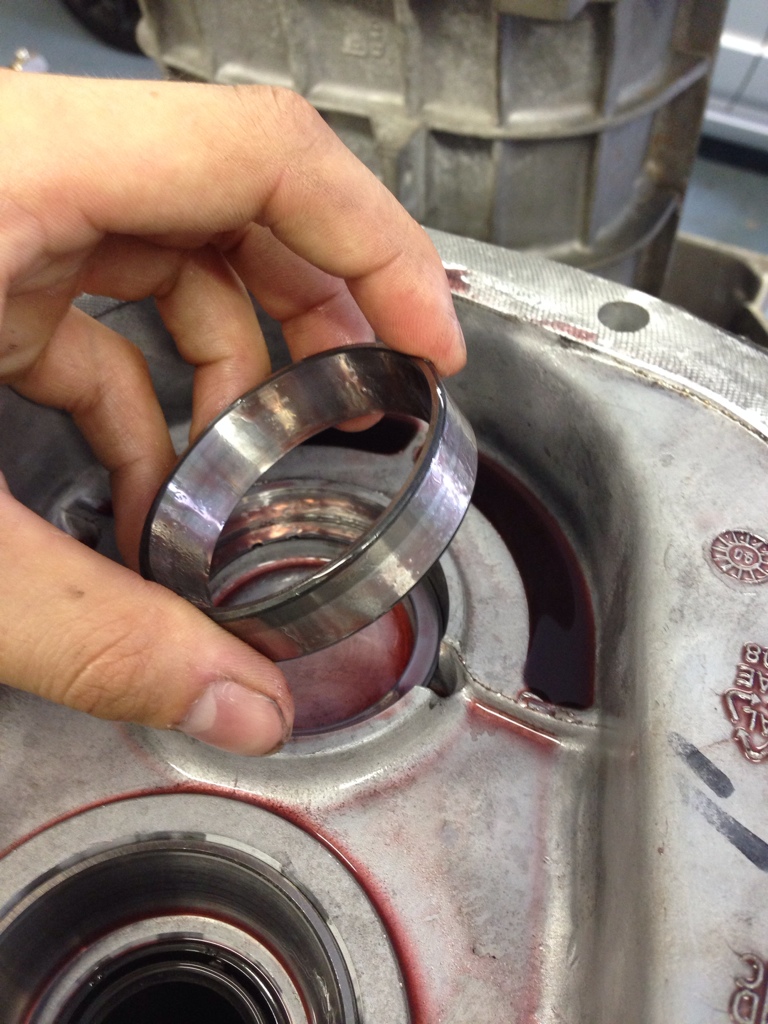
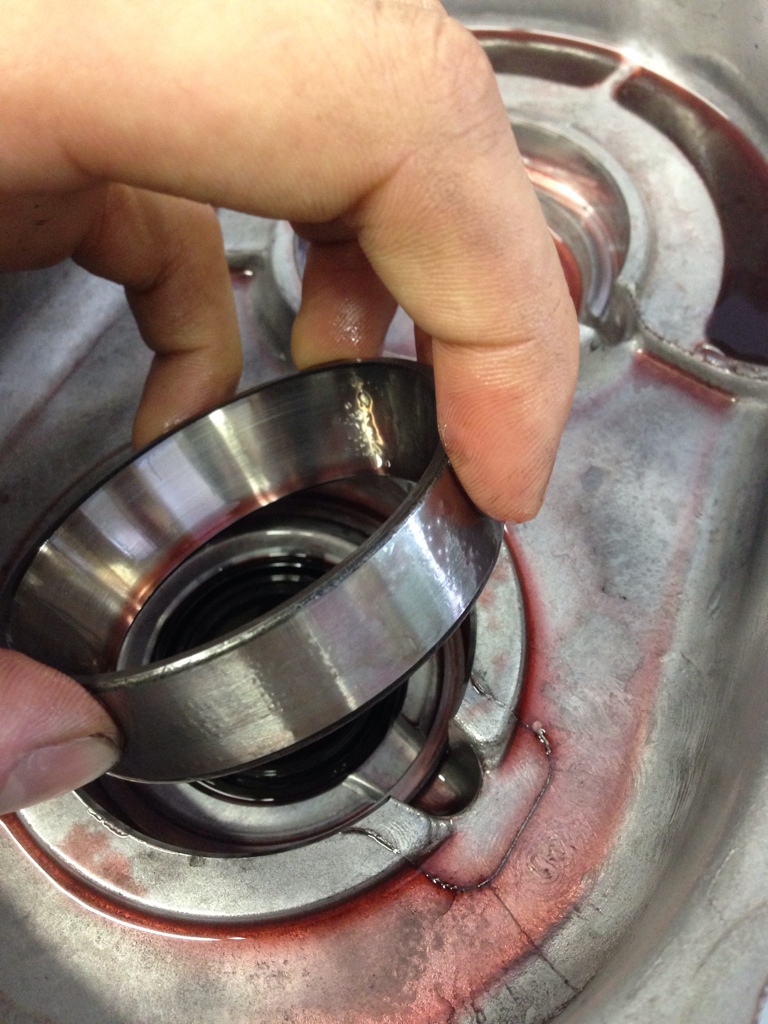
Once those are out move to the other side where the counter shaft is and remove the needle bearing assembly (it will side right up), washer and check ball. (Do use a magnet to get the check ball or you will lose it).

a8ebabub.jpg


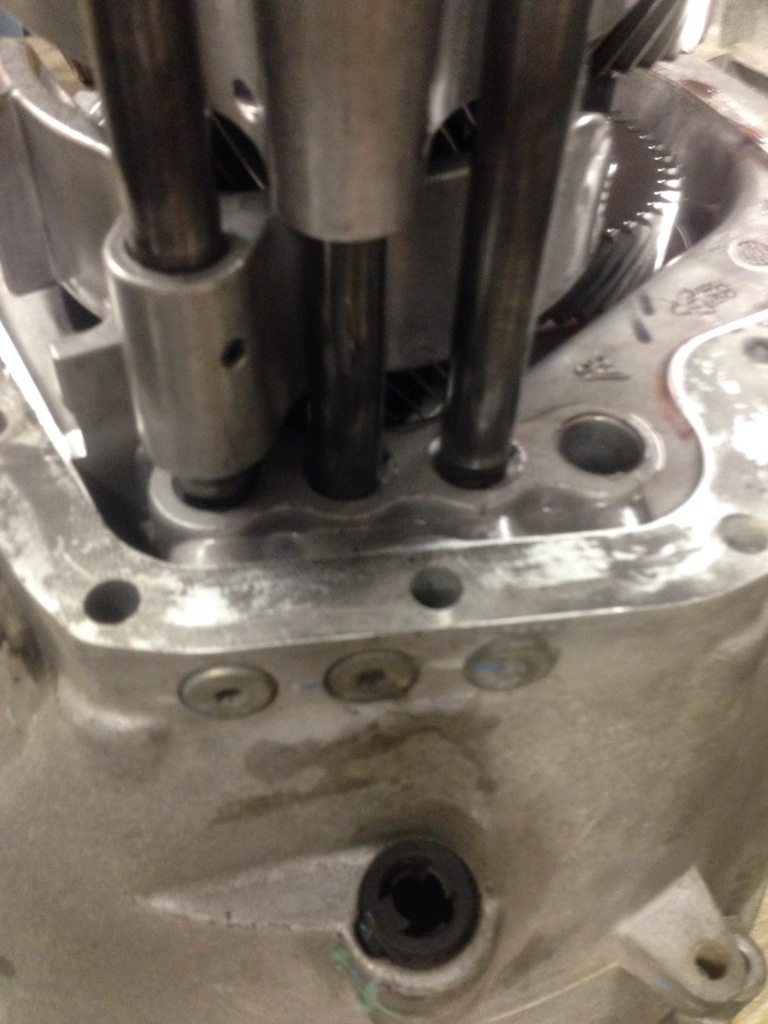
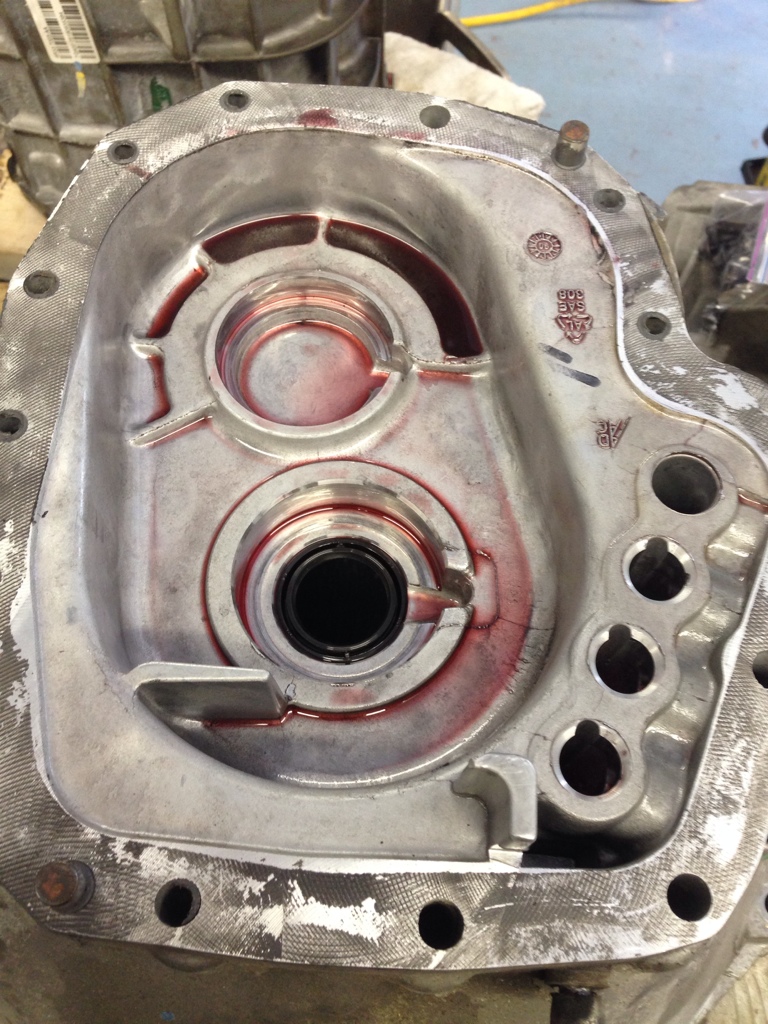
Now remove two 13mm bolts that hold the interlock plate on and slide the plate up, there will be 3 lock pins, (2) visible and (1) in the middle inside of the 3rd & 4th shift rail as pictured, remove those as well.

eguja9e2.jpg


de3ebyzu.jpg


9ada8u9a.jpg


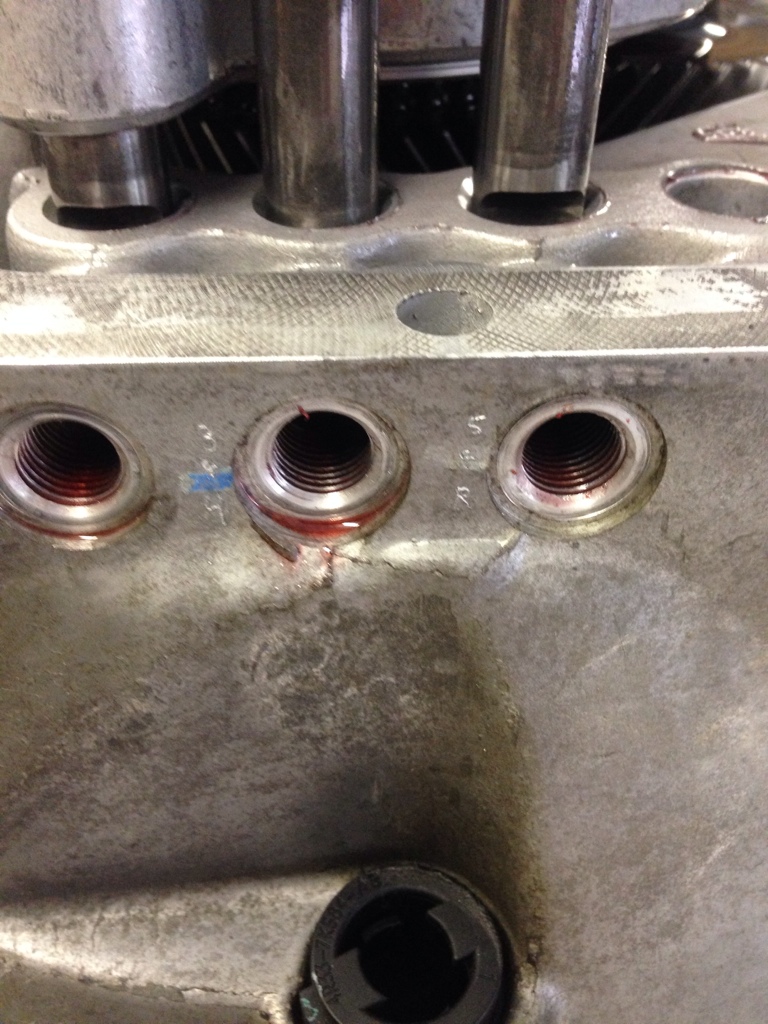
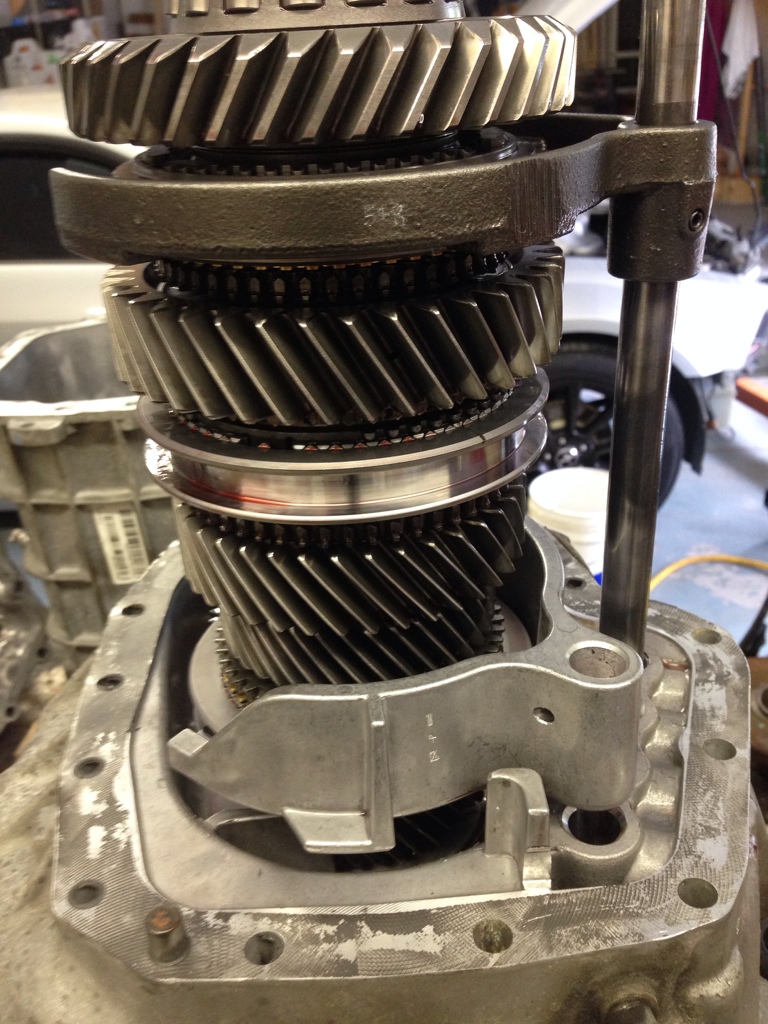
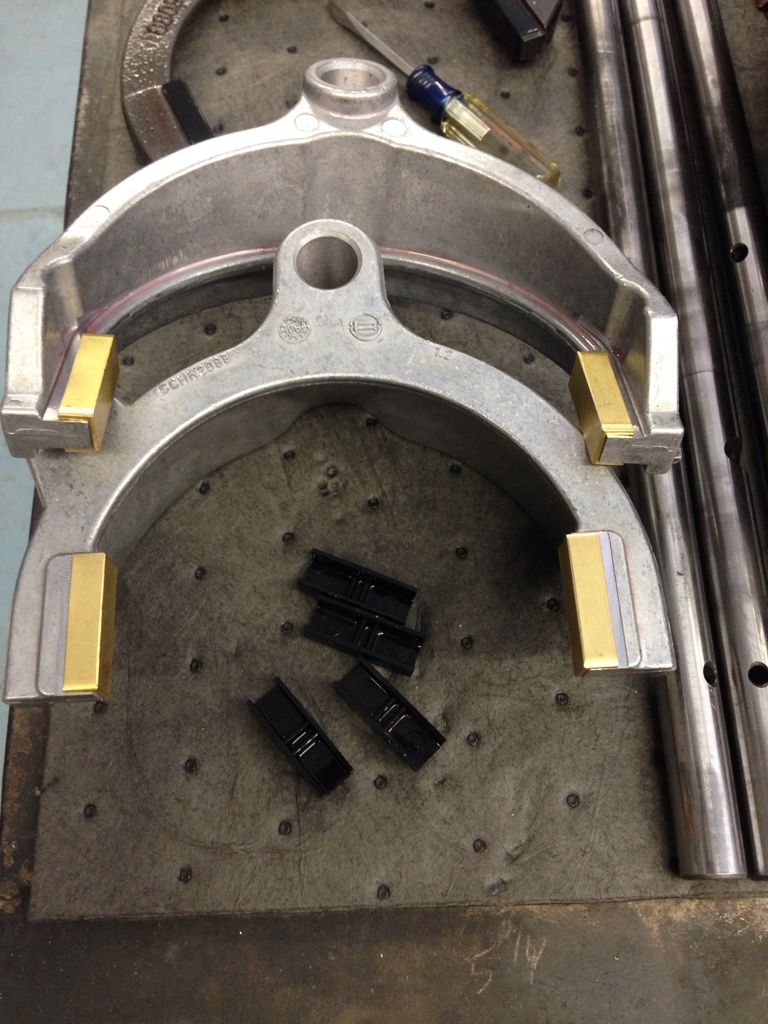
That completes the tail end disassembly, you can now lay the transmission down, loosen (14) 13mm bolts, keep (2) on opposite sides in and snug, remove the other (12).

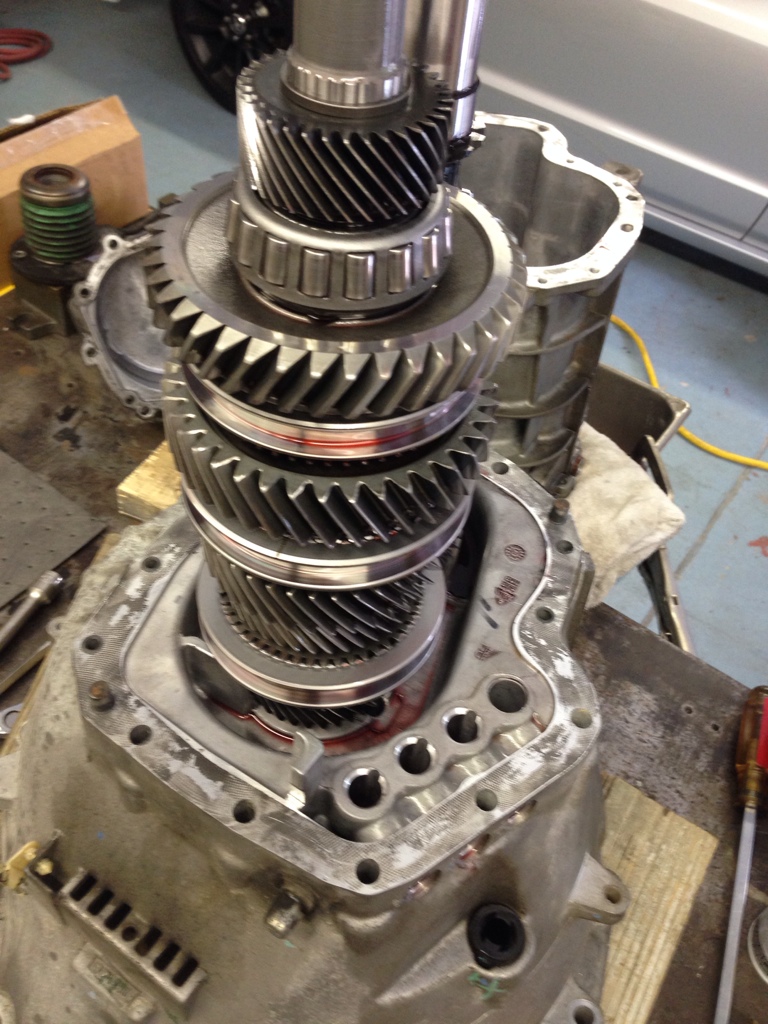
Now stand the transmission bell housing side down (on some tall blocks, I used 4x4) and reach under neath and remove the last (2) bolts, now pry the case carefully and slide it up, be sure to hold the bearing cone while lifting up, it's a struggle to do it by yourself so get someone to help if you can. After it's free of the cluster gear you can slide it up and off!

a9y6yzu7.jpg


usybuzu4.jpg


7umu3yju.jpg


gymeda4e.jpg


That is where I left off, I will pick back up when I get a torx plus t45 socket/bit.
 
Last edited:

gregsdart

Junior Member
Joined
Feb 1, 2013
Posts
12
Reaction score
0
Are you planning on a lot of upgrades? Will be interested to learn who sells the parts, and what helps this unit. I have a core with a bad 2nd gear synchro. Somebody likes to power shift too much!
 

DiMora

More Is Better
Joined
Aug 22, 2010
Posts
971
Reaction score
41
Location
Fayetteville, GA
Contact Stan @ proforceperformance

http://www.pro-forceperformance.com/

Very helpful guy and has all the parts :thumb2:

I've met Stan at Pro Performance. He's a nice guy.

I sold him my old TR3650. He was going to rebuild it / beef it up / sell it.

I could not sell it in good conscience to another member / person since I did not know if my shifting woes were clutch related or tranny related.

Anyway, he is a retired engineer and is very sharp - he works out of his home. His garage is filled with trannies. He gave me the nickel-tour and it was awesome...parts washers...brakleen, lots or rags, LOL...He showed me what sync cones look like.

I've rebuilt motorcycle trannies before but never an auto tranny.

He told me something very interesting - he said that he believes that redline tranny fluid dissolves the glue that hold the friction material into the cones.

He has rebuilt lots of TR3650's and said the redline ones show that damage.

He recommended I run Pennzoil Synchromesh in the TR3650.

On my T56 Magnum XL, he does not have as much experience, but he did recommend Mobil 1 ATF in it.
 

BeachMonkey100

forum member
Joined
Oct 6, 2013
Posts
1,092
Reaction score
2
Location
Myrtle Beach, SC
I've met Stan at Pro Performance. He's a nice guy.

I sold him my old TR3650. He was going to rebuild it / beef it up / sell it.

I could not sell it in good conscience to another member / person since I did not know if my shifting woes were clutch related or tranny related.

Anyway, he is a retired engineer and is very sharp - he works out of his home. His garage is filled with trannies. He gave me the nickel-tour and it was awesome...parts washers...brakleen, lots or rags, LOL...He showed me what sync cones look like.

I've rebuilt motorcycle trannies before but never an auto tranny.

He told me something very interesting - he said that he believes that redline tranny fluid dissolves the glue that hold the friction material into the cones.

He has rebuilt lots of TR3650's and said the redline ones show that damage.

He recommended I run Pennzoil Synchromesh in the TR3650.

On my T56 Magnum XL, he does not have as much experience, but he did recommend Mobil 1 ATF in it.


Yes definitely a stand up guy!

I ordered all my rebuild parts for mine through him, shipping was fast and even months later when I am finally getting to the transmission I get the best customer service. Either through email or a phone call, he will answer you around the clock. If you ever need anything for yours he is definitely the go to guy, be aware though if you are looking into doing a input shaft they are not readily available and usually will have to wait. I bought mine months ago due to him only having one left and having to wait until this coming Dec/Jan to get one.
 

BruceH

BBB Big Bore Boss 322
Joined
Sep 13, 2009
Posts
13,801
Reaction score
14
Location
Pacific Northwest
Yes definitely a stand up guy!

I ordered all my rebuild parts for mine through him, shipping was fast and even months later when I am finally getting to the transmission I get the best customer service. Either through email or a phone call, he will answer you around the clock. If you ever need anything for yours he is definitely the go to guy, be aware though if you are looking into doing a input shaft they are not readily available and usually will have to wait. I bought mine months ago due to him only having one left and having to wait until this coming Dec/Jan to get one.


I'm pretty sure that they get input shafts from Libery Gear. Might as well just order from Liberty.
 

BeachMonkey100

forum member
Joined
Oct 6, 2013
Posts
1,092
Reaction score
2
Location
Myrtle Beach, SC
Well today I got to pick up where I left off yesterday in the aid of a buddy who had the correct torx plus bit/socket.

Next step: remove the 3 plugs, behind each plug will be a spring and then a decent. I did not get pictures of them before I bagged them up.

3a6e3eta.jpg


You can now remove the roll pins from the 1st & 2nd, 3rd & 4th and Reverse shift rails/forks.

a6usunaj.jpg


Once that is complete pull the shift rails up and off the forks, you can now remove all 3 forks, the 1st & 2nd fork is a little tricky, it requires you to move the main shaft a little bit to remove. But everything at this point should move pretty freely.

u7a7azu9.jpg


y9ehedeb.jpg


adu6aru3.jpg


The main shaft can now be removed, it will not come straight out as the counter shaft gears are in the way, tilt the counter shaft and you should be able to pull the main shaft straight out.

avyqaga6.jpg


Now the counter shaft can be removed, it will slide straight out.

e8yqusud.jpg


And finally the input shaft will come out and will have the 1st gear synchro blocker ring on it. remove it as well as the axial bearing and input shaft needle bearing.

4ejahadu.jpg


e6u6a7yh.jpg


umesevas.jpg


5ybabequ.jpg


After that is finished, remove the bearing cups from the main shaft and counter shaft out and under neath will be the shims, if you're not replacing the input shaft or anything on the counter shaft record and mark these as they will need to go back into place. I am replacing the the input shaft so I will have to shim the main shaft, since my shim kit came with both sets and sizes I will check for both end plays while I am this far deep in the transmission.

e6yqe7a4.jpg


rujyruha.jpg


mapura8y.jpg


yde3a2eq.jpg


huvypapa.jpg


ydevydah.jpg


And that completes the initial tear down, I am waiting to get seals before I go any further (as in removing them and then cleaning the bell housing and casing).

So in the mean time I removed the oem plastic fork pads (use a small flat headed screwdriver and pull up on one side and it will pop off) and replaced them with the bronze pads. This is on the 1st & 2nd and 3rd & 4th forks only. Press the bronze pad on by hand and then I used a delrin faced hammer to tap them into place easily.

e6y8eja3.jpg
 

skwerl

tree hugger
Joined
Aug 6, 2011
Posts
16,194
Reaction score
1,144
Location
central Florida
100% completely and utterly lost. I'm impressed, and I'll be leaving any and all transmission work to folks like yourself who understand it. The one thing I've gained from this is the absolute knowledge that I have no business opening up a transmission because there's no way in hell it will ever go back together.
 

BeachMonkey100

forum member
Joined
Oct 6, 2013
Posts
1,092
Reaction score
2
Location
Myrtle Beach, SC
100% completely and utterly lost. I'm impressed, and I'll be leaving any and all transmission work to folks like yourself who understand it. The one thing I've gained from this is the absolute knowledge that I have no business opening up a transmission because there's no way in hell it will ever go back together.


lol to be honest it's really not that bad, just have to label each and every part, after a while you will know when something isn't in the right place. Everything I take apart for the most part goes into a labeled bag and waits to be cleaned and put back on. I am doing this in the midst of a shop renovation and a lot of clutter that's being moved out so everything for this transmission is staying on one table and one table only so nothing gets misplaced.

Edit: I sent this picture to my buddy who asked what I was up to.. His reply "F*** that shit, have fun buddy" Lol

sygune2a.jpg
 
Last edited:

Support us!

Support Us - Become A Supporting Member Today!

Click Here For Details

Sponsor Links

Banner image
Back
Top