psfracer
billy badass
So, as you know I like to do the COTM series, as well as some other projects. BUT, there is a problem. While we have many nice cars on here, not everyone has that "photographic eye". Here are some tips that apply to most of us. Often times the professionals will break many of the below rules, but they know how to and still come up with a great picture, most of us do not.
1) Start with the right camera. An older cell phone, for example, is just not going to cut it. Some of the new phones have some pretty good cameras, but start with something that doesn't double as a potato.
2) Once you have your camera, make sure you understand the settings that you can use to help with focus, depth of field, exposure, color, etc.
3) Background: choose a background that is pretty consistent and doesn't have a million different distracting things going on.
4) Perspective: I almost NEVER take a picture of a car by just standing, I will always try different heights, very low to the ground, for example, gives a dramatic look. Even up high on a ladder. Try different perspectives.
5) Lighting: Position the car so the sun is behind you when taking the picture. Also position the car so the entire car is either in sunlight, or shade, but not both. If shooting at night with longer shutter speeds, use a tripod.
6) Car placement: Wheels--always have the front wheels face the camera vs away from the camera.
7) Fill the frame with your subject. Or if not possible, crop later in editing to fill the frame with your subject. Use the rule of thirds when cropping, unless you are doing something specific/creative which requires otherwise.
Of course there are many "rules" of photography, and many are quite complicated, but for now this is just for a beginner. Later, I will update this first post with much more "complicated" info regarding DSLRs, shutter priority, aperture priority, ISO, HDR, etc.
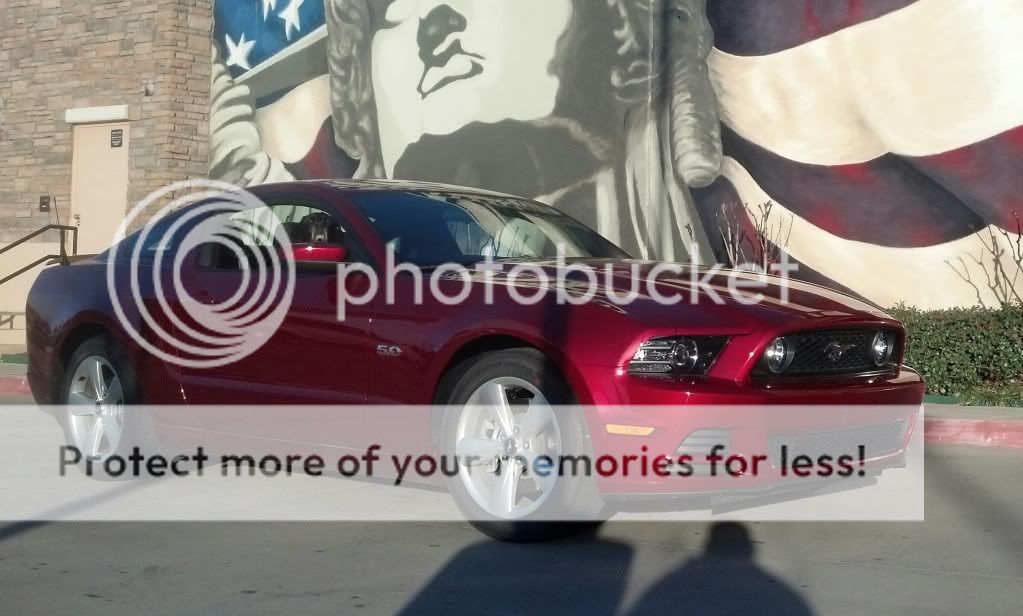
Here are two examples that use these simple rules that I could use in a COTM write up. Its hard for me to do a COTM write up to show how awesome a car is, then have crappy pics which do NOT convey that same message.

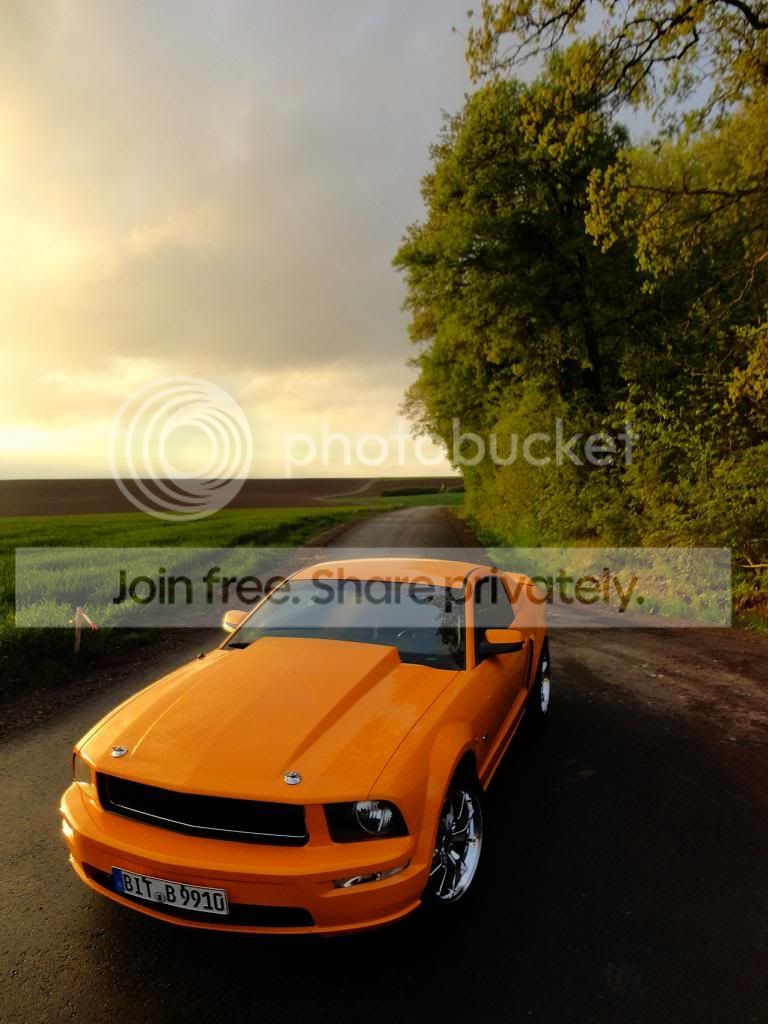
^^^Notice, no distracting background, front wheel turned towards camera, picture taken from a low perspective, subject fills the frame, consistent lighting (no bright sunlight combined with shadows).

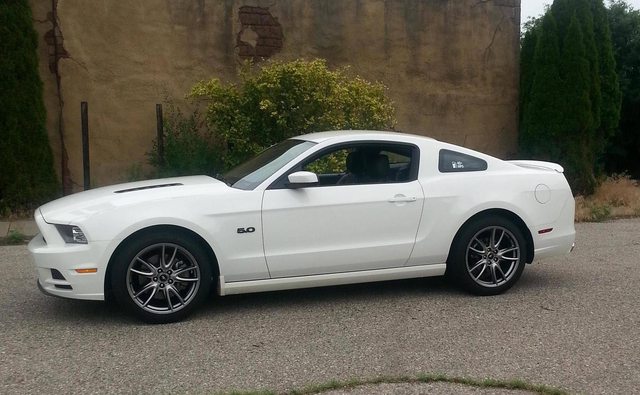
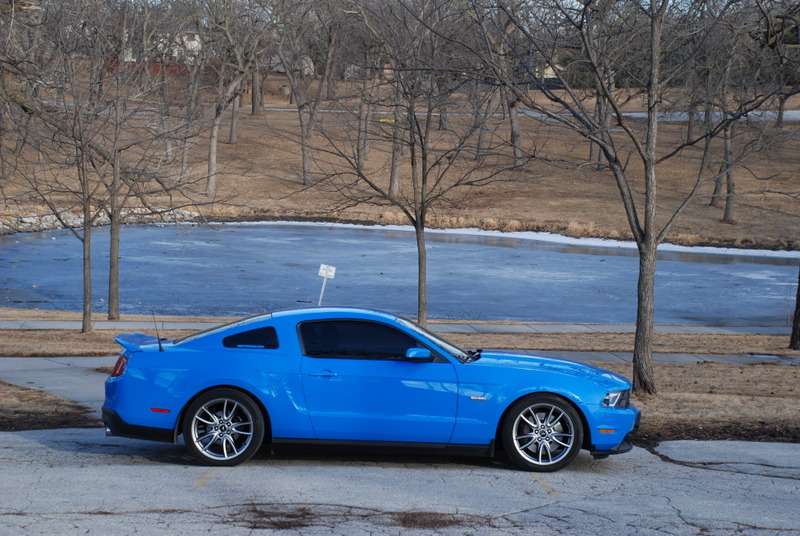
^^^wheels facing camera, picture taken from a kneeling perspective, consistent lighting, subject fills the frame. Background is relatively consistent, but some may consider the trees distracting. For me I do not, as they run across the entire pic, giving a consistent background. If there were only one or two trees, then yes that would not be good for the pic.
DSLR owners:
1) Shoot in RAW whenever possible. RAW files edit 10X better then JPEG files, because a RAW file contains ALL of the data the camera acquired when the picture was taken. In JPEG mode, the camera compresses the file, then throws away a lot of the data, which is forever lost, which no editing program can recover. The down side is a JPEG file might be 6-8mb, a RAW file could be 20mb.
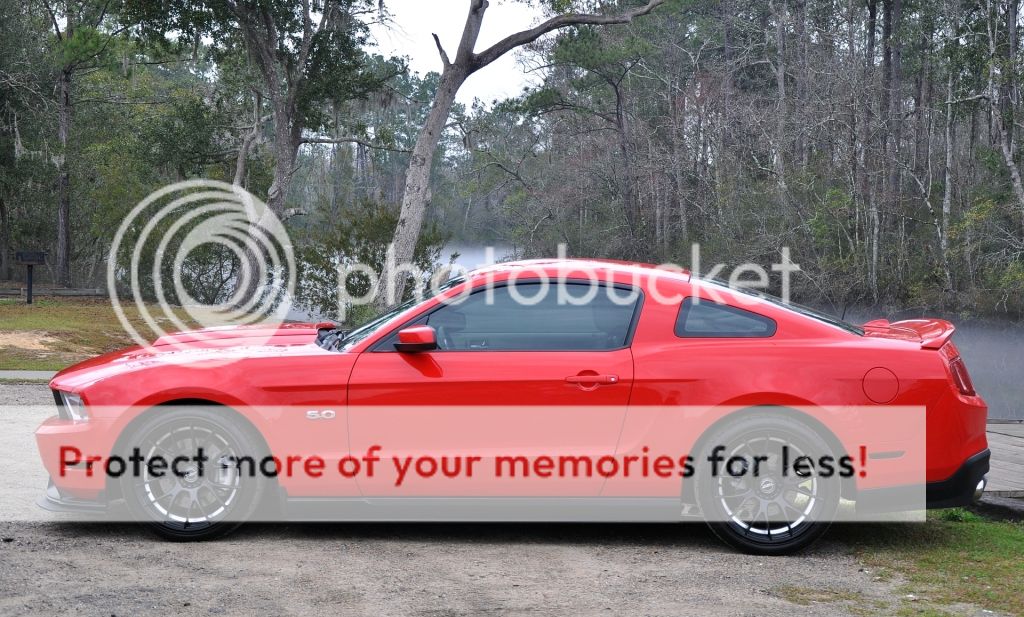
2) When panning or shooting something where you need to convey speed in the picture, use shutter priority mode. The shutter speed you choose will depend on many factors (zoom of the lens, how close you are to the moving subject, how fast the subject is moving, etc). You need to pick the appropriate shutter speed so the subject is still in focus, but the background is blurred. Shutter priority allows you to do this. So in the example below, this was 1/60 of a second. If the car was slower, maybe 1/30 would do. If the car was really fast, maybe 1/80 or so. Just depends, you have to experiment.

3) Aperature--the smaller the number, the larger the lens opens up to allow in more light. However, the larger the lens opens up, your depth of field narrows. This is good for portraits or whenever you are taking pics of something where you want the background blurred. When the aperture number is higher, then lens opening is smaller. A large number aperture (small opening) allows you to have a very wide depth of field, keeping almost everything in the picture in focus (subject and background). This confuses most people as it is opposite of what you would think--meaning the smaller the aperture number (F2.8 for example), the larger the opening to let in light. Likewise the larger the aperture number (F22 for example) the smaller the opening to let in light.
4) ISO. Ideally you want 100 whenever possible, as 100 has the least amount of noise in dark colors and blacks. However sometimes you can not shoot at 100, so the higher the number, the more sensitive to light the exposure is, but you also get more noise.
Here is a great video that explains all of this way better then I can:
1) Start with the right camera. An older cell phone, for example, is just not going to cut it. Some of the new phones have some pretty good cameras, but start with something that doesn't double as a potato.
2) Once you have your camera, make sure you understand the settings that you can use to help with focus, depth of field, exposure, color, etc.
3) Background: choose a background that is pretty consistent and doesn't have a million different distracting things going on.
4) Perspective: I almost NEVER take a picture of a car by just standing, I will always try different heights, very low to the ground, for example, gives a dramatic look. Even up high on a ladder. Try different perspectives.
5) Lighting: Position the car so the sun is behind you when taking the picture. Also position the car so the entire car is either in sunlight, or shade, but not both. If shooting at night with longer shutter speeds, use a tripod.
6) Car placement: Wheels--always have the front wheels face the camera vs away from the camera.
7) Fill the frame with your subject. Or if not possible, crop later in editing to fill the frame with your subject. Use the rule of thirds when cropping, unless you are doing something specific/creative which requires otherwise.
Of course there are many "rules" of photography, and many are quite complicated, but for now this is just for a beginner. Later, I will update this first post with much more "complicated" info regarding DSLRs, shutter priority, aperture priority, ISO, HDR, etc.
Here are two examples that use these simple rules that I could use in a COTM write up. Its hard for me to do a COTM write up to show how awesome a car is, then have crappy pics which do NOT convey that same message.
^^^Notice, no distracting background, front wheel turned towards camera, picture taken from a low perspective, subject fills the frame, consistent lighting (no bright sunlight combined with shadows).
^^^wheels facing camera, picture taken from a kneeling perspective, consistent lighting, subject fills the frame. Background is relatively consistent, but some may consider the trees distracting. For me I do not, as they run across the entire pic, giving a consistent background. If there were only one or two trees, then yes that would not be good for the pic.
DSLR owners:
1) Shoot in RAW whenever possible. RAW files edit 10X better then JPEG files, because a RAW file contains ALL of the data the camera acquired when the picture was taken. In JPEG mode, the camera compresses the file, then throws away a lot of the data, which is forever lost, which no editing program can recover. The down side is a JPEG file might be 6-8mb, a RAW file could be 20mb.
2) When panning or shooting something where you need to convey speed in the picture, use shutter priority mode. The shutter speed you choose will depend on many factors (zoom of the lens, how close you are to the moving subject, how fast the subject is moving, etc). You need to pick the appropriate shutter speed so the subject is still in focus, but the background is blurred. Shutter priority allows you to do this. So in the example below, this was 1/60 of a second. If the car was slower, maybe 1/30 would do. If the car was really fast, maybe 1/80 or so. Just depends, you have to experiment.
3) Aperature--the smaller the number, the larger the lens opens up to allow in more light. However, the larger the lens opens up, your depth of field narrows. This is good for portraits or whenever you are taking pics of something where you want the background blurred. When the aperture number is higher, then lens opening is smaller. A large number aperture (small opening) allows you to have a very wide depth of field, keeping almost everything in the picture in focus (subject and background). This confuses most people as it is opposite of what you would think--meaning the smaller the aperture number (F2.8 for example), the larger the opening to let in light. Likewise the larger the aperture number (F22 for example) the smaller the opening to let in light.
4) ISO. Ideally you want 100 whenever possible, as 100 has the least amount of noise in dark colors and blacks. However sometimes you can not shoot at 100, so the higher the number, the more sensitive to light the exposure is, but you also get more noise.
Here is a great video that explains all of this way better then I can:
Last edited: