VTXFrank
Obama SUCKS!
First off, the disclaimers. I do not know for sure if this will be the same fasteners and so on for 2010 and 2012 Mustangs. But I bet it is. Spelling mistakes, while regrettable, simply are.
This is SUPER EASY to do and I did mine in less than 45 minutes without ever having done it before. I didn't burn my car down, stab myself in the hand, scratch my paint, put dents in the car or otherwise injure myself or my car. If YOU do, that's just tough shit buddy. Learn your way around a car/garage.
Tools:
1/4" drive ratchet
4" or 6" 1/4" drive extension
7mm 1/4" drive socket
8mm 1/4" drive socket
Cross-Tip Screwdriver
Thin, slotted tip Screwdriver
A blanket or other soft surface to put the bumper cover on
Yep, that's all you need to do this. Let's get to it.
First off, you need to remove the airbag deployment sensor. Unless you have disconnected your battery, DO NOT unplug it. There's a much easier way to get that dog to hunt. Simply reach down between your radiator and front bumper and grasp the sensor. It is mounted to a VERY flexible piece of rubber and you WILL not harm that rubber tab by doing this. Grab the sensor and while pulling upwards and rocking it back and forth, the sensor will pop right out of that tab. Install is just as easy. Just shove it back in there.
Now you need to disconnect your fog lights if you have them mounted in your grill. The passenger side one is more difficult to get at and I waited until I had the bumper cover off enough to disconnect it.

Next up, you will want to remove your radiator cooling plate and the two upper bumper cover bolts.

Next up, you will want to go to each front tire fender area and remove three bolts. One is underneath the edge of the lower fascia/under-body panel. Look at the note on the picture to see approximately where it's located.

This is a view from underneath the car.

Finally, we will remove the last four bolts holding the cover on.

Next up, you will want to go to the passenger side, or driver side, which ever you prefer, and grasp the bumper cover under where it meets the fender. Now, you simply pull it out towards you. Gently now! It will pop off very easily.

As soon as it pops off, pull it out a little bit and reach down there and unplug the side marker light. It's the same for both sides of the car.

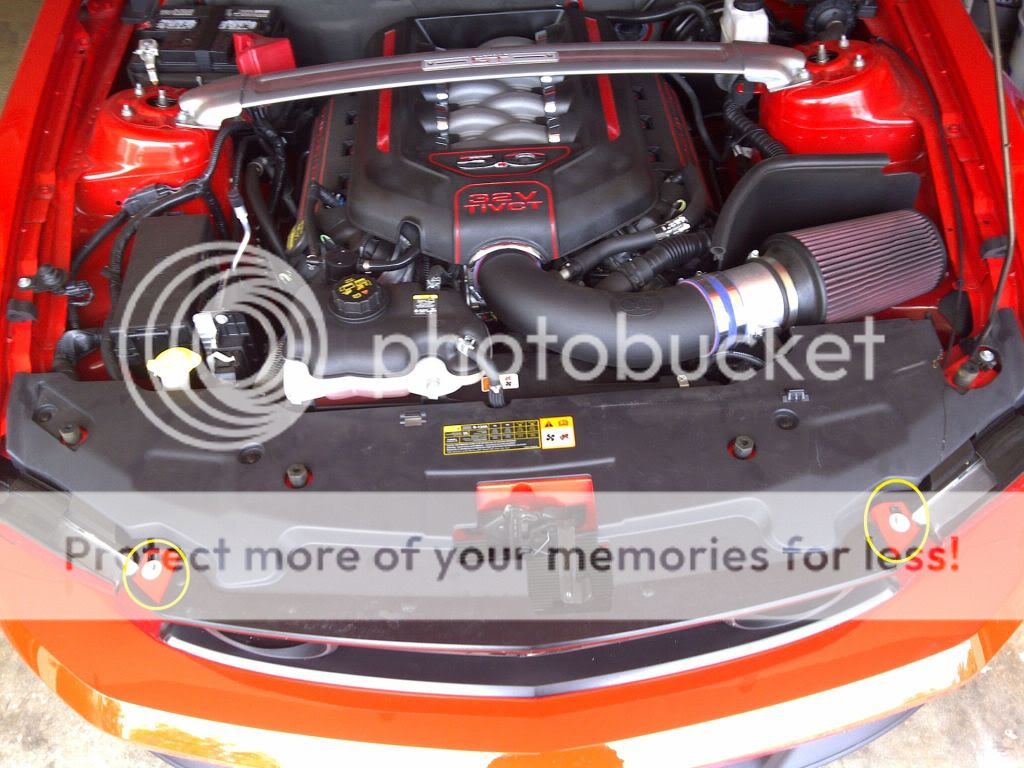
Now you should be ready to pull the cover off. If you need to unplug your fog lights still, this is an excellent time to do so. You will see two tabs on the top side, just in front of where the radiator diversion plate/cooling plate is normally. I have circled them in YELLOW. You will have removed those two bolts already, so now, the only thing holding your cover on the car are these two tabs. If you feel like you need an assistant, go right ahead. Personally, I didn't. Carefully lift the bumper cover up, pop those tabs over the hooks, then SLOWLY start pulling the cover away from the car. If, for some reason, it hangs up, take this opportunity to see what you didn't disconnect. You can hang the cover right back on those hooks if you need too.
Now lay the cover on whatever soft surface you've prepared. You will need to remove a Phillips head screw and a plastic fastener from each side of the lower fascia to cover.

When you pop up the plastic fastener, you'll notice it's different from the others. However, once you pop the center post up, you can push on the bottom of it while pulling the top part. It might have a lot of dirt and stuff in there, so wiggle that sucker around a bit. That's what she said! HA!

Now you will want to look at all the tabs that are now holding the lower fascia onto your bumper cover. Looks like a pain in the pecker doesn't it? Well, not to fear. There's an easy way to do this. Just read the directions I've put on the picture!!

Once that is done with, it's a simple matter of putting your new GT/CS fascia into your bumper cover. ALL of the upper tabs and the hardware on each end will match up and fit. However, on the lower side of the new fascia, there will only be 3 or 4 tabs that will engage. You will also have a gap underneath once you put the cover back on your car. There is NO reason to worry about the gap or the three tabs that are engaged on the lower part of the new fascia. I have checked it out at speed while I was in Me-he-koh!
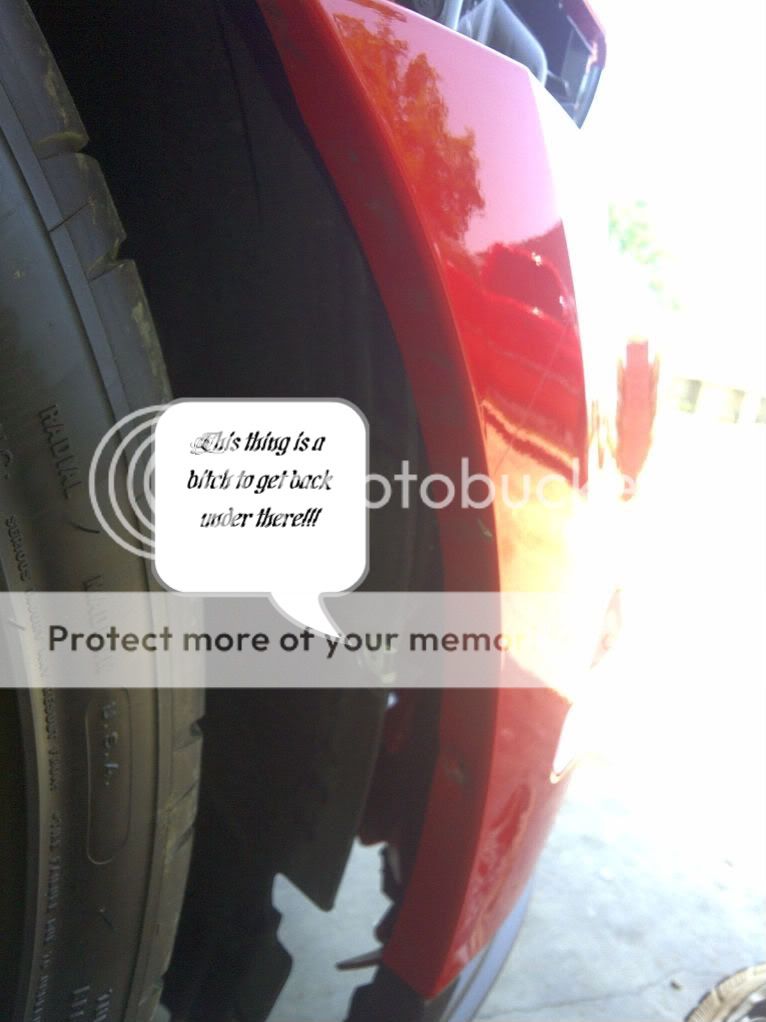
One last note folks. When you're putting this sucker back on, hang it on the hooks first. Connect your side marker lights, fog lights and push your sensor back into the tab. The tab on the GT/CS is the same type as the old one, so no worries. Then, and this is very important to save yourself a lot of headaches, get the bottom panels and the side panels in the wheel well underneath the bumper cover. If you need to install a couple of bolts to keep it there, then by all means, do so. The side, in the fender well area, is a real bitch to get back under there. Just use some muskles, eat yer spinach if ya need too, and push that sucker under there. Here's a picture of the ones I'm talking about.
Any suggestions, questions or comments, go ahead and post away. Especially if you know an easier way to get at this. Personally, this was the easiest way I could figure out to do it without any instructions. Have fun!
Oh yeah, forgot to post completed pictures.


This is SUPER EASY to do and I did mine in less than 45 minutes without ever having done it before. I didn't burn my car down, stab myself in the hand, scratch my paint, put dents in the car or otherwise injure myself or my car. If YOU do, that's just tough shit buddy. Learn your way around a car/garage.
Tools:
1/4" drive ratchet
4" or 6" 1/4" drive extension
7mm 1/4" drive socket
8mm 1/4" drive socket
Cross-Tip Screwdriver
Thin, slotted tip Screwdriver
A blanket or other soft surface to put the bumper cover on
Yep, that's all you need to do this. Let's get to it.
First off, you need to remove the airbag deployment sensor. Unless you have disconnected your battery, DO NOT unplug it. There's a much easier way to get that dog to hunt. Simply reach down between your radiator and front bumper and grasp the sensor. It is mounted to a VERY flexible piece of rubber and you WILL not harm that rubber tab by doing this. Grab the sensor and while pulling upwards and rocking it back and forth, the sensor will pop right out of that tab. Install is just as easy. Just shove it back in there.
Now you need to disconnect your fog lights if you have them mounted in your grill. The passenger side one is more difficult to get at and I waited until I had the bumper cover off enough to disconnect it.
Next up, you will want to remove your radiator cooling plate and the two upper bumper cover bolts.
Next up, you will want to go to each front tire fender area and remove three bolts. One is underneath the edge of the lower fascia/under-body panel. Look at the note on the picture to see approximately where it's located.
This is a view from underneath the car.
Finally, we will remove the last four bolts holding the cover on.
Next up, you will want to go to the passenger side, or driver side, which ever you prefer, and grasp the bumper cover under where it meets the fender. Now, you simply pull it out towards you. Gently now! It will pop off very easily.
As soon as it pops off, pull it out a little bit and reach down there and unplug the side marker light. It's the same for both sides of the car.
Now you should be ready to pull the cover off. If you need to unplug your fog lights still, this is an excellent time to do so. You will see two tabs on the top side, just in front of where the radiator diversion plate/cooling plate is normally. I have circled them in YELLOW. You will have removed those two bolts already, so now, the only thing holding your cover on the car are these two tabs. If you feel like you need an assistant, go right ahead. Personally, I didn't. Carefully lift the bumper cover up, pop those tabs over the hooks, then SLOWLY start pulling the cover away from the car. If, for some reason, it hangs up, take this opportunity to see what you didn't disconnect. You can hang the cover right back on those hooks if you need too.
Now lay the cover on whatever soft surface you've prepared. You will need to remove a Phillips head screw and a plastic fastener from each side of the lower fascia to cover.
When you pop up the plastic fastener, you'll notice it's different from the others. However, once you pop the center post up, you can push on the bottom of it while pulling the top part. It might have a lot of dirt and stuff in there, so wiggle that sucker around a bit. That's what she said! HA!
Now you will want to look at all the tabs that are now holding the lower fascia onto your bumper cover. Looks like a pain in the pecker doesn't it? Well, not to fear. There's an easy way to do this. Just read the directions I've put on the picture!!
Once that is done with, it's a simple matter of putting your new GT/CS fascia into your bumper cover. ALL of the upper tabs and the hardware on each end will match up and fit. However, on the lower side of the new fascia, there will only be 3 or 4 tabs that will engage. You will also have a gap underneath once you put the cover back on your car. There is NO reason to worry about the gap or the three tabs that are engaged on the lower part of the new fascia. I have checked it out at speed while I was in Me-he-koh!
One last note folks. When you're putting this sucker back on, hang it on the hooks first. Connect your side marker lights, fog lights and push your sensor back into the tab. The tab on the GT/CS is the same type as the old one, so no worries. Then, and this is very important to save yourself a lot of headaches, get the bottom panels and the side panels in the wheel well underneath the bumper cover. If you need to install a couple of bolts to keep it there, then by all means, do so. The side, in the fender well area, is a real bitch to get back under there. Just use some muskles, eat yer spinach if ya need too, and push that sucker under there. Here's a picture of the ones I'm talking about.
Any suggestions, questions or comments, go ahead and post away. Especially if you know an easier way to get at this. Personally, this was the easiest way I could figure out to do it without any instructions. Have fun!
Oh yeah, forgot to post completed pictures.
Last edited:
")