GlassTop09
Senior Member
Got the old BMR UCA differential bushing out & new Ford DR3Z-5A638-A UCA differential bushing installed this afternoon (while under the car I also backed off both FR 8.8" girdle bearing cap preload bolts, cleaned bolt threads then applied some RTV to the threads then ran em back in to draw some RTV into the girdle threads & set the bearing cap preload then set the lock nuts & cleaned the girdle off to see if the slight oil leaks have been fixed then checked the shift linkage nut on the Barton ST shifter--had installed AMP bronze bushings earlier....all good).
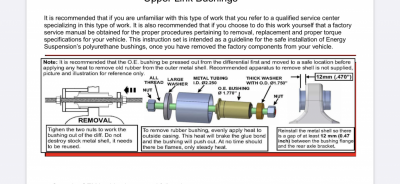
The Rotunda tool worked very well. 1st tried to remove old outer shell w\ BMR insert bushing intact w\ tool using my new Craftsman 1\2" dr electric impact but wasn't happening (not strong enough) so I got out my old 1\2" dr torque wrench to use as a long ratchet for leverage (have 2 more spare 1\2" dr torque wrenches)....ended up destroying the little bearing & the washer as they weren't up to the task (bushing shell was in there good) & the outer shell end where I had 204-590(1) removal driver against started flaring out so I had to pull the tool, drive out the BMR inserts, cut a groove in the outer shell to relieve some of the socket tension on it, took a crescent wrench & folded the outer shell end back inward so the 204-590(1) driver would square back up on the end then using the 1\2" long "ratchet" I slowly put tension on the tool & kept an eye on the driver to ensure it was staying square & eased the outer shell out. Cleaned all up, put some KK on the new bushing's outer shell, set it up in the socket in the proper orientation (both flat sides on flange in vertical parallel to sides of rear end socket....places the gaps in rubber at top & bottom of inner core for articulation), put the 204-590(2) installer driver on the flanged end of bushing & the 205-813 installer cup on the other side (notch in cup clears some casting at bottom of socket) then used a reg 1\2" dr ratchet to get all started good then got the long 1\2" "ratchet" & drew the new bushing into place....204-590(2) installer driver cup is offset so when you draw the installer cup in full against the rear end's bushing socket it automatically spaces the bushing in the socket to centerline of the UCA....lowered the UCA back onto the new bushing & it slid onto the bushing w\o having to fiddle w\ the UCA. Lined up the holes using my jack & slid the bolt in & ran it up snug. Jacked the car up to load the rear end, pulled the 2 rear jack stands from the unibody, set my ramps under the rear wheels, set the car down on them, flexed the rear of car a couple of times to settle it then torqued the rear UCA diff bushing up to the required 129 ft\lbs then reinstalled my rear sway bar & PHB after fixing the leaks on the girdle then put her on the ground & test drove her after picking up\putting away all tools & cleaning up.
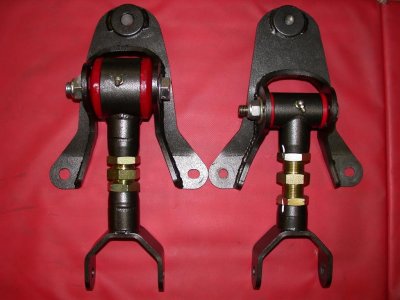
Drove around town for about 1 hr.....rear end felt no different now w\ new Ford DR3Z-5A638-A bushing than it did w\ the BMR insert, could not detect any pinion rise from rear end upon a hard clutch dump & had no wheel hop occur when tires broke loose. Rear end was quiet when axle was moving around on bumpy roads & felt very solid w\ no creaks\squeaks. Made a couple of spirited turns to see how the rear end would act....felt good & smooth & was also very quiet during articulation off body roll so all in all I'm a happy camper now that I got this bushing installed. I had checked the BMR adj UCA's front bushing & found it still in good order (held the UCA up & out of the way the whole time during the job w\o drooping) so all is good now....rear end feels very planted. The BMR diff insert bushing was starting to get a little loose (pushed the BMR's metal inner sleeve out w\ my hand while the insert was still installed in the shell but had to drive the rest out...had to drive it all in when I initially installed it) so it had loosened up enough from rear end articulation to offload the UCA of some excessive torsional force anyway but I feel better now knowing that there is an OEM designed diff axle bushing designed to articulate installed but is a much, much better 1 than the 05-09 OEM 5R3Z-5A638-DA bushing that came originally on the rear axle.
Gonna pick up a couple of Grd 8 flat washers to use under the Rotunda tool's nuts going forward as these should be able to handle the high tensile load between the nut & driver\cup w\o dishing out & breaking (this happened even when coated w\ some KK to reduce friction), the thicker the better.
Rear end is now checked off my list....all handled for now.


