
You are using an out of date browser. It may not display this or other websites correctly.
You should upgrade or use an alternative browser.
You should upgrade or use an alternative browser.
Drag Truck - The Danger Ranger
- Thread starter ksack
- Start date
Spent the afternoon chopping the front off. Video and pics below. Please consider letting the video run (even if you don't want to watch) to help it get more views for the Algorithm.
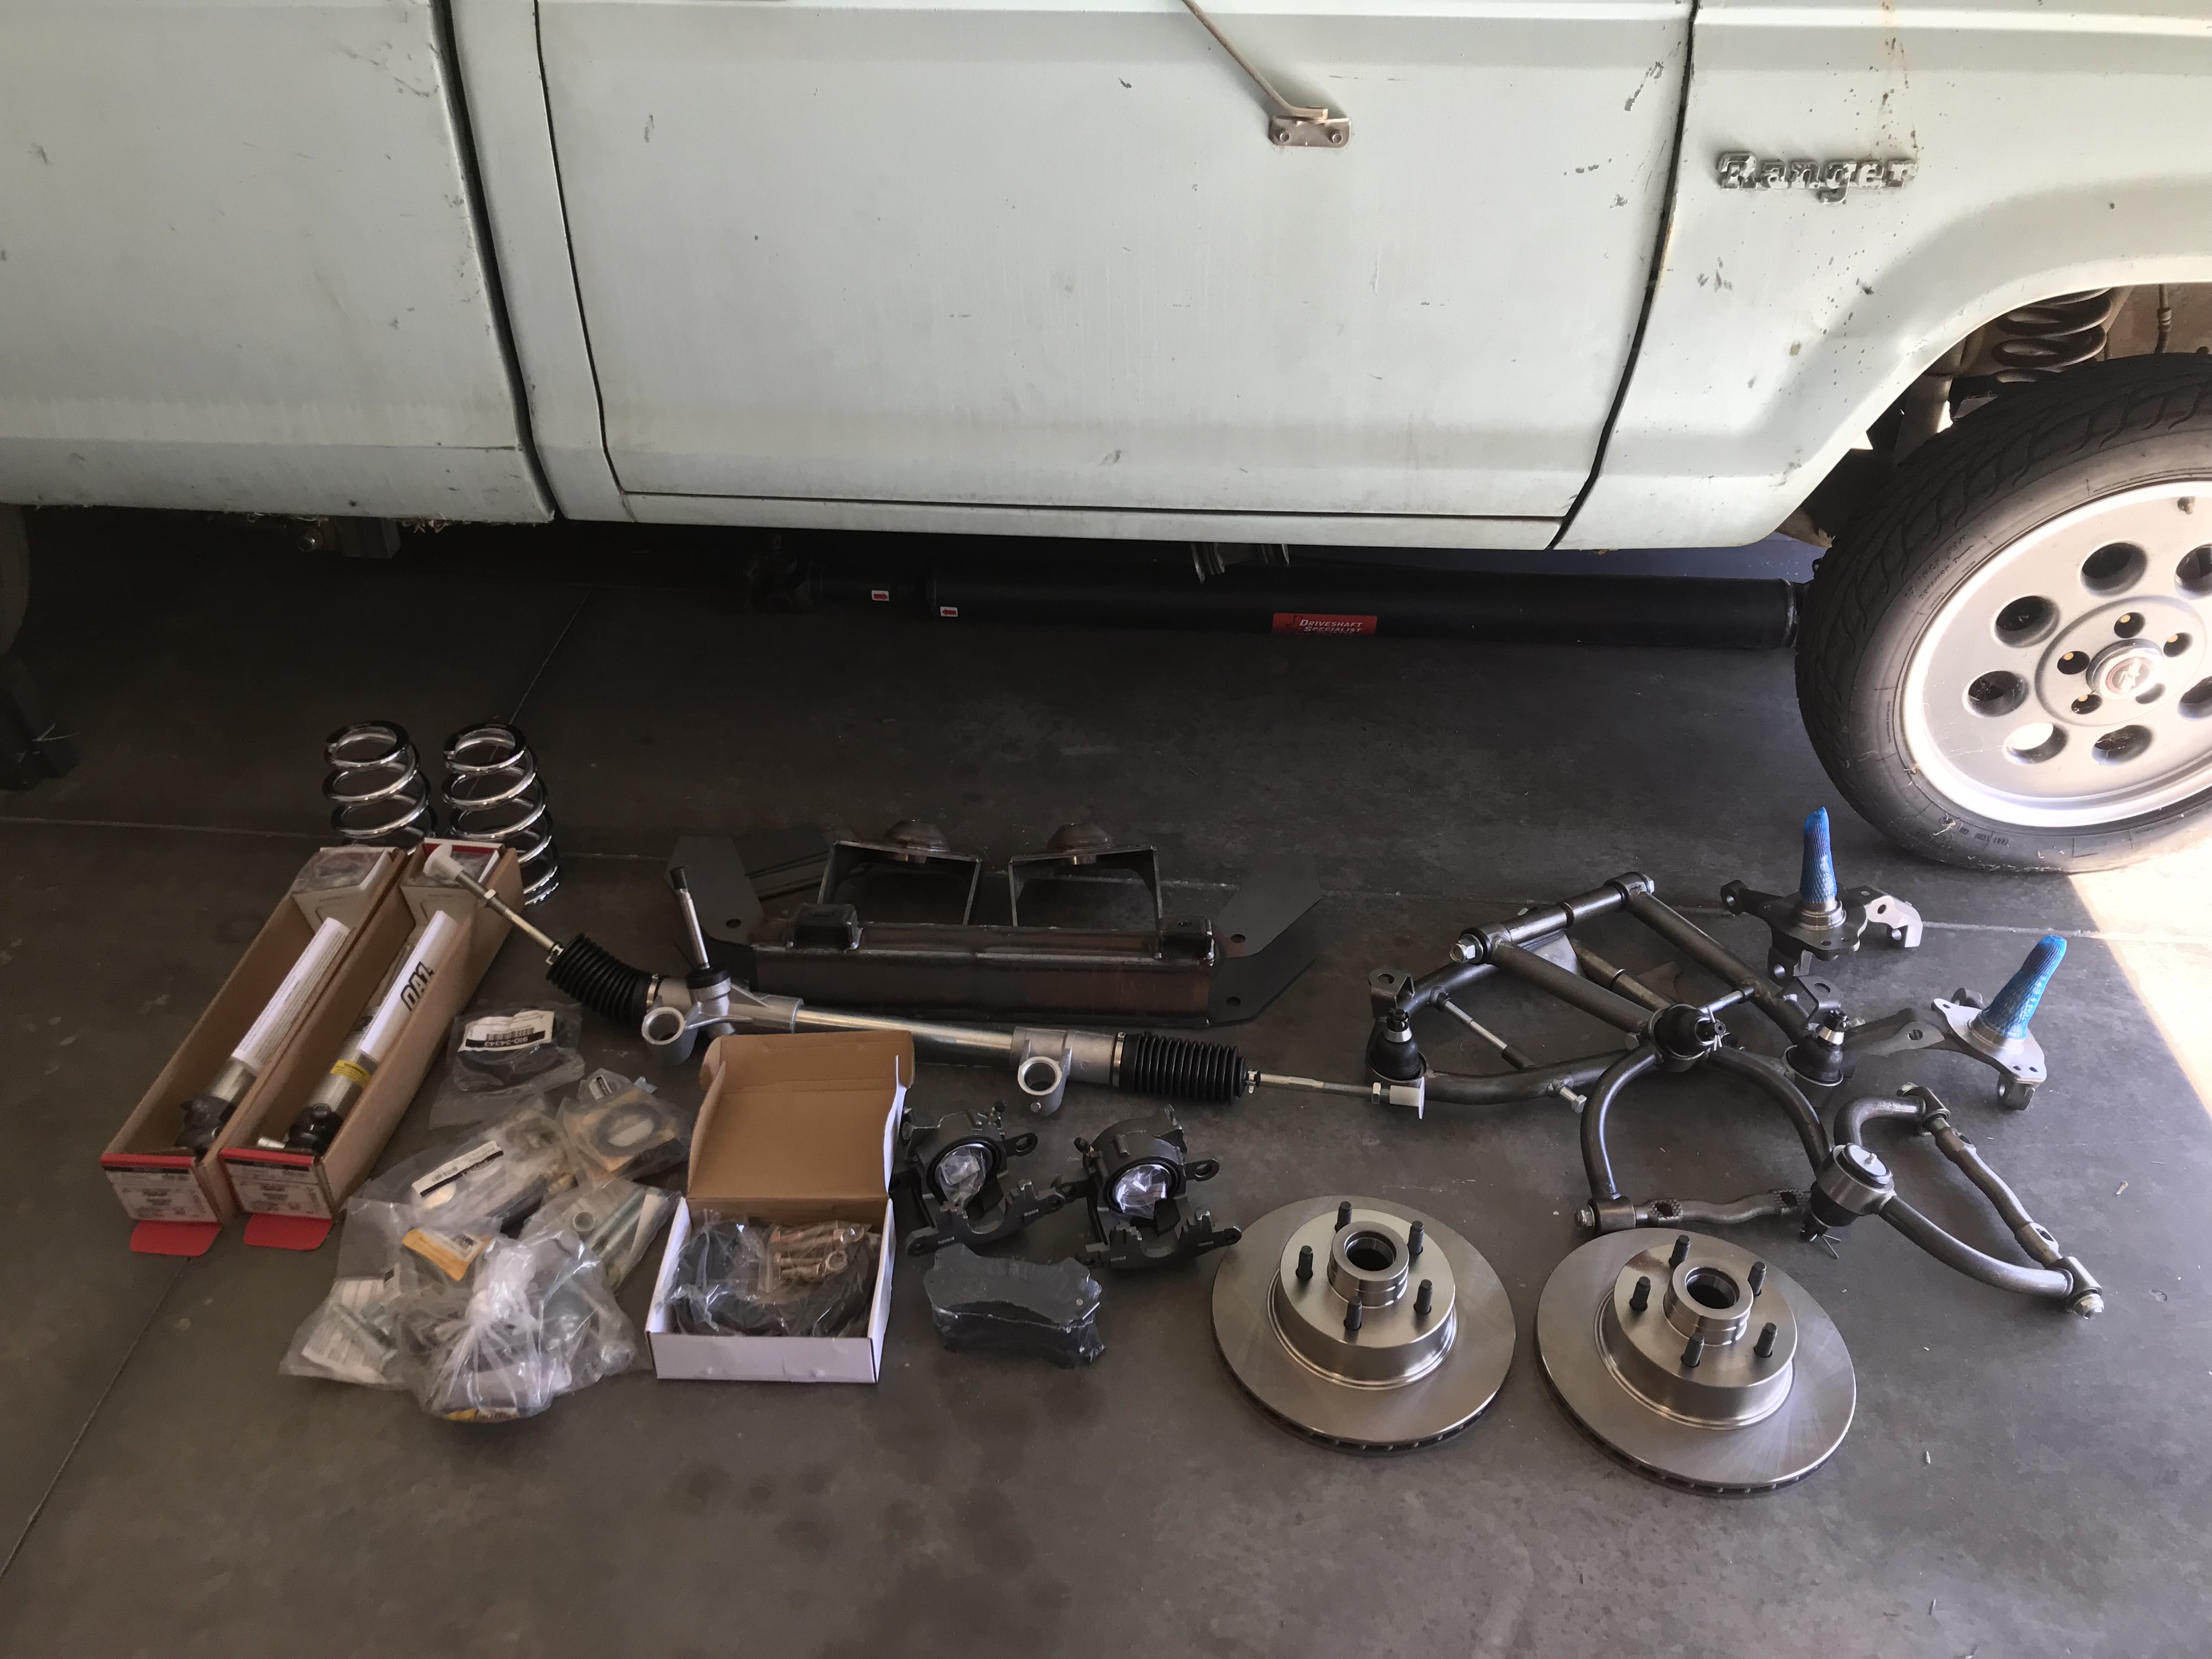
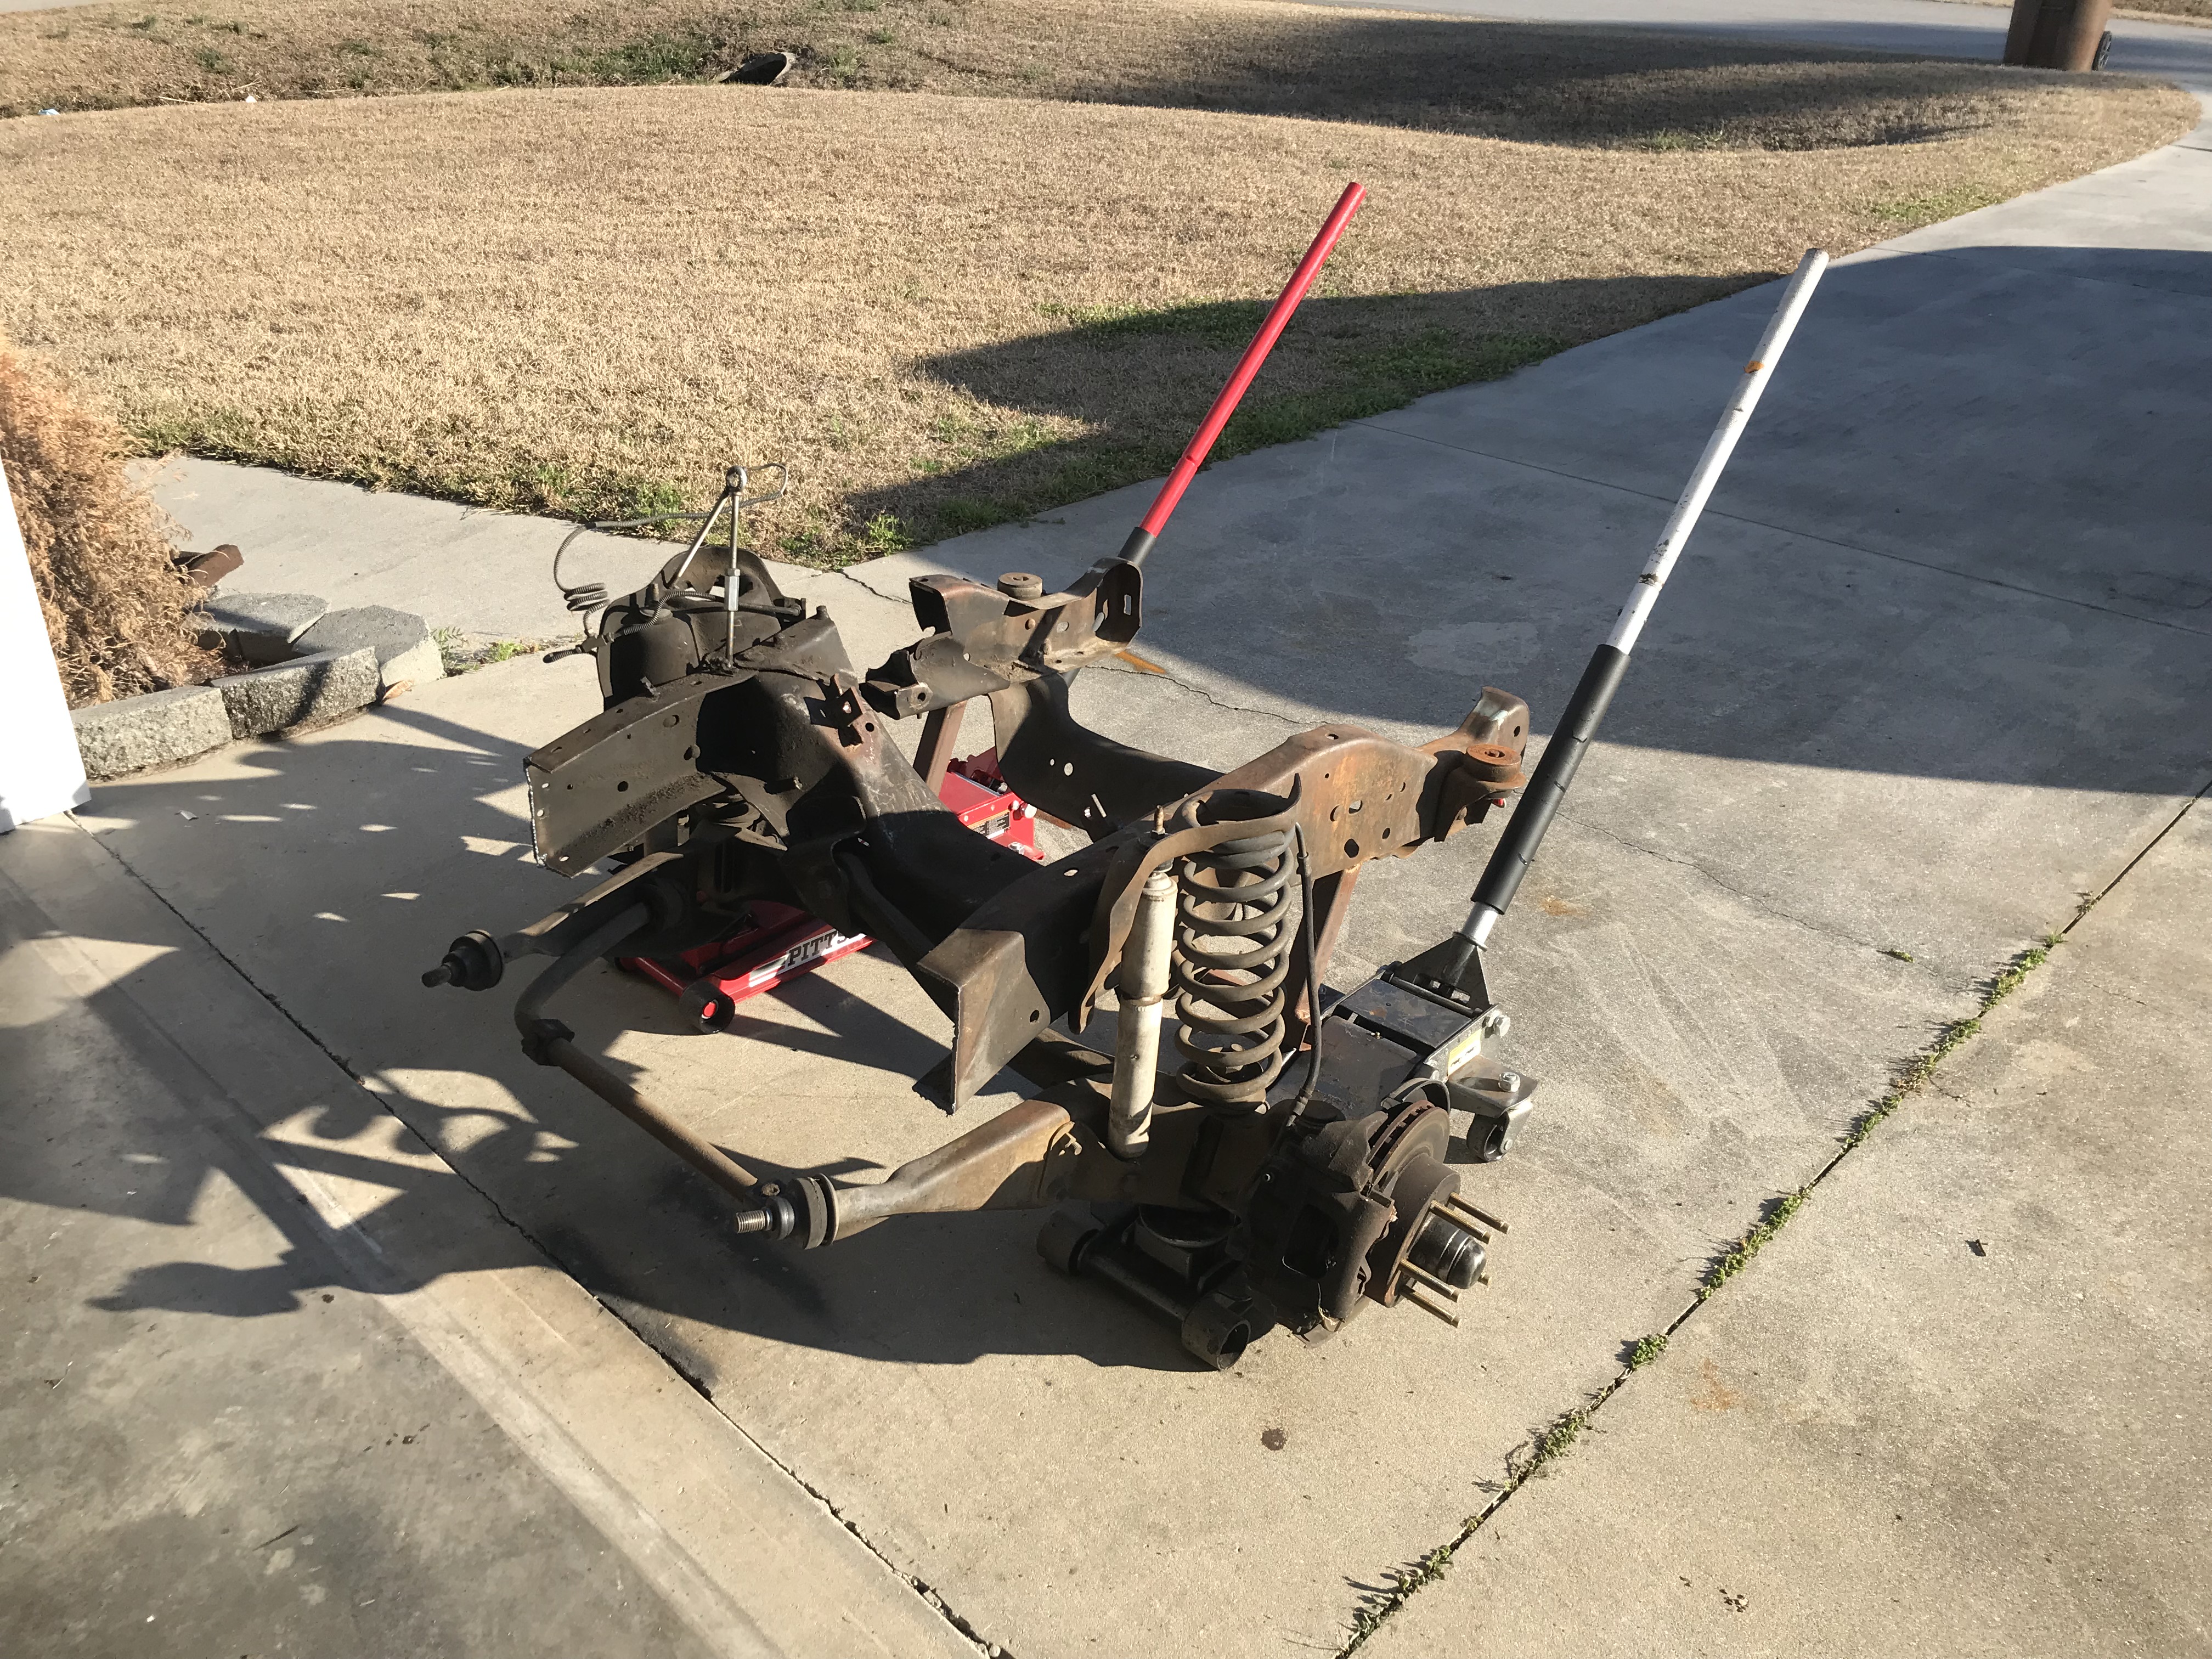
Here are all the parts. Paul Horton's Welder Series K-member, and a Speedway Motors Mustang II IFS kit
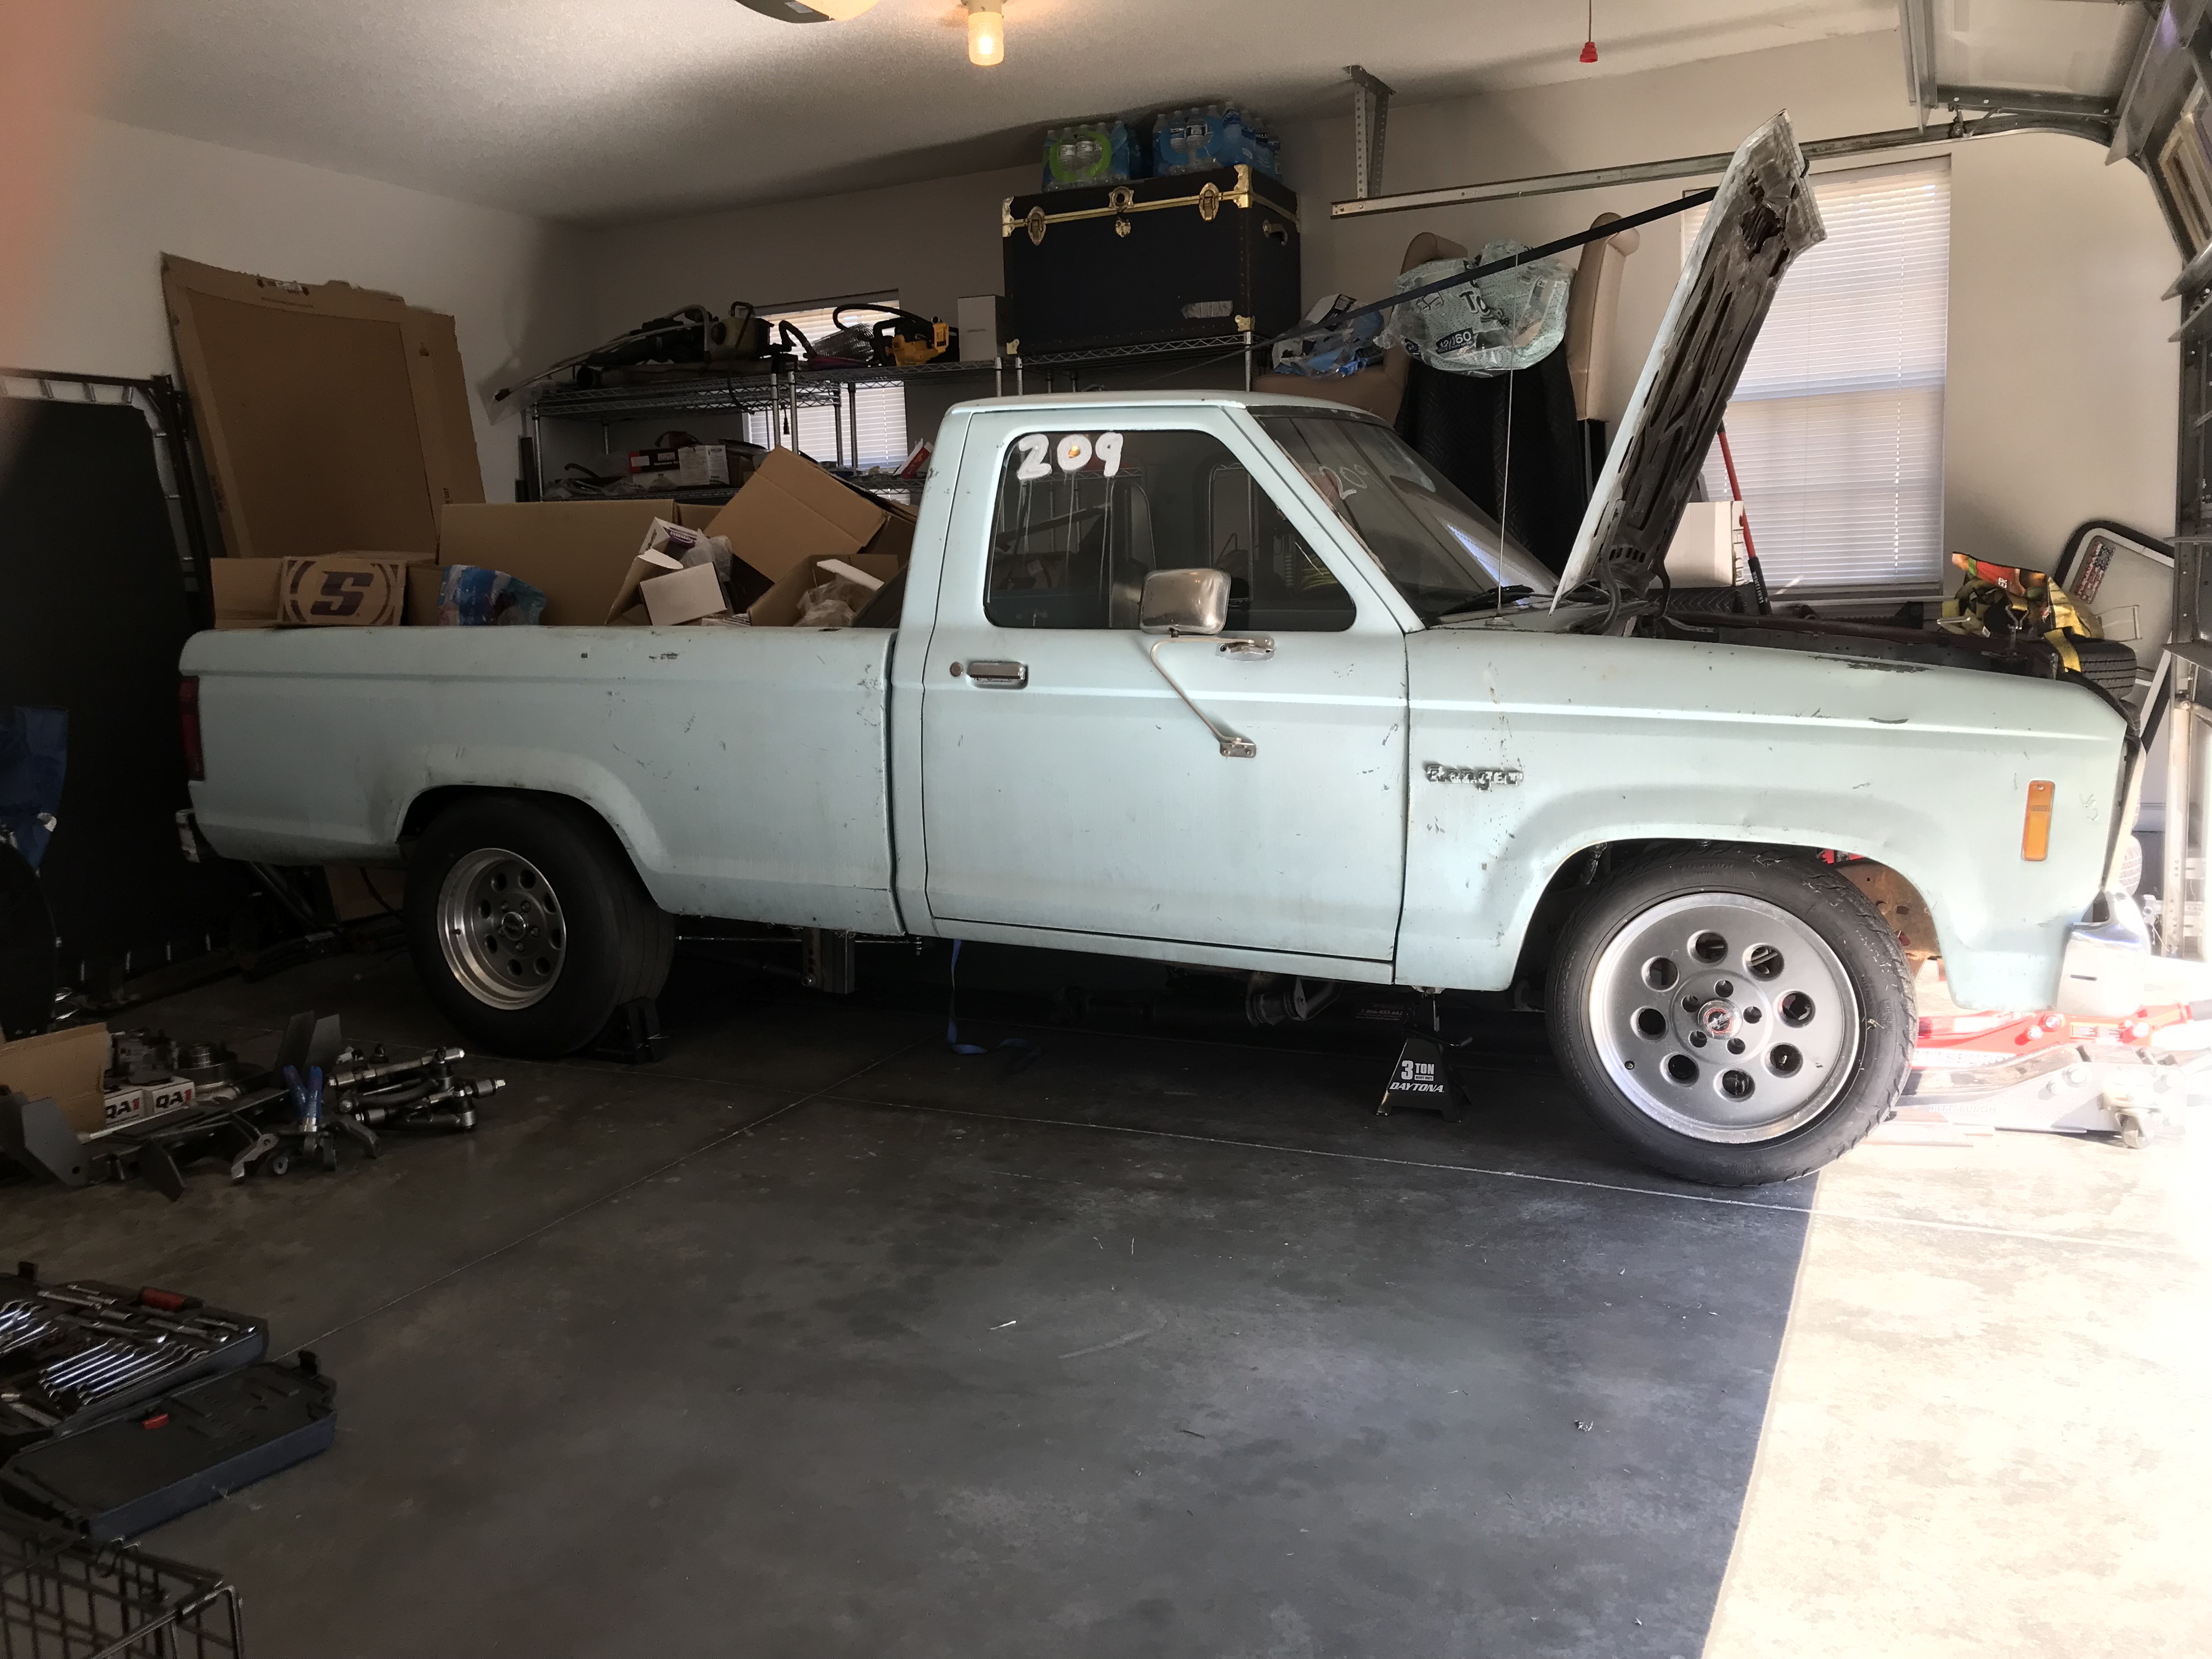
Set on jackstands at the ride height I am targeting. I think it looks awesome!
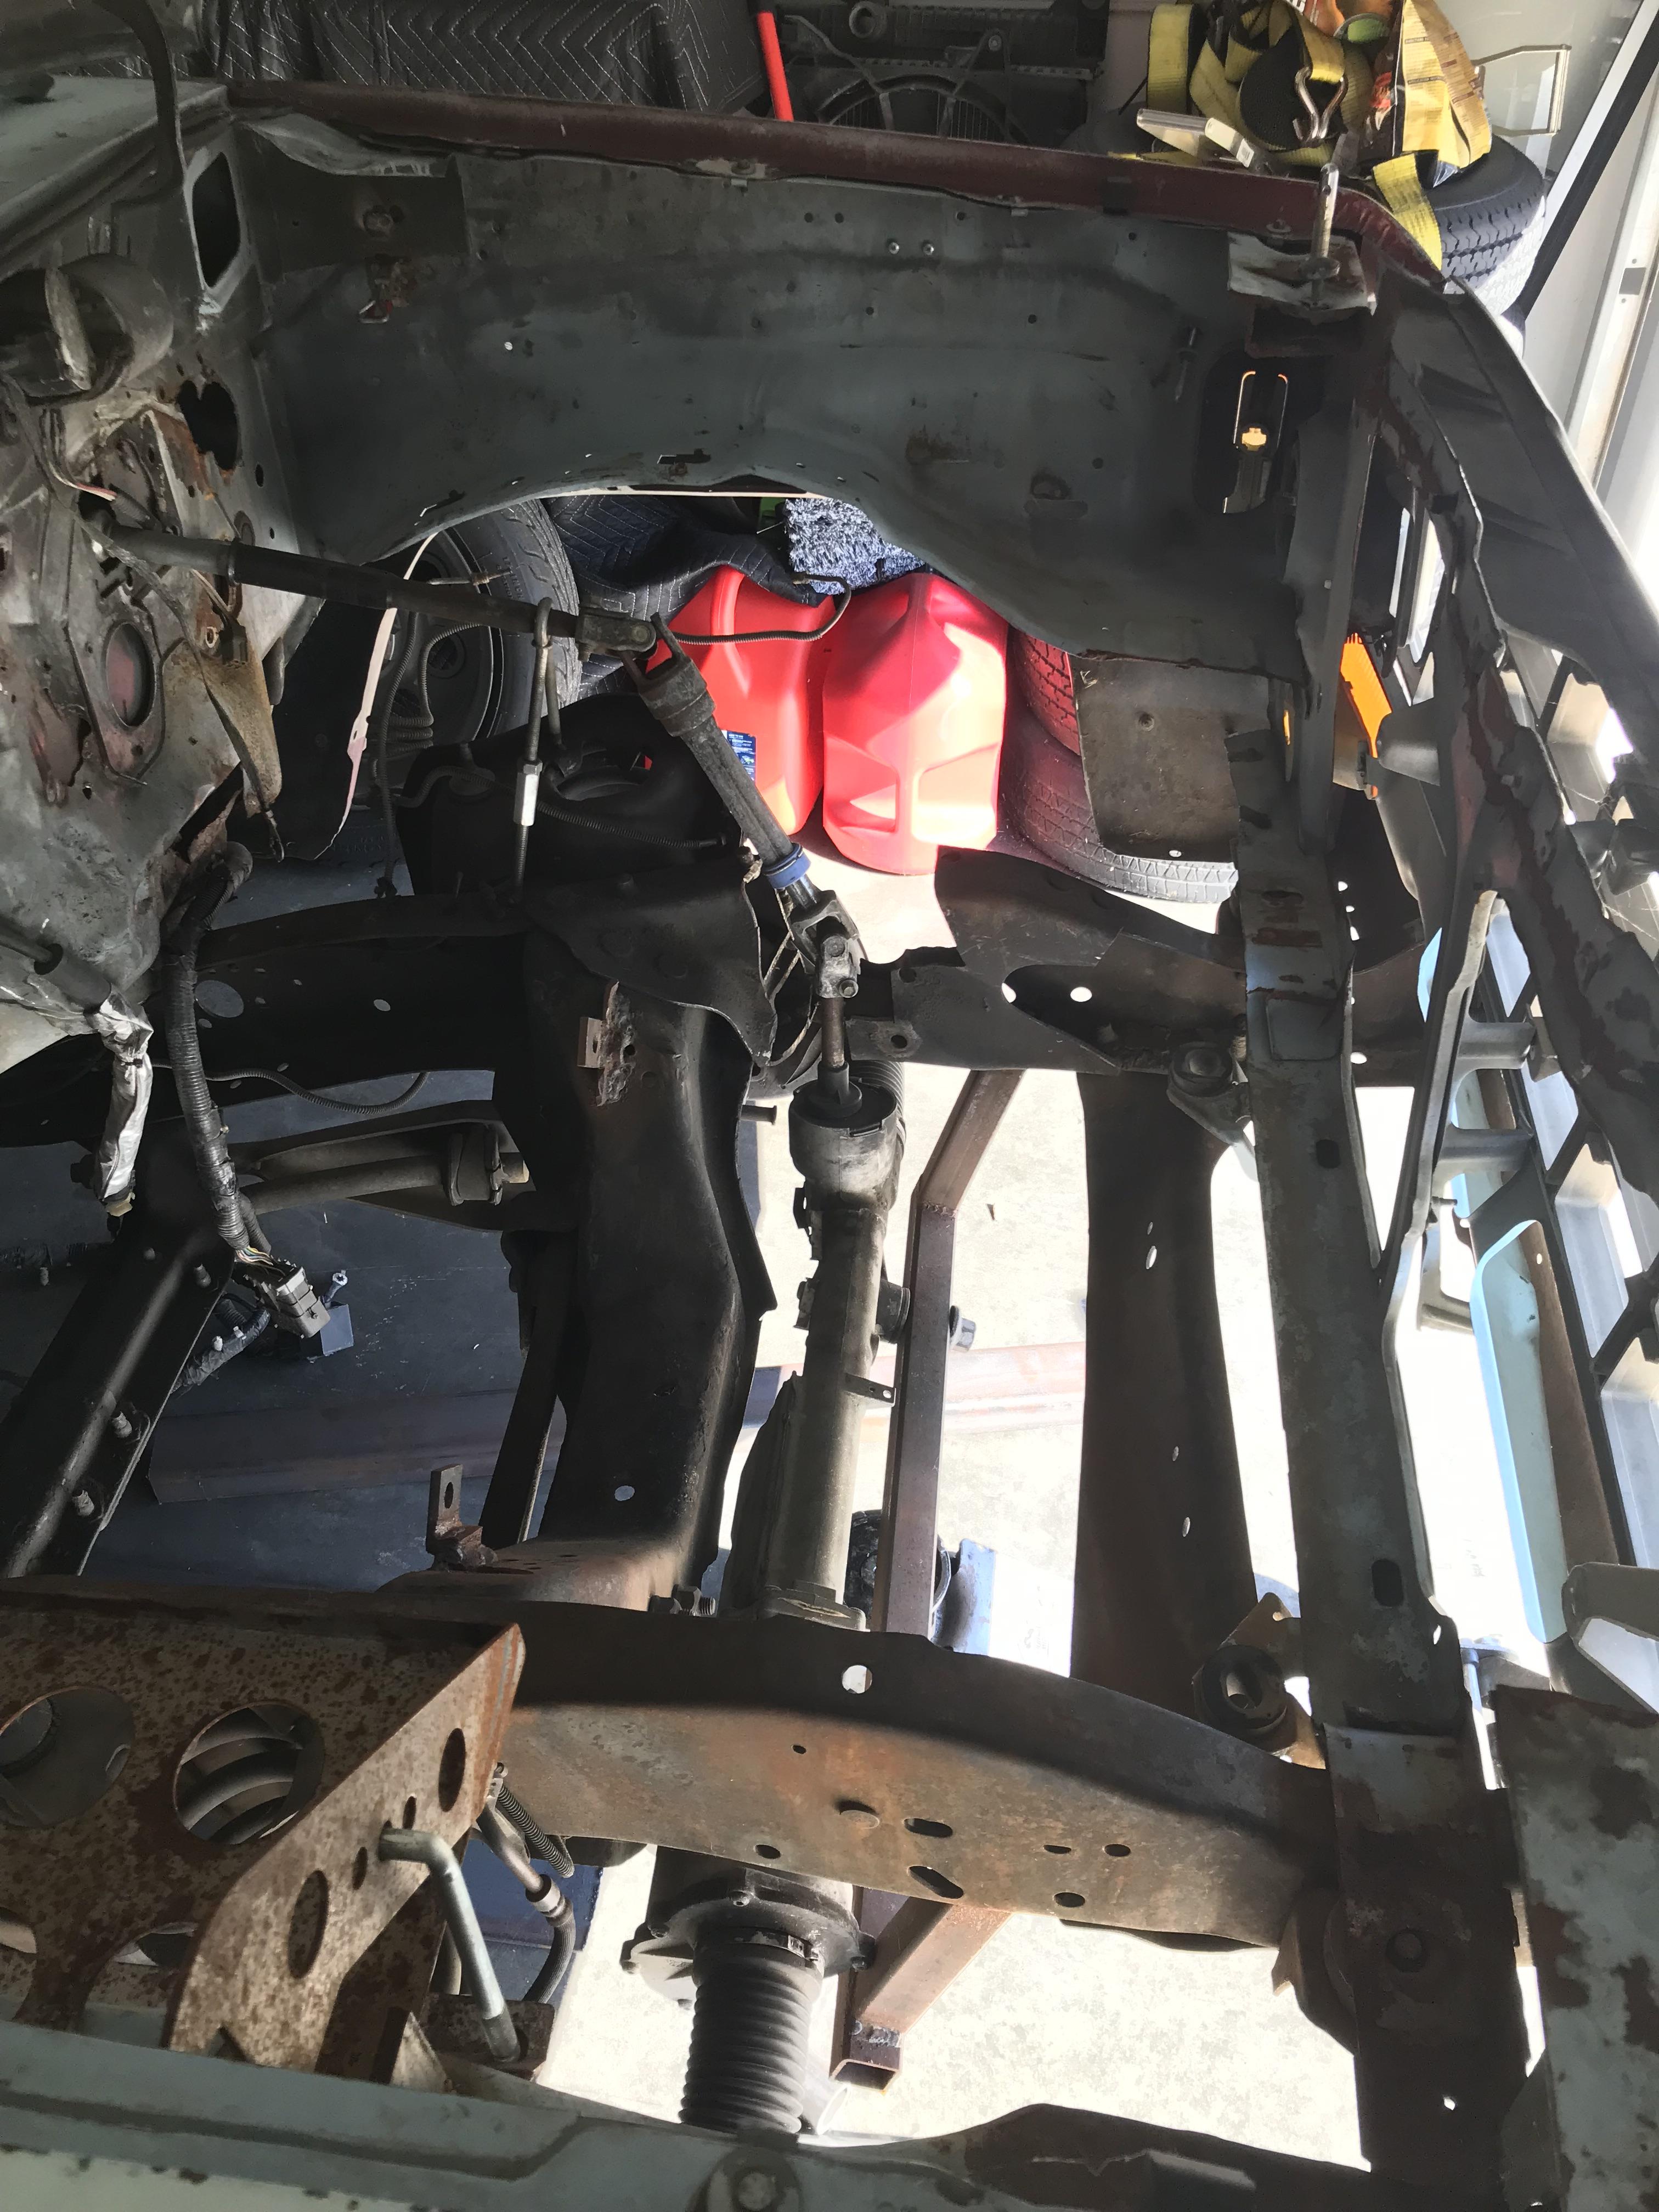
Picture showing how cluttered and small the engine bay is.
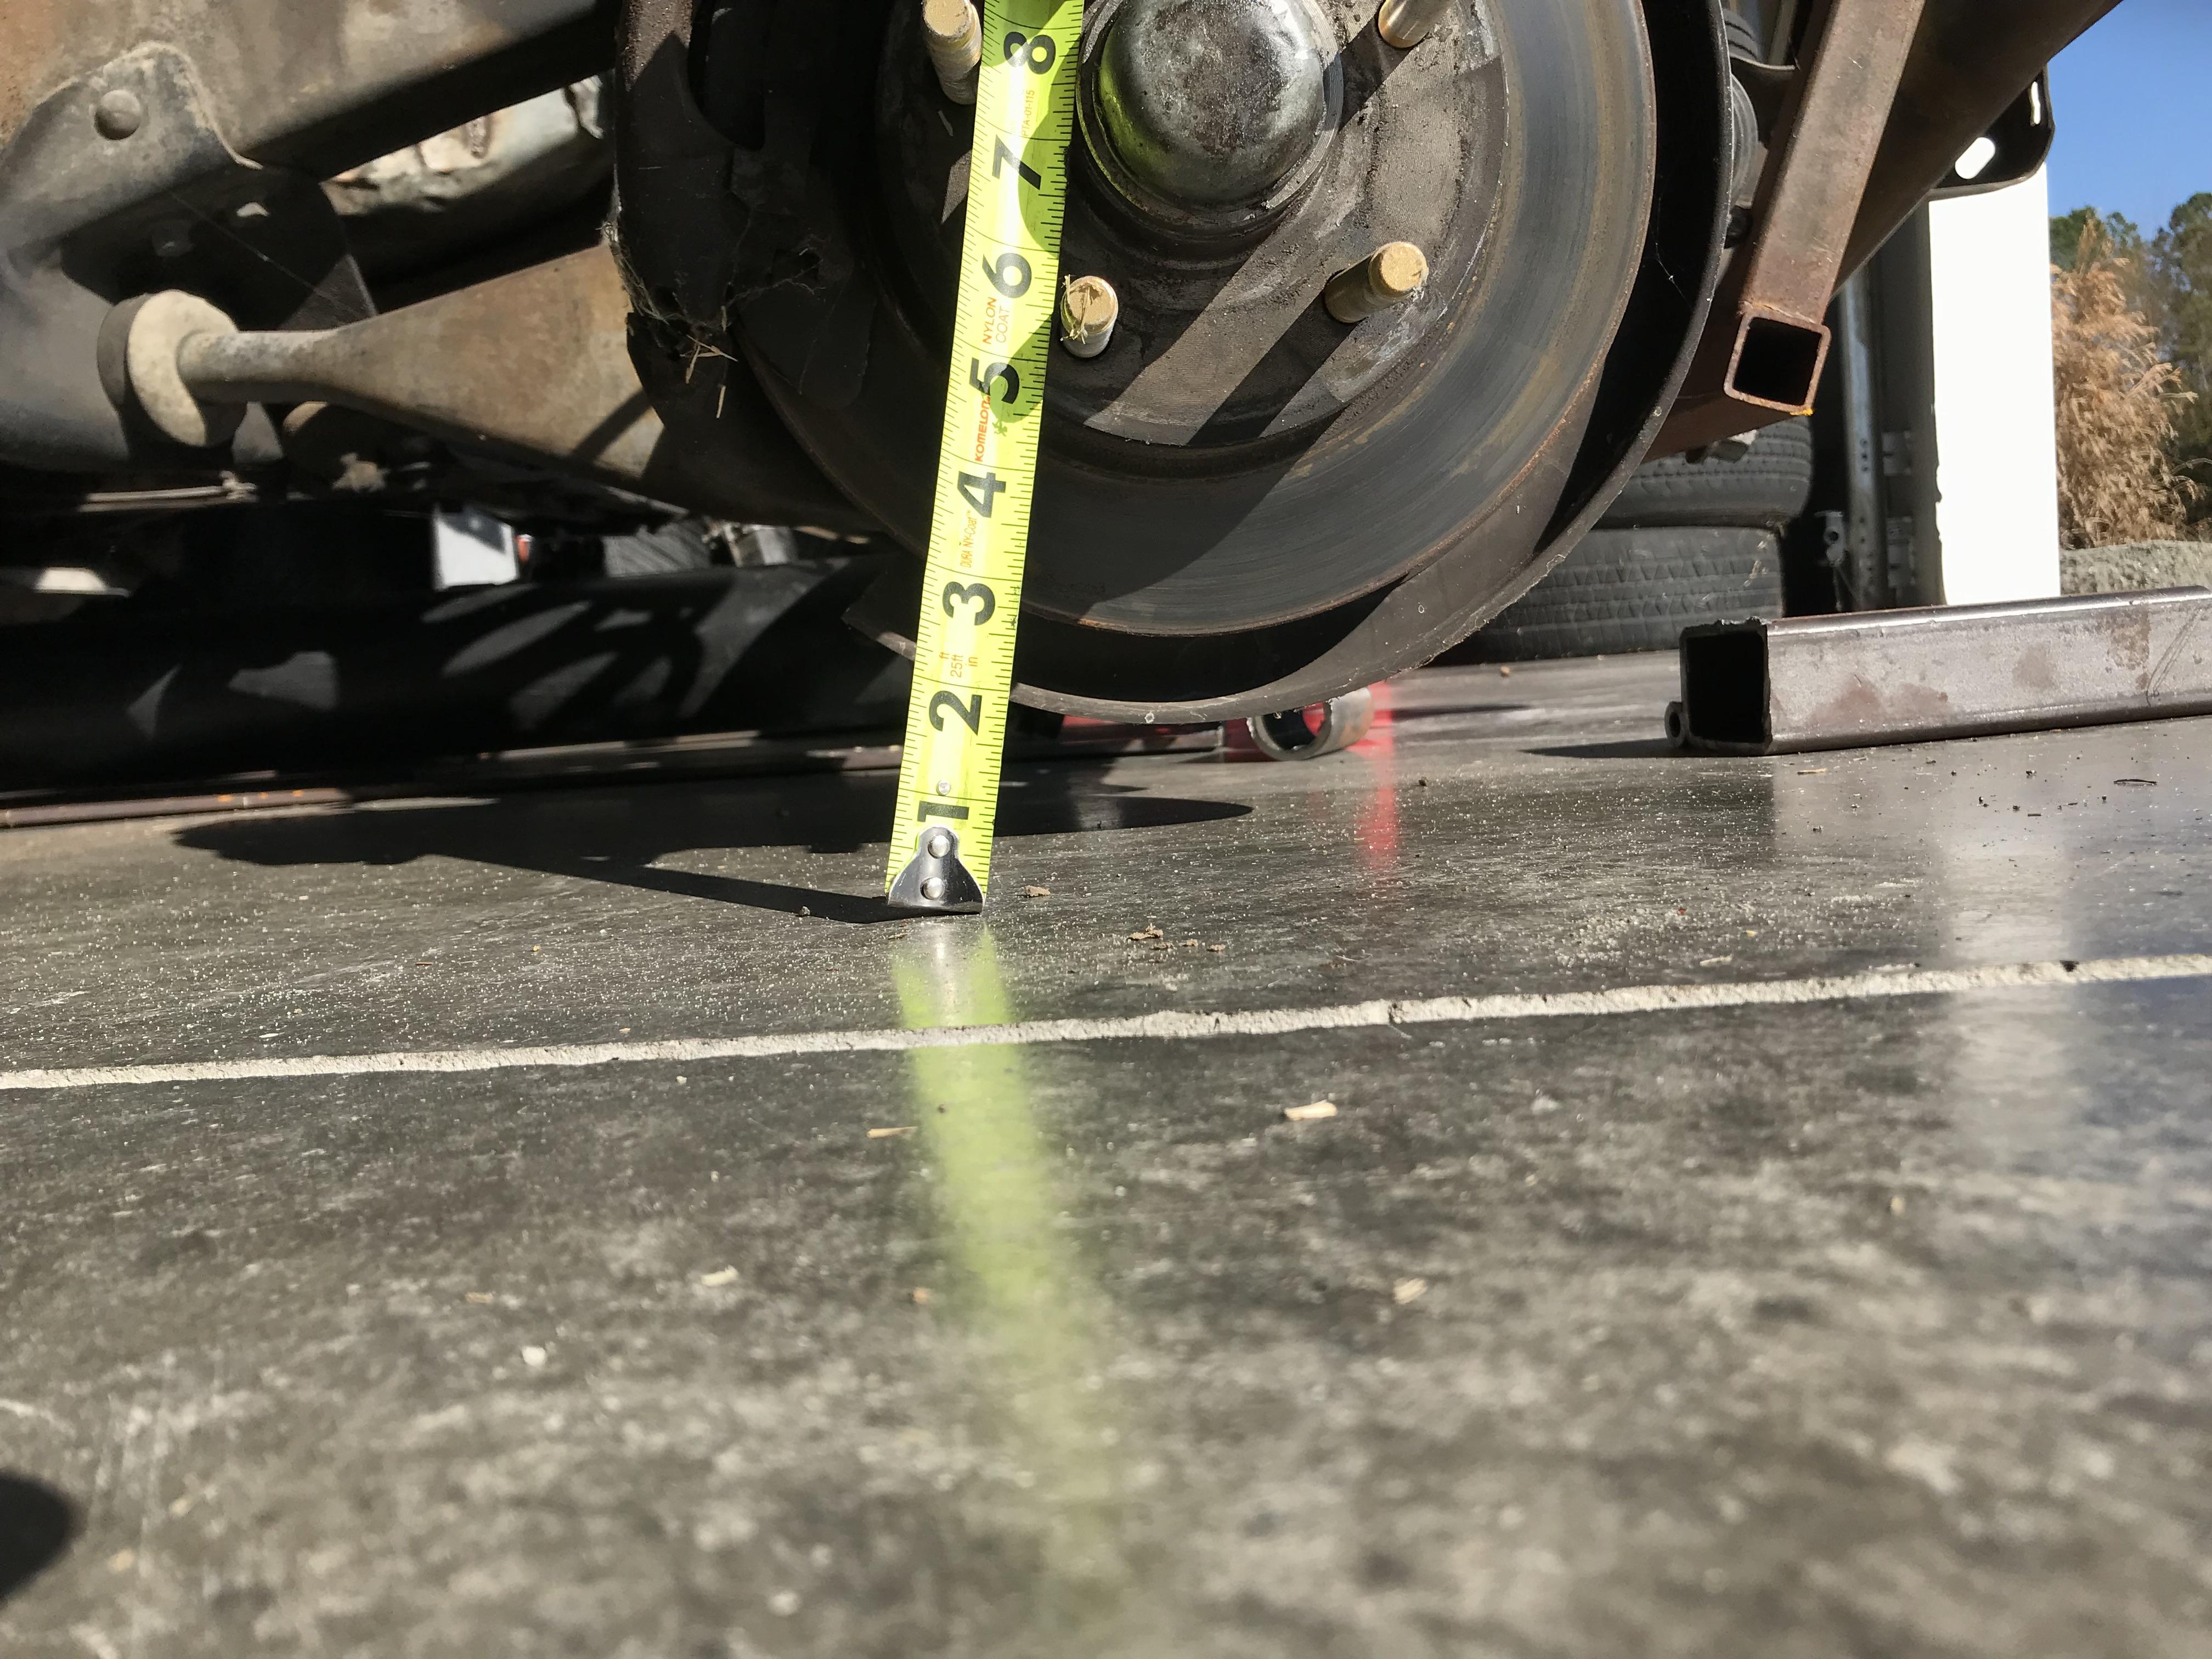
Here's how low the old rotors are to the ground (with no weight, of course) at the new ride height.
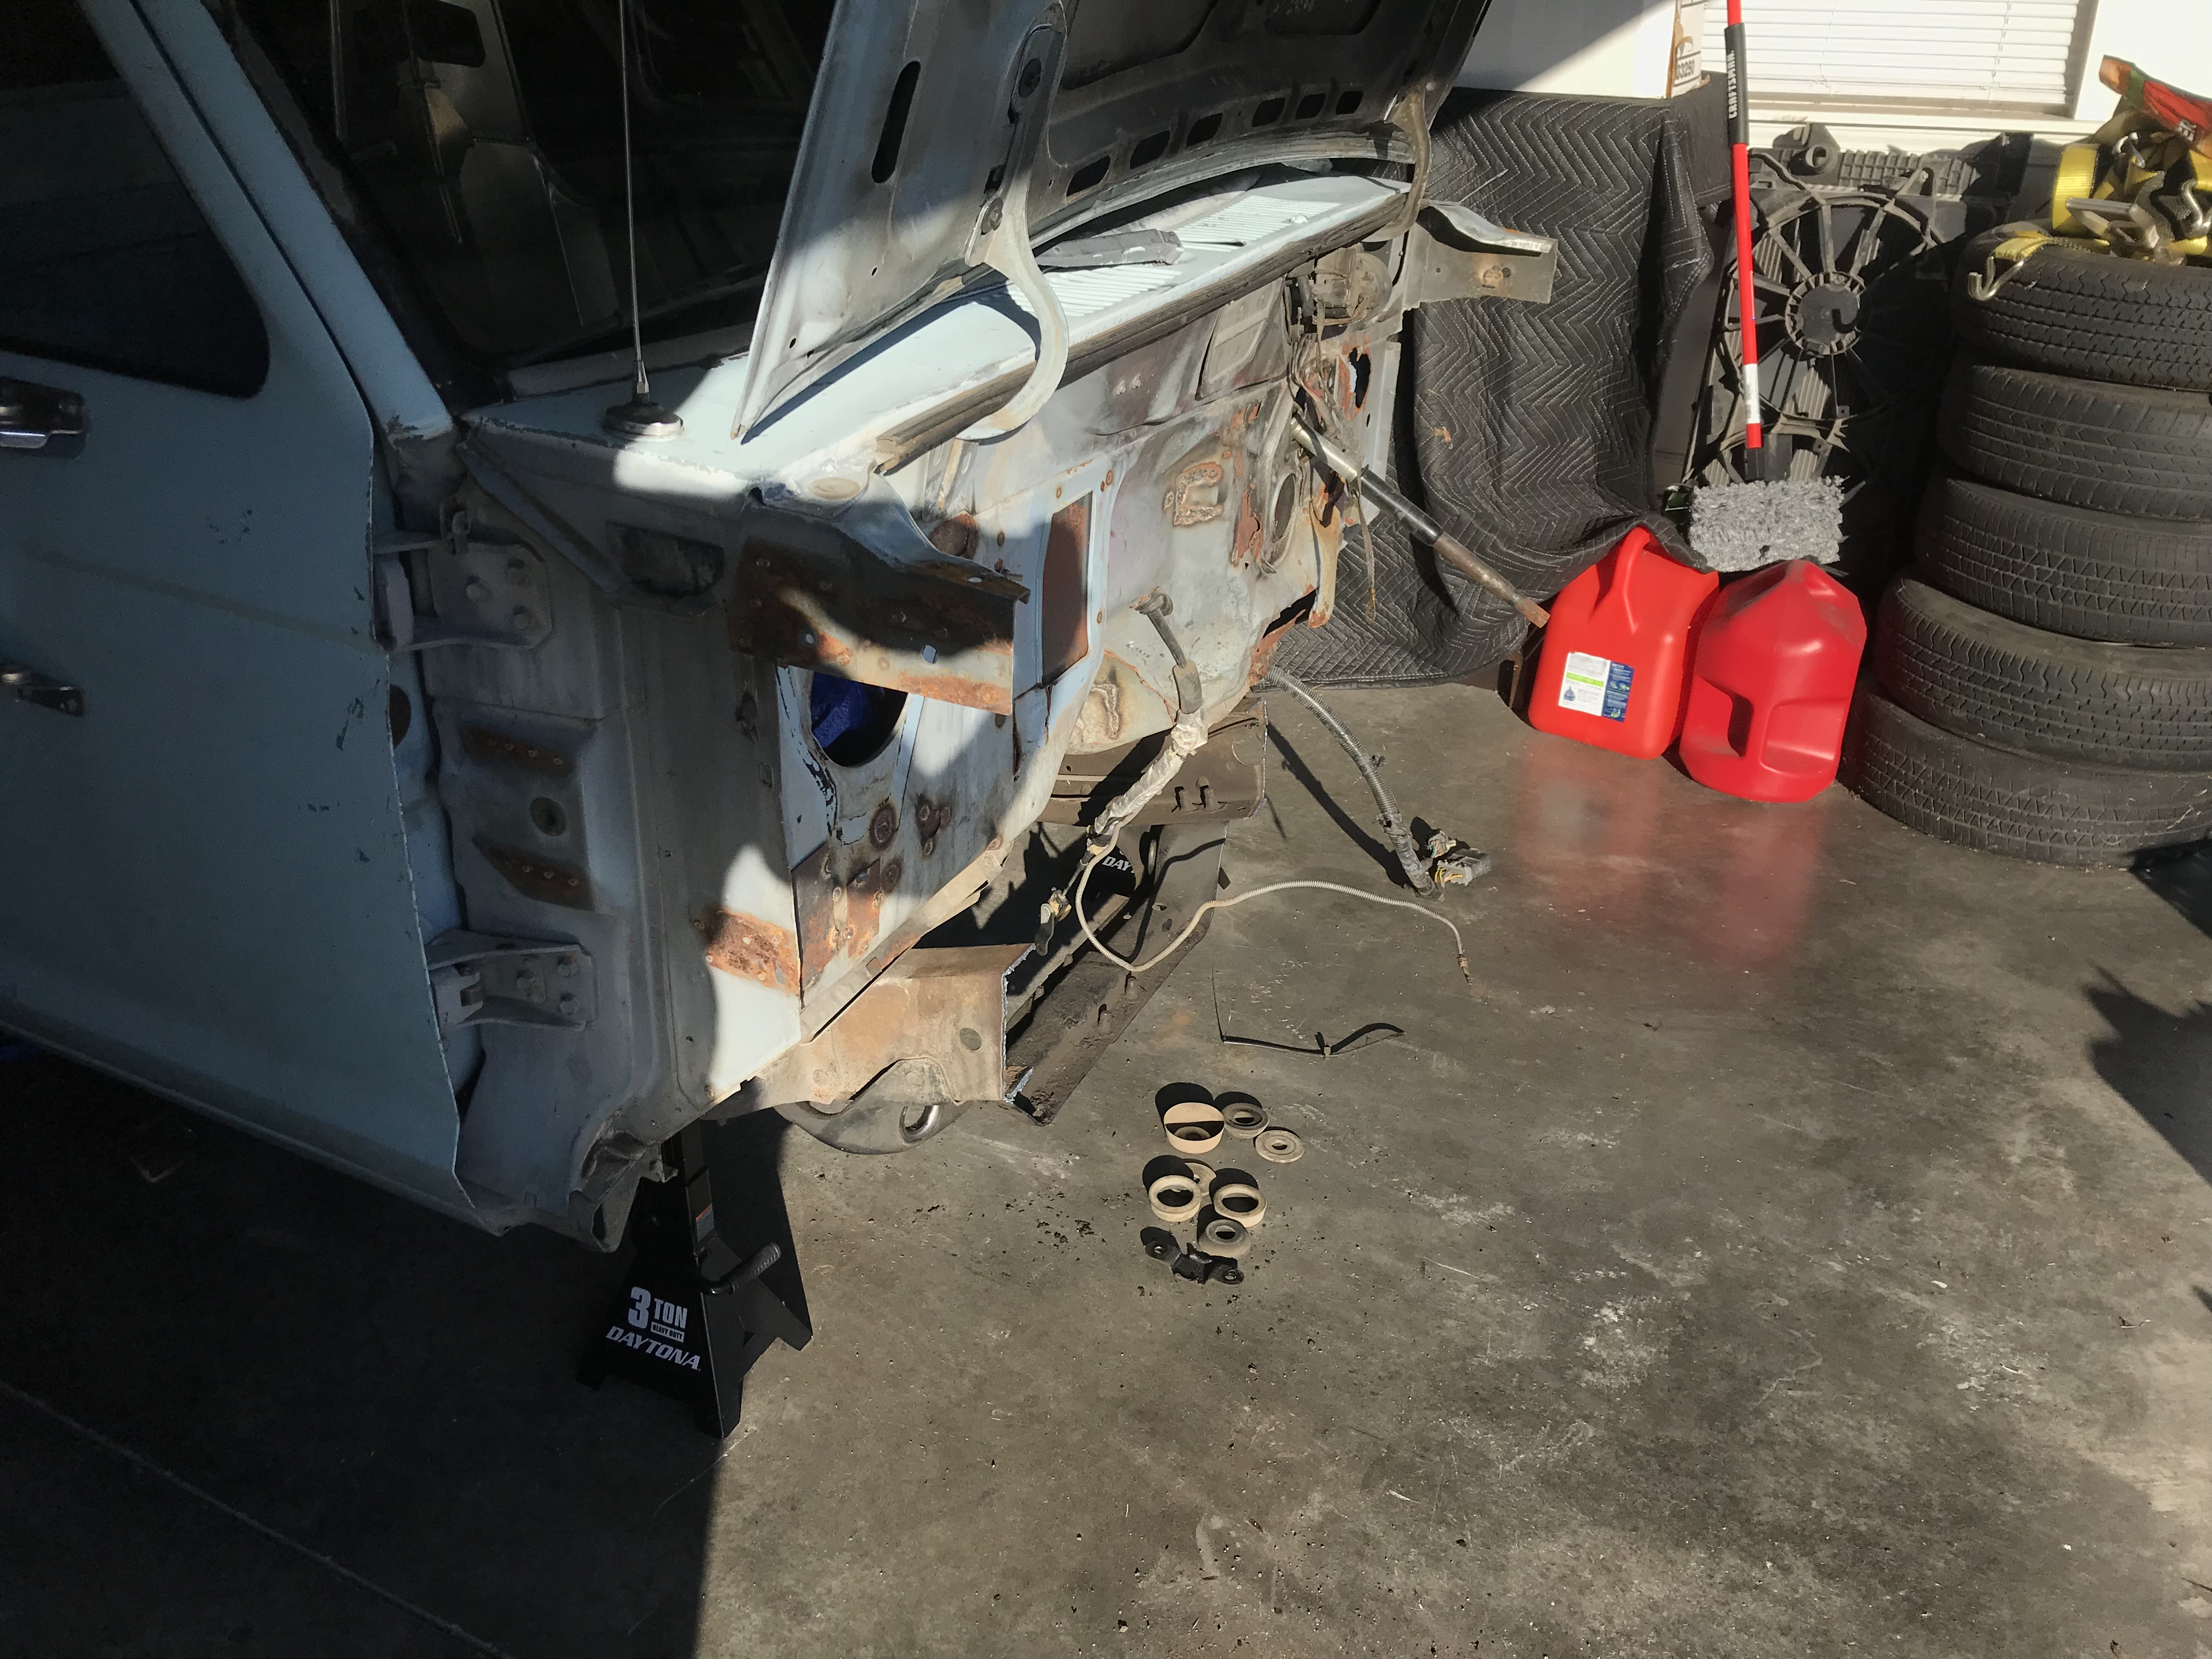
Front end removed!
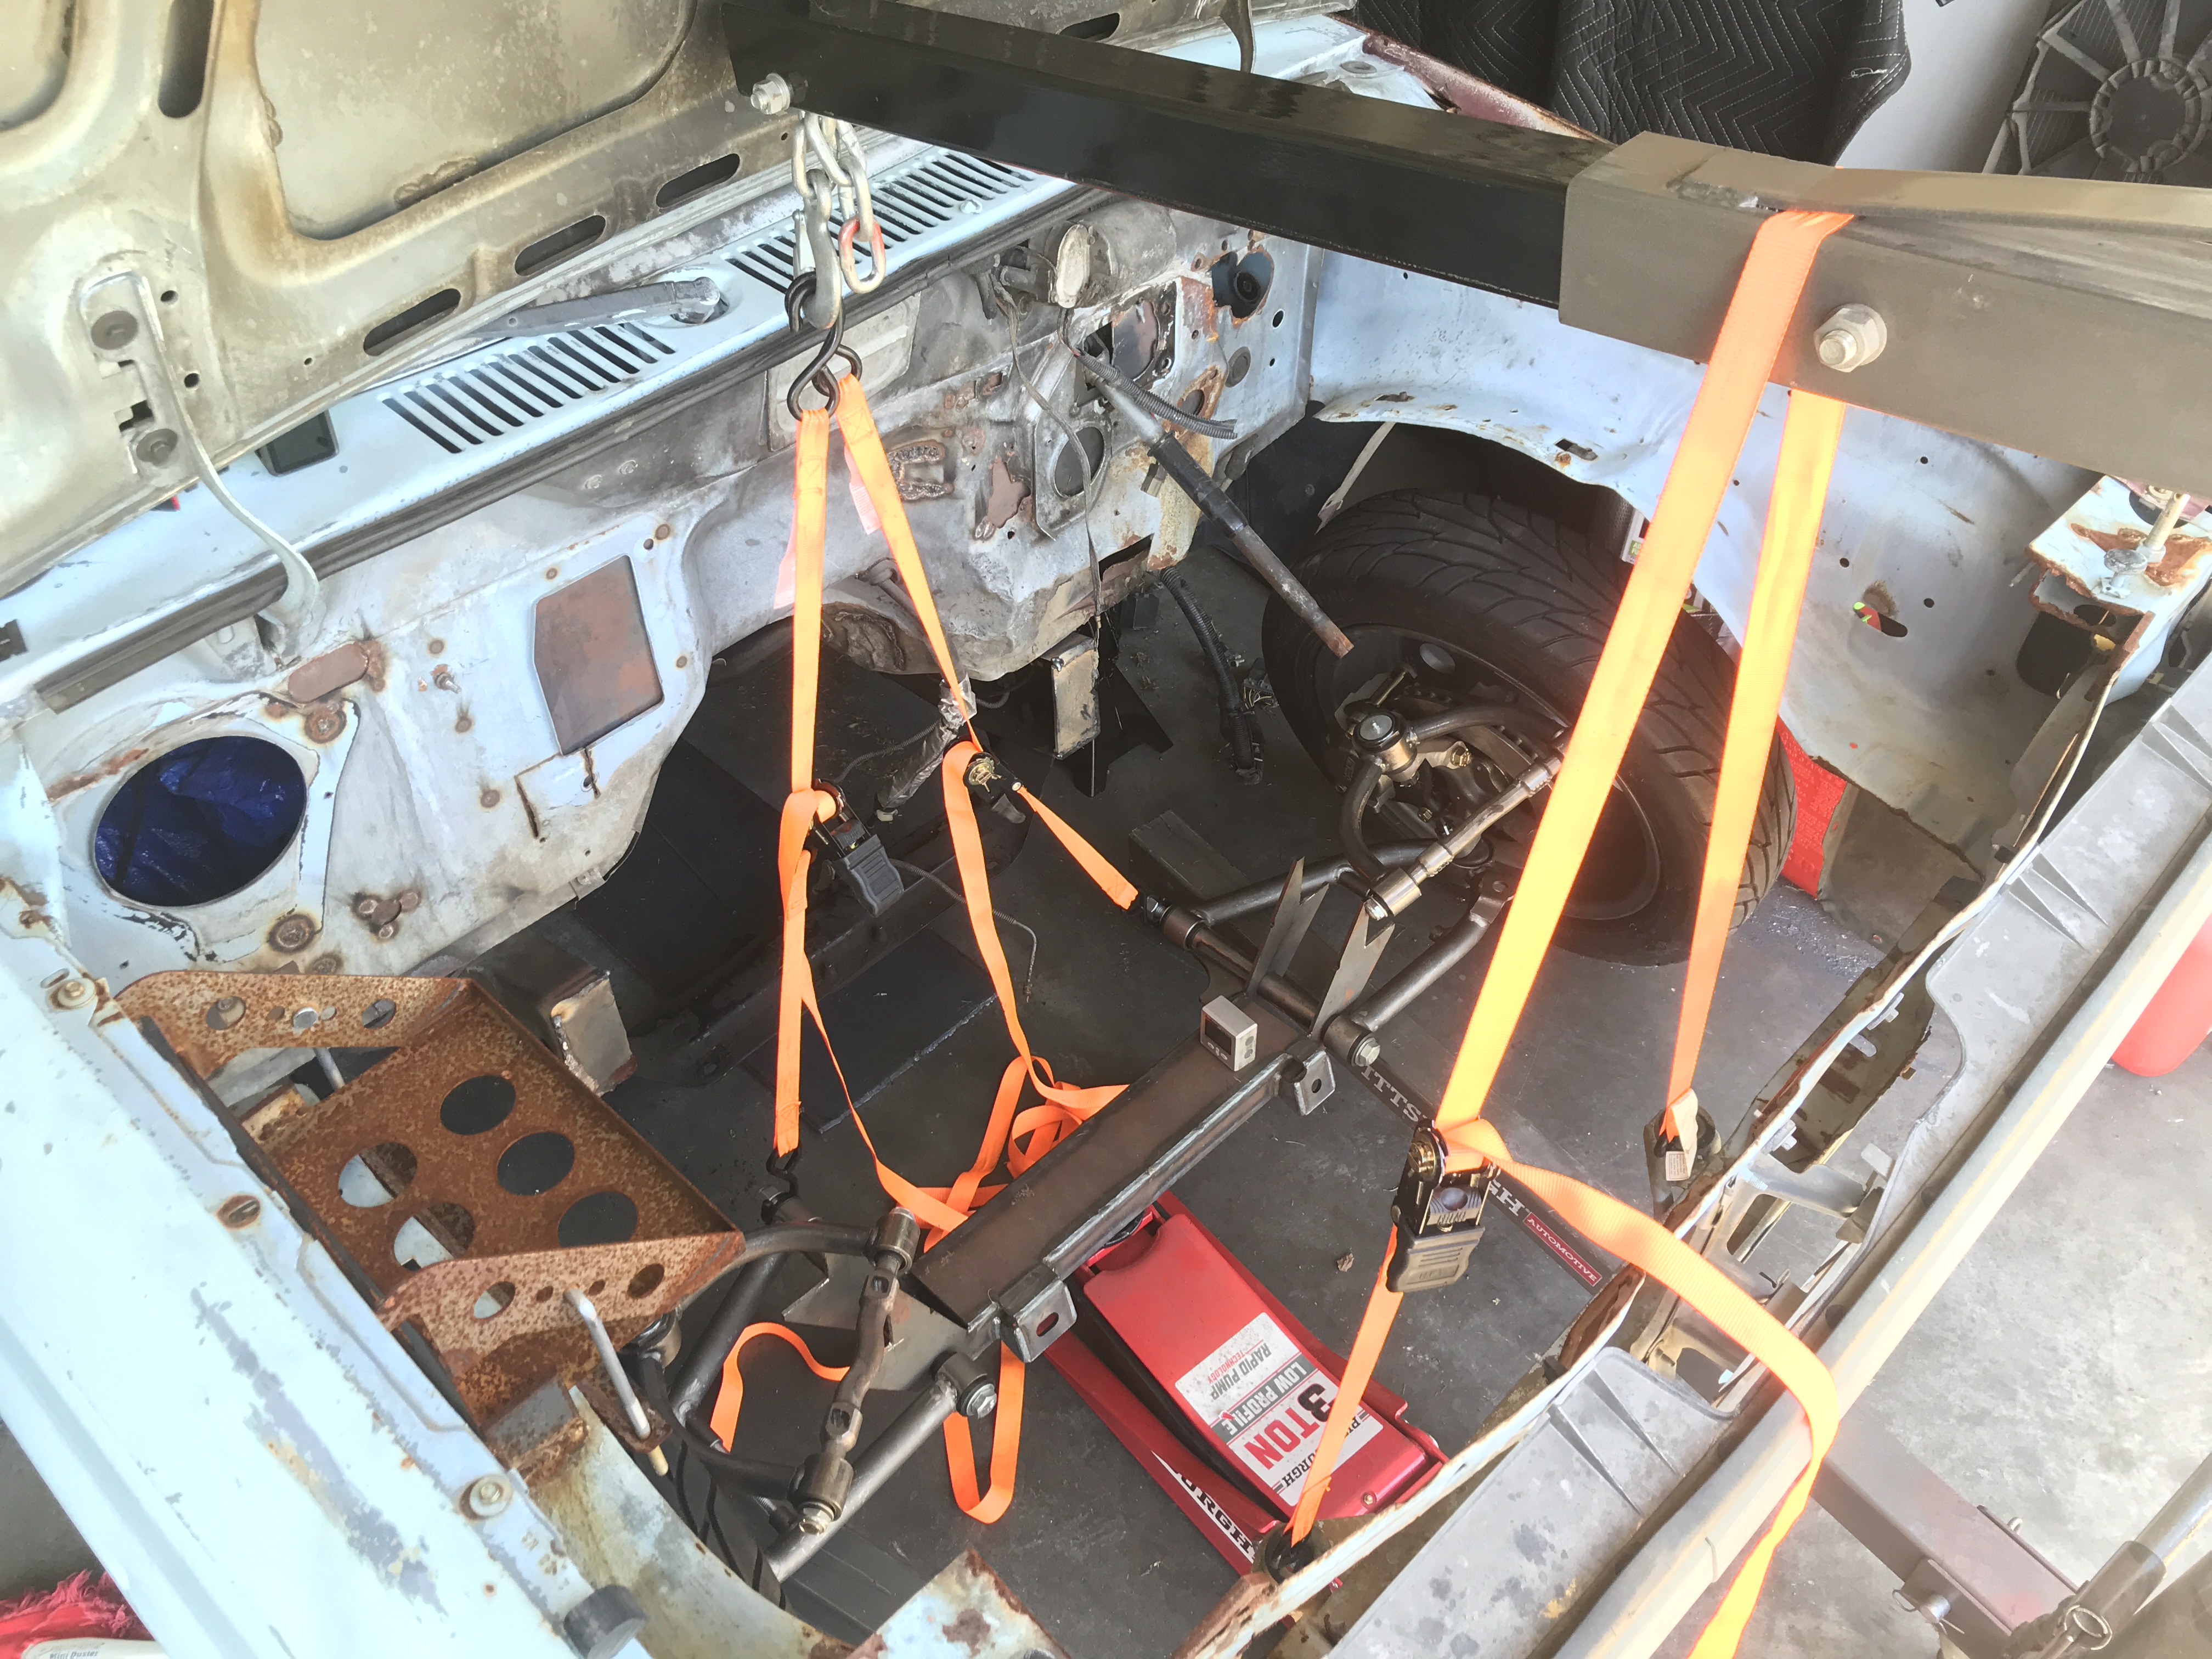
A beautiful blank canvas to work with. It will be 2x4 channel up to the cross member, then tubular forward. Not sure how much weight I'm going to save or gain, but I'm freeing up a lot of space that I didn't otherwise have for the turbo.
Here are all the parts. Paul Horton's Welder Series K-member, and a Speedway Motors Mustang II IFS kit
Set on jackstands at the ride height I am targeting. I think it looks awesome!
Picture showing how cluttered and small the engine bay is.
Here's how low the old rotors are to the ground (with no weight, of course) at the new ride height.
Front end removed!
A beautiful blank canvas to work with. It will be 2x4 channel up to the cross member, then tubular forward. Not sure how much weight I'm going to save or gain, but I'm freeing up a lot of space that I didn't otherwise have for the turbo.
Be warned the injector pump likes to crap out and they are not cheap. Other than that they are stout.
New video from this weekend's progress. I got the crossmember in FINALLY. One hiccup- I thought I had 2x4 channel so I cut everything for that....I actually have 2x3. Confirmed with the parts builder that I just need to add an inch back to the upper tower mounts and it'll be good to go. The reference points on the Paul Horton's kit are fantastic for measuring and making sure everything lines up.
The ass pain that was trying to get everything lined up. Too many pivot points made this a real challenge.
The finished product for the weekend. Ran out of welding wire and I was ready for dinner. The rest should come along pretty quick! Hoping to get a good day or two in over the Juneteenth long weekend.
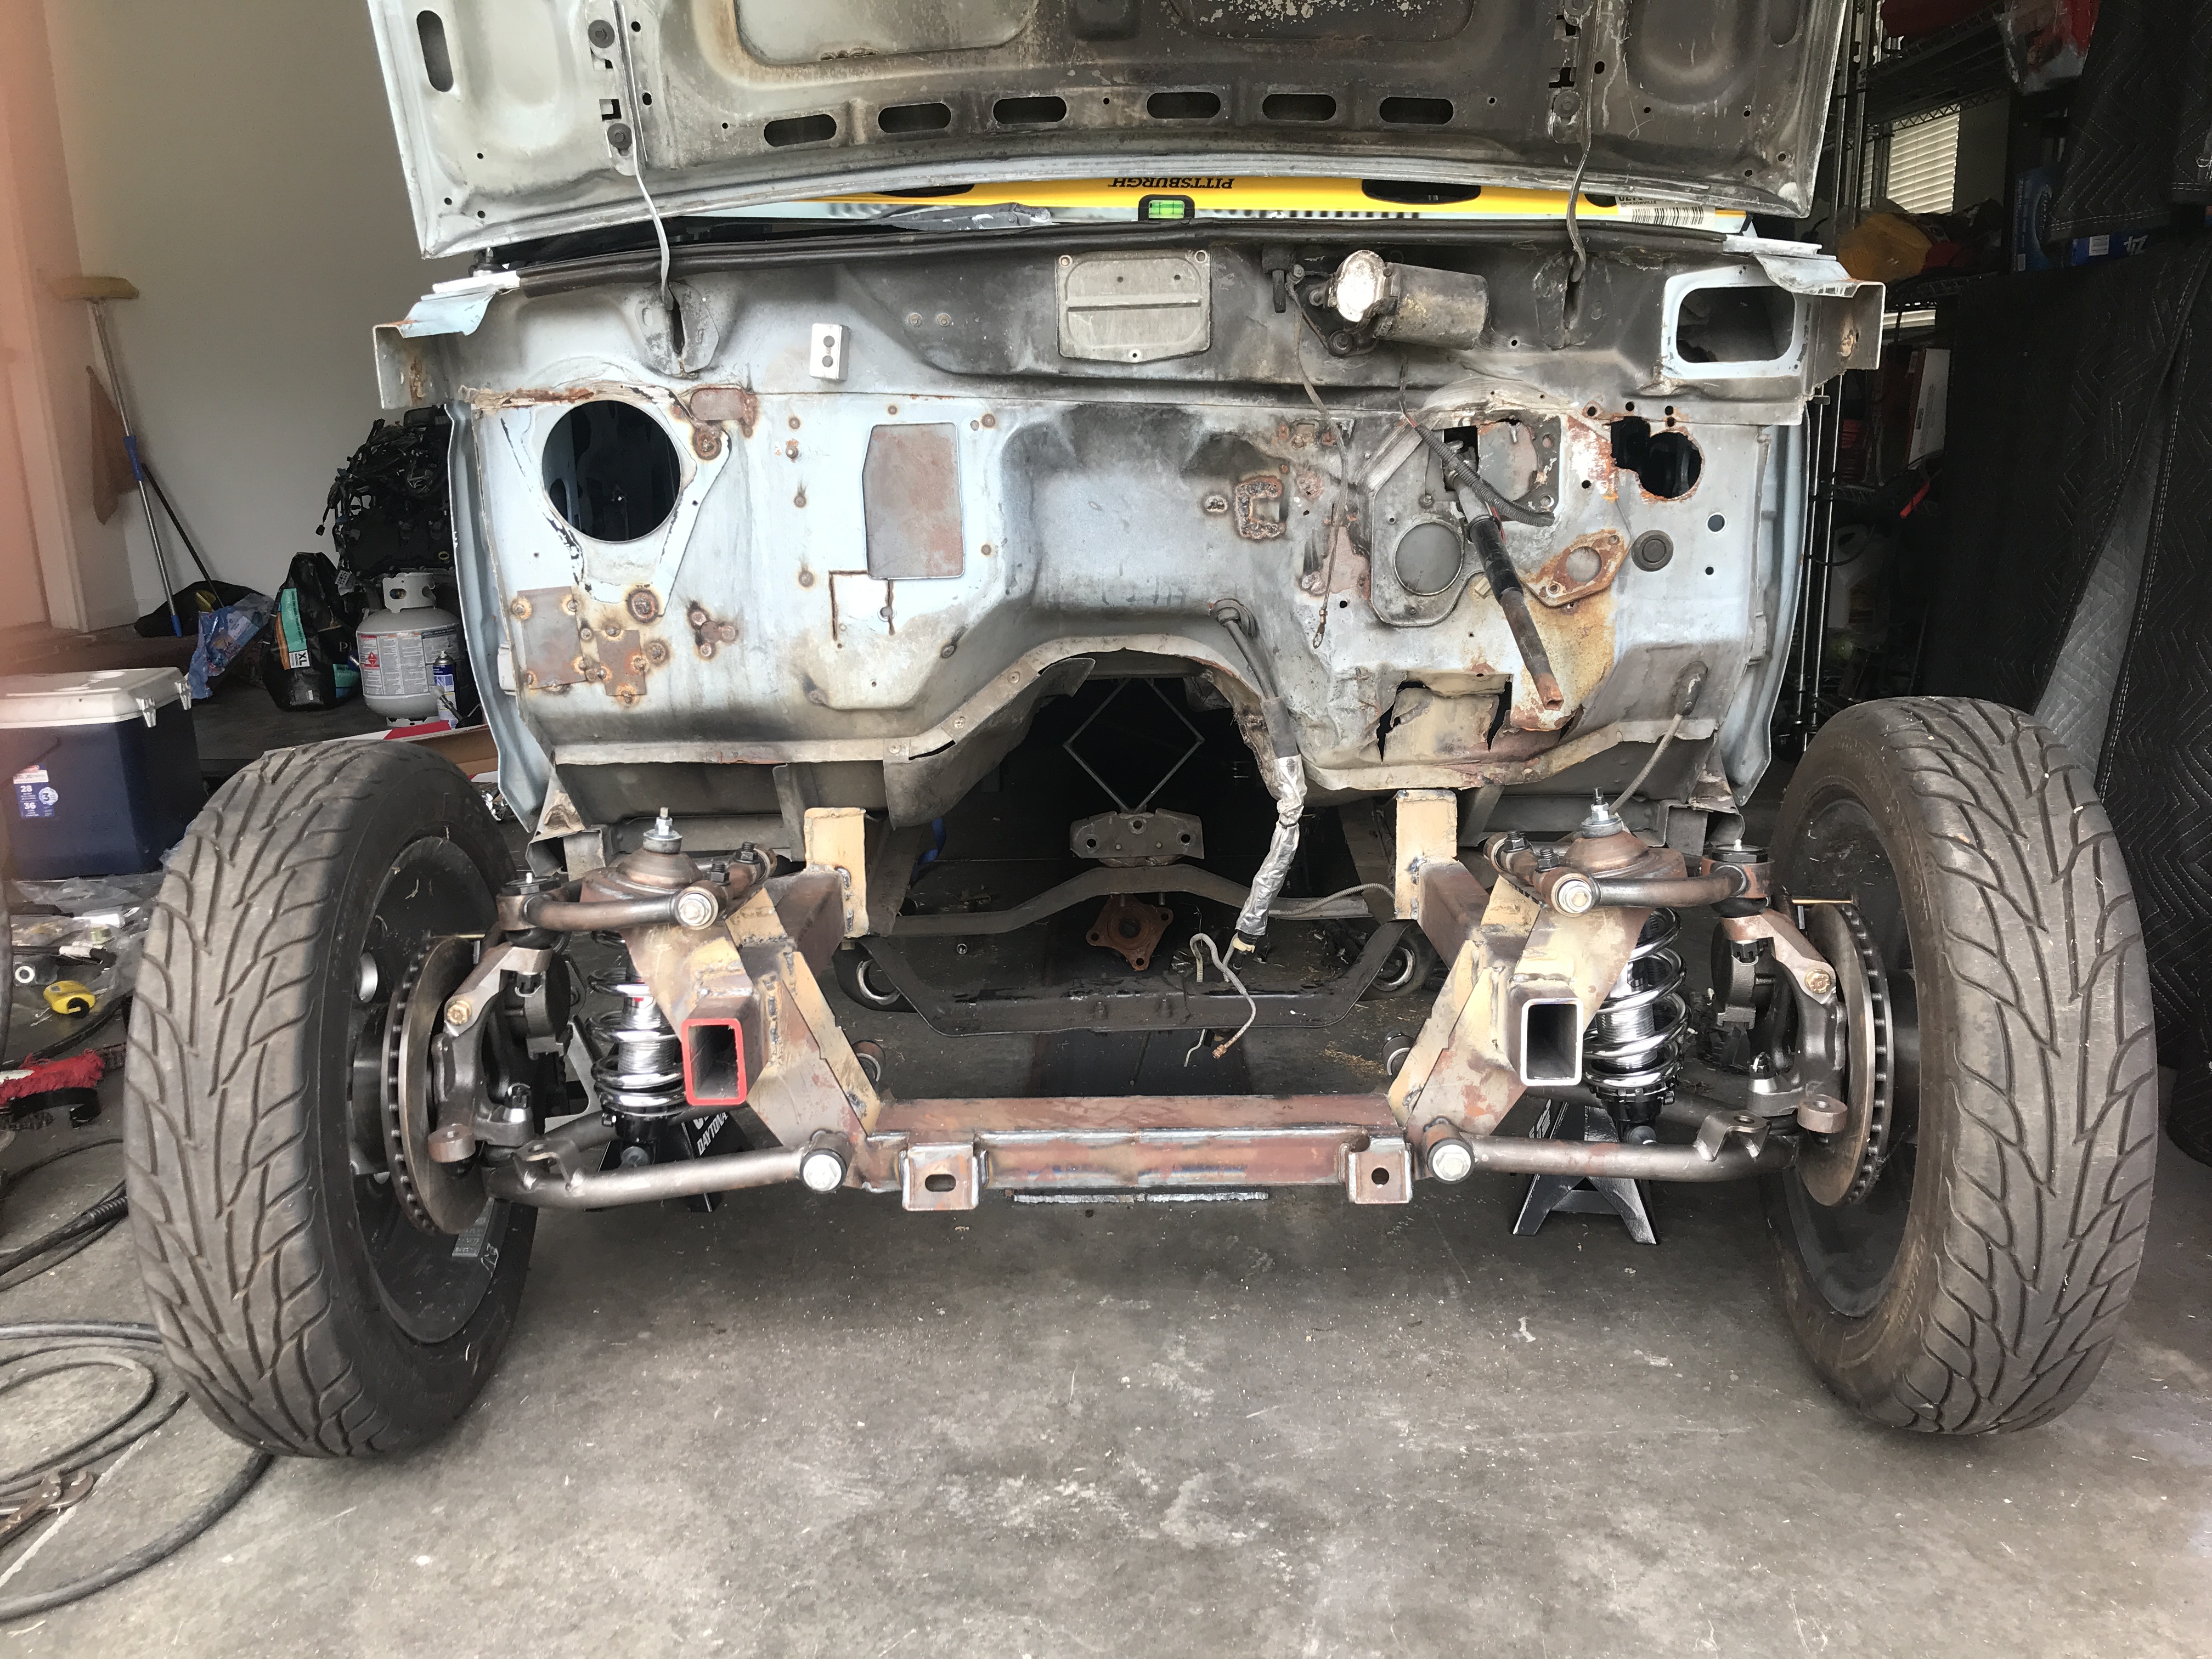
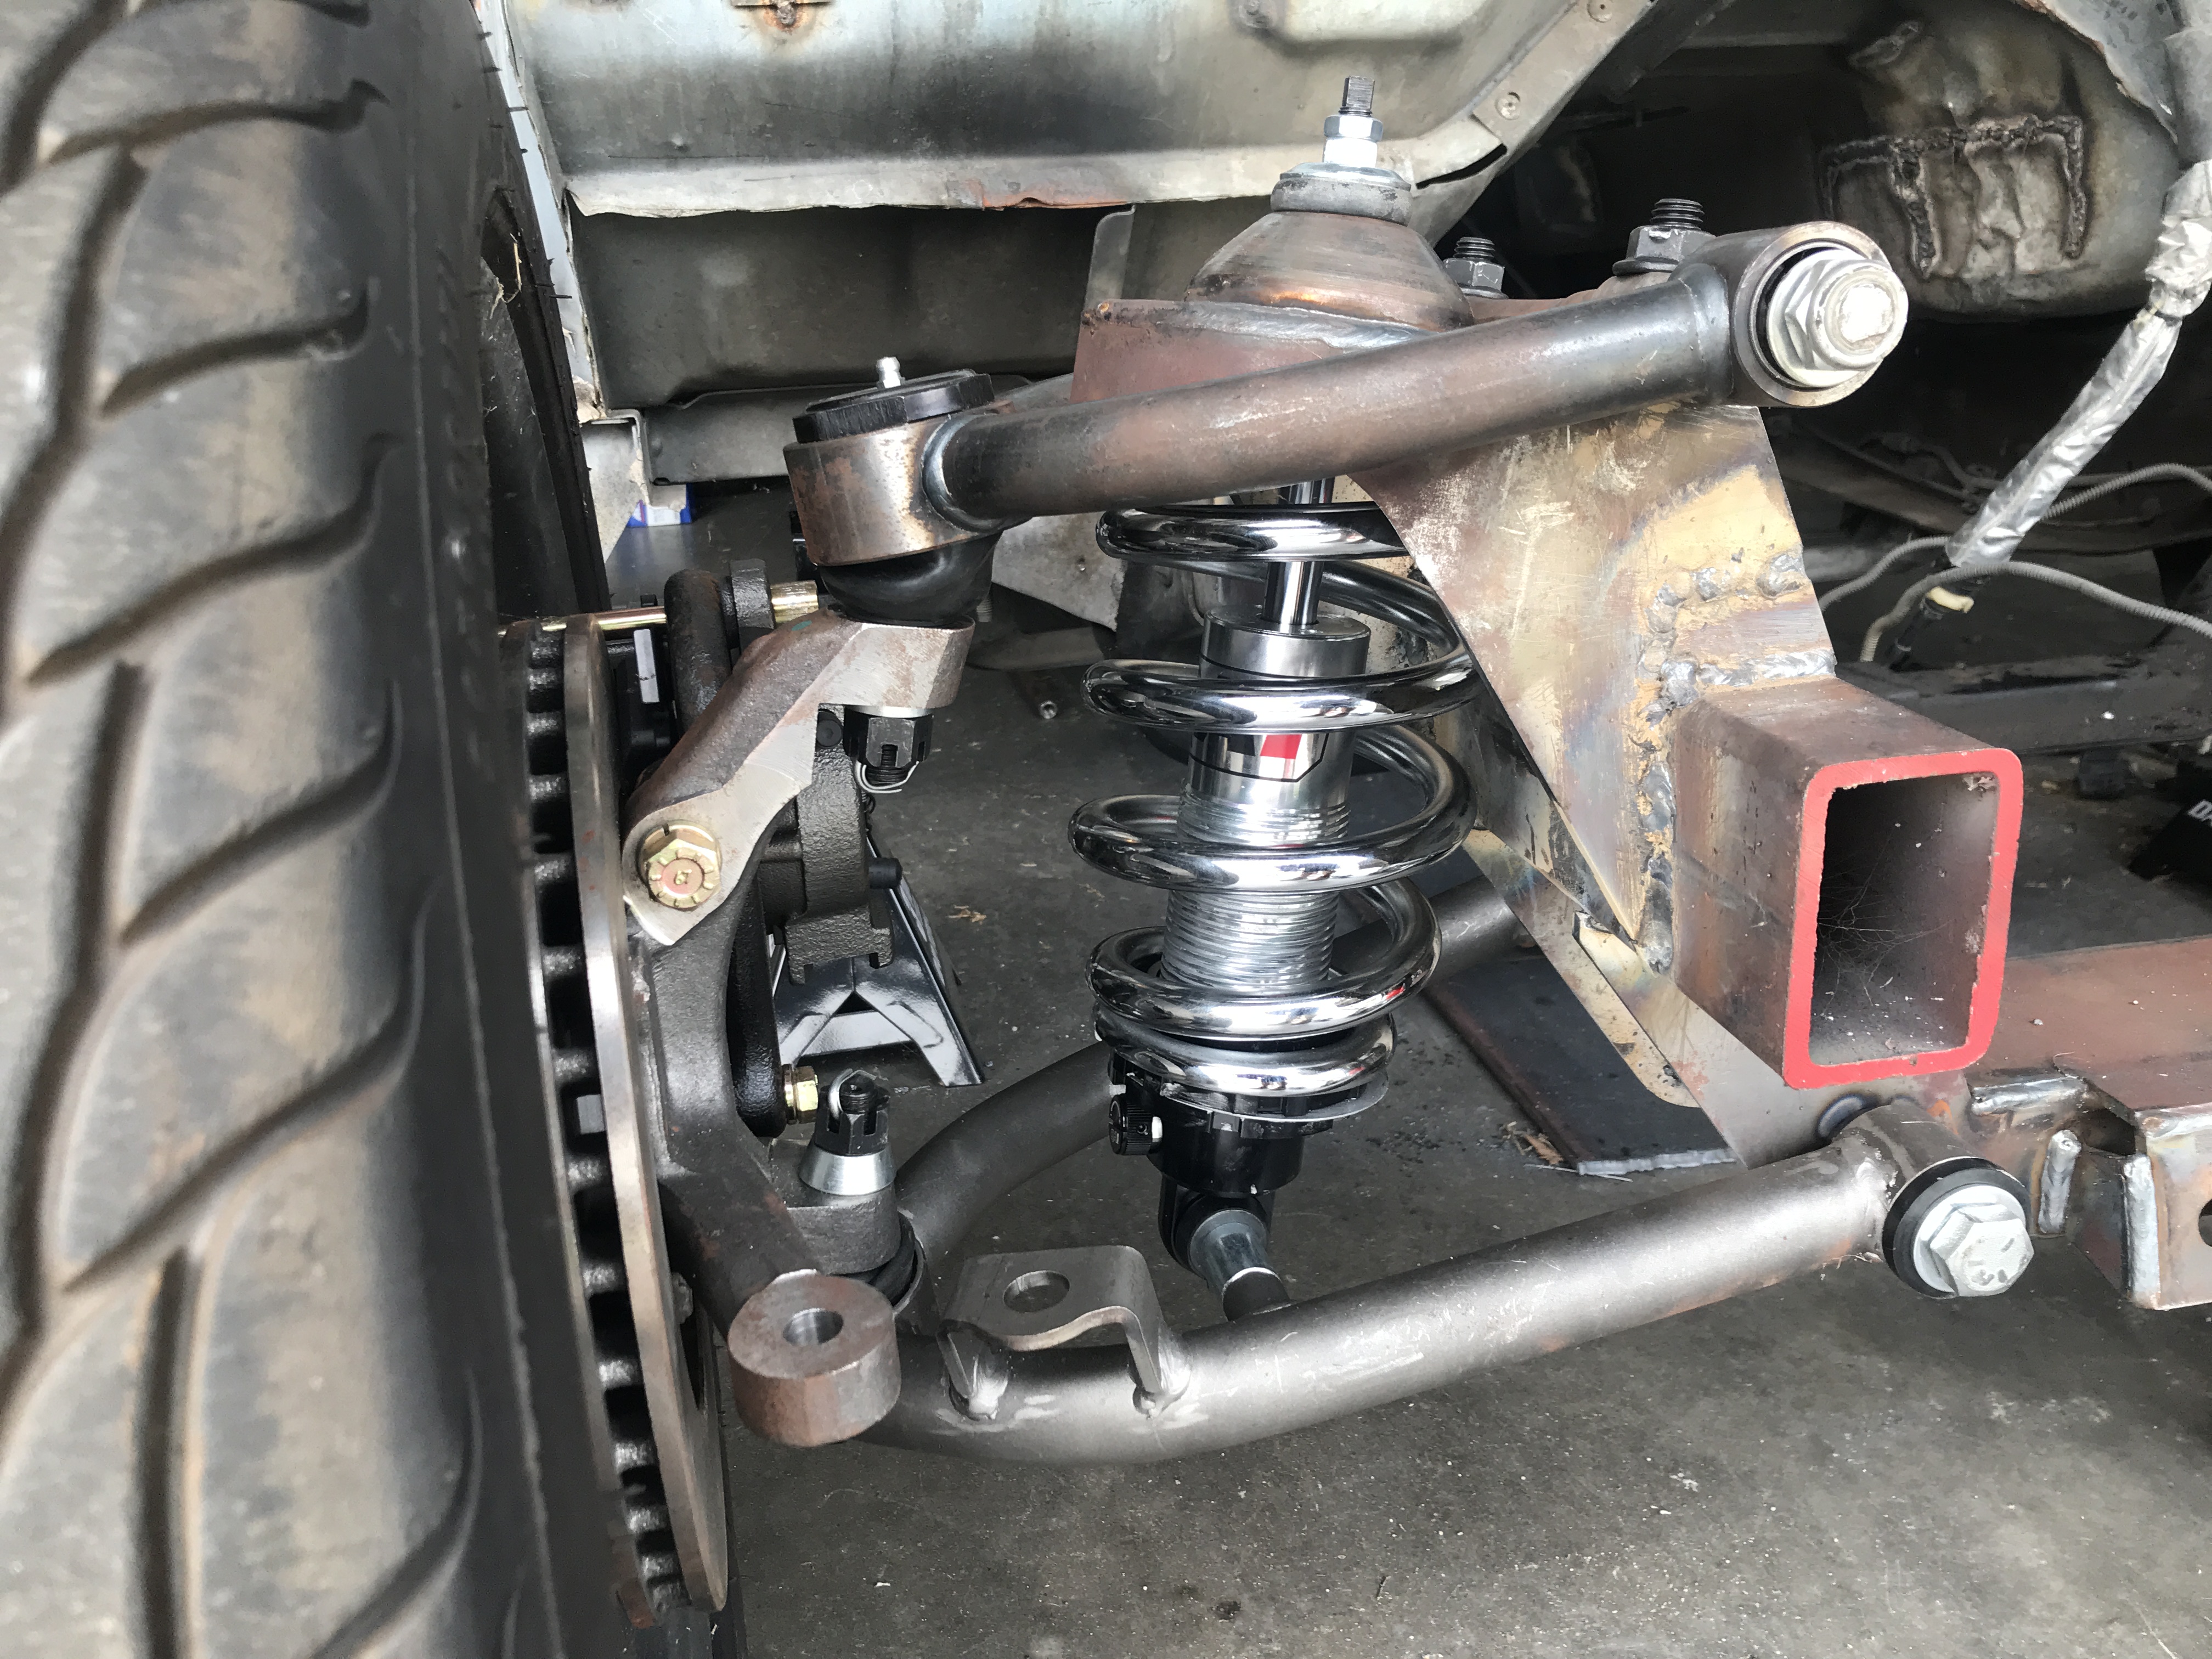
Front suspension is all in and the truck is finally off jackstands. Up next is oil pump gears for the engine and a billet intermediate shaft and new clutches for the transmission. Then we can start putting everything back together!
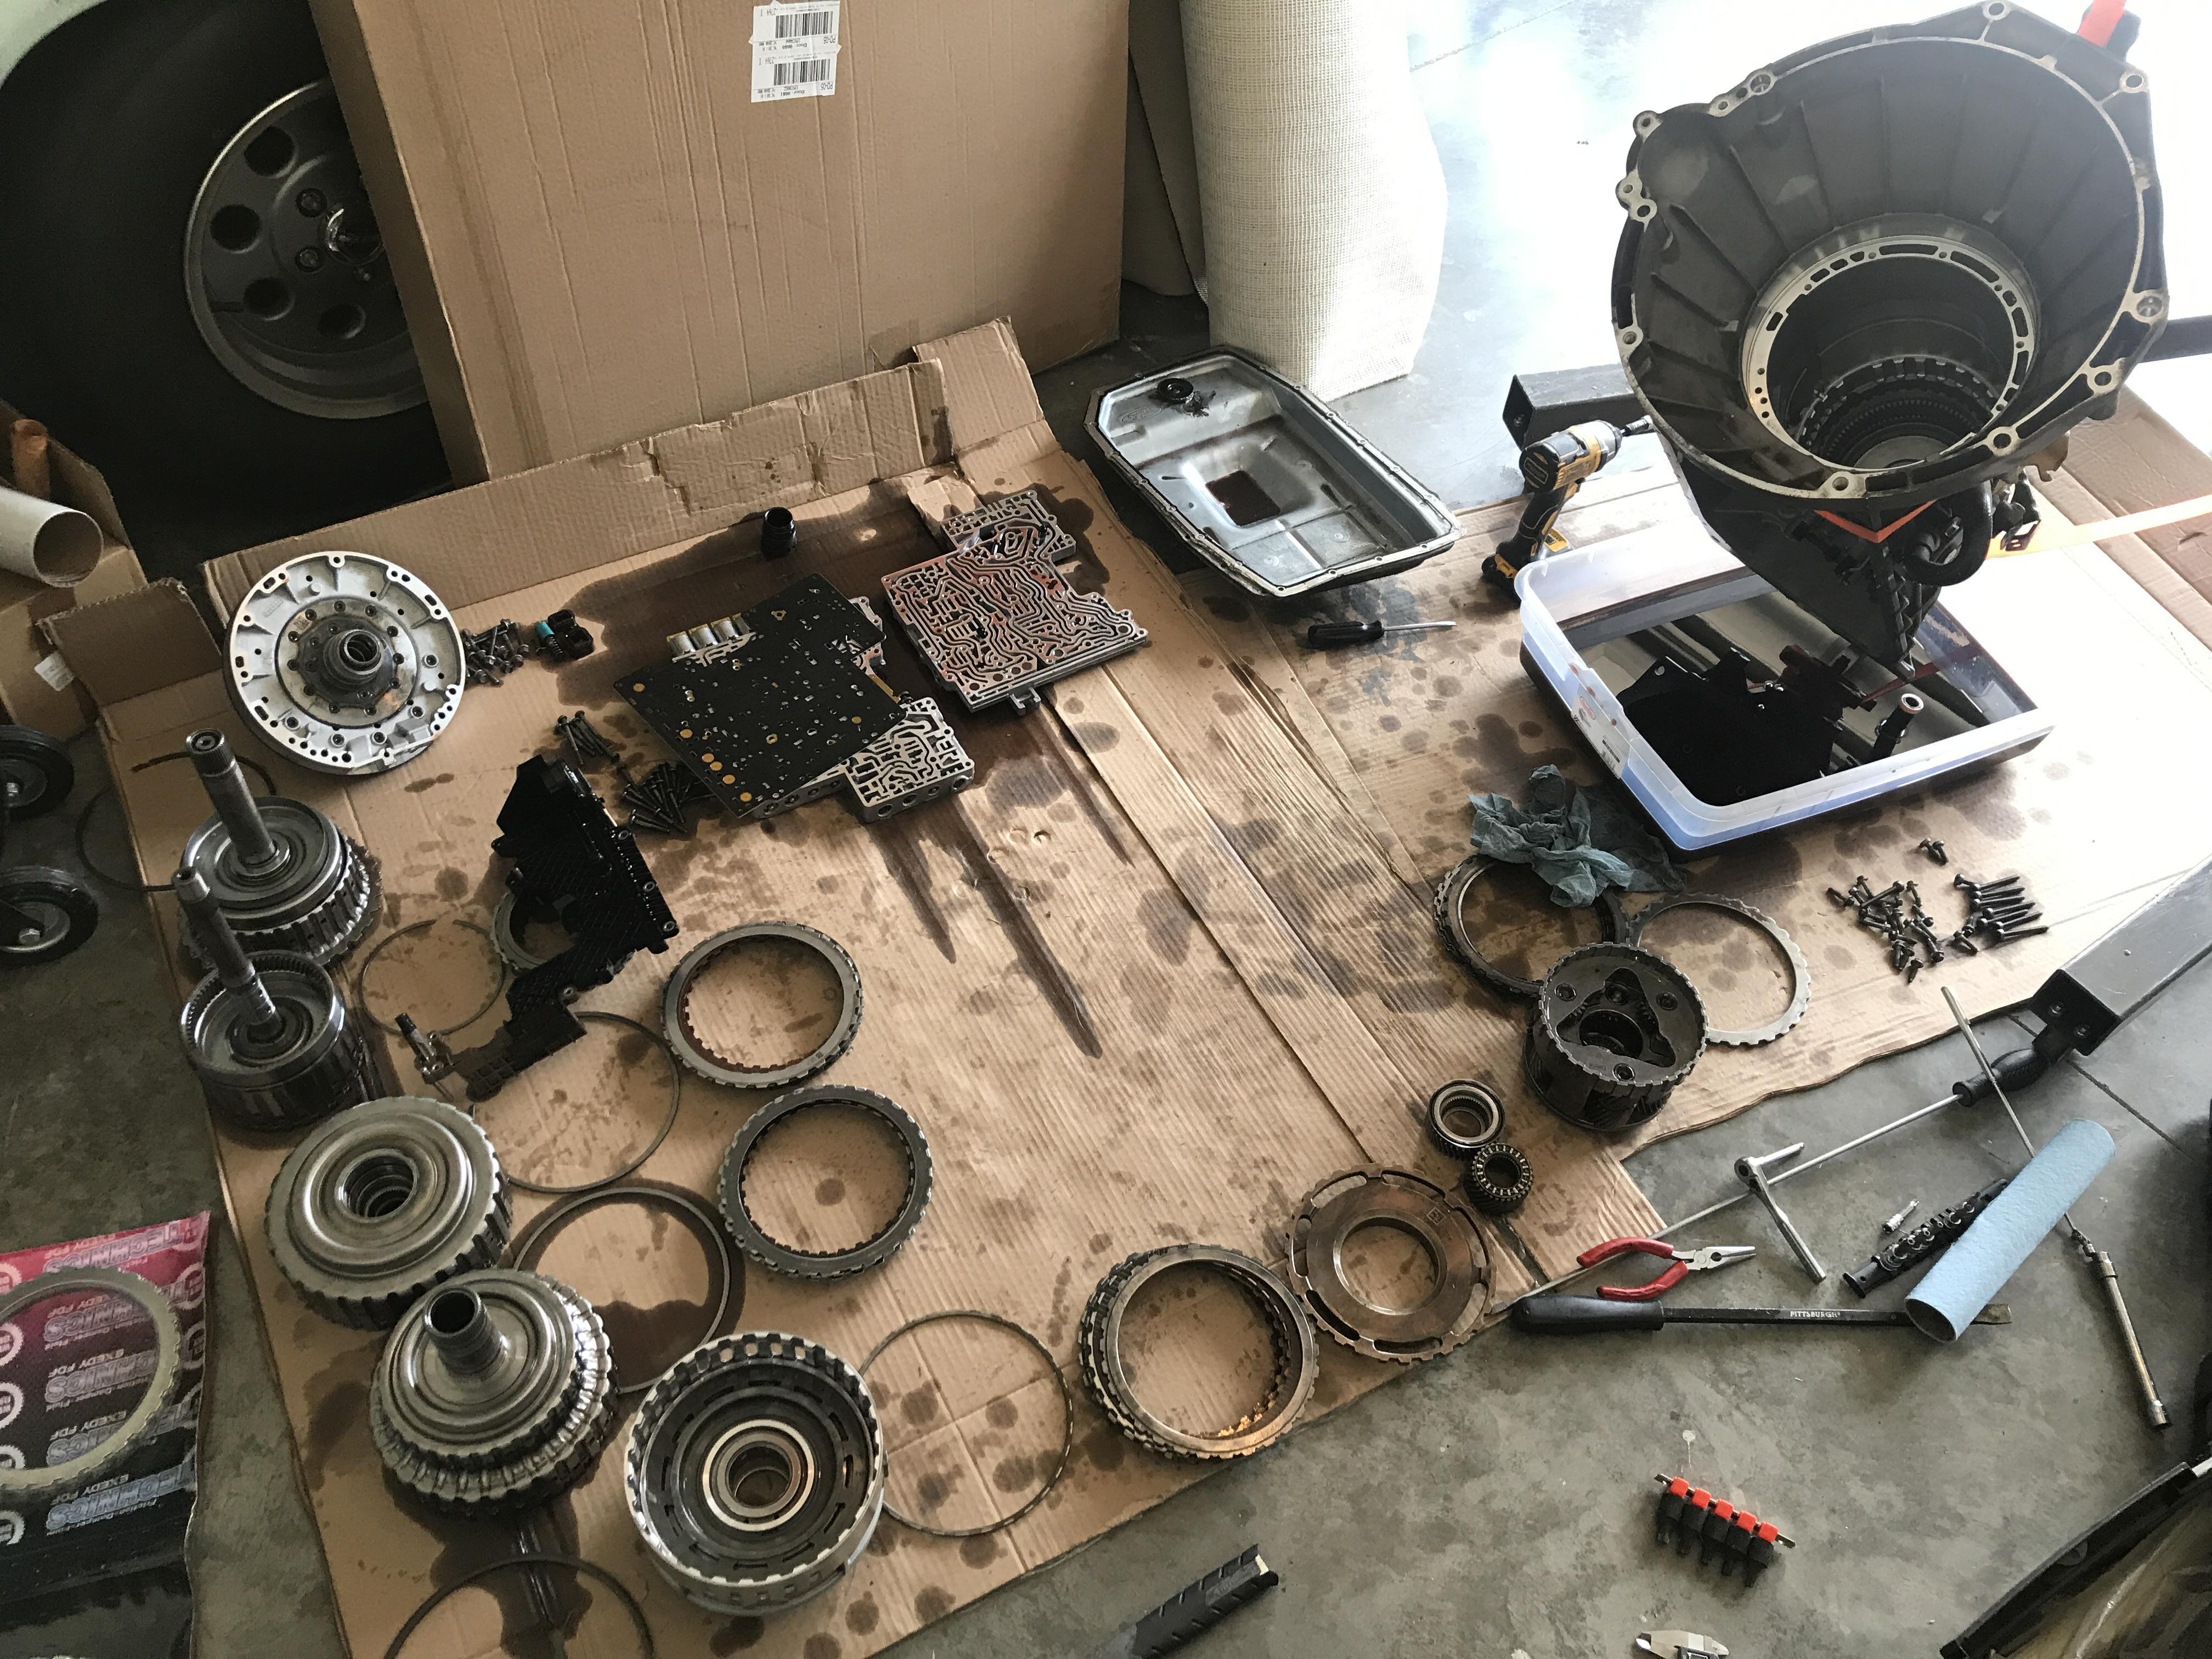
Hot one today in Eastern NC with the heat index over 100, but we persevered and got the trans torn down.
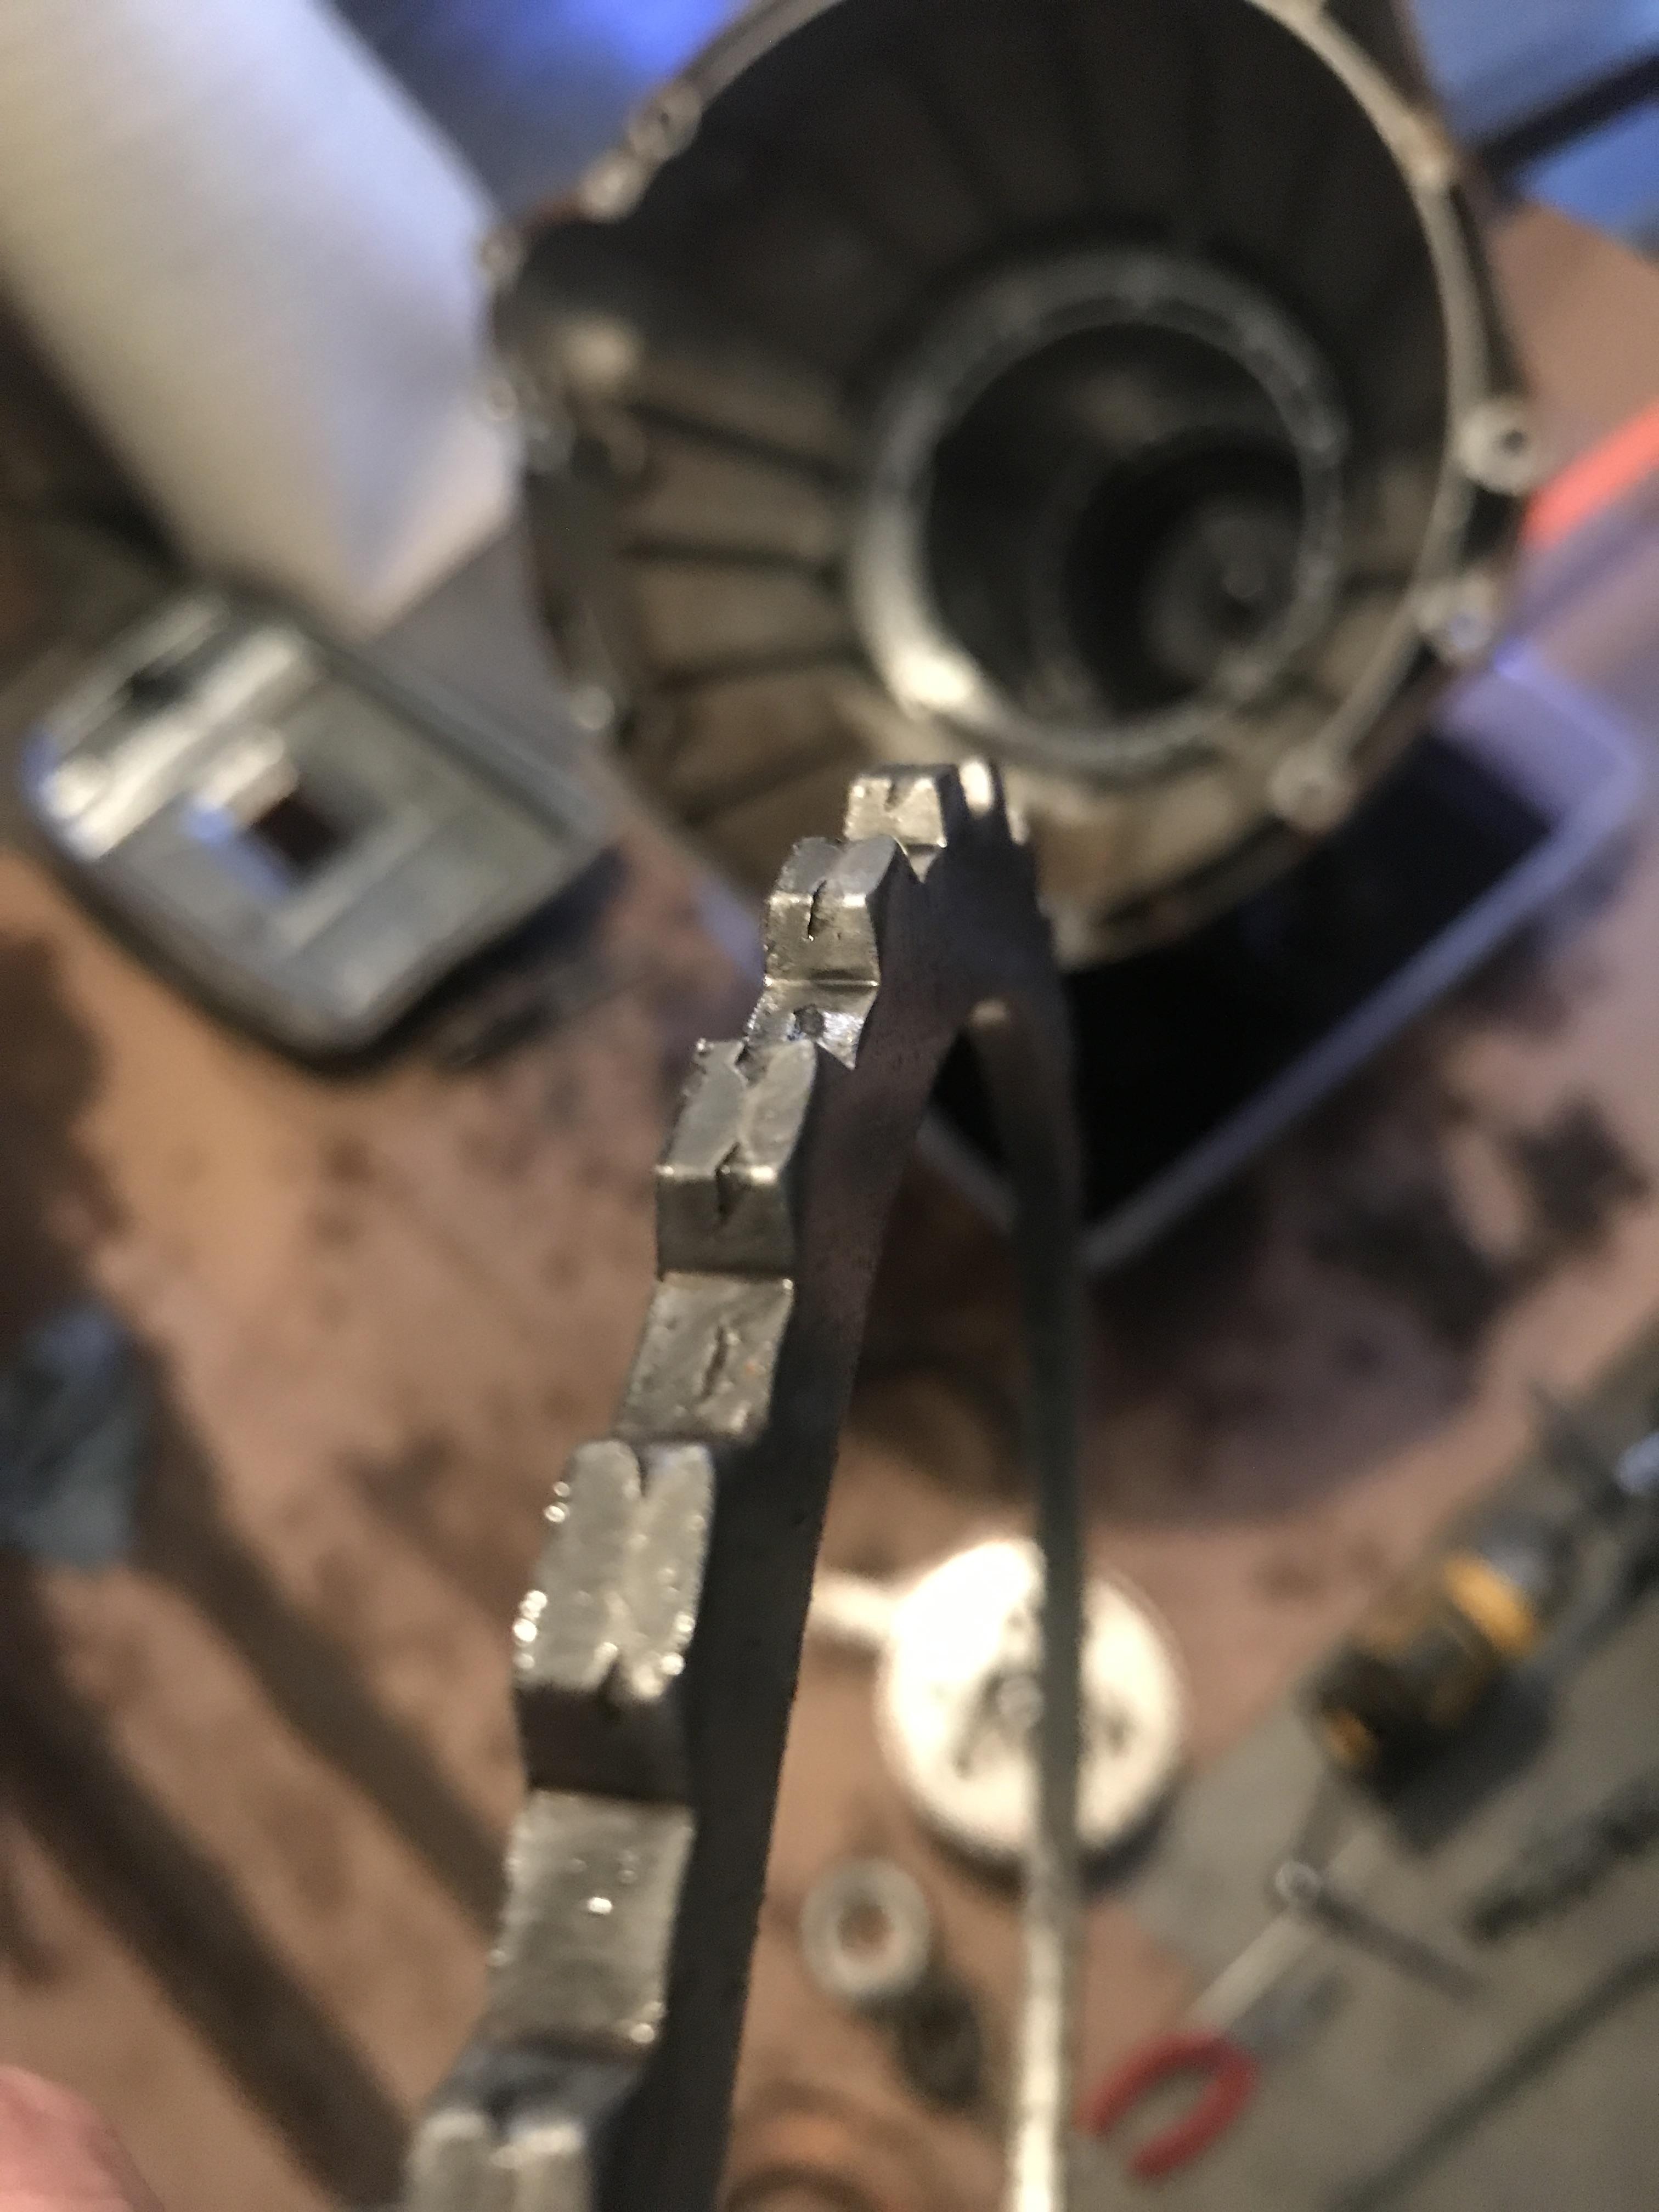
This is the clutch plate from the low speed clutch. Every tooth has what looks like spalling, and I can't wrap my head around where it would come from since that basically sits against the case. If you know, please post below. I have another one on order that supposedly will take 1.5 weeks to get here.
And a pic of how I left the garage today
Not a super exciting update this time around. After letting the trans sit a few weeks, I checked it again with air and I'm fairly confident I was just using too much PSI last time. It is back together now and ready to be cleaned and installed. Up next is the oil pump gears. This video also has diagnosing my diesel's rear end squeak.
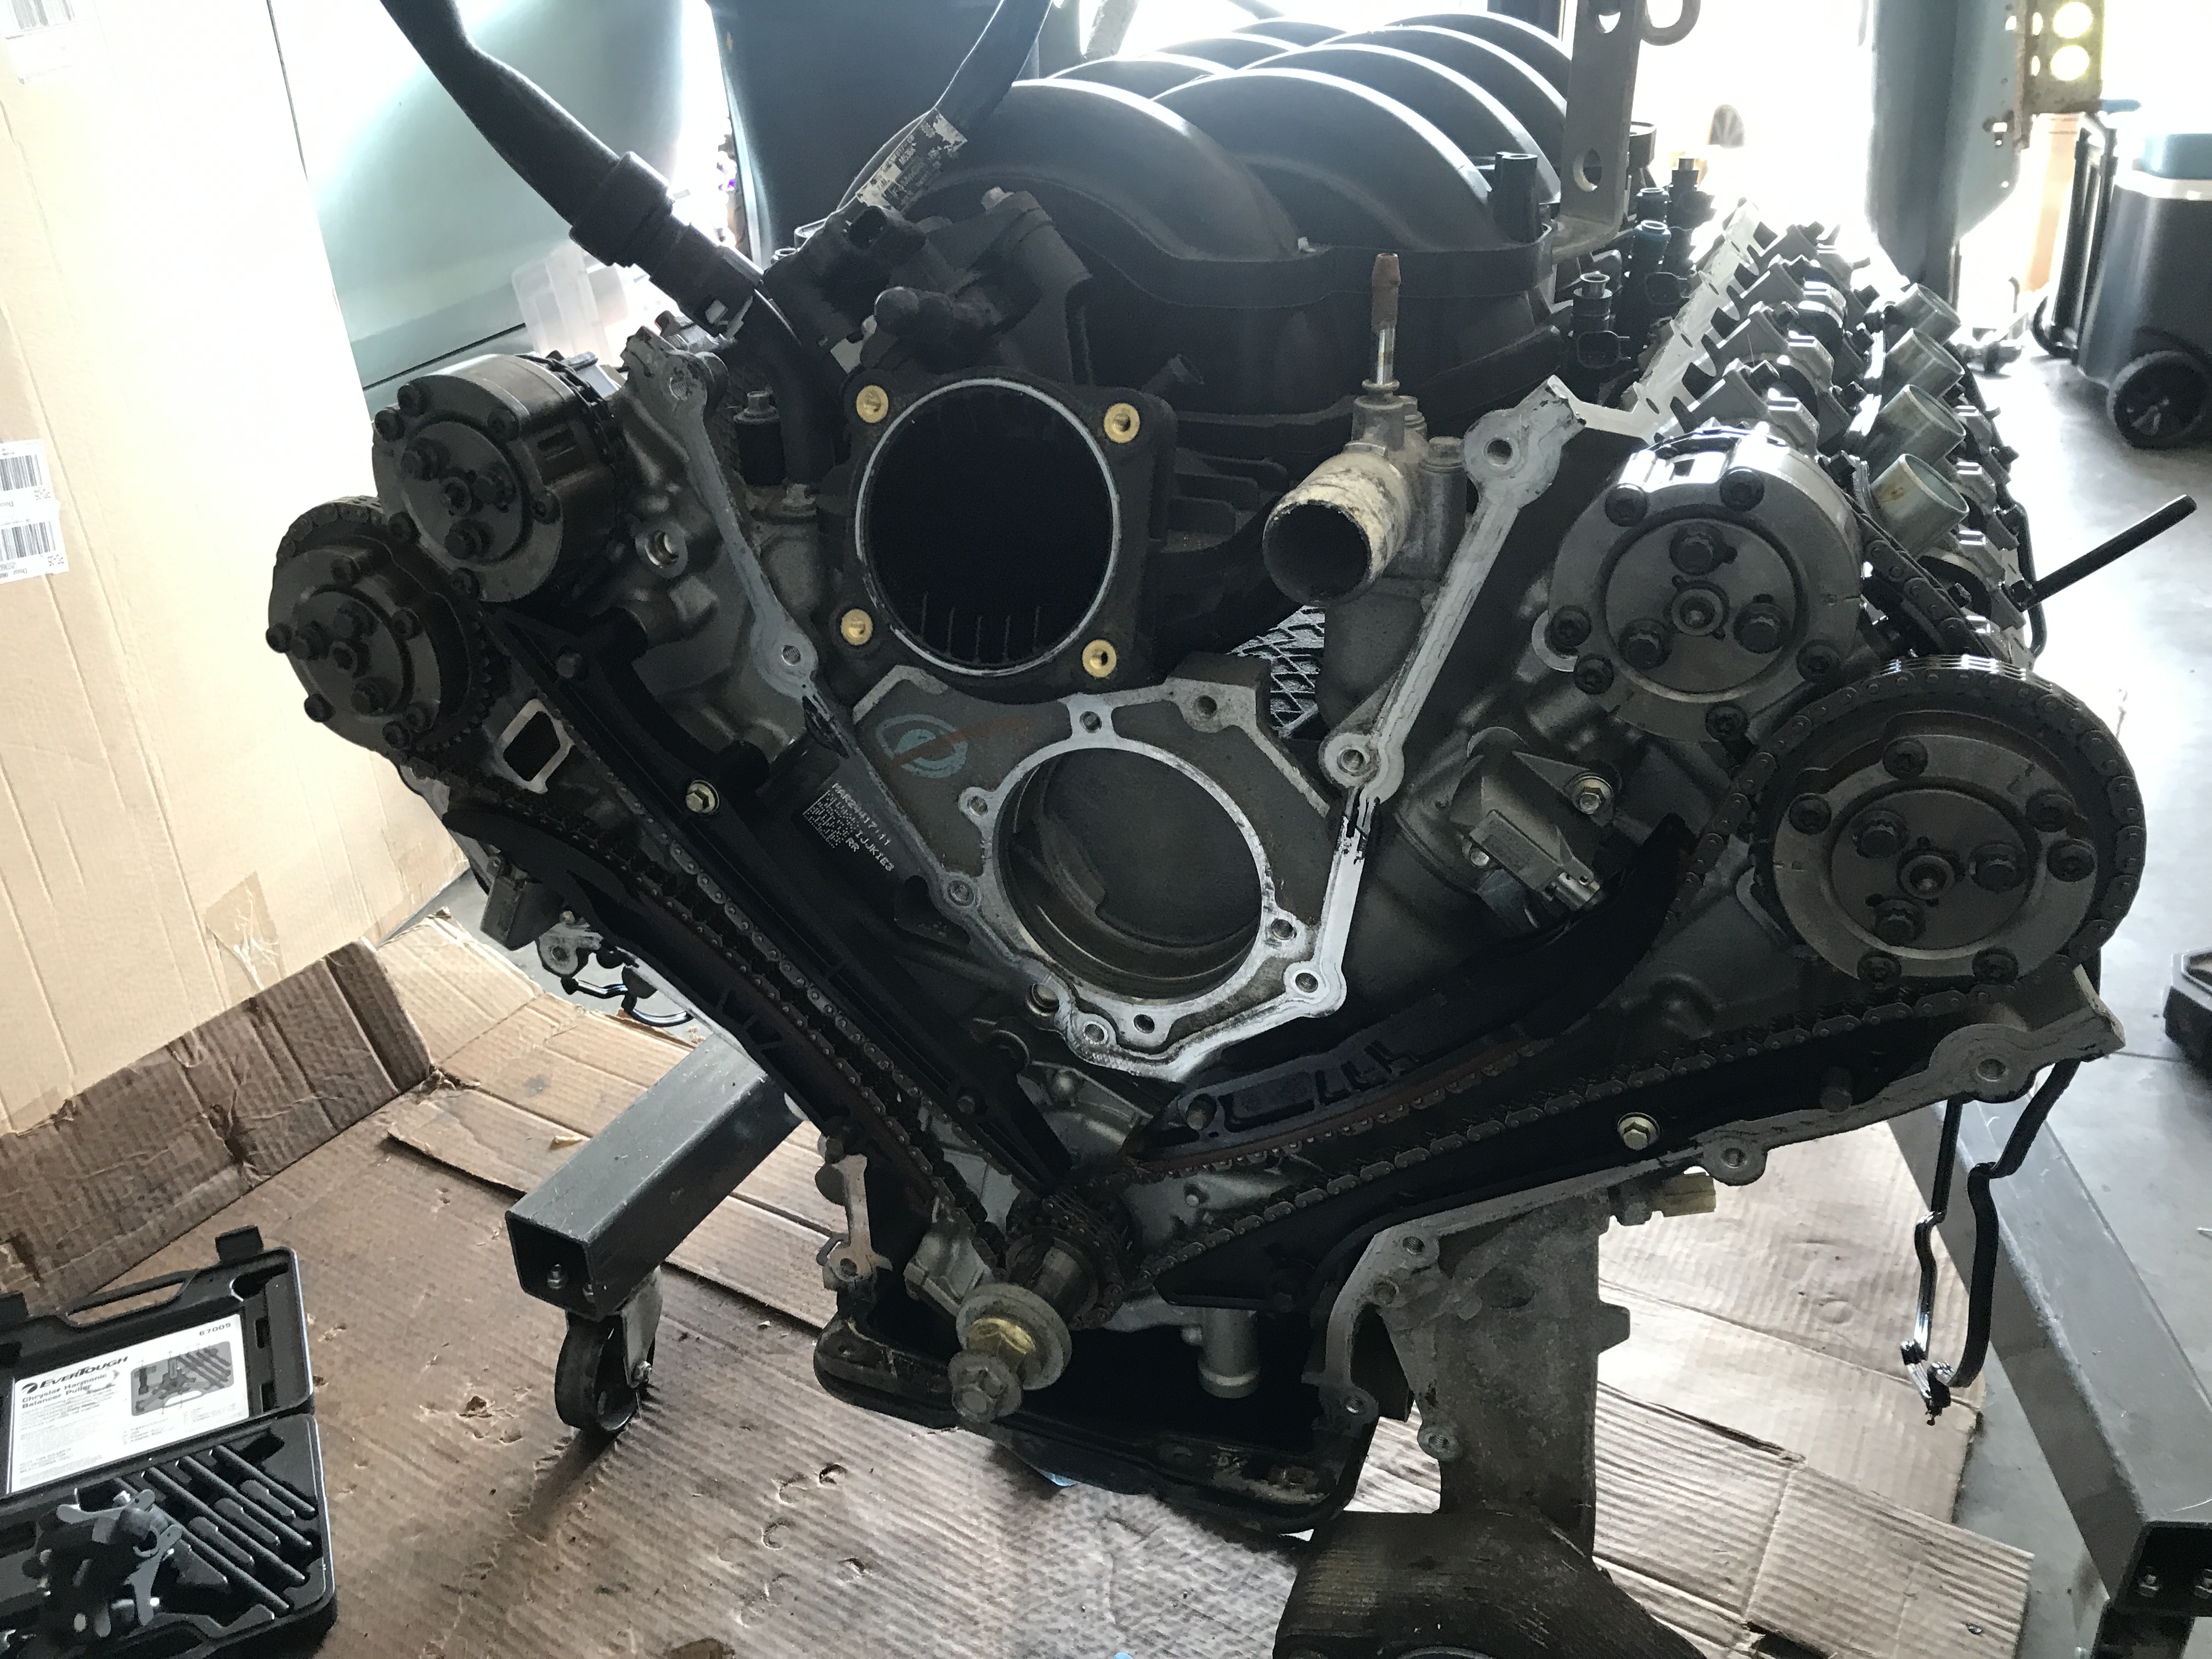
Oil pump gears installed today. Took 4 hours all said and done...not bad. Using the 3 arm Chrysler balancer puller as recommended on other forums was a huge help. Time for the drivetrain to go back into the truck, fab up some motor mounts, get the steering rack mounted, then off to the welder for cage install.
Here's what I used to help me through this procedure:
https://www.svtperformance.com/threads/how-to-mmr-billet-oil-pump-gears-install-a-few-pics.994775/
Here's what I used to help me through this procedure:
https://www.svtperformance.com/threads/how-to-mmr-billet-oil-pump-gears-install-a-few-pics.994775/
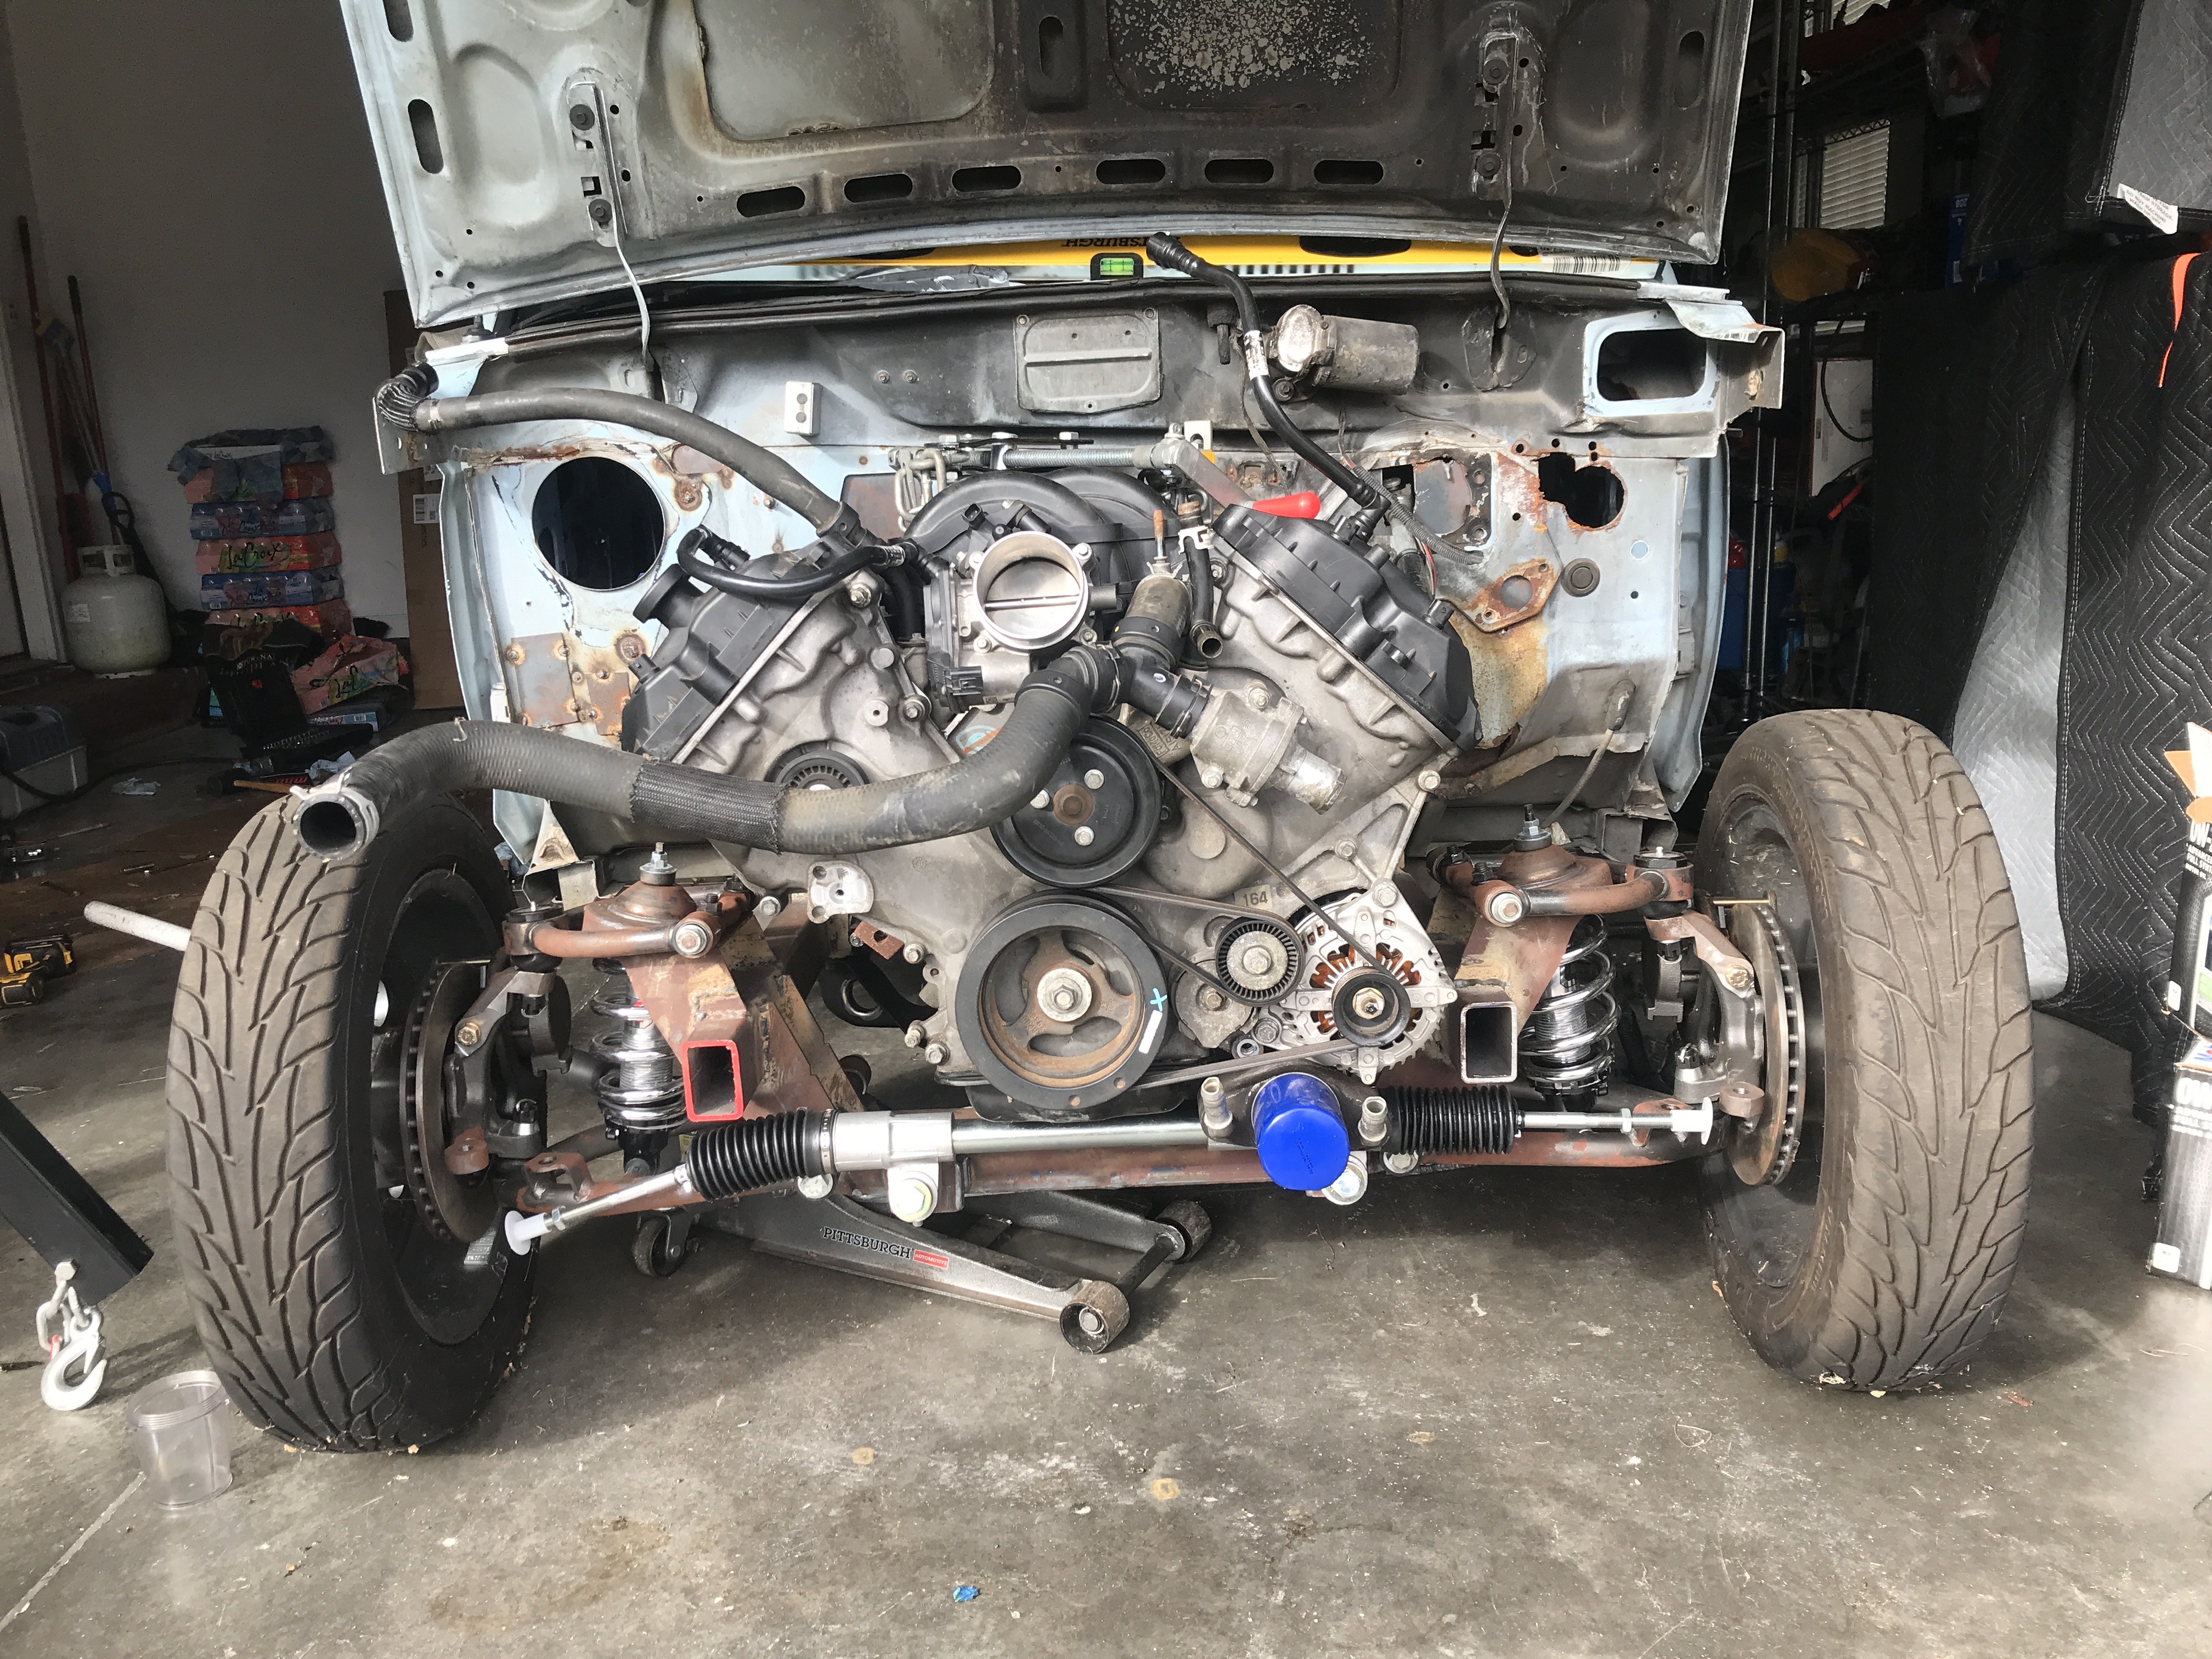
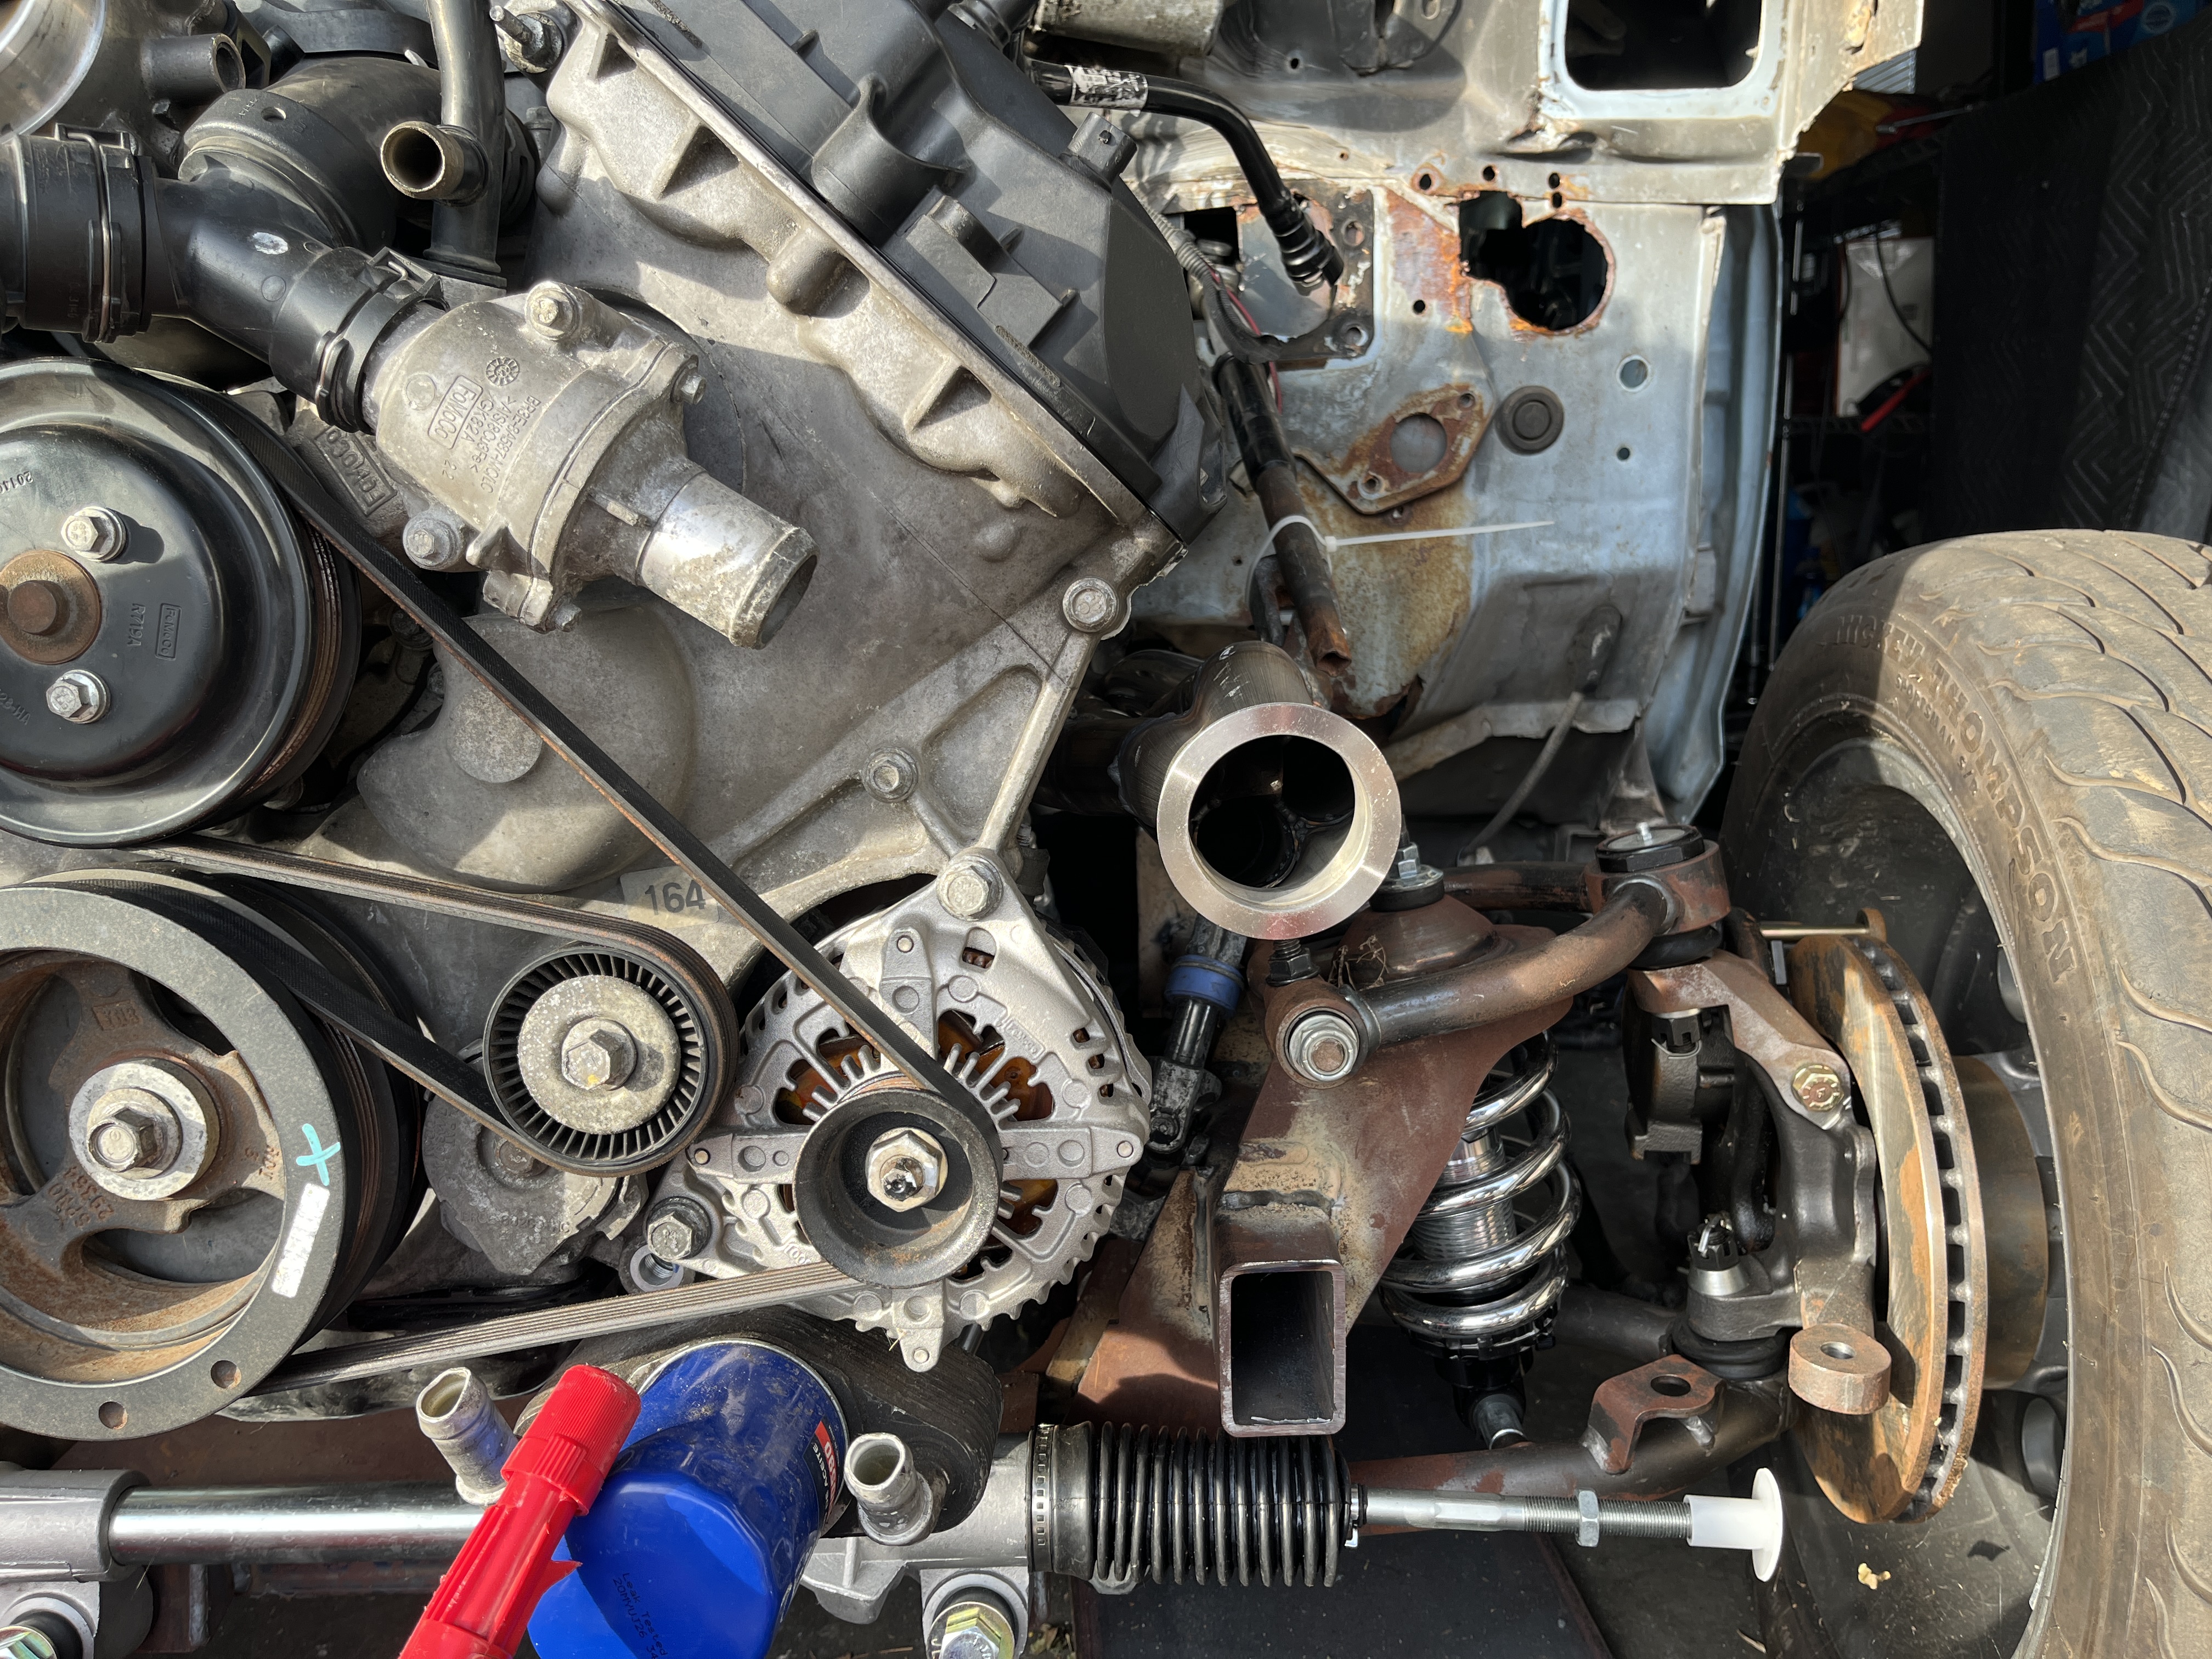
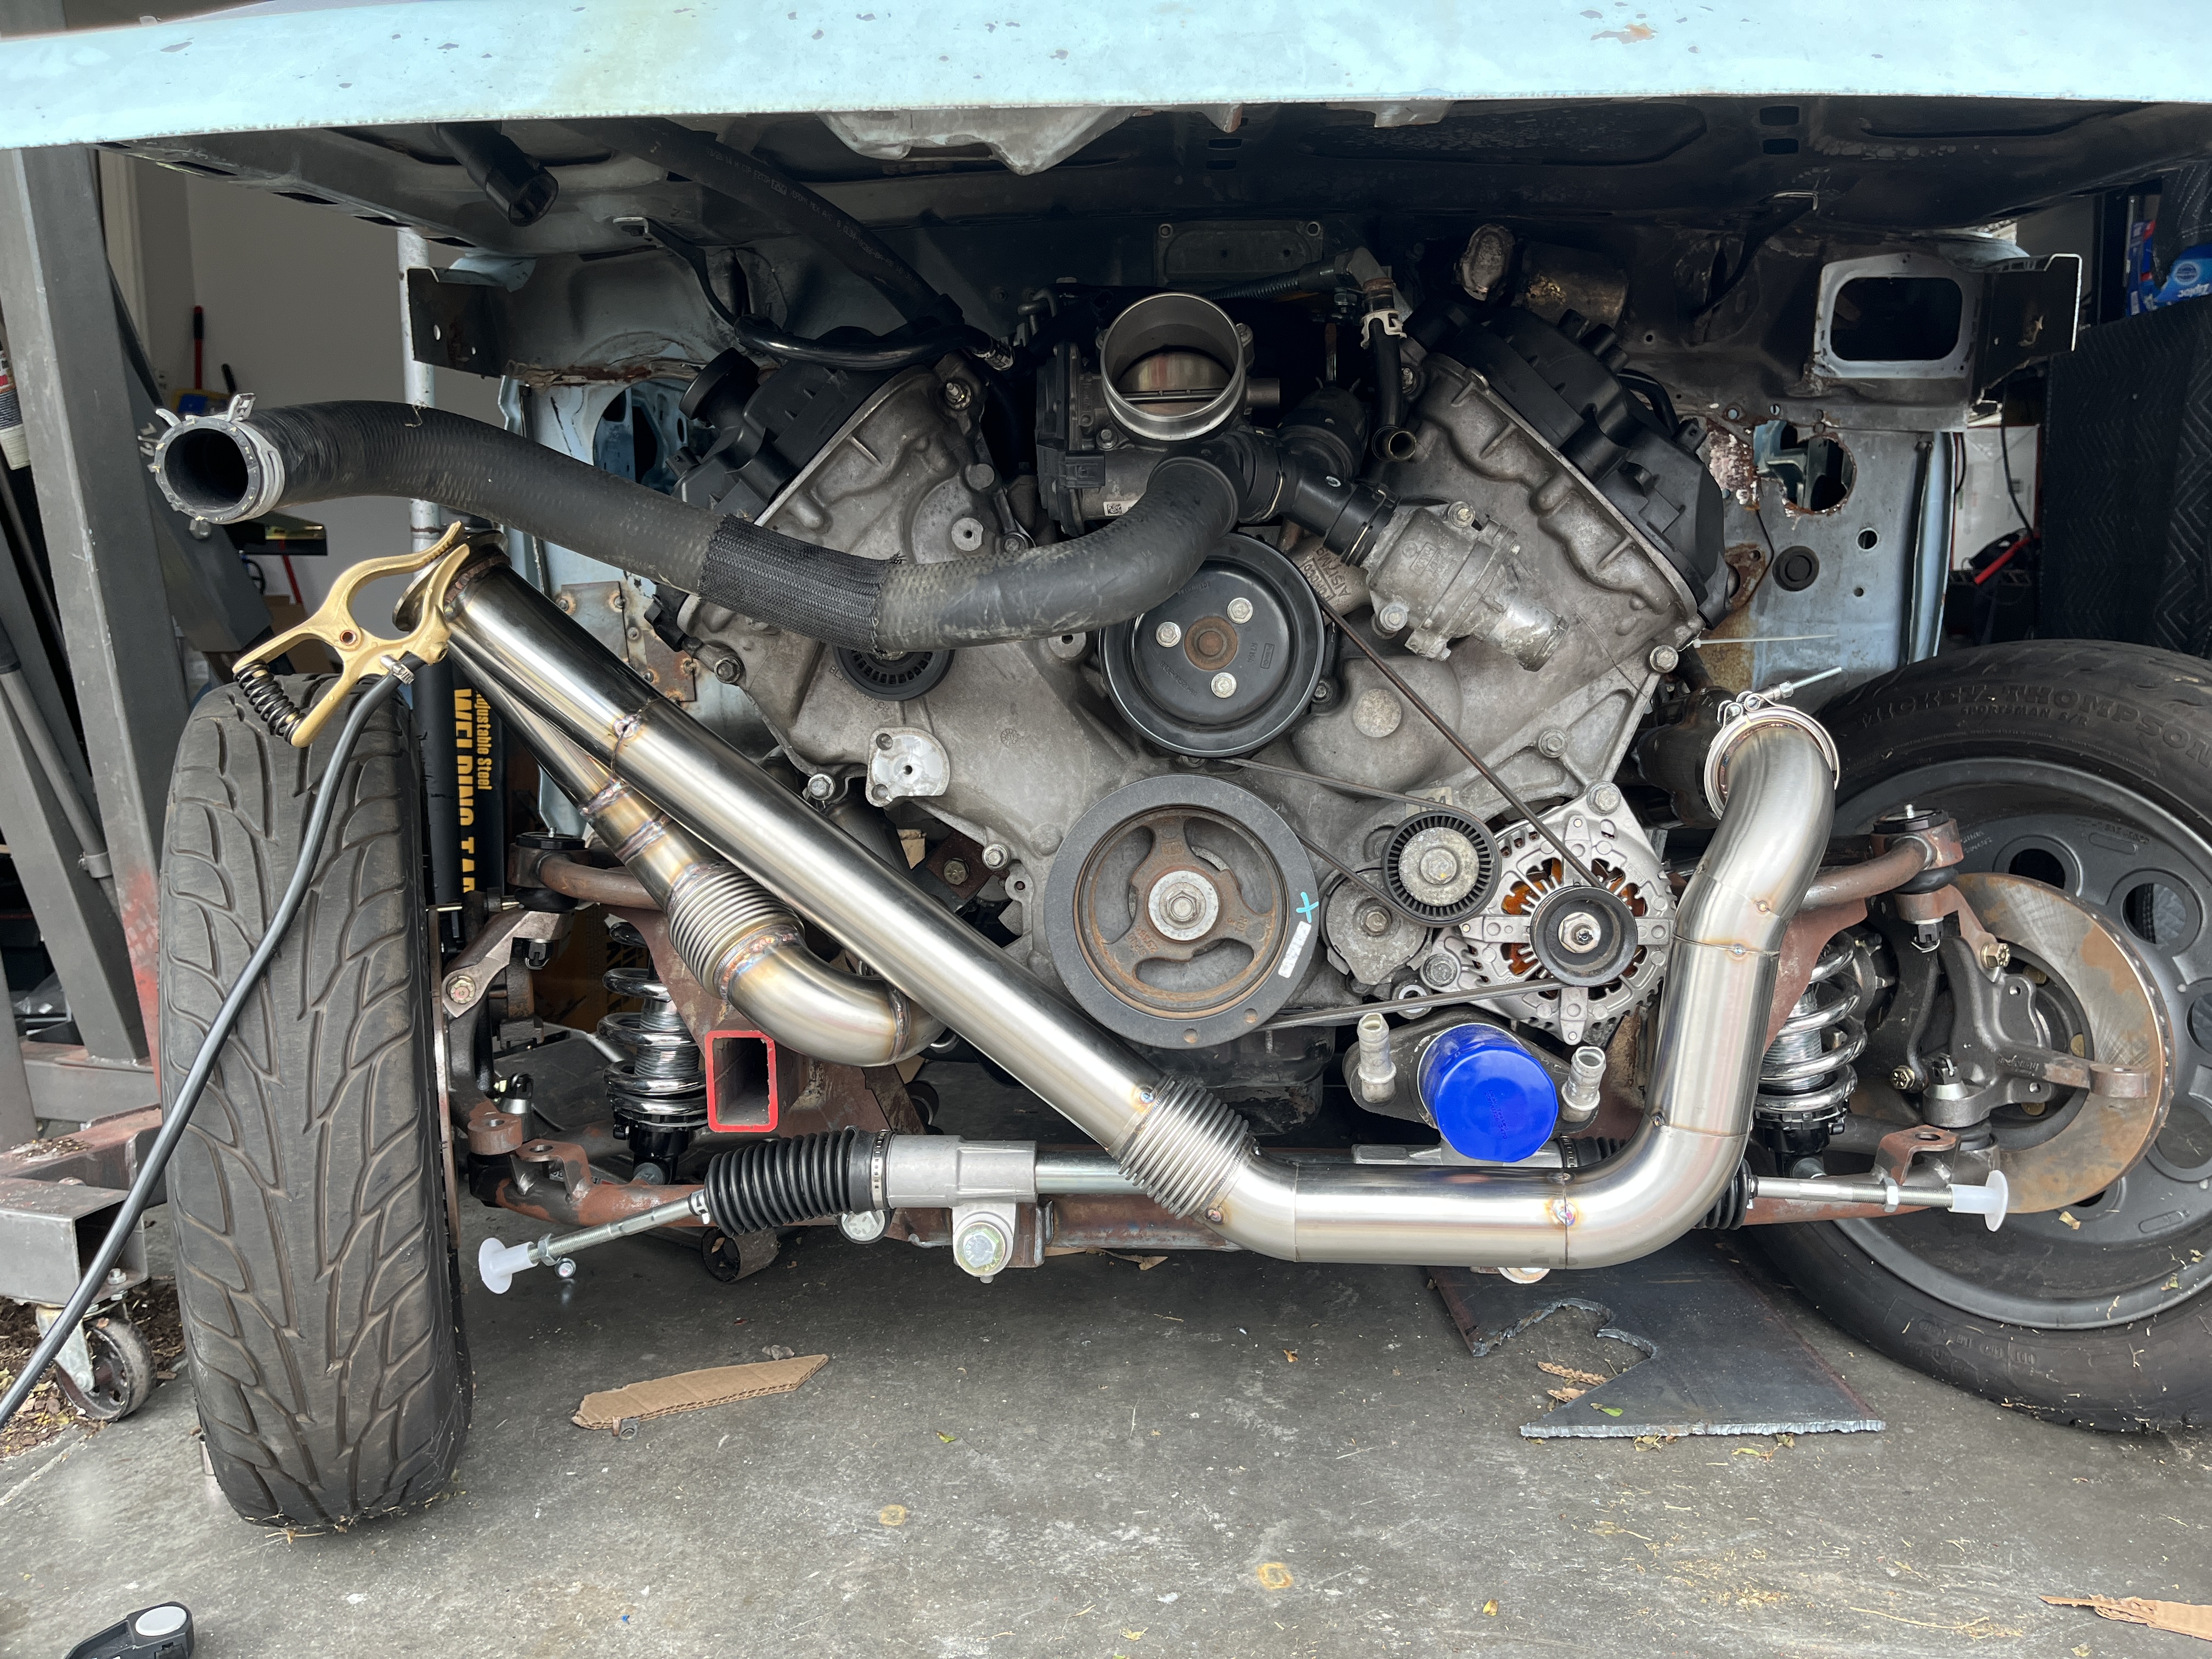
Engine and trans are mocked up on the engine bay. Ordered a set of forward facing turbo headers from Summit hoping they would get here yesterday or today so I could work through the long weekend, but of course they shipped from the Sparks, NV location so they aren't expected until Monday. Anyway, room is tight in the bay but the headers should clear everything...we'll know on Monday! The manual steering rack may be an issue as far as header clearance and routing the steering shaft down to it. I'm going to do some more research since the input lays down at more of an angle, whereas the old rack was more vertical so it went up and over the header. Pic of how I left the truck today. I chose to not do the motor mounts yet in the off-chance the headers or steering don't work out.
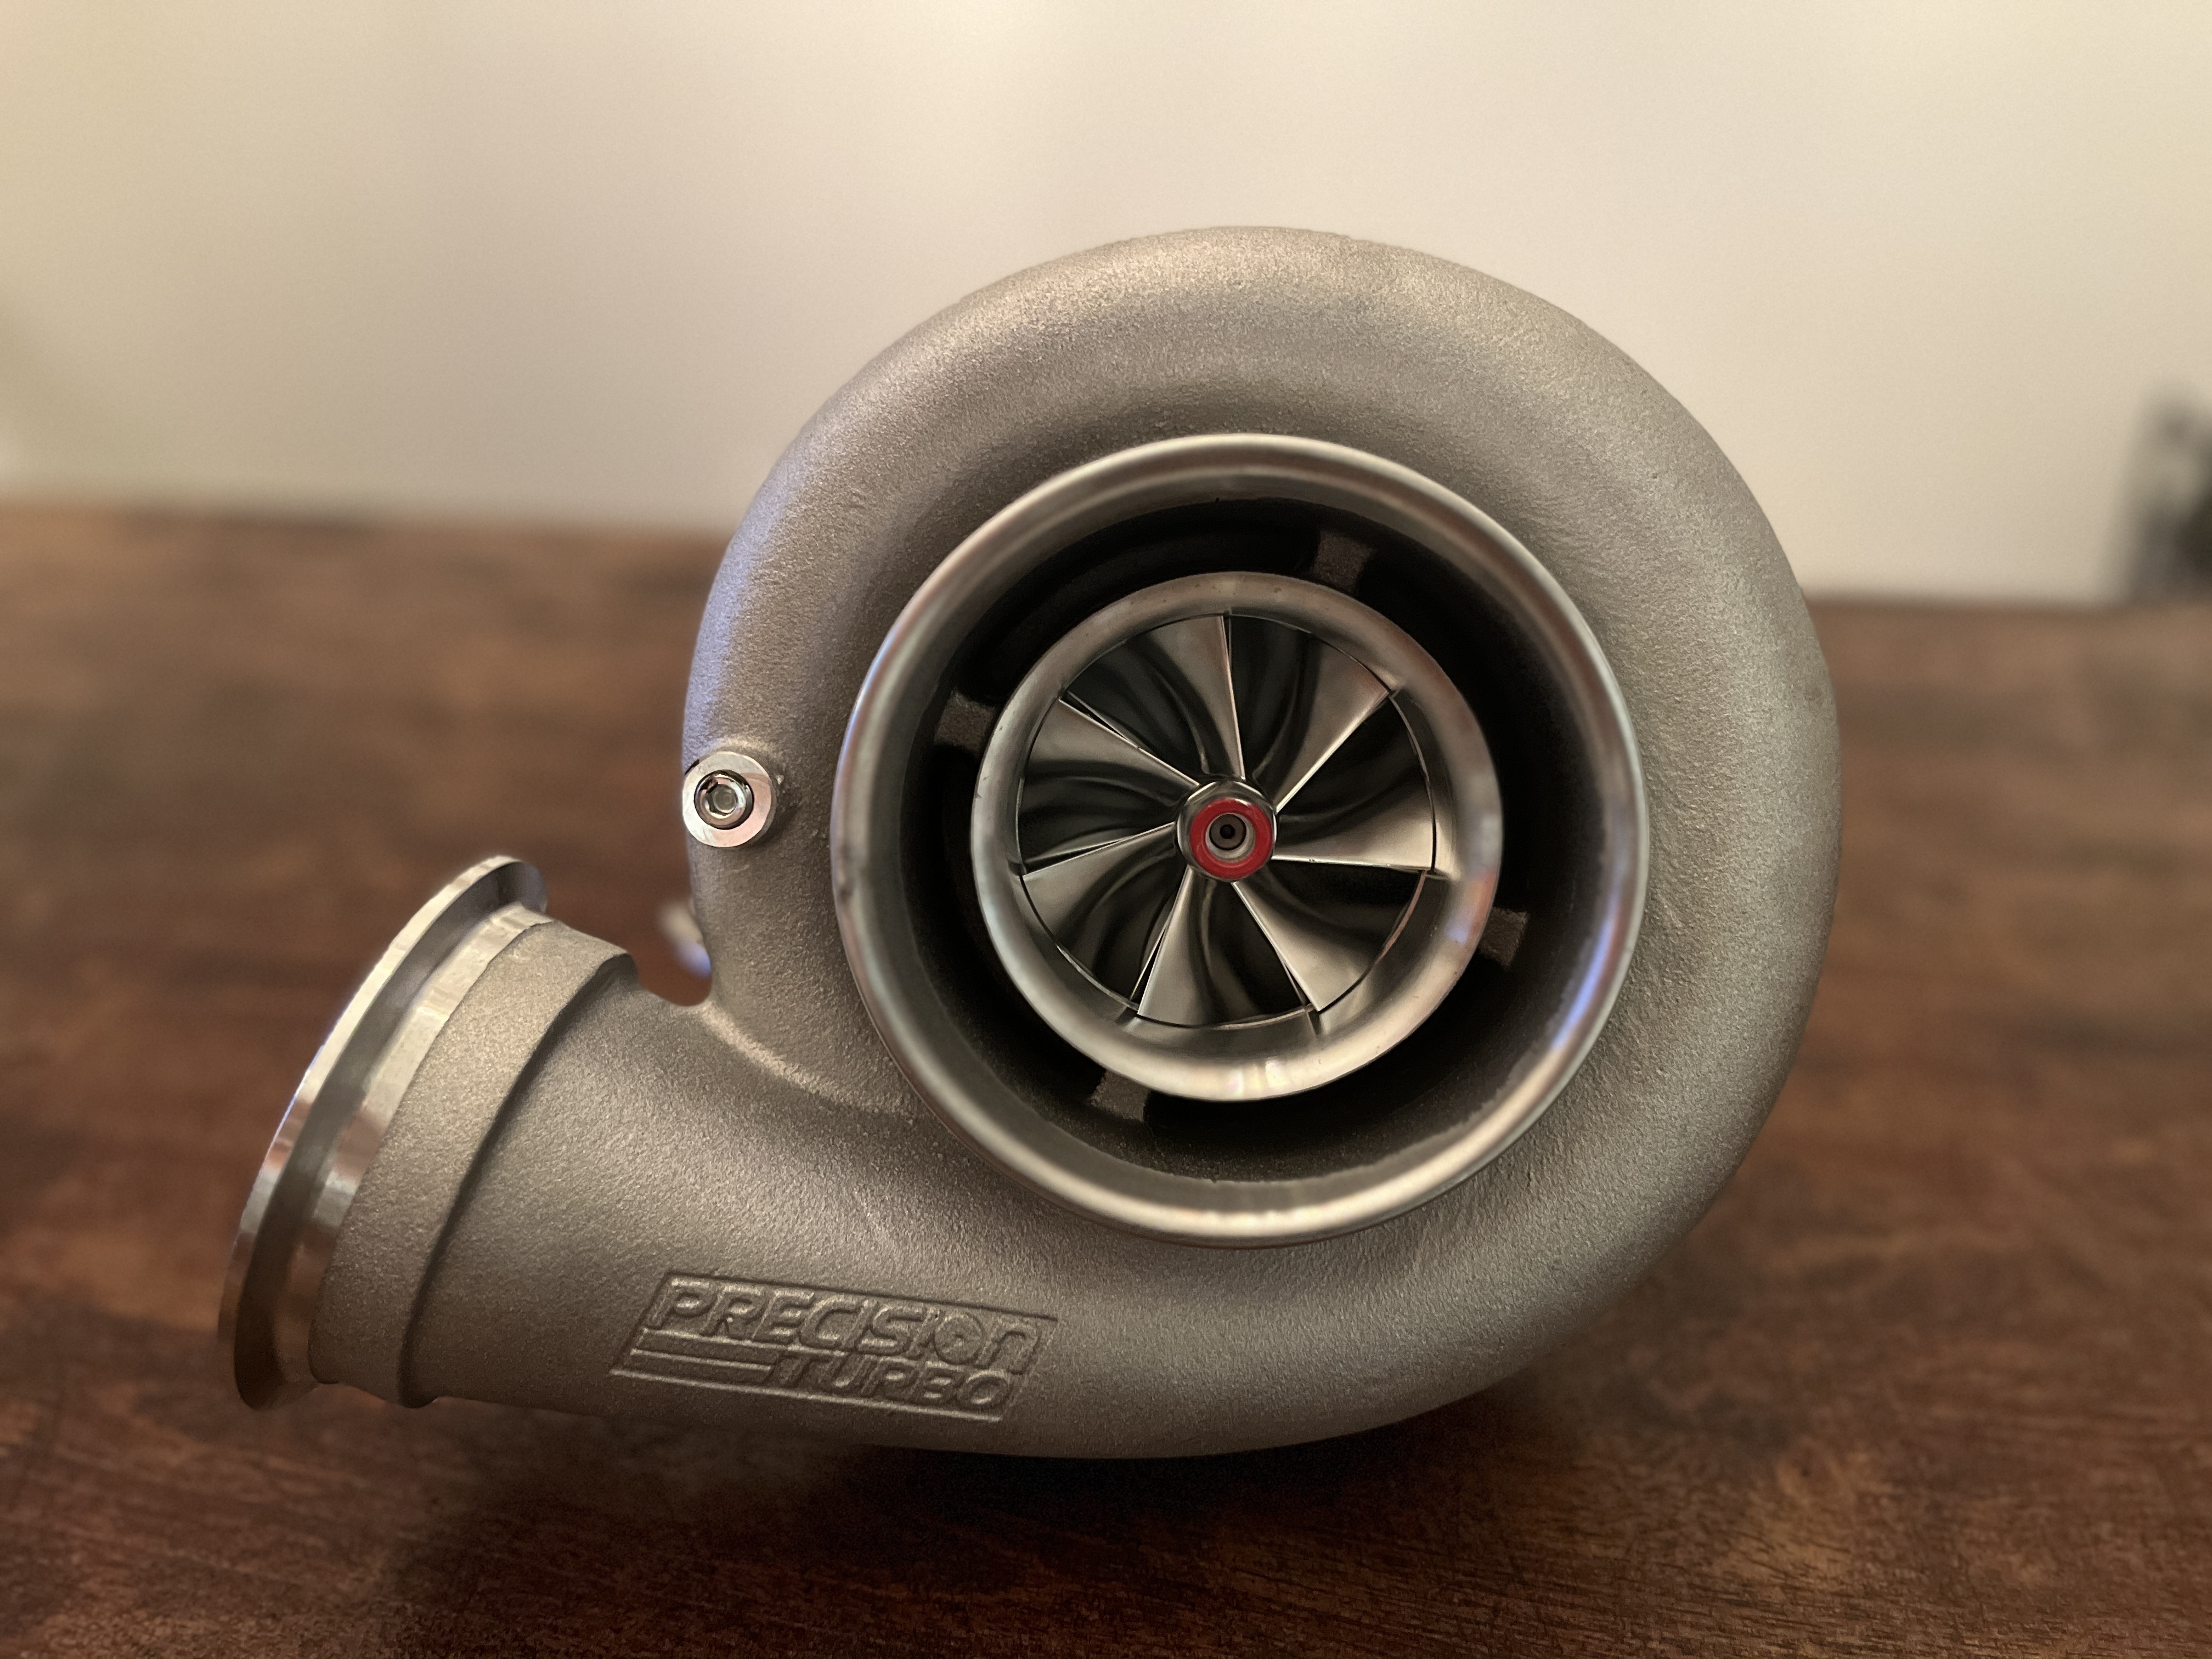
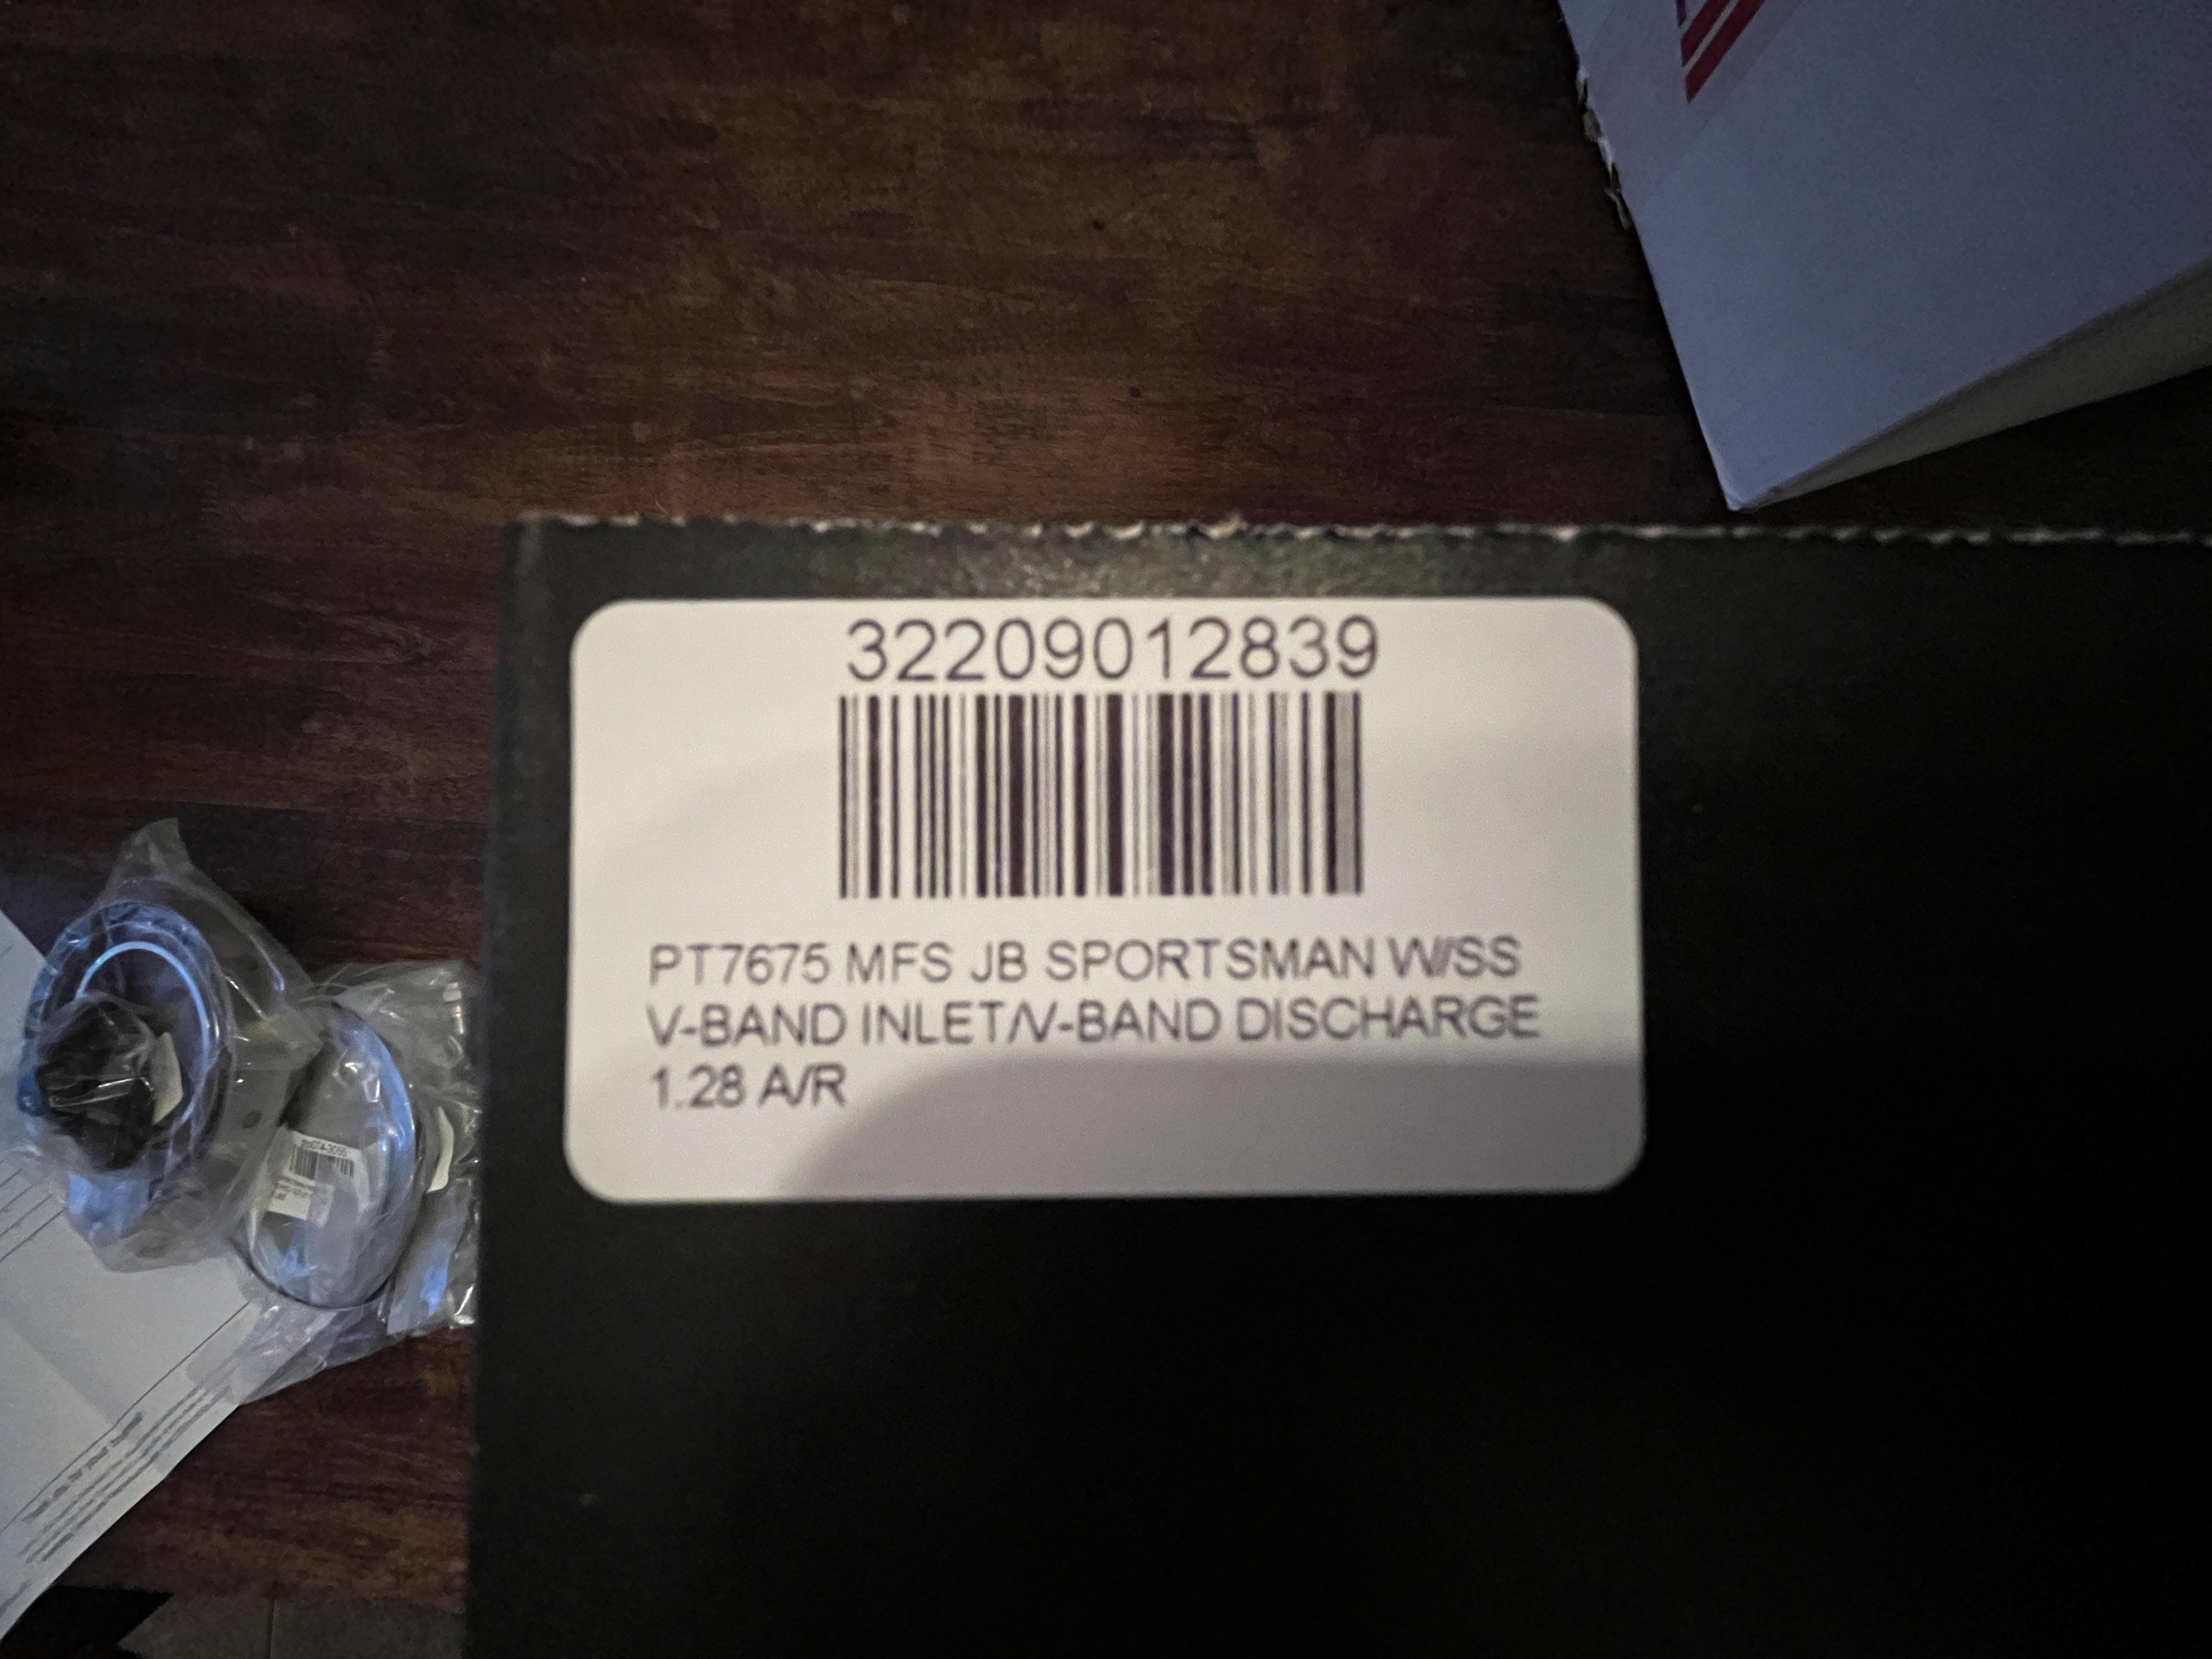
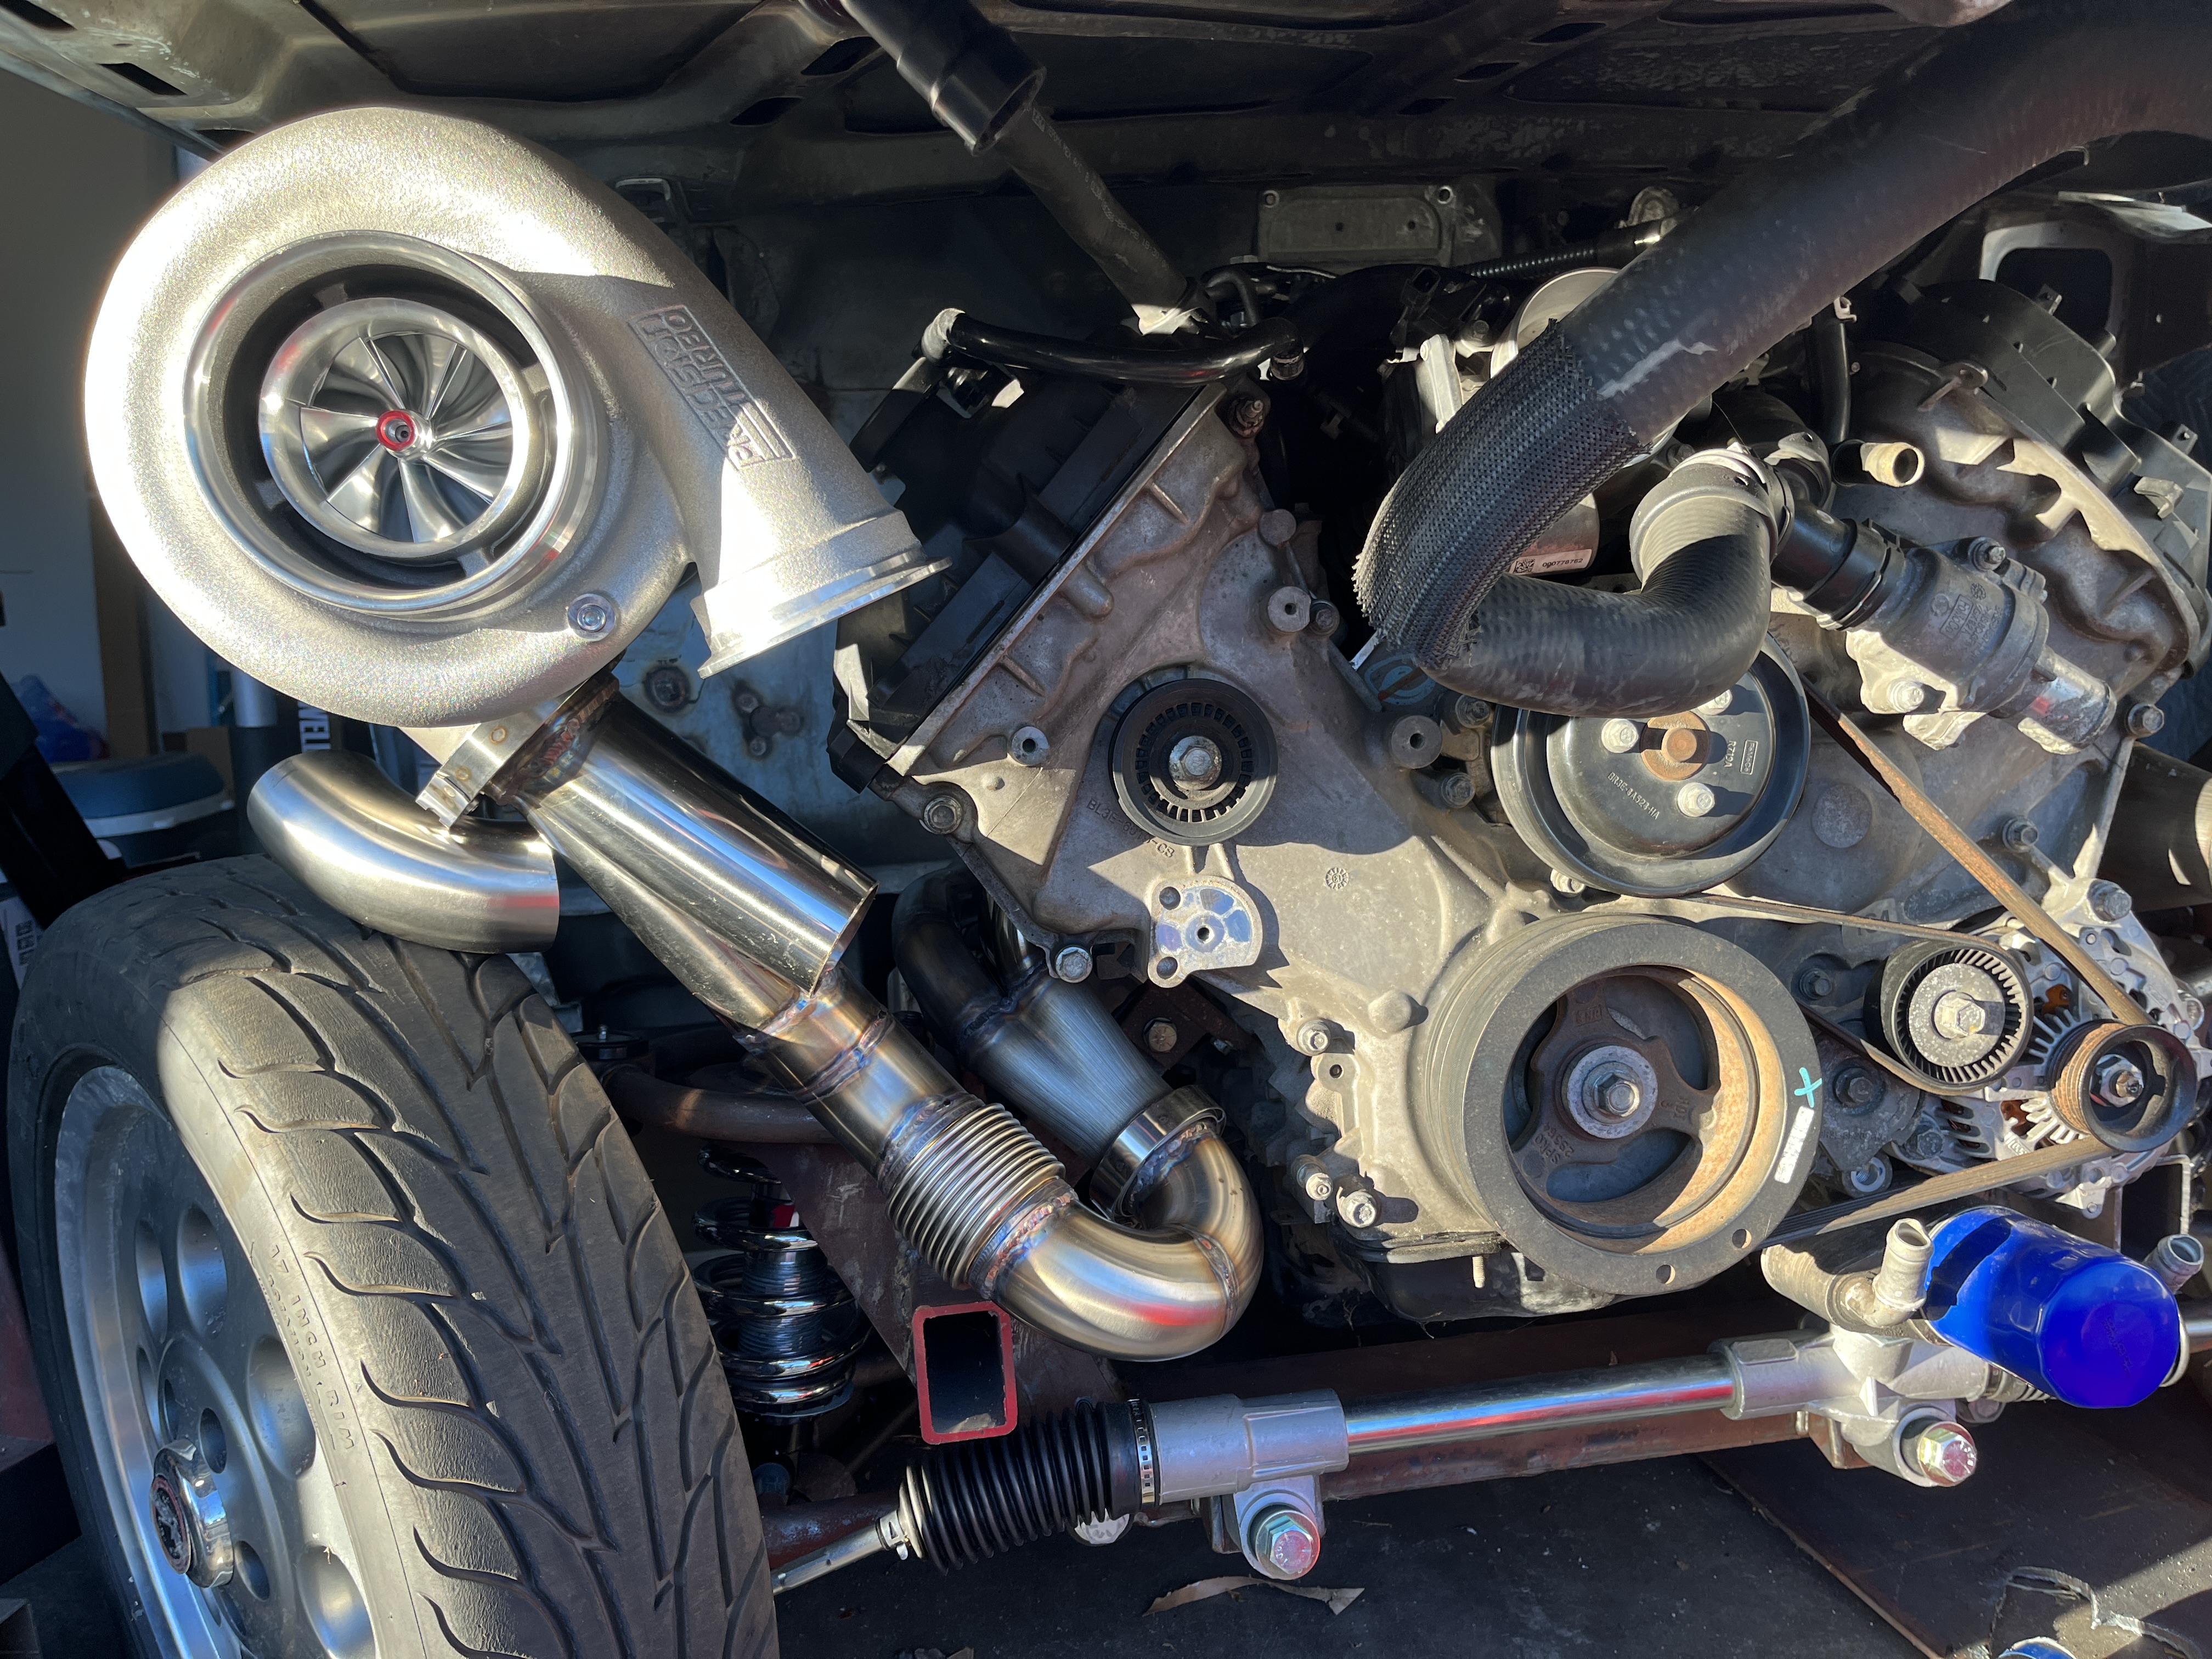
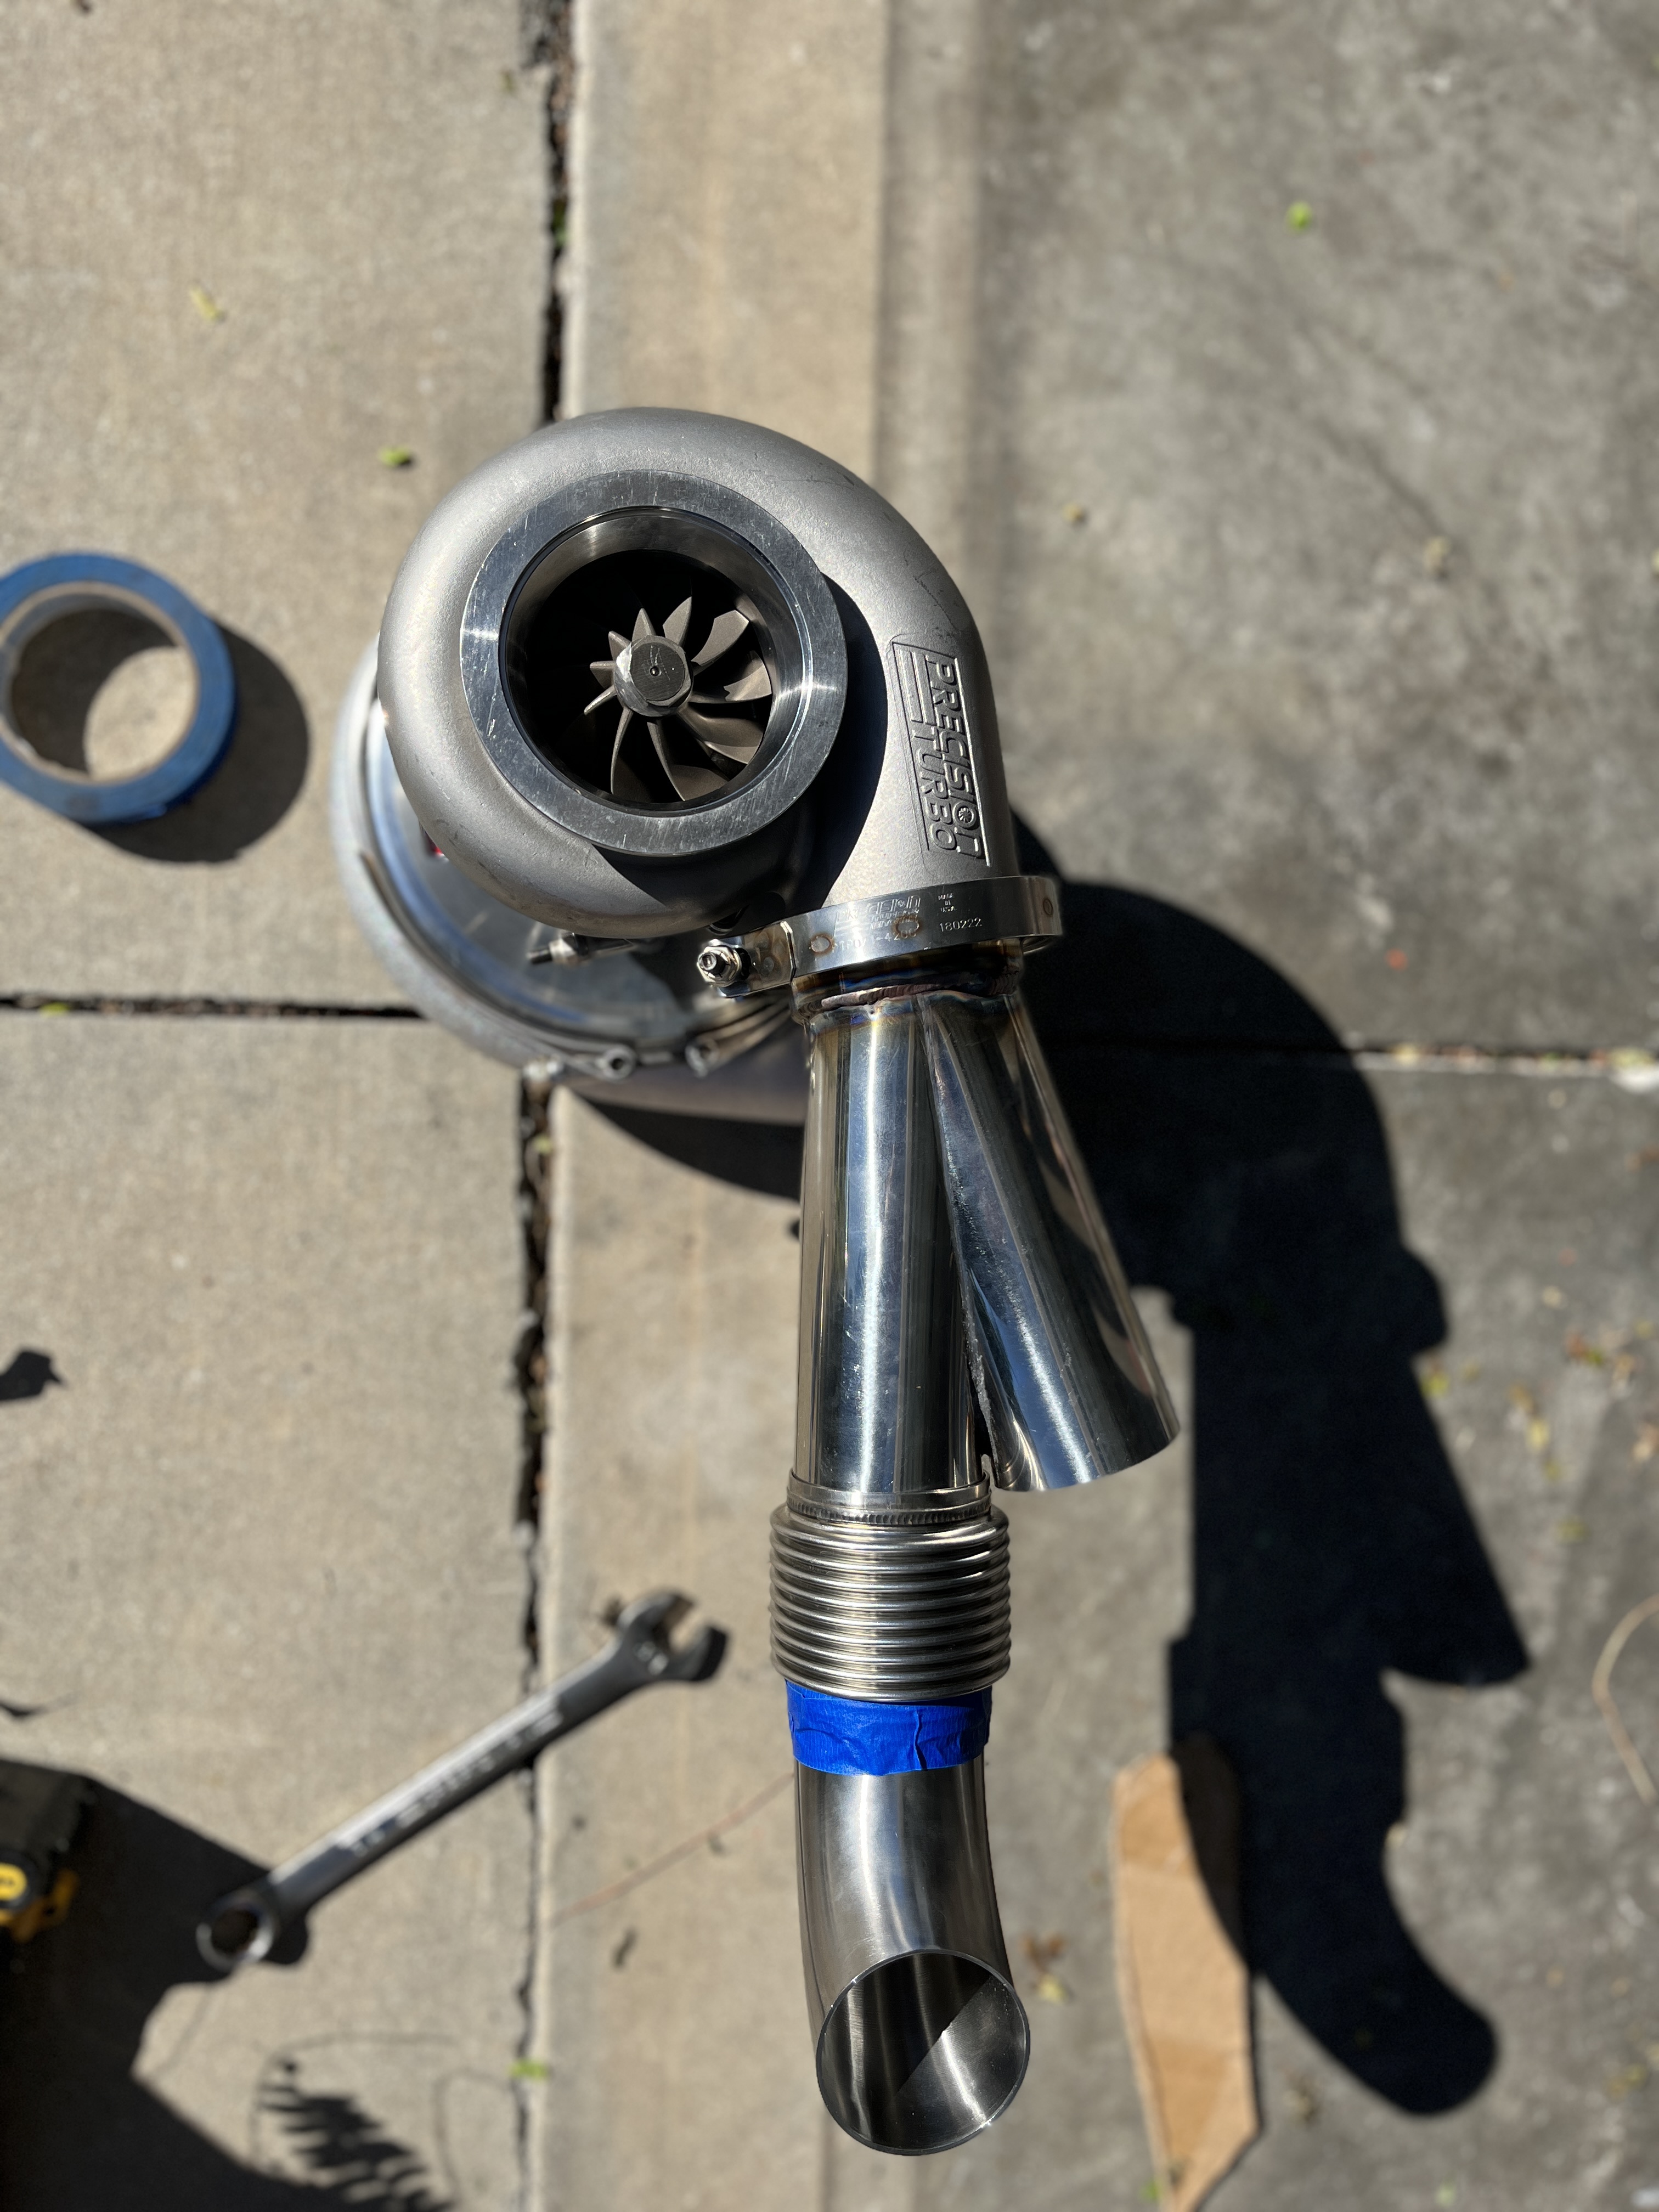
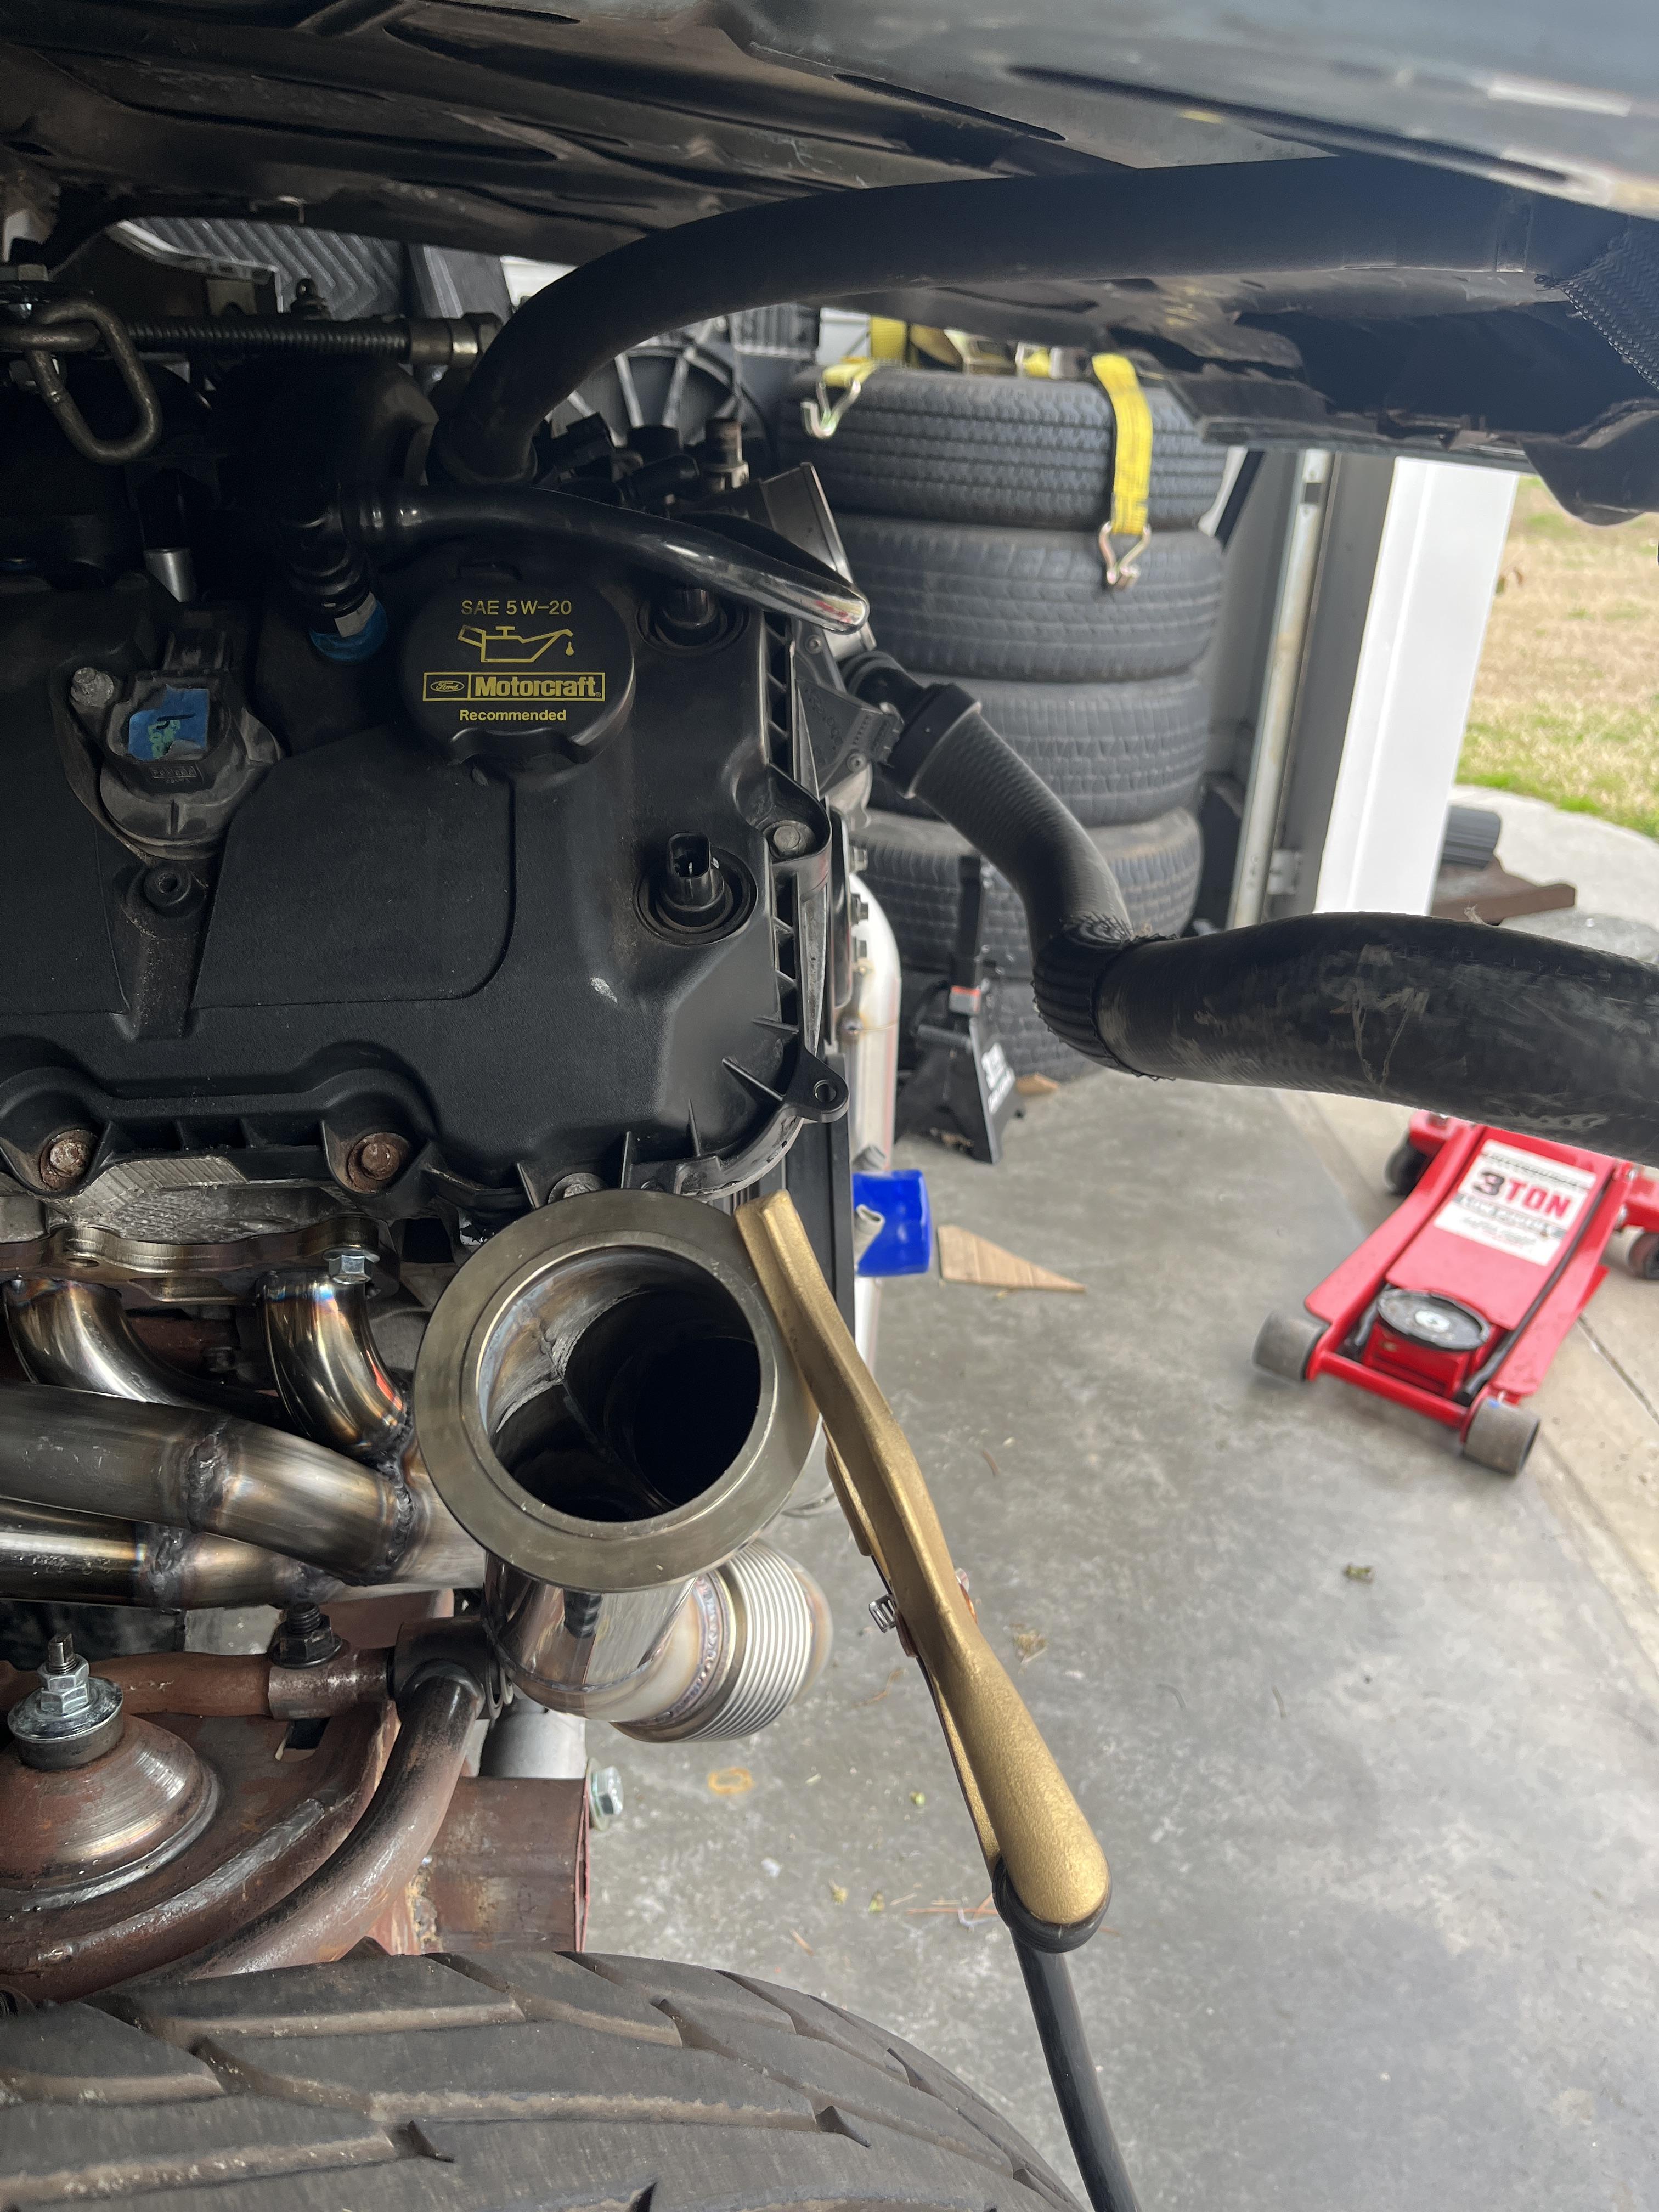
Today is very exciting. I've been waiting on this box for two months now! They were behind on machining compressor wheels. Weighs in a 35lbs so it will definitely be needing a mount and not just relying on the hot side tubing to support. Gen 2 PT7675 Sportsman with v-band flanges. Big thanks to my sponsor Auto Mafia Racing for the hookup! I've also been busy teaching myself how to tig weld and modifying the driver side header to affect the hot side routing. If you are on Instagram, I'd appreciate a follow over at @SacksGarage as I'm trying to grow that page to accompany my Youtube.
The box it came in is top-notch quality, as to be expected from such a reputable company
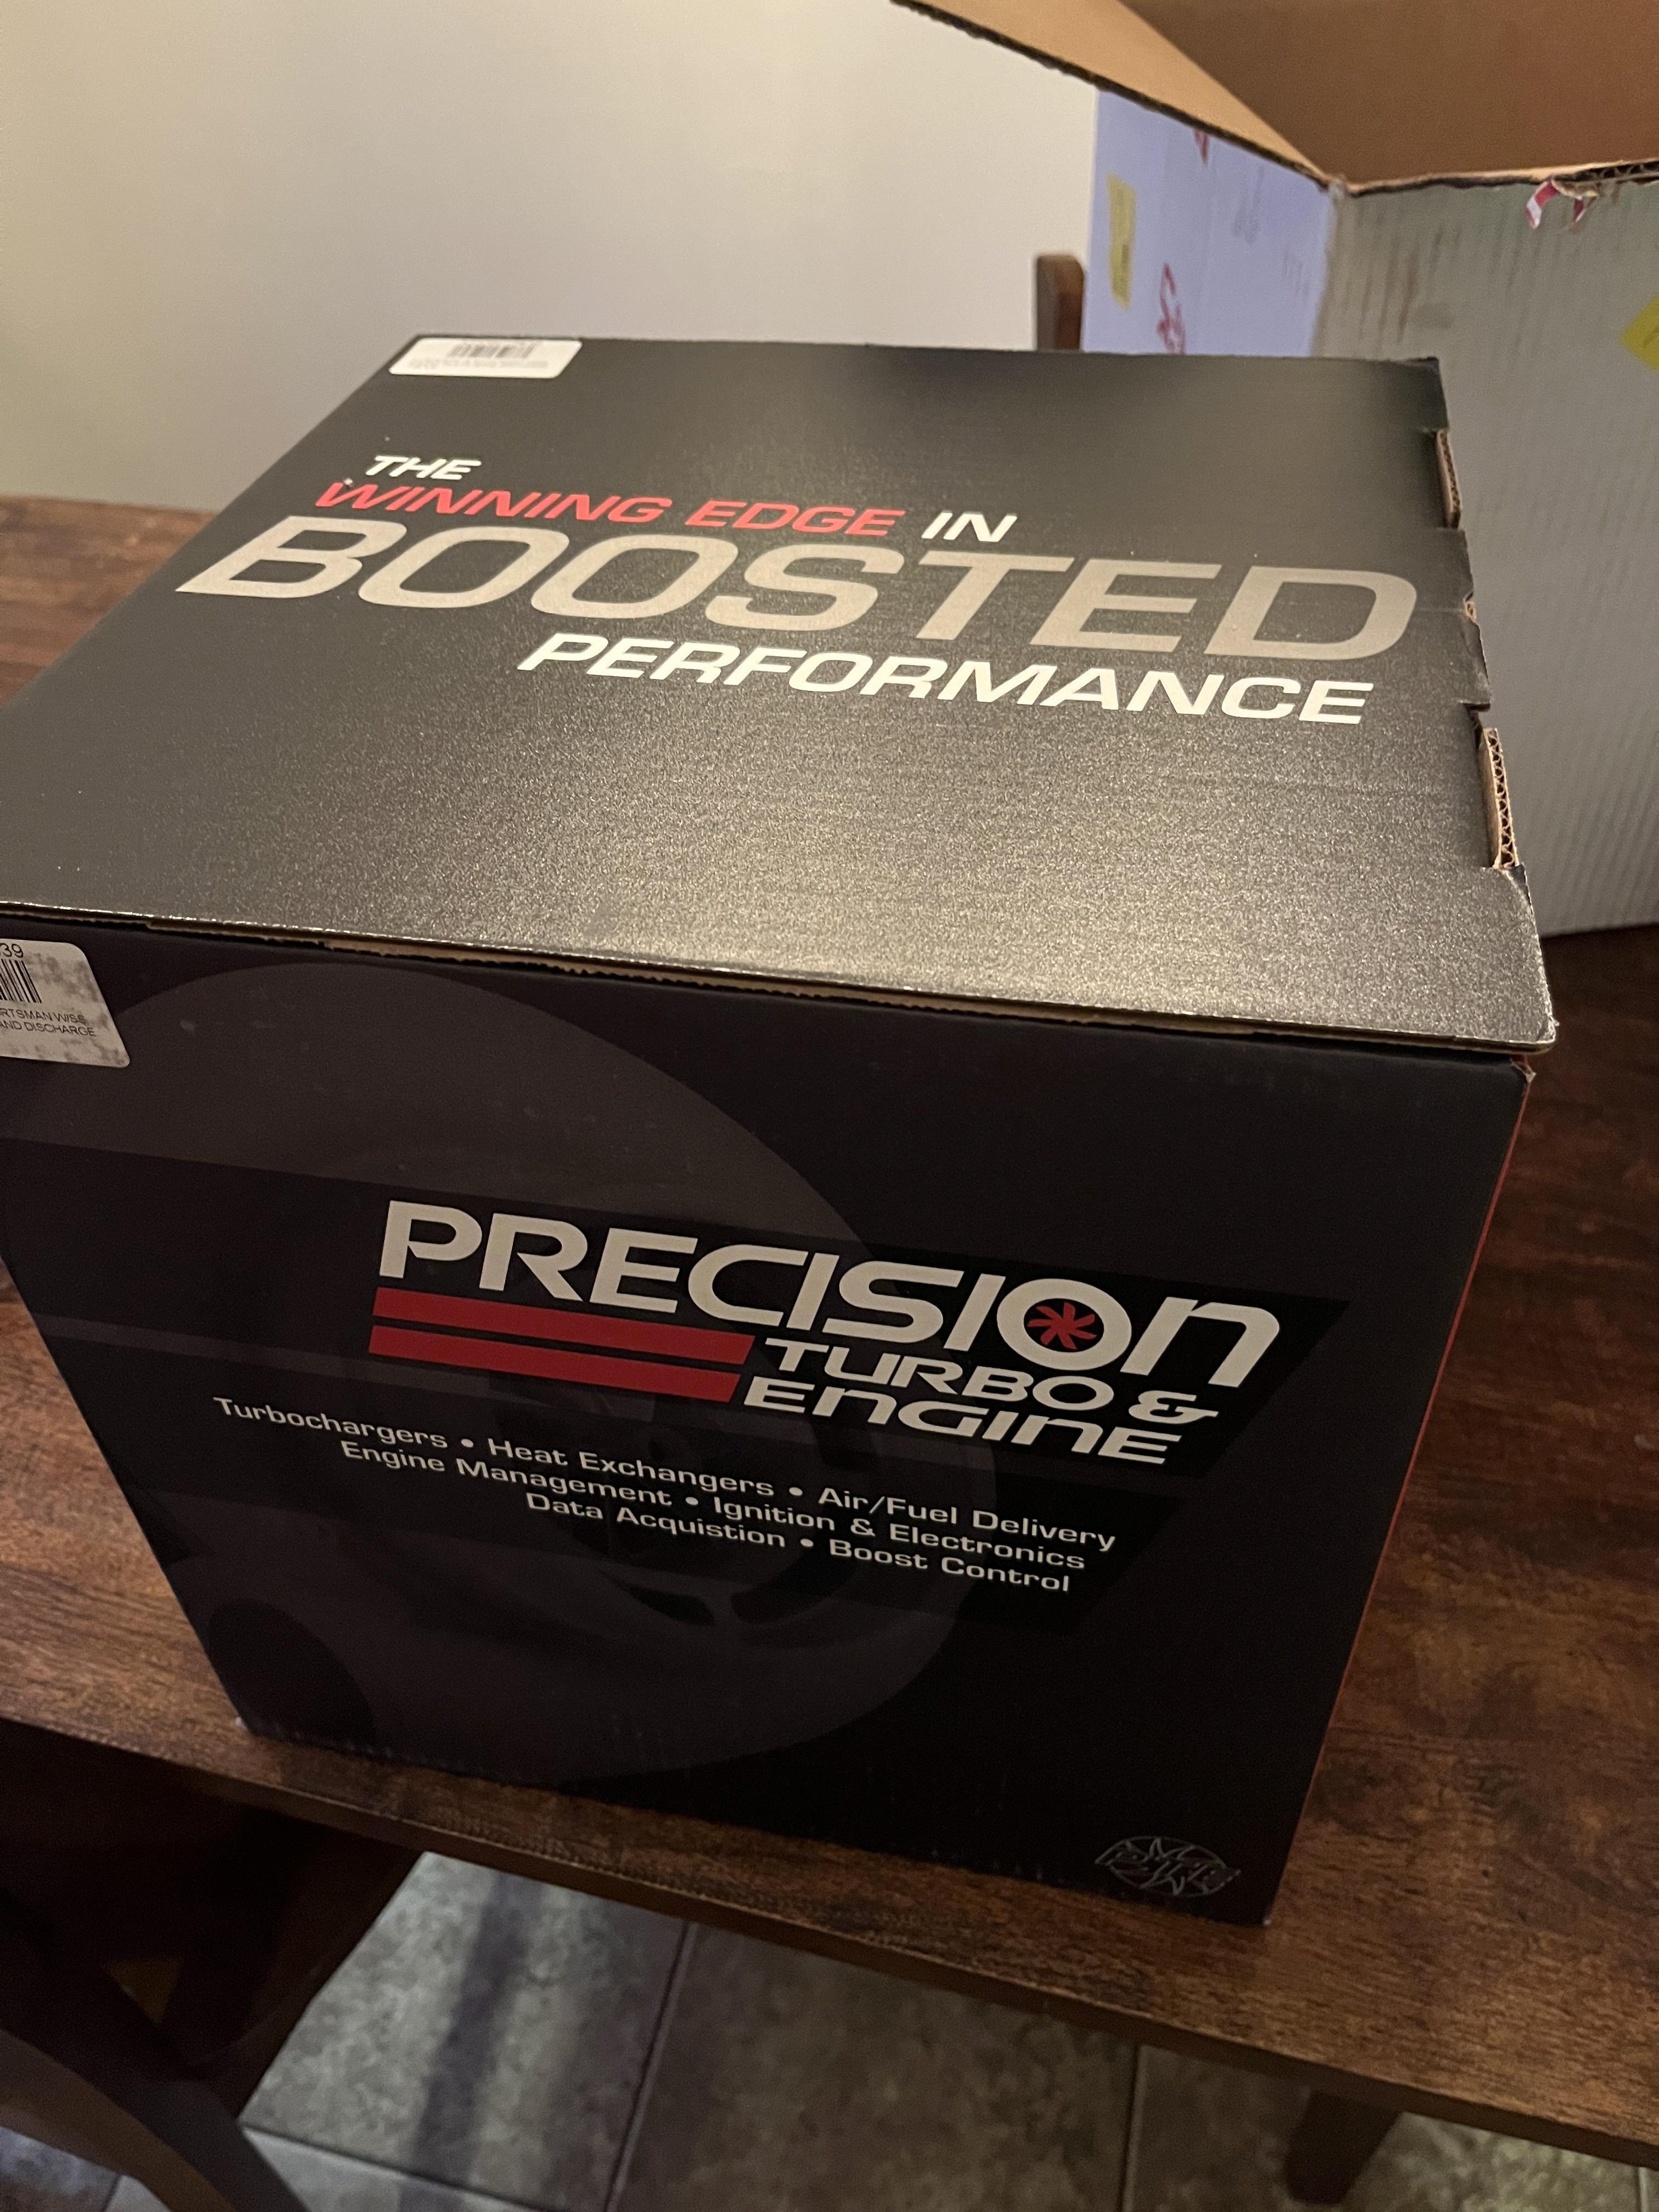
The box it came in is top-notch quality, as to be expected from such a reputable company
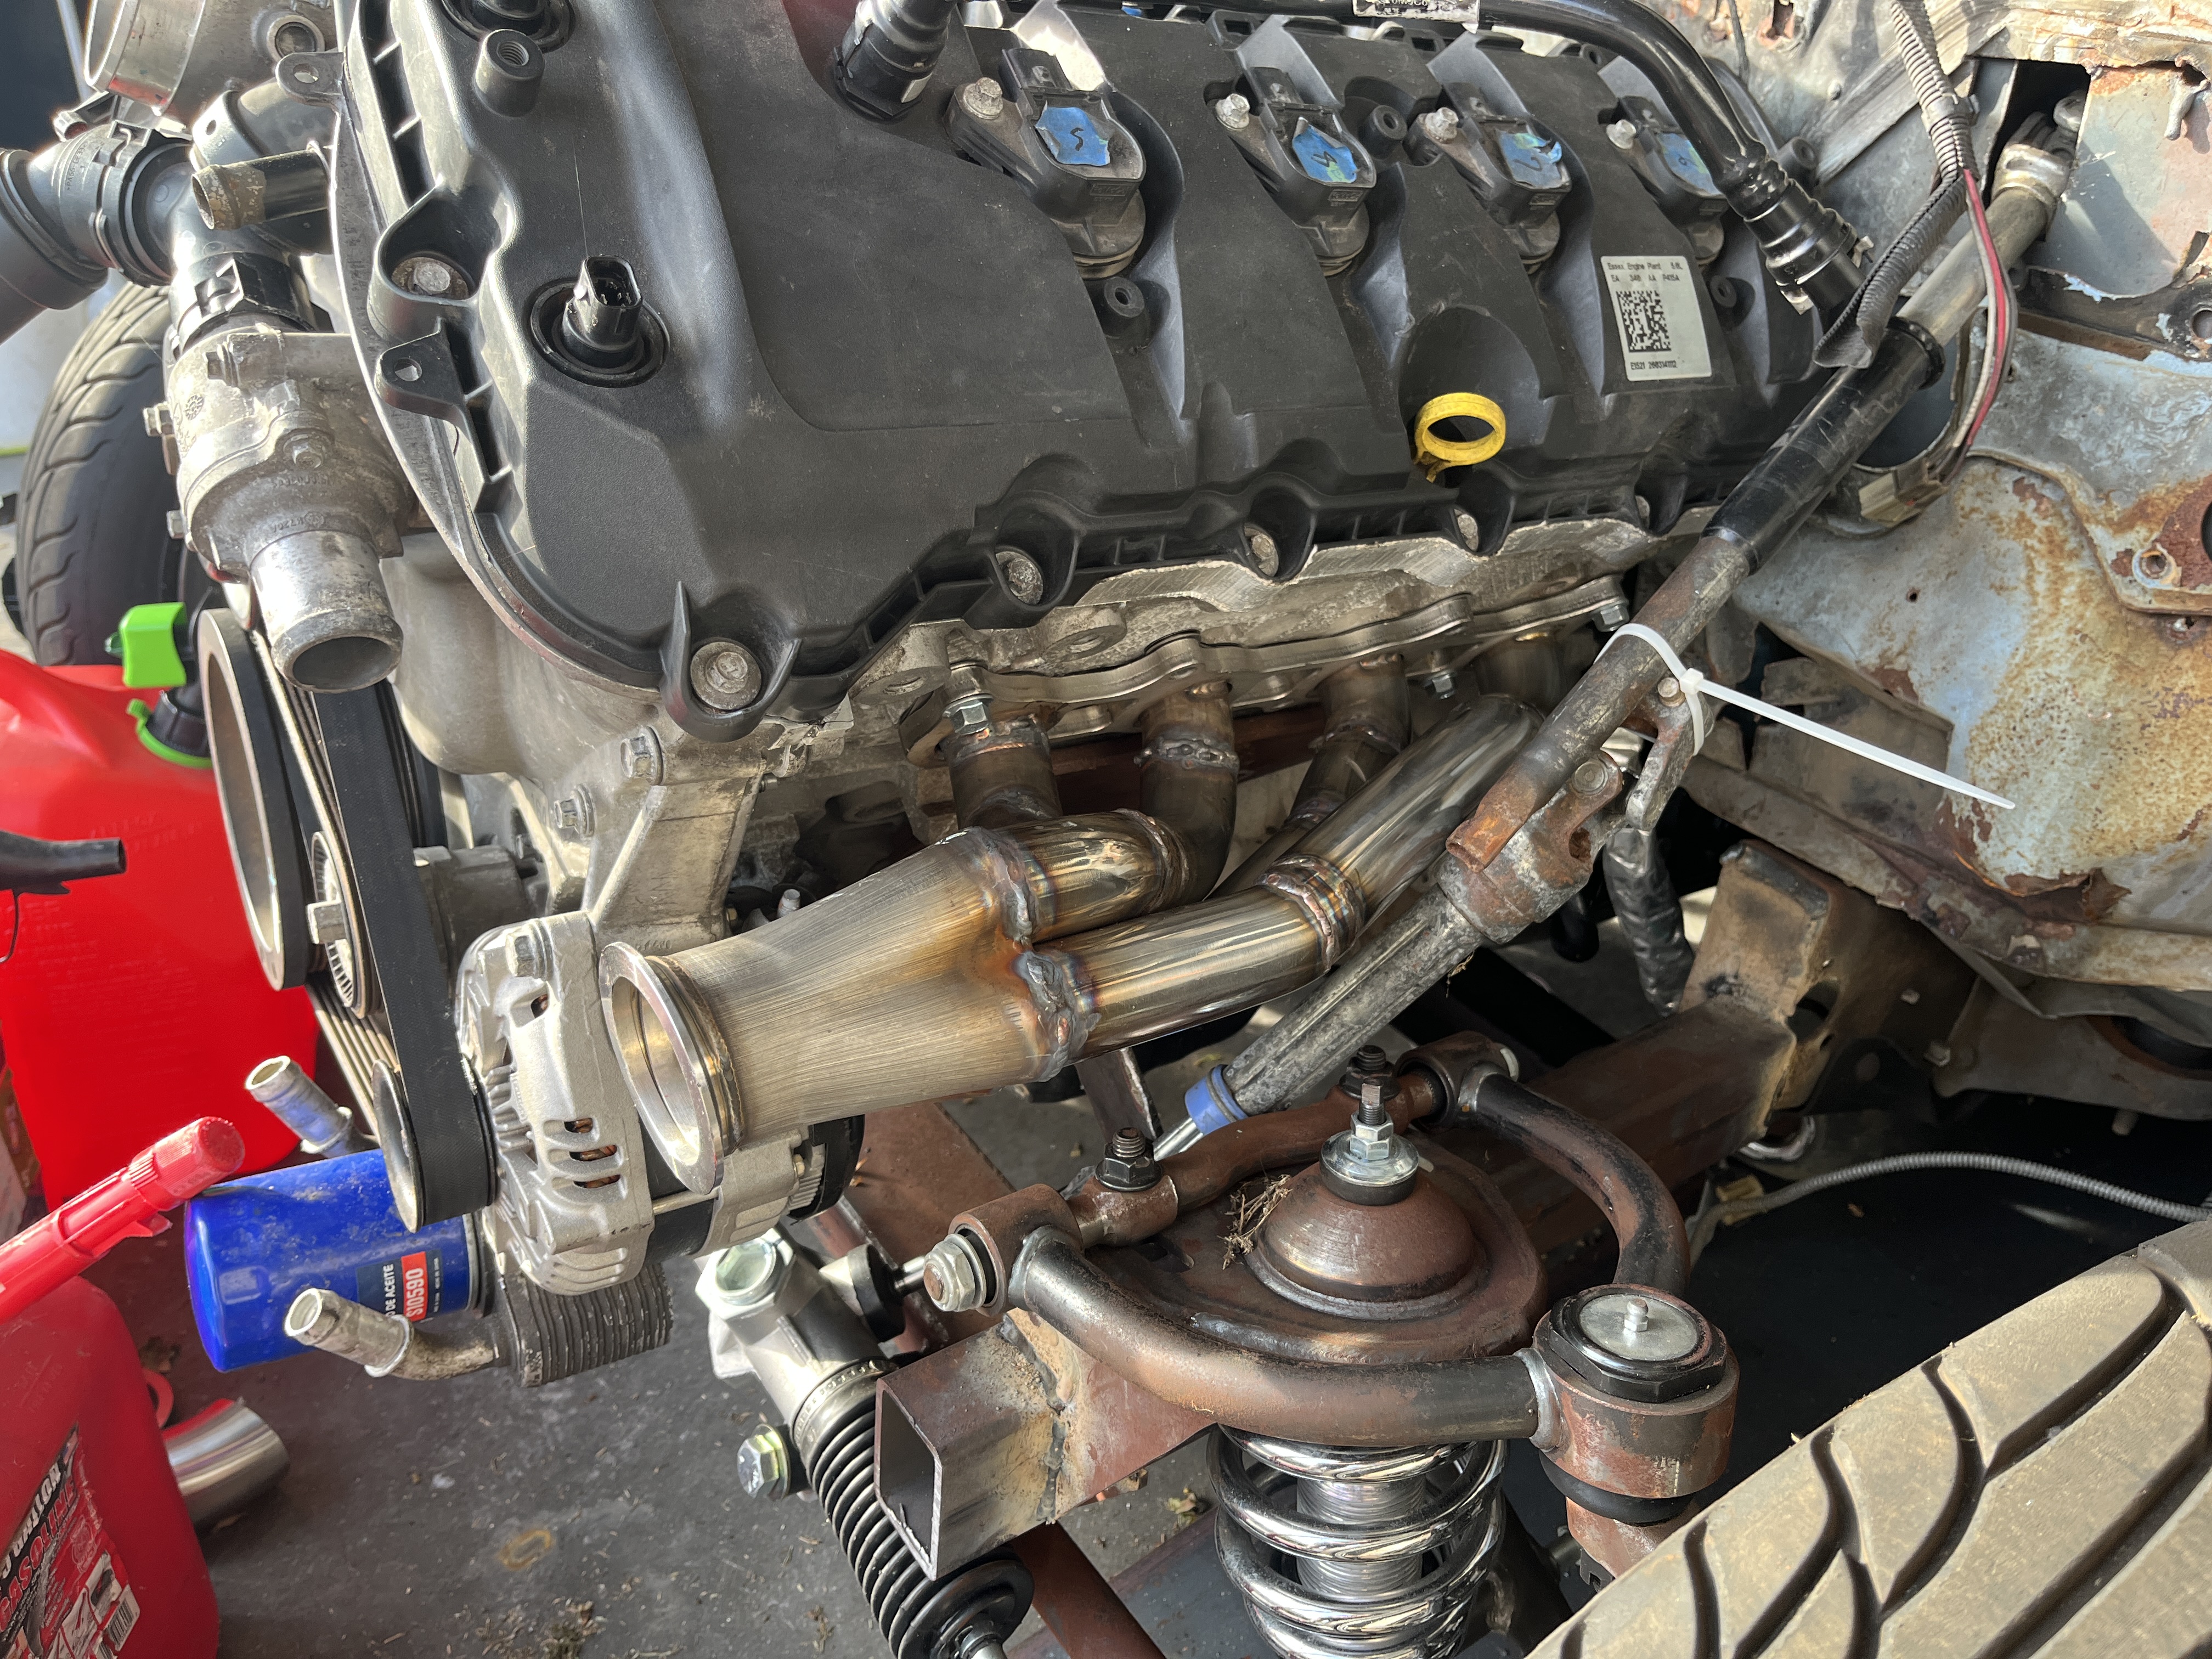
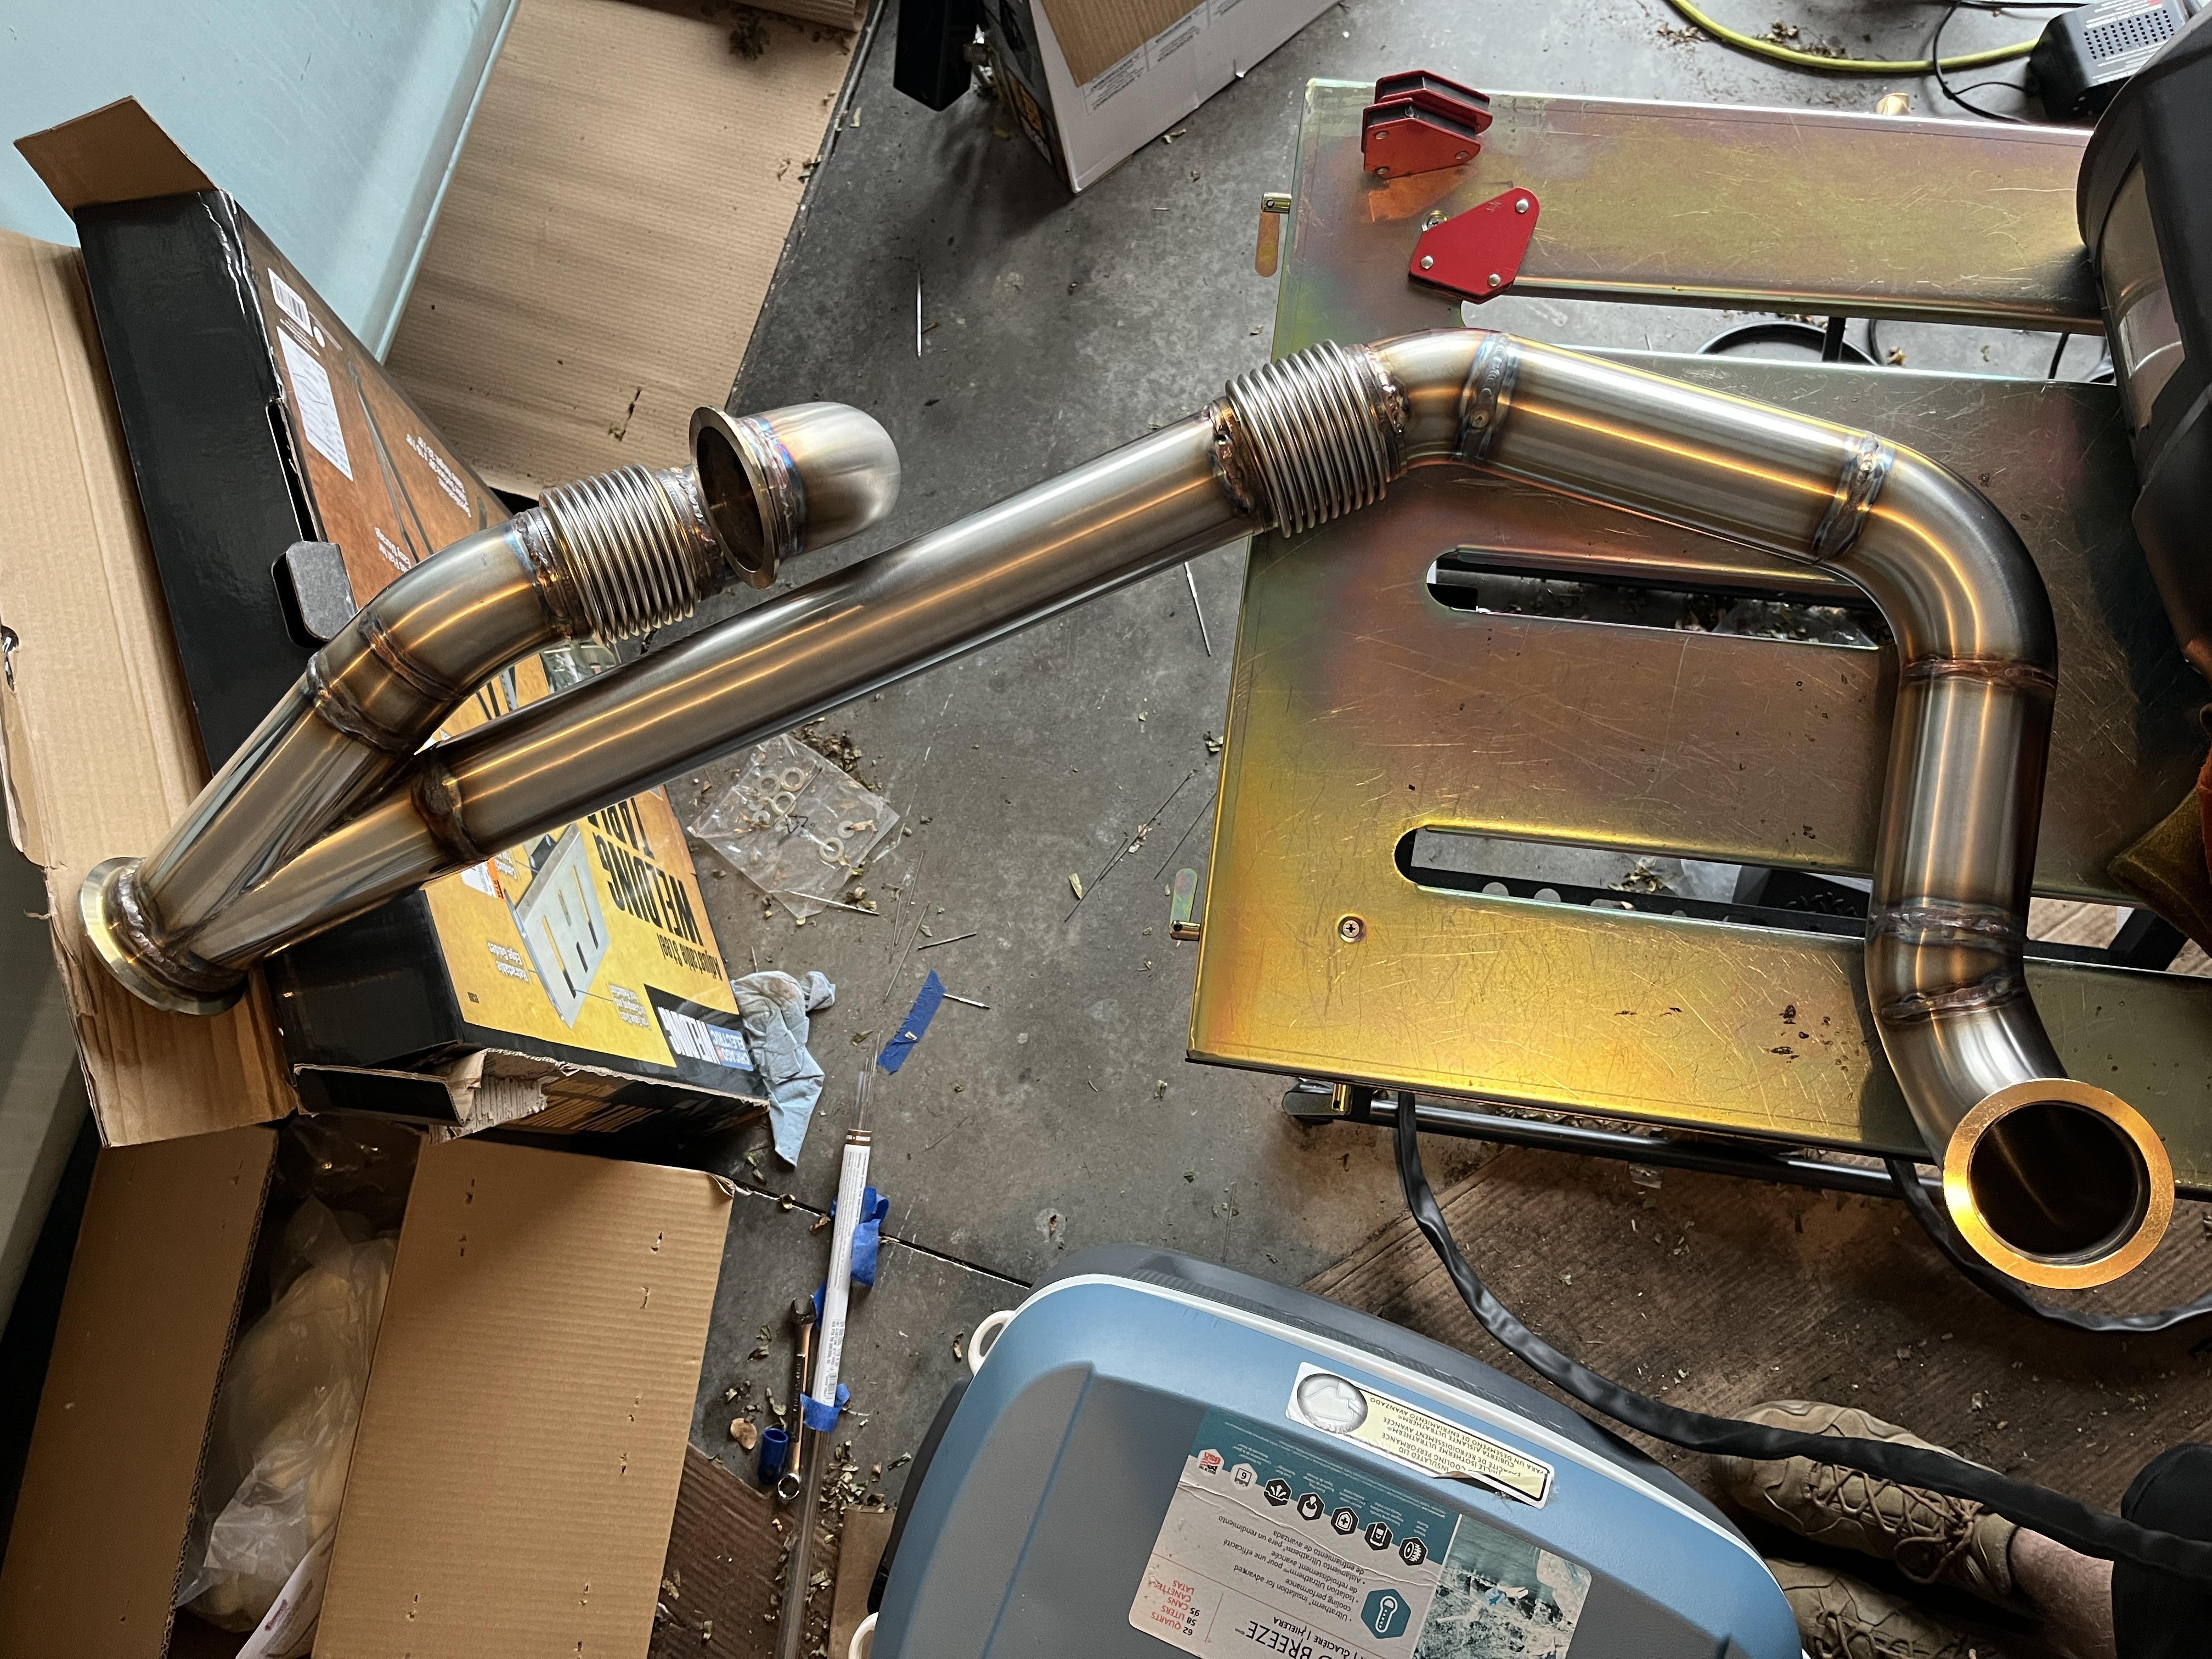
Made good progress recently. Pax header is done and hot side routing complete minus the crossover. Need to get some 1" tubing to actually mount the turbo to the Maven Performance turbo mount. Goal for today is to finish the crossover. I'm quite happy with how this is turning out both aesthetically and space usage wise. Pics and video below. I just made an Instagram and I'd appreciate a follow @sacksgarage.
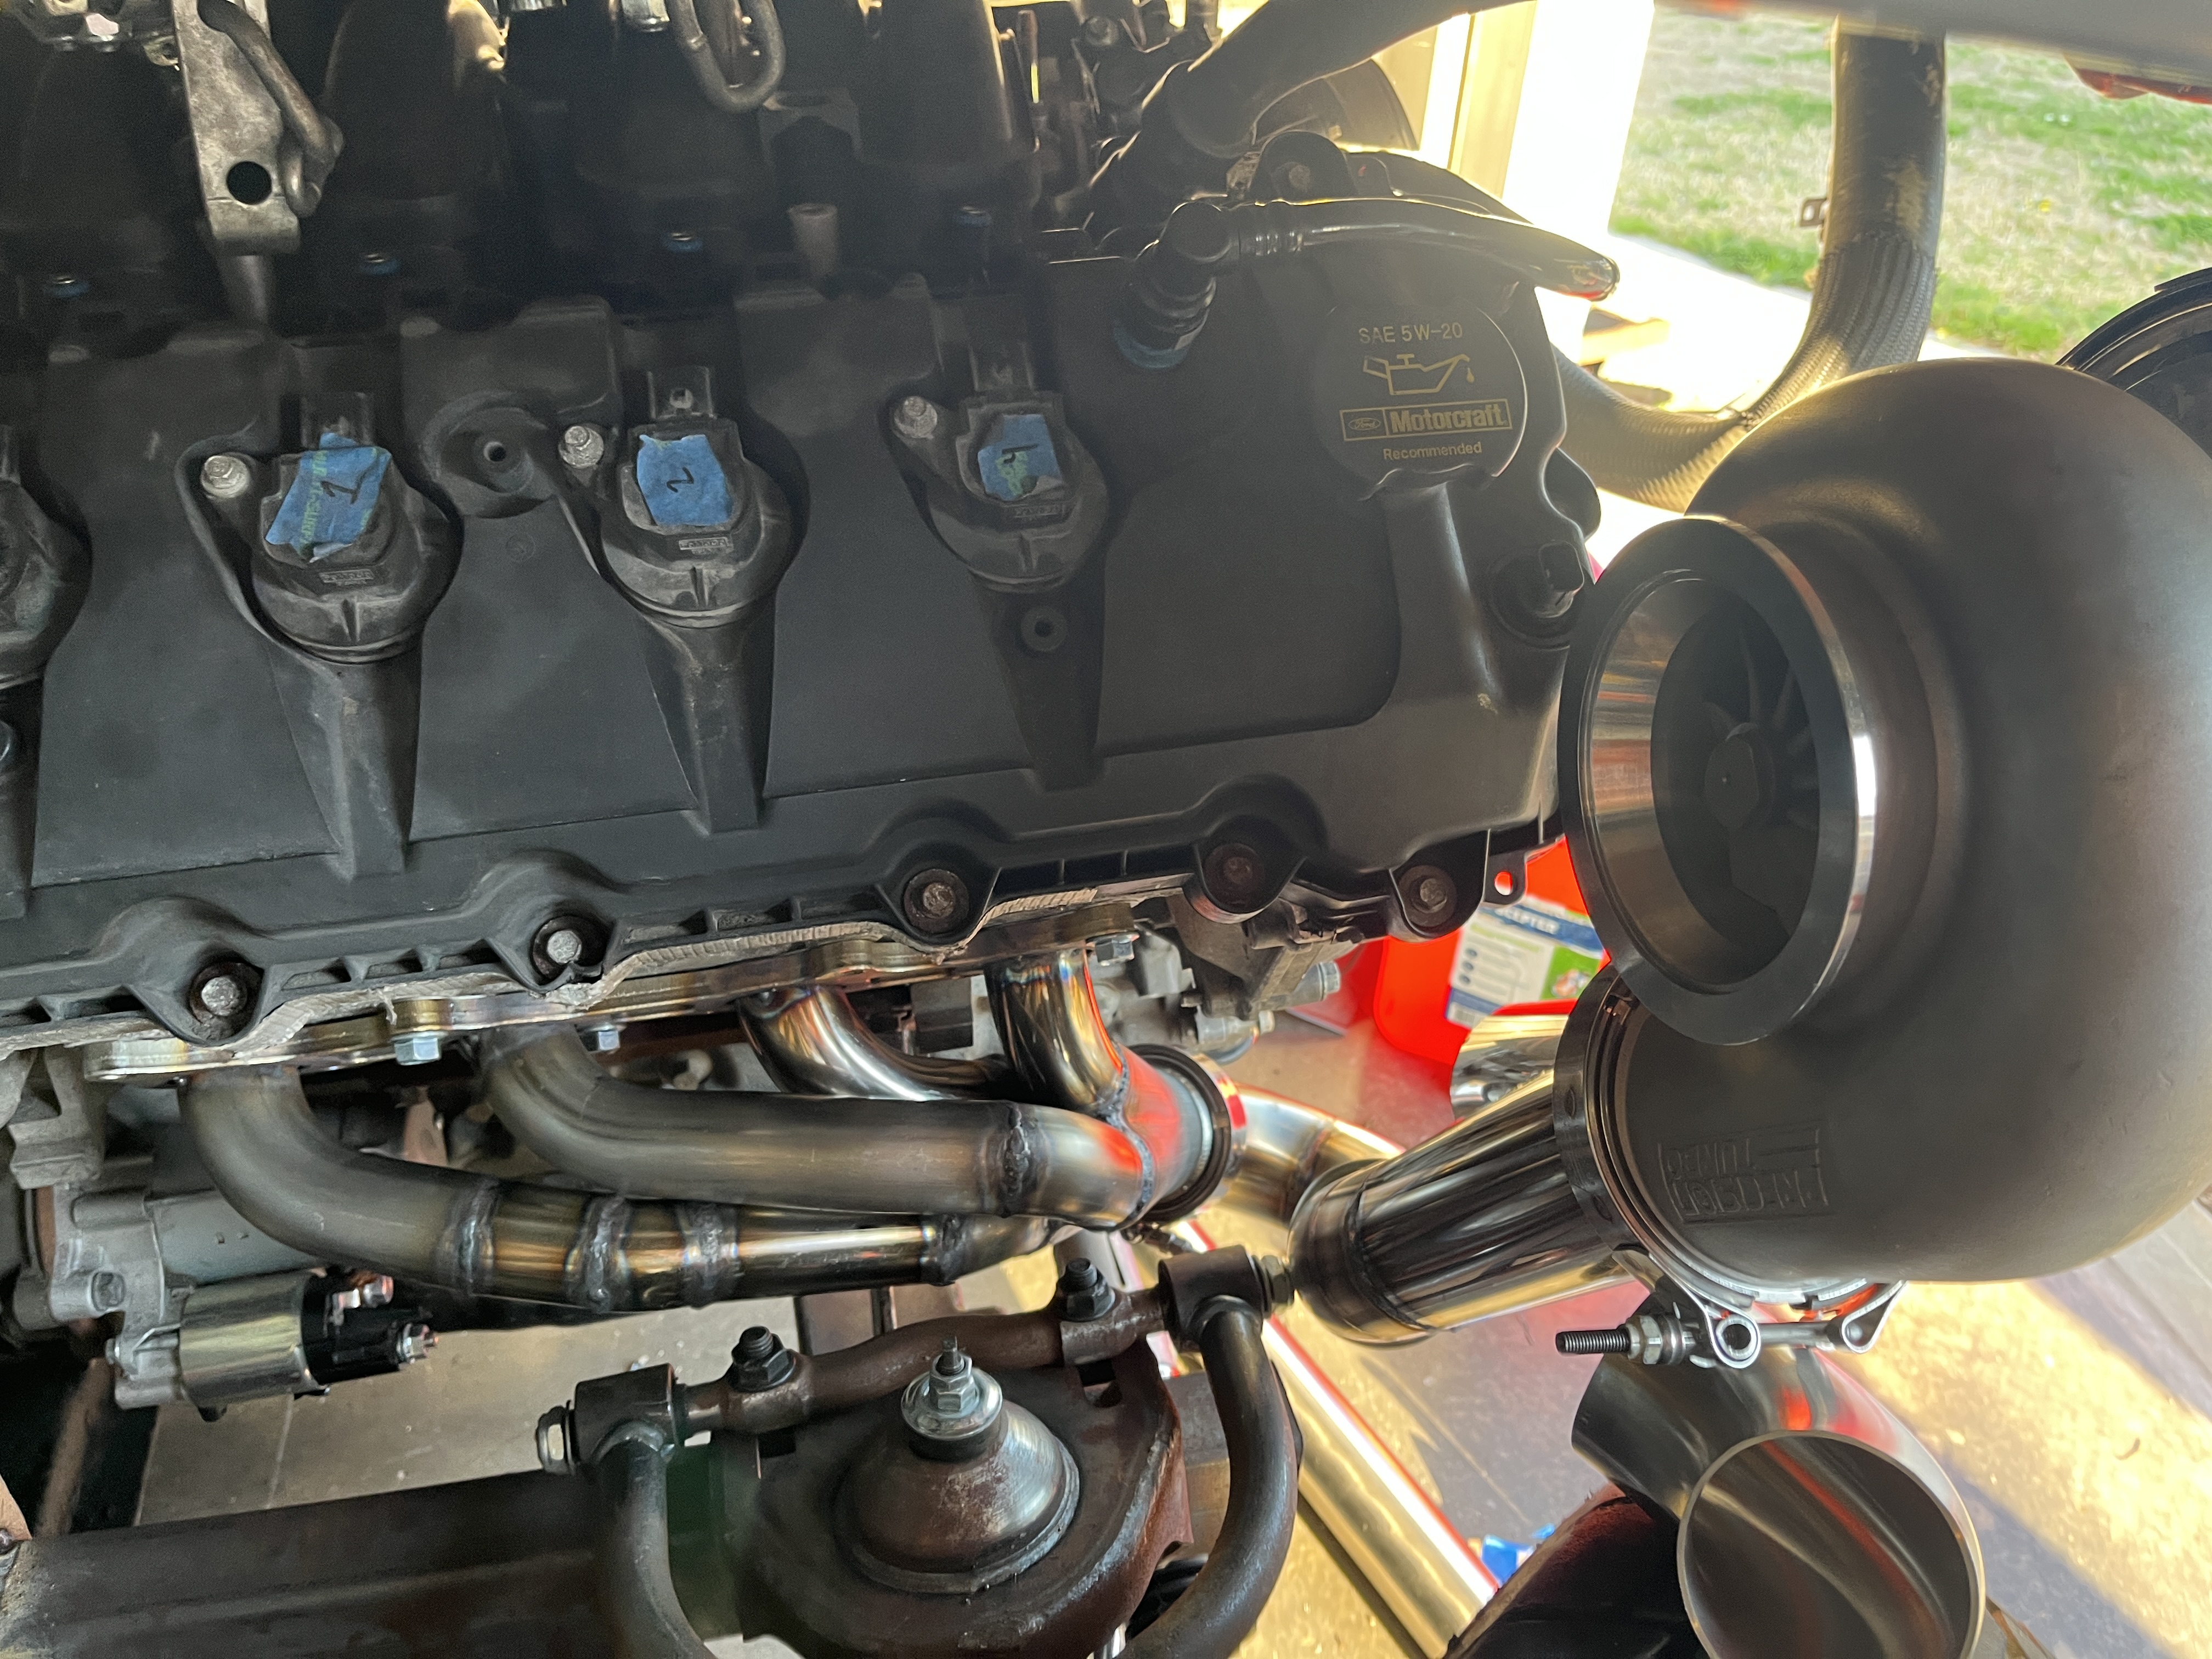
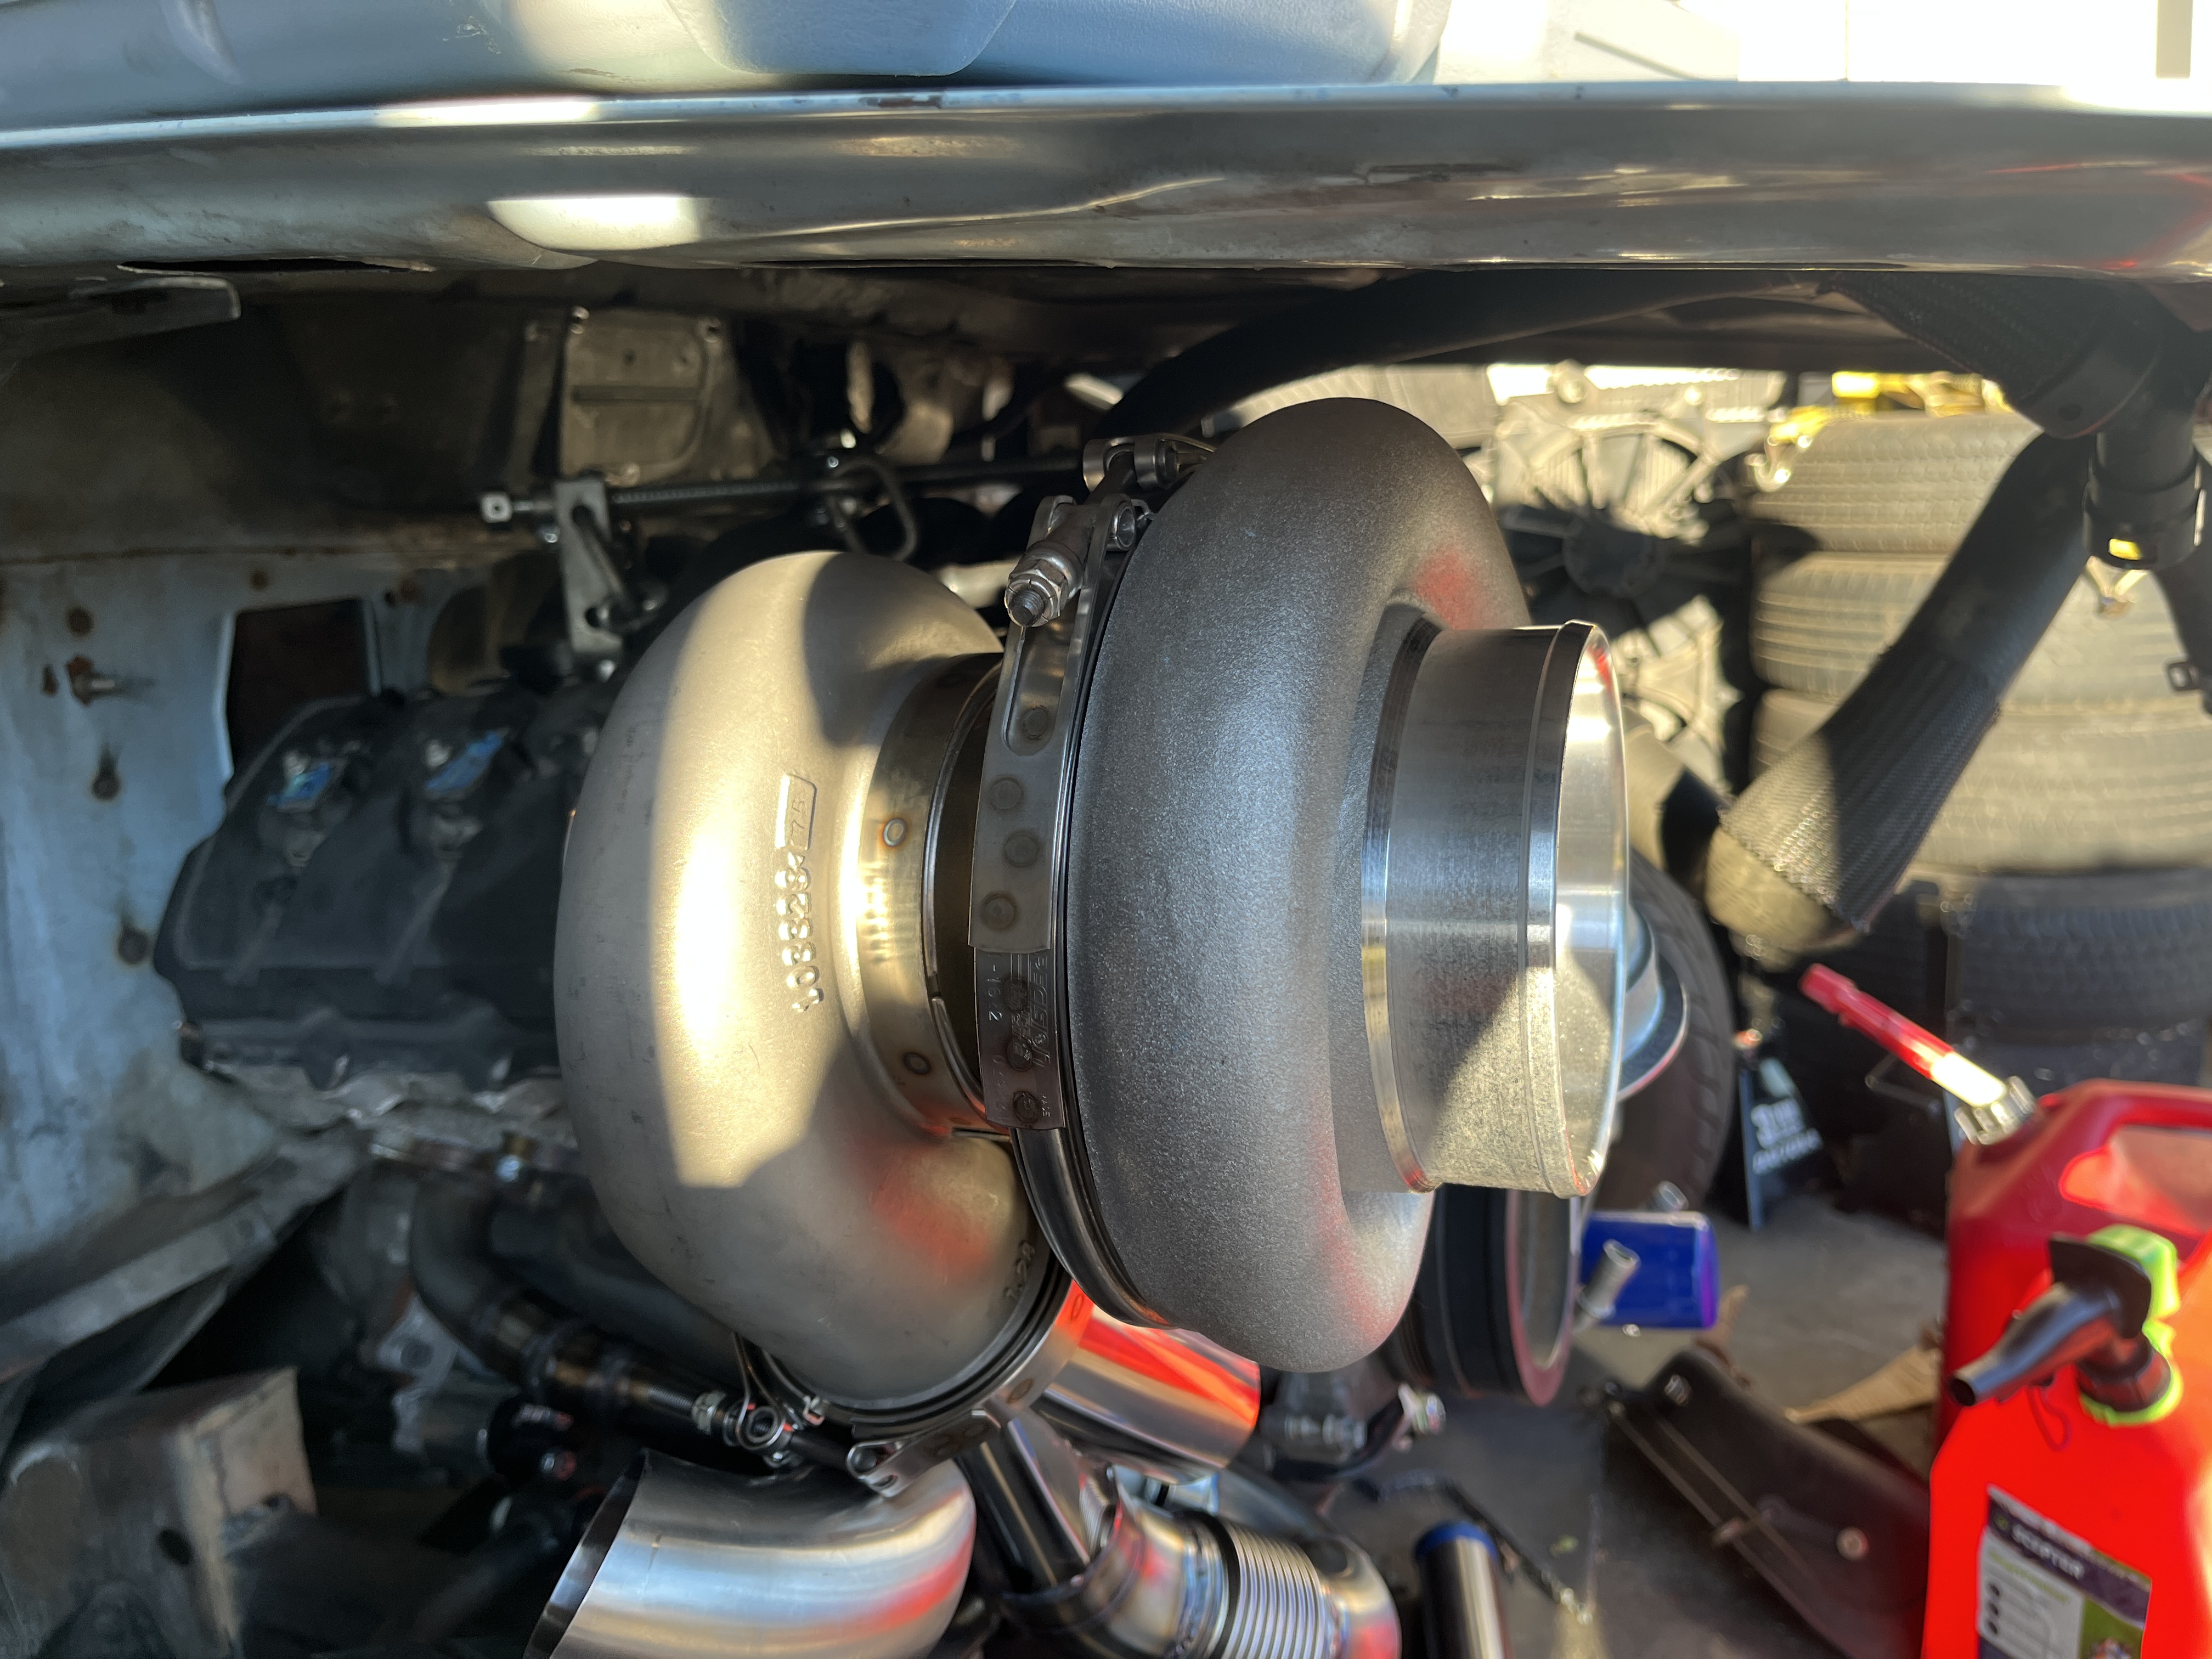


Didn't finish the crossover per se, as I have about half of the finish welding to do, but we'll call it complete. Very happy with how it looks and especially my use of space and not sticking out much beyond the crank pulley (only a little on the driver's side) as there was only an inch or two between the stock radiator fans and the pulley.
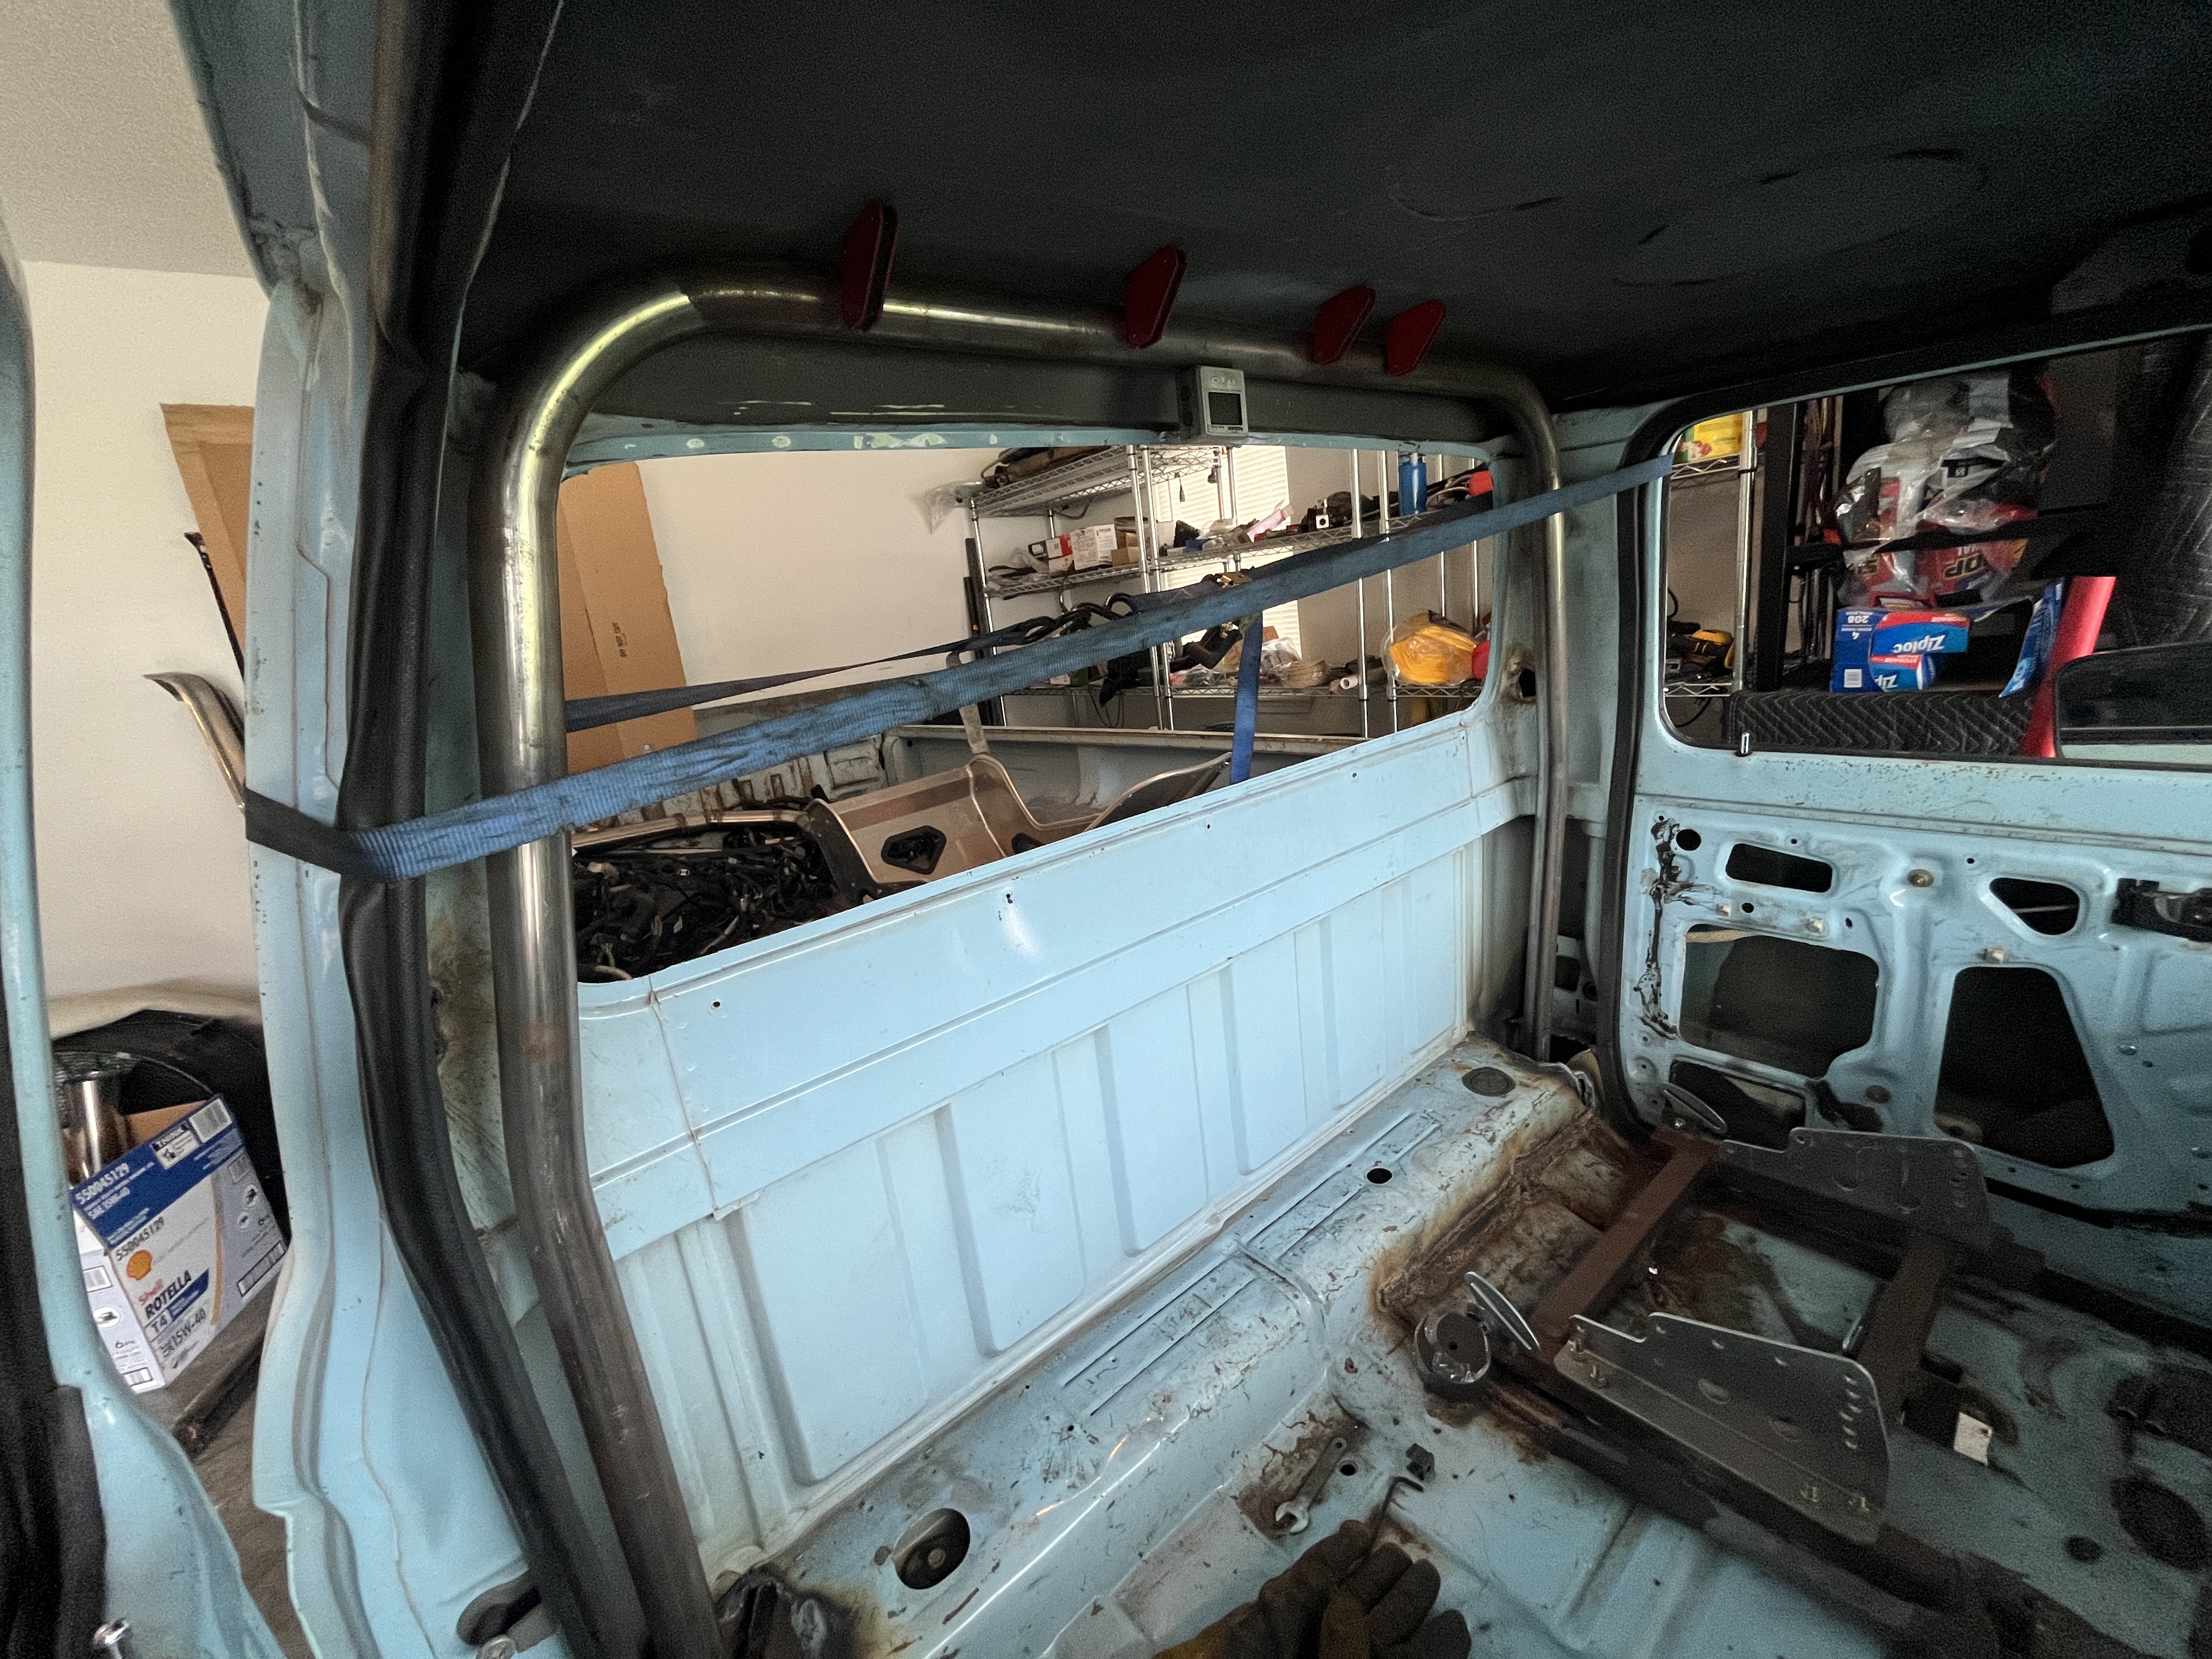
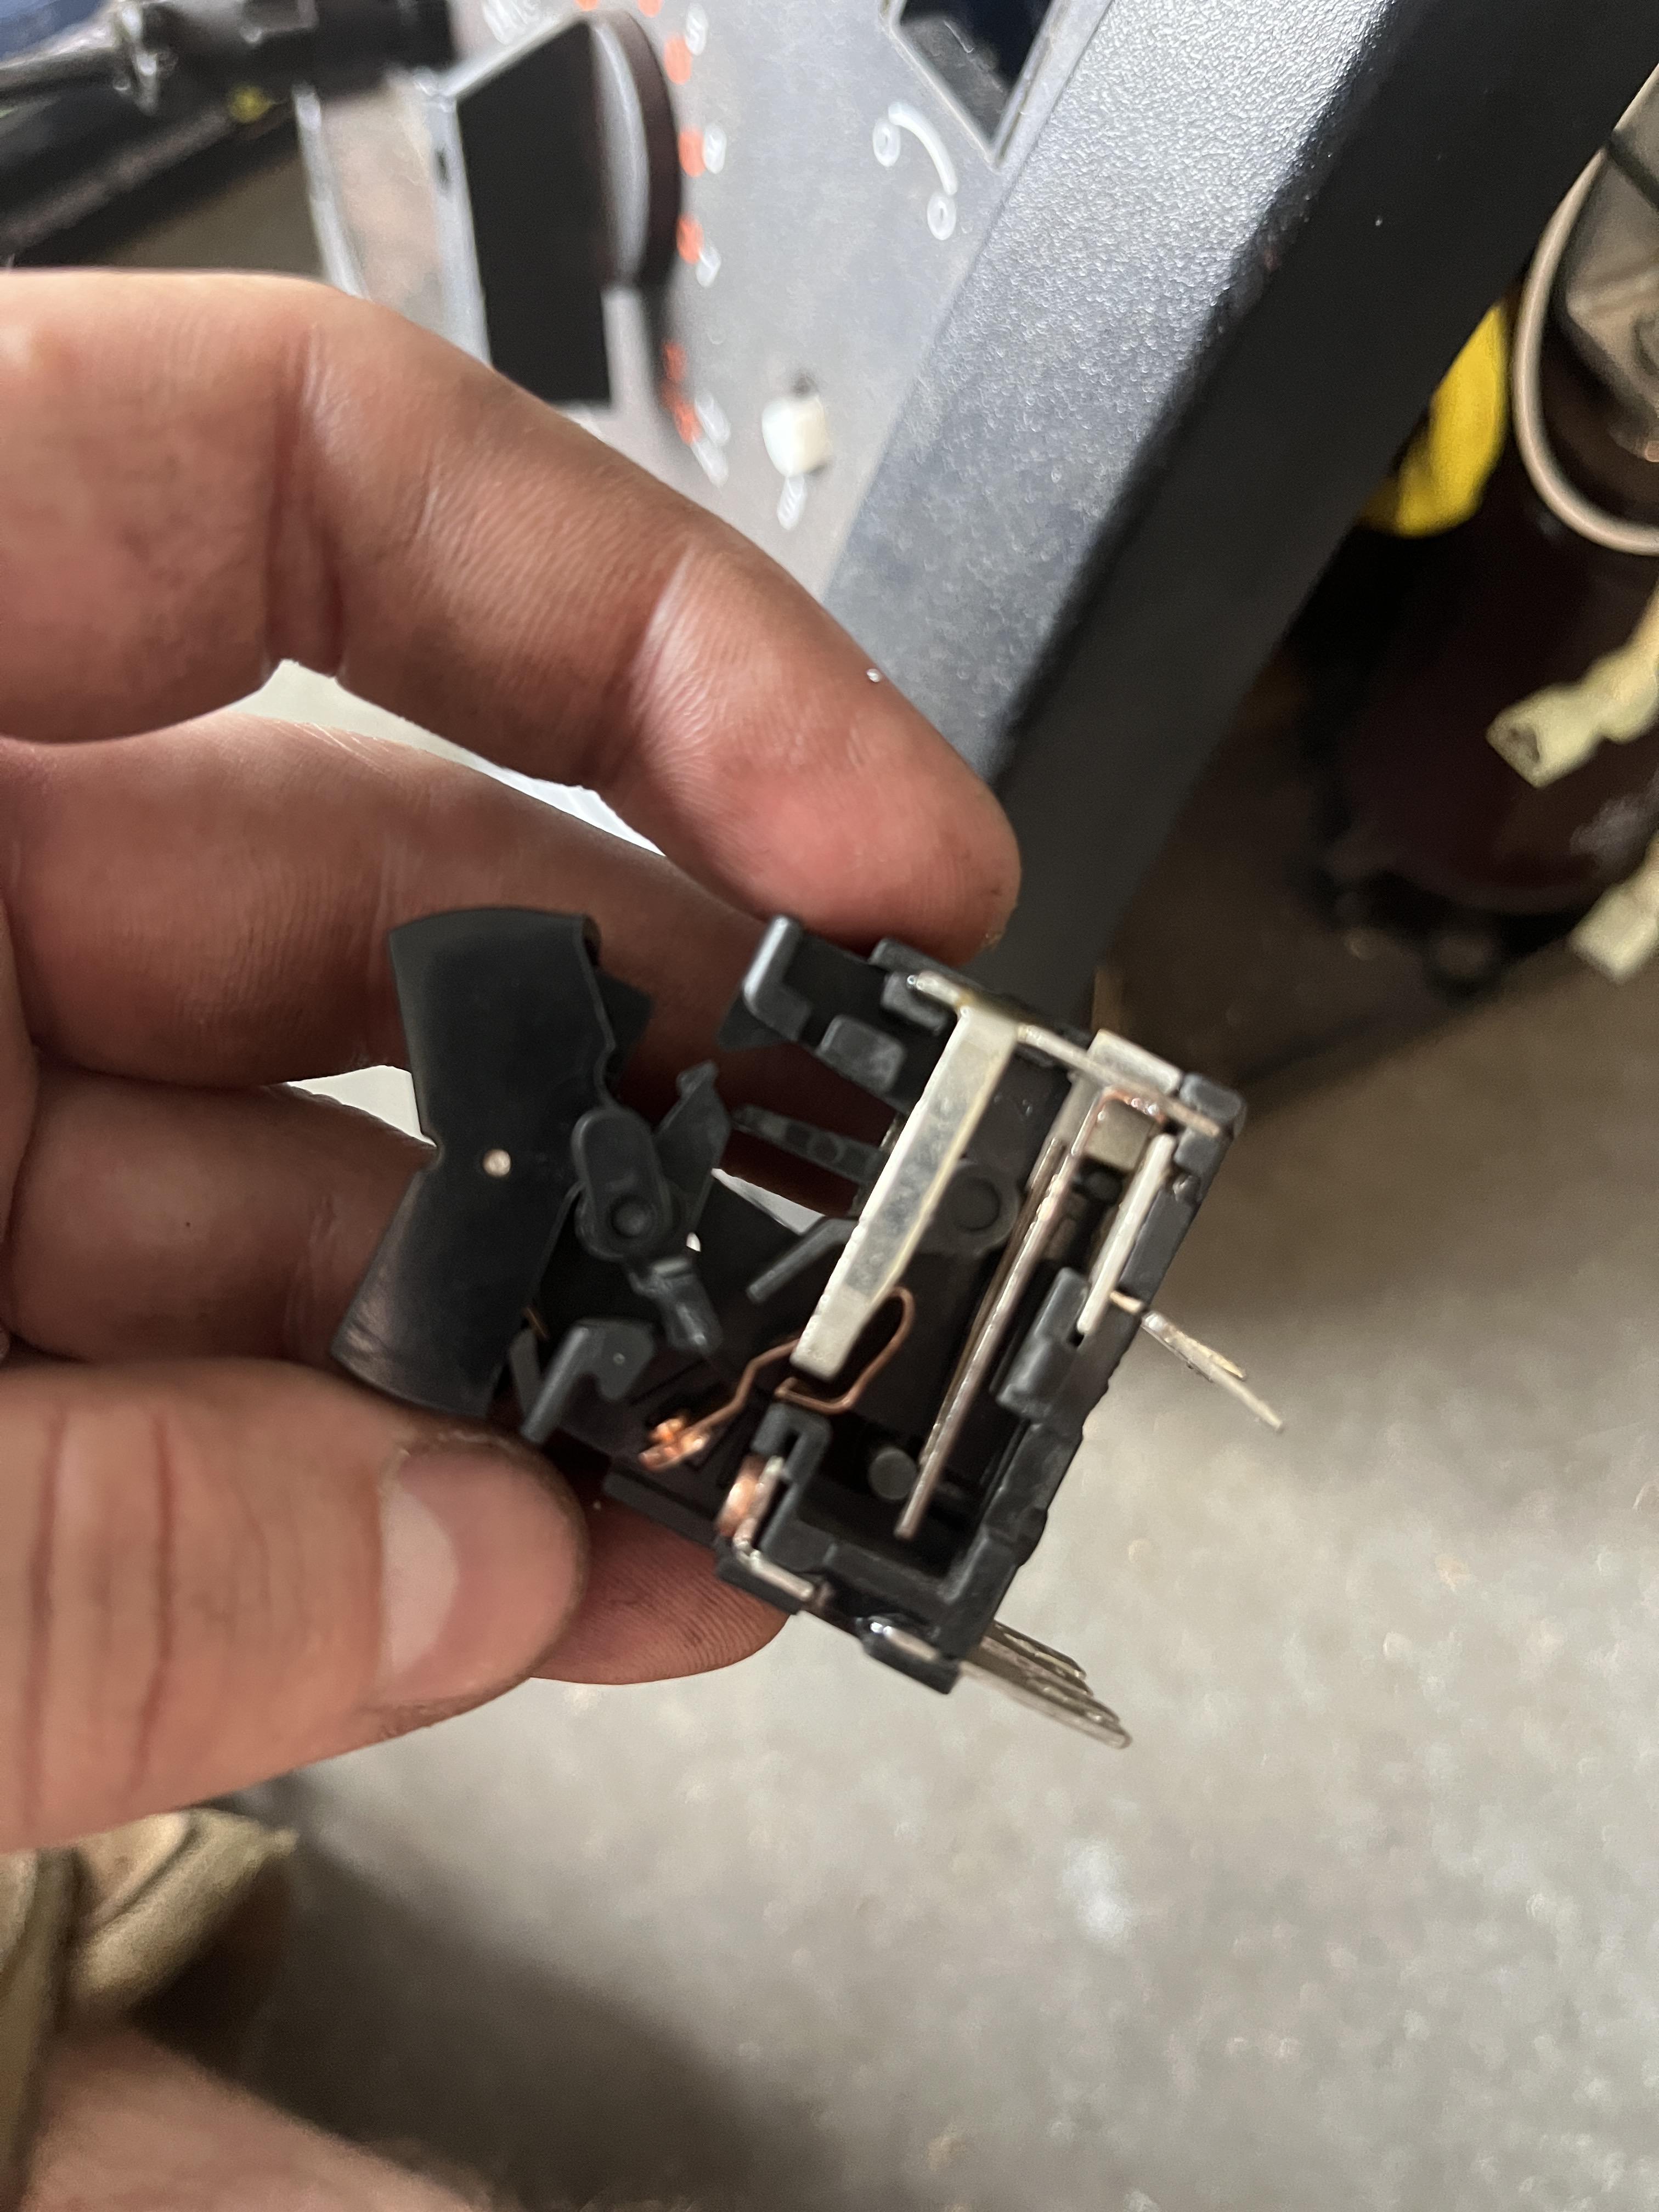
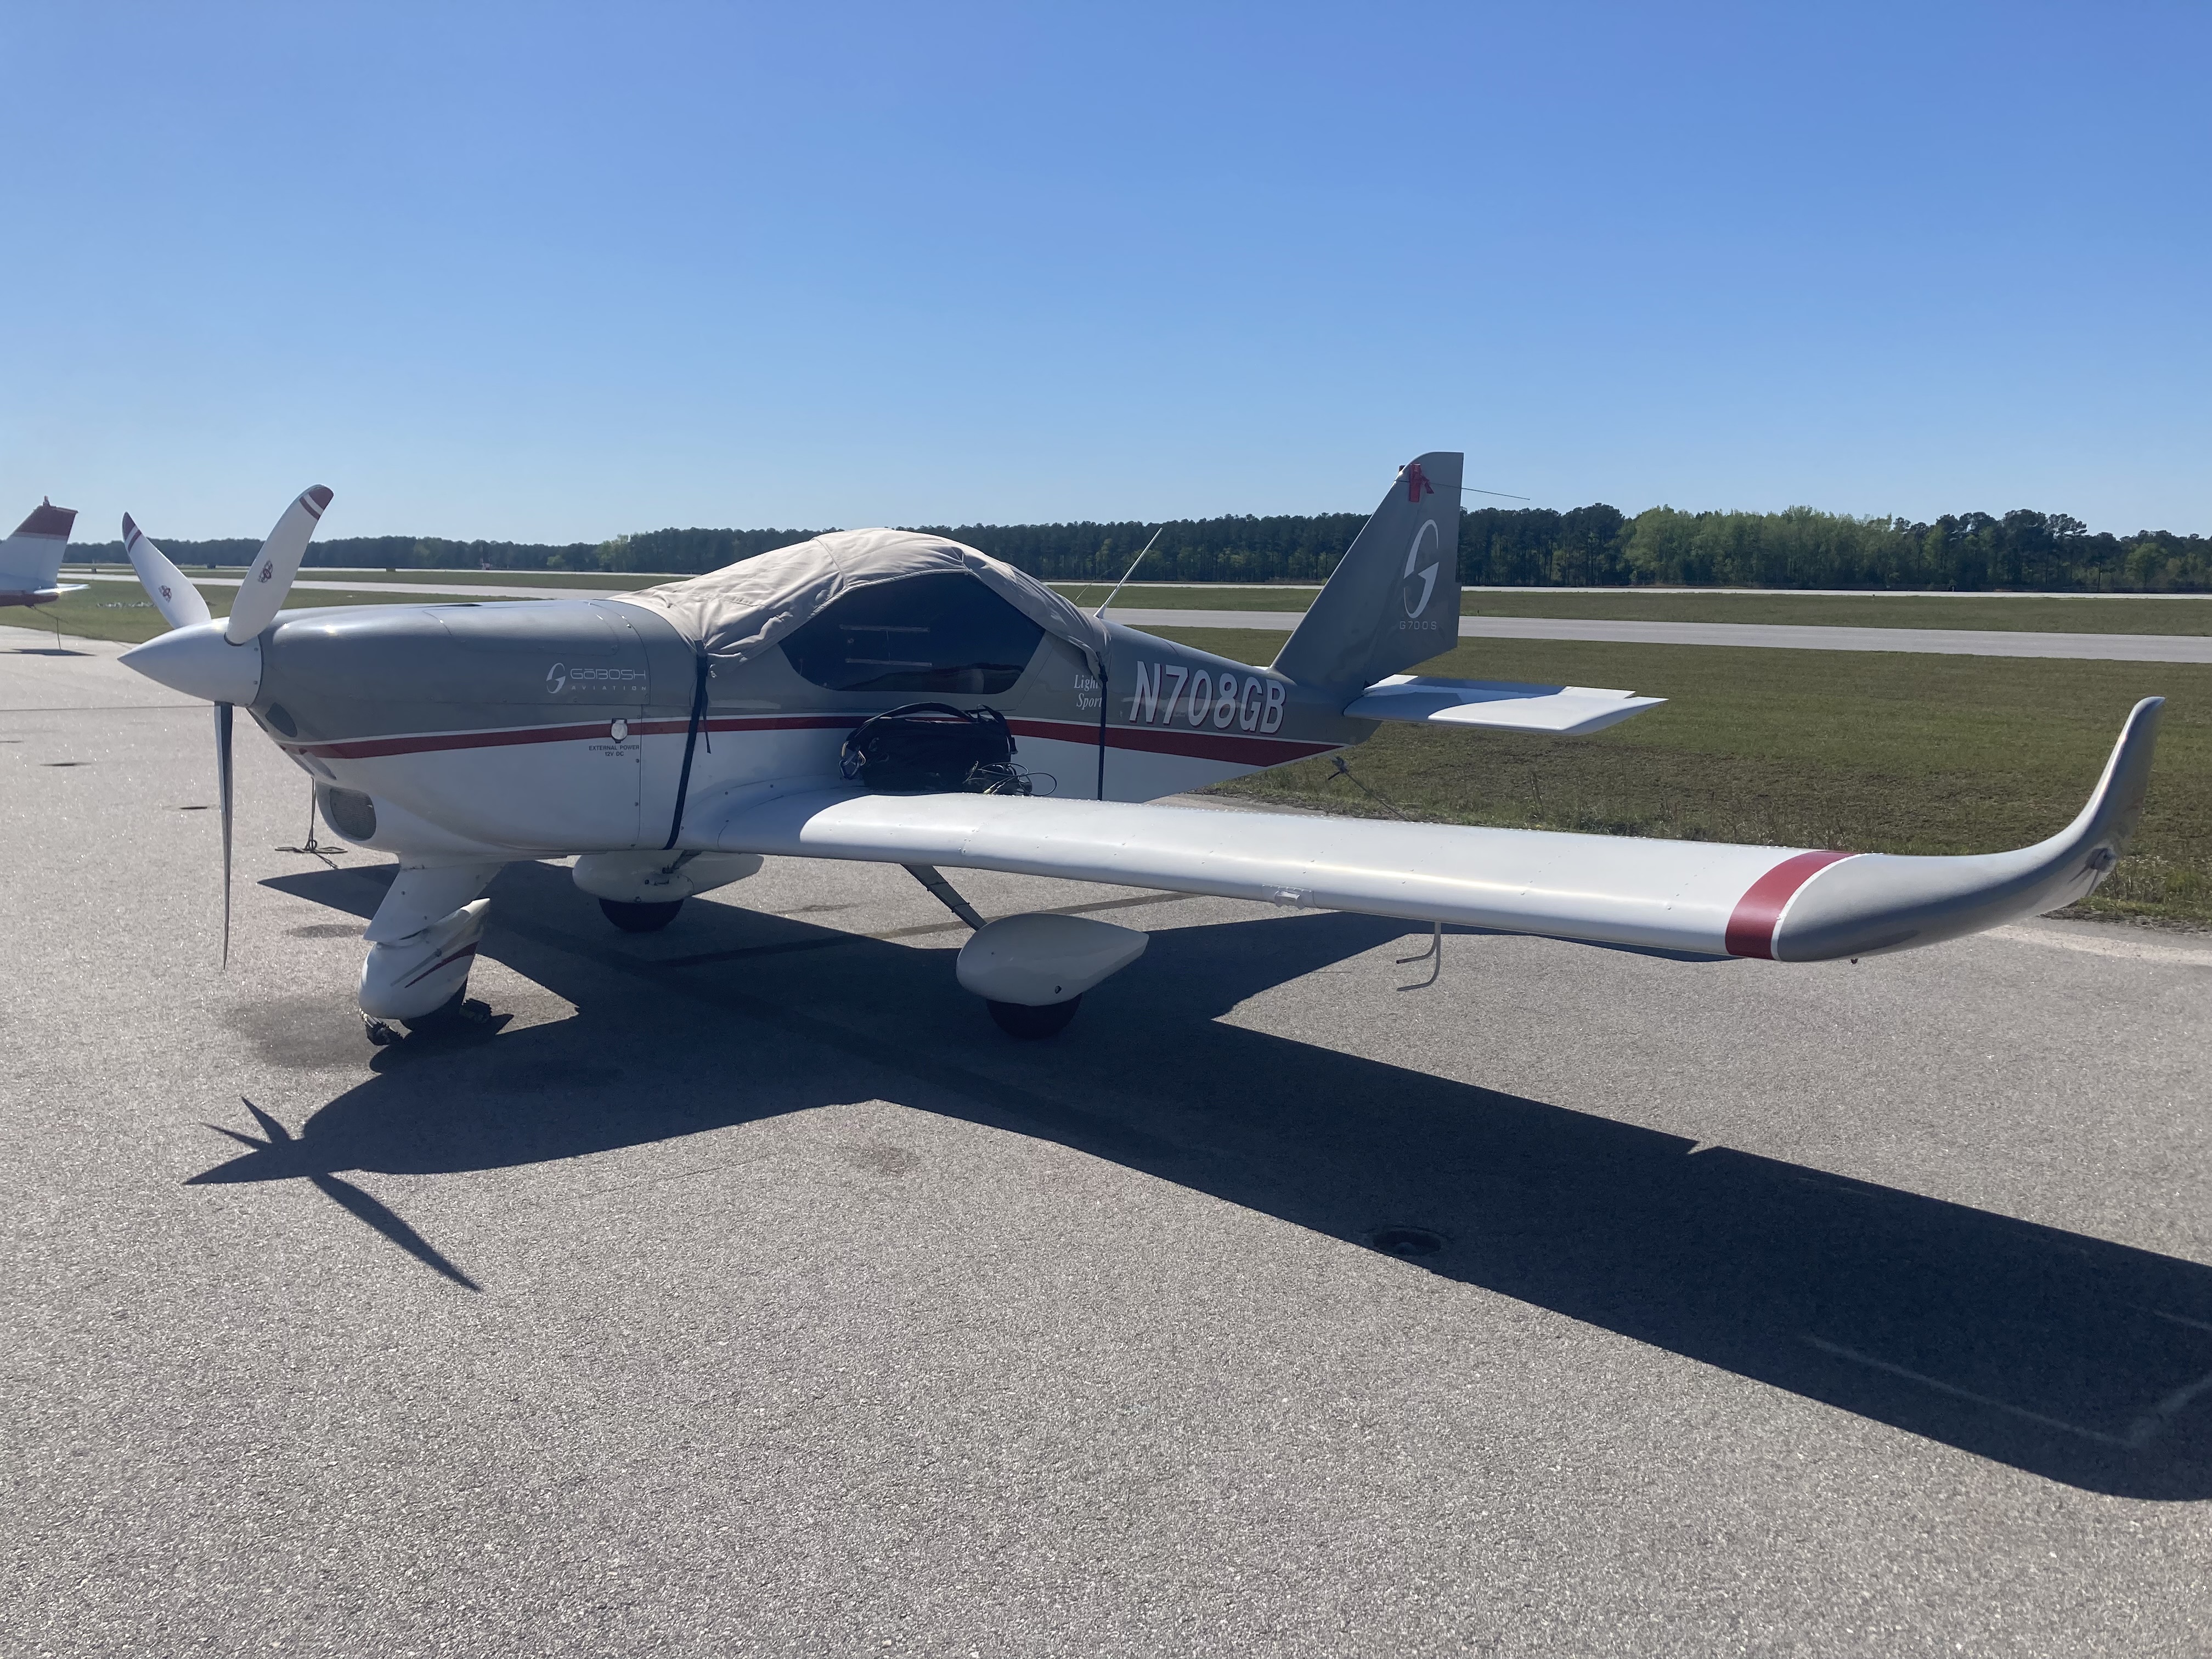
Hey everyone! Sorry I've been absent for a bit. Bought an airplane so I've been flying that instead of working on the Ranger. Anyway, started the roll cage install and progress was halted by a broken power switch on my MIG welder. Short video below!
Similar threads
- Replies
- 5
- Views
- 198
- Replies
- 9
- Views
- 965
Support us!
Support Us - Become A Supporting Member Today!
Click Here For Details
Sponsor Links
