Planning a Ford Racing “Aluminator” Build with associated mods over the winter

Scott

Senior Member
S197 Team Member
Joined
Nov 17, 2009
Posts
2,337
Reaction score
43
Location
King City, Ontario, Canada
Using the floor jacks again the subframe connector was held in place making sure all contact points were flush with the frame. The subframe connector was tack welded in place at each of the four contact points. Jacks were lowered and the welds were finished.

Curtis my youngest daughter’s boyfriend hard at work.


Process was repeated for the Driver’s side. The fuel lines were insulated from the welding heat with damp rags where required.

The space under the car with my camera did not permit a full length installed picture.

All subframe connector and the chassis weld points were sprayed with Kyrlon Black Hammered like this.


The plastic fuel line cover was sectioned into three pieces and the middle piece discarded. I cut the cover a little more complex than recommended in the BMR instructions to pick up an additional mounting point for the front cover.


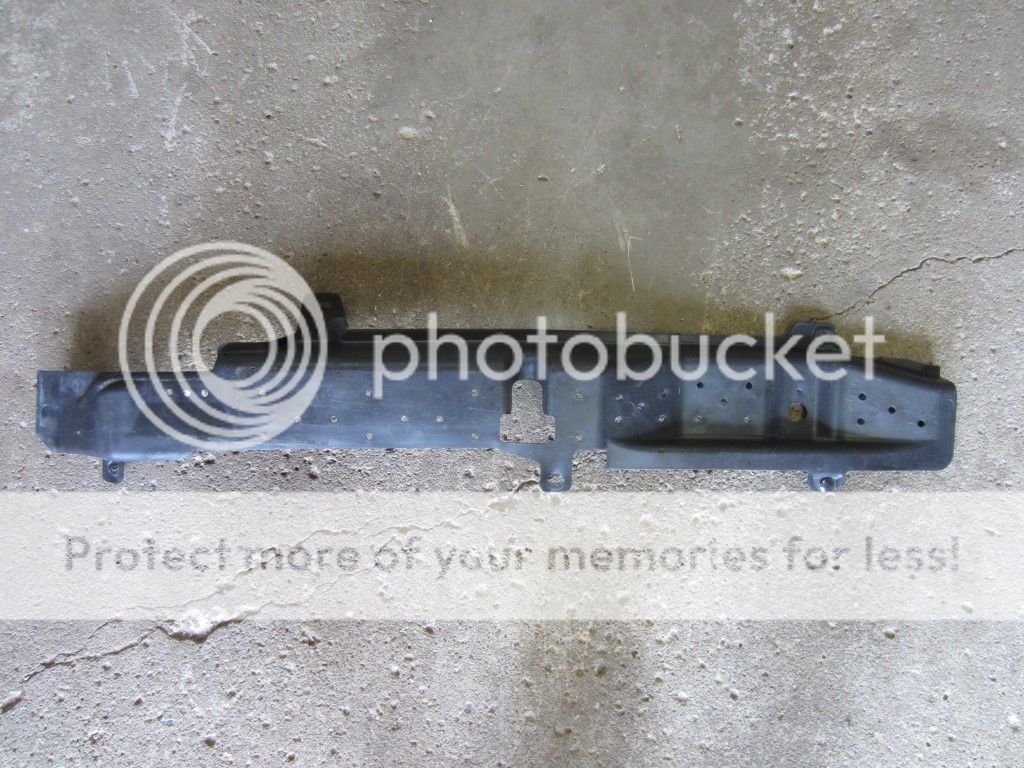
From the other direction showing the notch I made to retain the fastener mounting position.


Next up once the paint is dry the fuel covers and the parking brake cables go on.
 

Scott

Senior Member
S197 Team Member
Joined
Nov 17, 2009
Posts
2,337
Reaction score
43
Location
King City, Ontario, Canada
looking real good :thumb2:

Thanks, just finished the SFC's.

Paint dried and everything buttoned up. Front section of Fuel Line cover installed.


Rear section Fuel Line cover installed.


The parking brake cable brackets were installed on the studs located on the rear of the subframe connectors and secured with the nuts provided by BMR using an 11mm wrench.


Scott

Senior Member
S197 Team Member
Joined
Nov 17, 2009
Posts
2,337
Reaction score
43
Location
King City, Ontario, Canada
Back to the Differential

Had a couple of hours garage time yesterday and you can’t win…..just a few short weeks ago it was too cold to work in the garage and the last couple of days it has been too hot and humid.

Managed to get the back of the car up on stands and unbolted or removed the following: Panhard bar, bottom shock bolts, anti-roll bar, air bag mounts inside the trunk, brake calipers, axle speed sensors, rear LCA bolts.

Differential should be pretty much ready to come out after the drive shaft and upper UCA mount are disconnected and the air lines are released.


Scott

Senior Member
S197 Team Member
Joined
Nov 17, 2009
Posts
2,337
Reaction score
43
Location
King City, Ontario, Canada
Differential is out and the air bags transferred over.


In addition to swapping the differential I am also exchanging my OEM UCA mount for a BMR mount. I have loosened the two rear UCA mount bolts with an 18mm socket and long extension. In preparation for removing the OEM UCA mount the gas tank strap bolts were also loosened with a 17mm socket. To access the front UCA mount bolt the rear seat delete bottom panel will need to removed.


BMR UCA Mount, part number UCM001


I noticed when aired out the differential is contacting the 3” over axle pipes this is with my shortened bump stops removed.


gtman

forum member
Joined
Aug 9, 2014
Posts
284
Reaction score
0
Looks great, thanks for sharing the pics. Glad to see other people putting in work and parts i cant afford. Keep it up man
 

Scott

Senior Member
S197 Team Member
Joined
Nov 17, 2009
Posts
2,337
Reaction score
43
Location
King City, Ontario, Canada
Looks good I gotta get the subframe before something bad happens

Thanks!

Got a bit more done in my garage time today.

From inside the car front seats were moved full forward, the two upper bolts at the harness bar removed, the four fasteners retaining the rear seat delete were removed and the lower rear set delete panel was lifted to access the front UCA bolt. Broke the bolt loose with an 18mm socket and a long ratcheting breaker bar.

From under the car the two remaining UCA mount bolts were removed with an 18mm socket, long extension and a ratcheting breaker bar.
Driver side gas tank strap was removed with a 17mm socket, long extension and a ratcheting breaker bar. Passenger side bolt was loosened but it was not necessary to remove the bolt in order to pull the UCA and Mount free from the car.


OEM UCA mount (approximately 1/8” stamped steel) with Steeda Adjustable UCA compared to and BMR UCA Mount (approximately ¼” plate steel).


Steeda UCA was removed from the OEM mount and transferred to the BMR Mount. A liberal coating of silicone grease was applied to the bushings and the bolt was tightened to 129 ft-lbs with two 22mm sockets. The design of the Steeda UCA only allows it to be installed in the BMR Mount lower holes.


Scott

Senior Member
S197 Team Member
Joined
Nov 17, 2009
Posts
2,337
Reaction score
43
Location
King City, Ontario, Canada
Added Amsoil SAE 75W-140 synthetic gear lube using an Amsoil Auto/Marine pump. With the reduced volume of the spool and the larger capacity of the Ford Girdle it was close to three quarts before lubricant reached the bottom of the fill hole in the housing.


Added a little Loctite 567 Thread Sealant to the Girdle and Housing fill Plugs and snugged them down.


While under the car the drive shaft matting surface that bolts to the pinion flange was cleaned up with some emery cloth.

Before.


And after.


High Strength Loctite was removed from the three UCA Mount bolts with a wire wheel. UCA and Mount were slipped in place with a little red Loctite applied to the bolts. The bolt in the cabin was tightened to 129 ft-lbs with an 18mm socket and the rear bolts were tightened to 85 ft-lbs with the same socket.


eighty6gt

forum member
Joined
May 9, 2011
Posts
4,299
Reaction score
405
I like this build thread, you're doing all the stuff I am but are actually bothering to take photos! Hehe. I'm pretty OCD with painting brackets, cleaning wiring harnesses, what have you.
 

Scott

Senior Member
S197 Team Member
Joined
Nov 17, 2009
Posts
2,337
Reaction score
43
Location
King City, Ontario, Canada
I like this build thread, you're doing all the stuff I am but are actually bothering to take photos! Hehe. I'm pretty OCD with painting brackets, cleaning wiring harnesses, what have you.

Thanks! My body is riddled with arthritis so taking pictures and sitting down to type is a bit of a break for me.
 

Scott

Senior Member
S197 Team Member
Joined
Nov 17, 2009
Posts
2,337
Reaction score
43
Location
King City, Ontario, Canada
Cleaned and put new silicone grease on the LCA rear bushings. Got the LCA bolts and the UCA bolt in.


Wanted to make clean cuts on the air lines, have looked and looked but can’t locate my cutter. Likely spent more time looking for the cutter than it took to get the differential in place. Going to risk putting the air lines in without a new cut and keep my fingers crossed.

I can see light at the end of the tunnel, up next:

- Attach the air lines
- Feed the air bag bolts through the floor and fasten the nuts
- Driveshaft
- Lower shock bolts
- Panhard Bar
- Sway Bar
- Rotors
- Calipers
- Speed sensors
- Wheels and tires
- Lower the car onto wheel cribs and torque everything that needs to be done with the chassis loaded.
 

Scott

Senior Member
S197 Team Member
Joined
Nov 17, 2009
Posts
2,337
Reaction score
43
Location
King City, Ontario, Canada
Could not wait any longer I had to slip a tire on and take a look see. It is going to be very tight but it looks like 325/50/15's are going to clear the fender.


Did find one fail and I will definitely have to go back to the OEM vent. The old differential had the vent on the other side and I do not think it hit the exhaust.


Scott

Senior Member
S197 Team Member
Joined
Nov 17, 2009
Posts
2,337
Reaction score
43
Location
King City, Ontario, Canada
Ok, everything now tightened to specifications while on wheel cribs except the Swaybar bolts at the axle housing, had to place the housing on stands to access them. Also had to replace the 325/50/15 on Race Stars with my Nitto’s on 18” rims to be able to get a wrench on the BMR LCA Relocation and LCA nuts.

Swapped out the vent.


Checked to see if the axle housing was centred - with the differential on stands, with wheels removed and fishing line taped to the fender weighted down with a couple of washers. Measured from the Strange Engineering logo on the face of the axle hubs to the fishing line. Ended up with 4-11/16” on the passenger side and 4-9/16” on the driver’s side. For 1/16 of an inch I am good to go as is for now.


All done! The Before:


And the After:


Scott

Senior Member
S197 Team Member
Joined
Nov 17, 2009
Posts
2,337
Reaction score
43
Location
King City, Ontario, Canada
Looks freakin awesome!!

Thanks, first time down on the ground since put away for the winter build.


All the rubber in the exhaust hangers was toast as the differential pushes on the exhaust when aired out. It was this way before the new diff but frankly I never noticed it. I replaced the two hangers on the driver's side but the passenger's need to be done as evident in these pictures.


Support us!

Support Us - Become A Supporting Member Today!

Click Here For Details

Sponsor Links

Banner image
Back
Top