one eyed willy
Pizzle fo shizzle
Ive been wanting one of these machines for some time. Great for finding any sort of small leaks. You wouldn't think they would be a arm and a leg.....but they are usually over $1k.....
I found a few ideas on line how to build a simple working one......
The way it works: using a glow plug and a power supply from a old PC, it will heat up mineral oil ( actually using baby oil, easy to find, makes my hands soft and smells good!)to around 350-450 degrees. As it heats it will turn into white smoke. Using a air compressor set to approx 5 PSI it will force the smoke out of the hose nozzle. I will be using a cheap PC power supply to power the glow plug, it needs about 12 volts @ 10 amps.
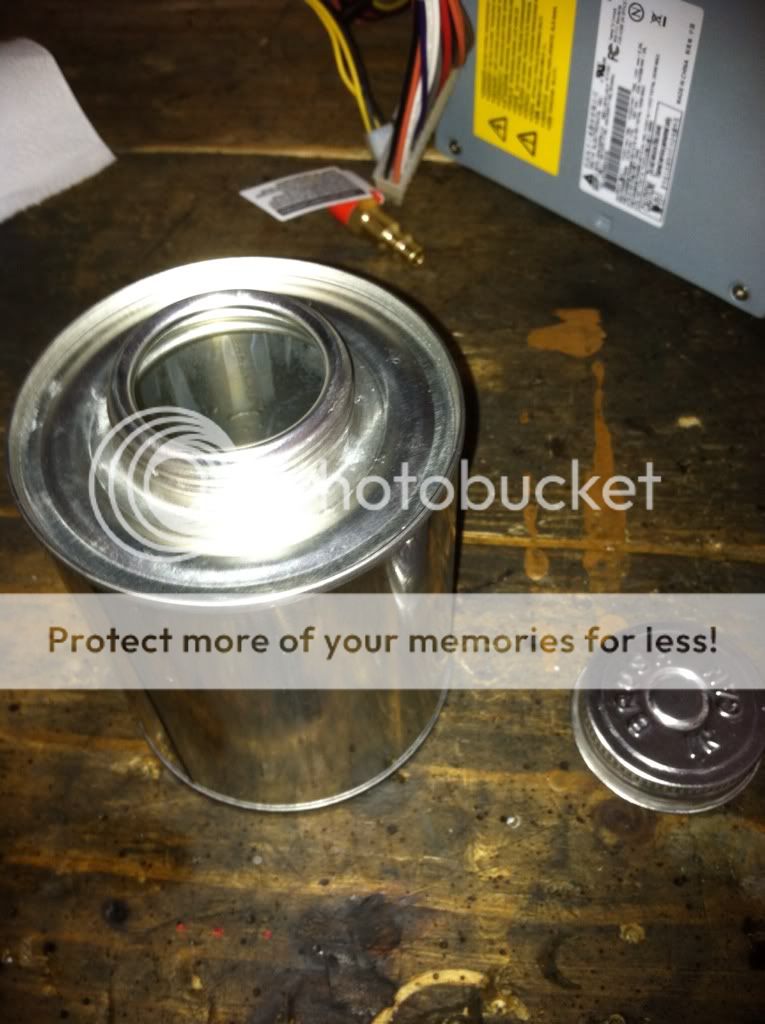
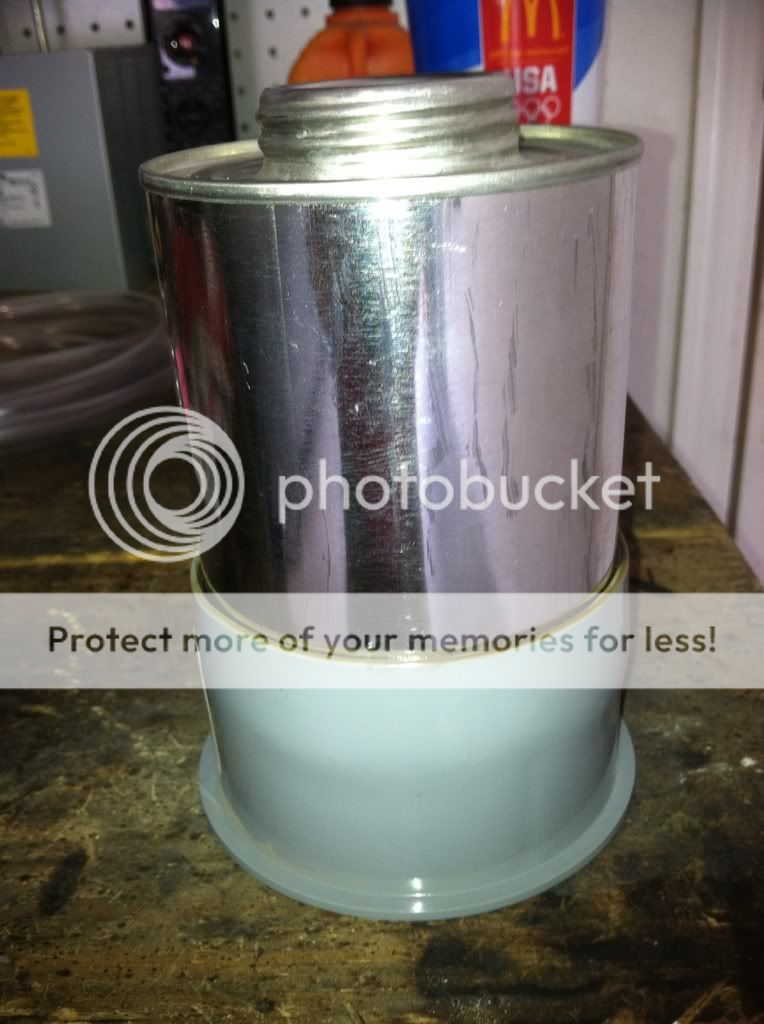
I'm using a PVC glue can, washed it out with acetone to get it nice and clean. Mounting the glow plug in the bottom. Mounting 2 fittings in the side for compressed air and a outlet hose. All fittings sealed with plumbers solder.
Works great...takes about 3 minutes to start filling up my entire exhaust or my turbo piping/ intake......smoke is easy to spot and will pinpoint things FAST!
Parts:
60G AC Delco glow plug $8 ( only get the true AC Delco )

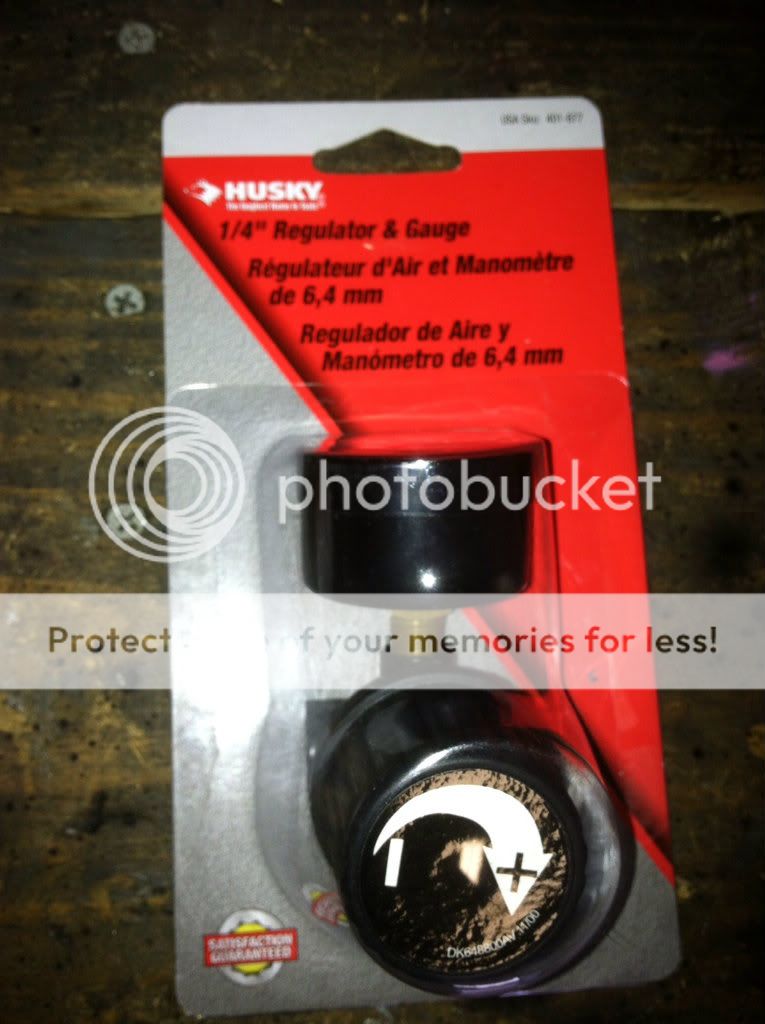
Air regulator $20
PC power supply, free from any old computer
PVC glue can, cleaned out with acetone $8
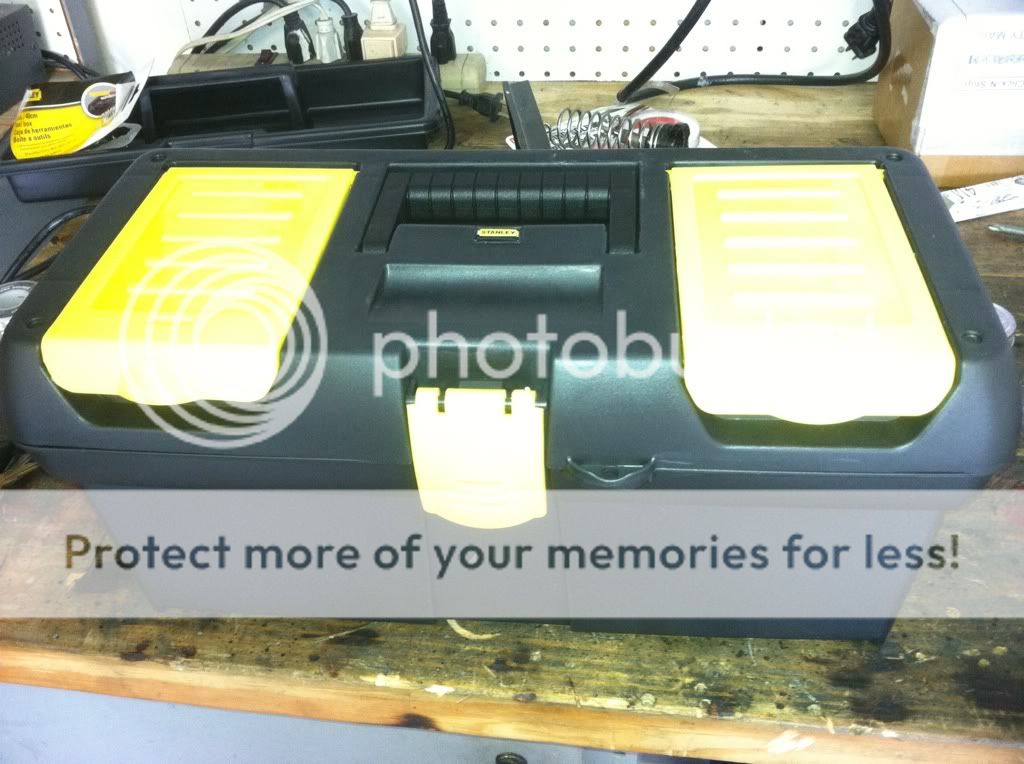
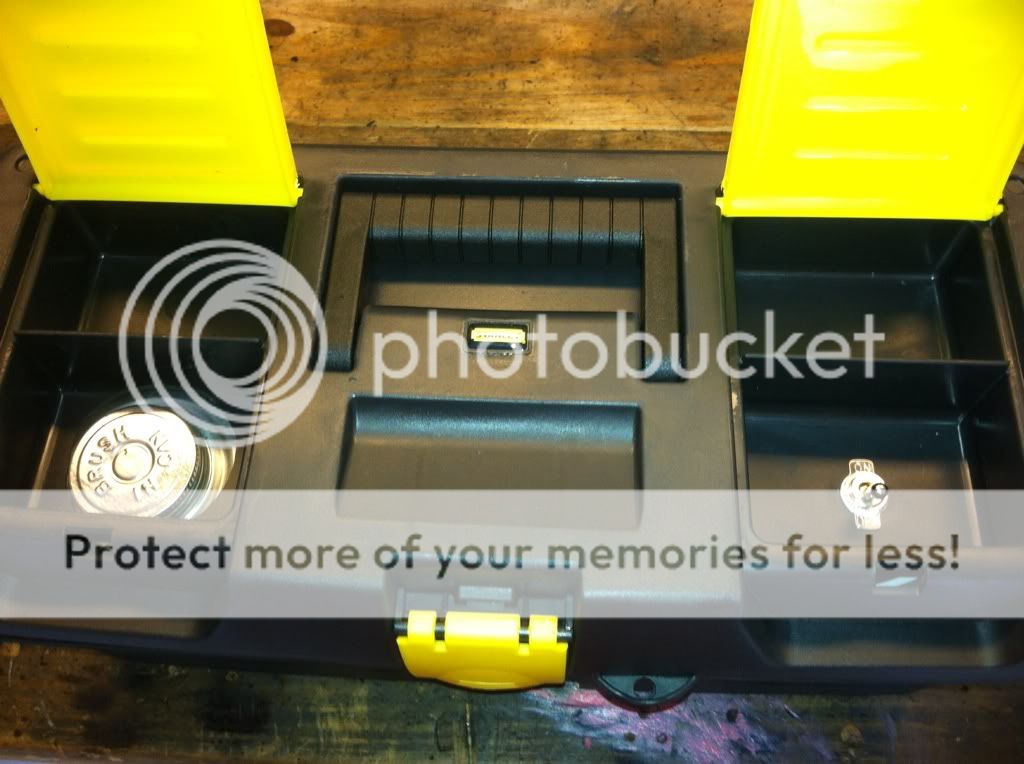
Cheap Tool Box to house everything $8
Baby oil $3

Misc fitting and hose $15
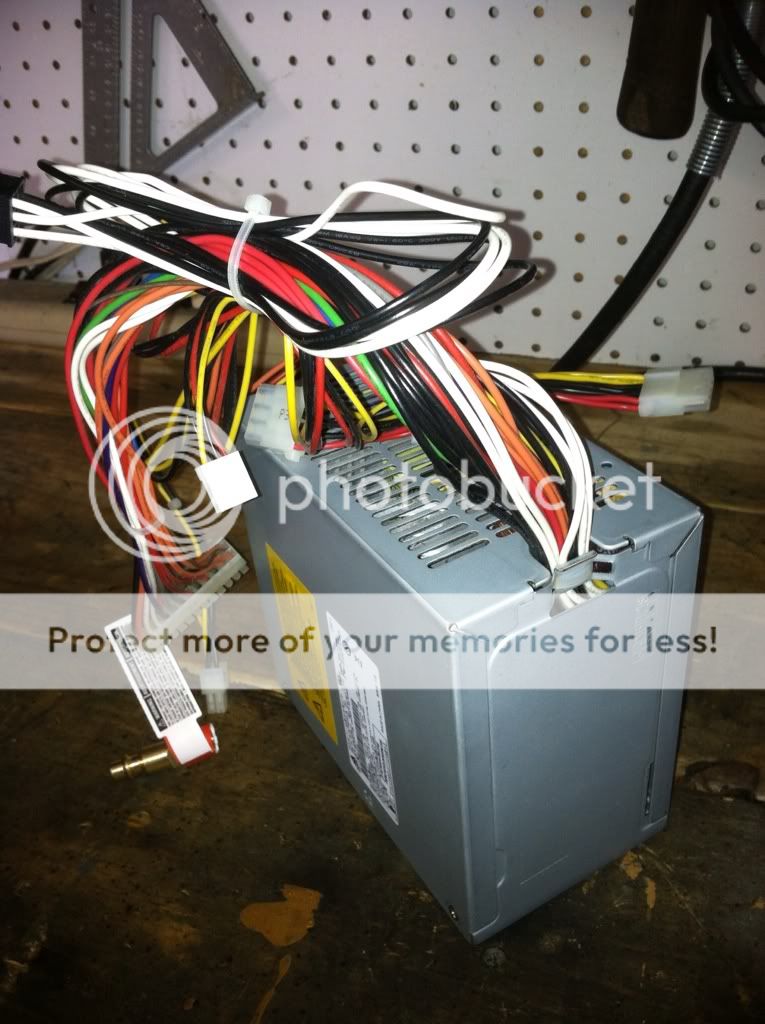
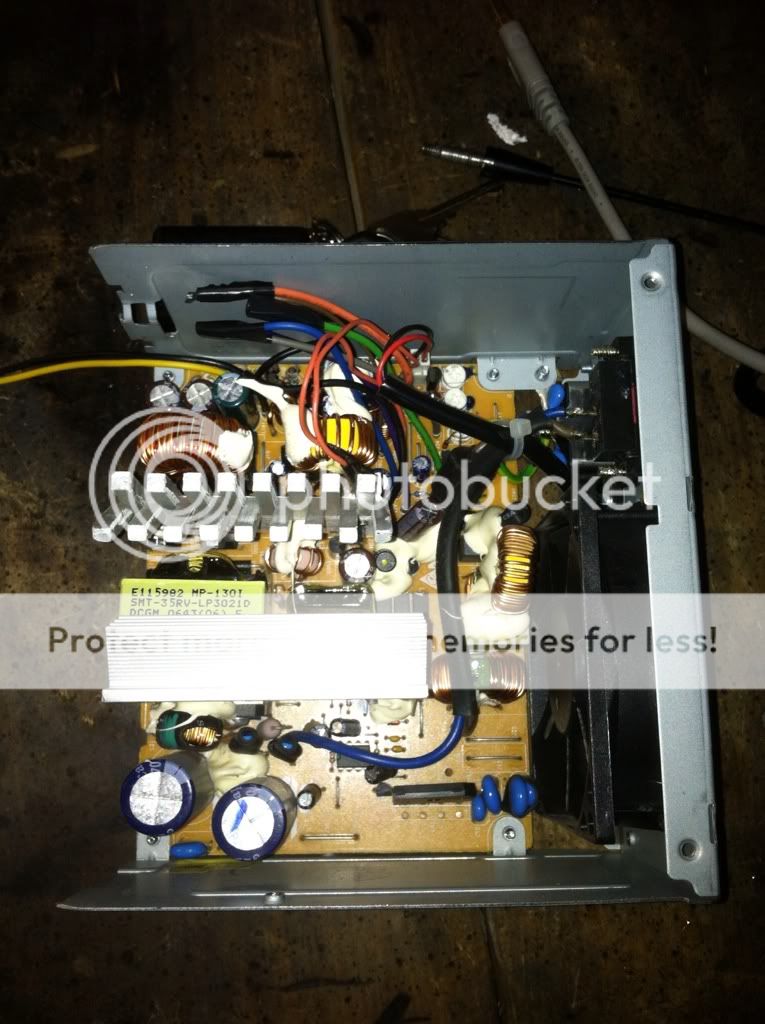
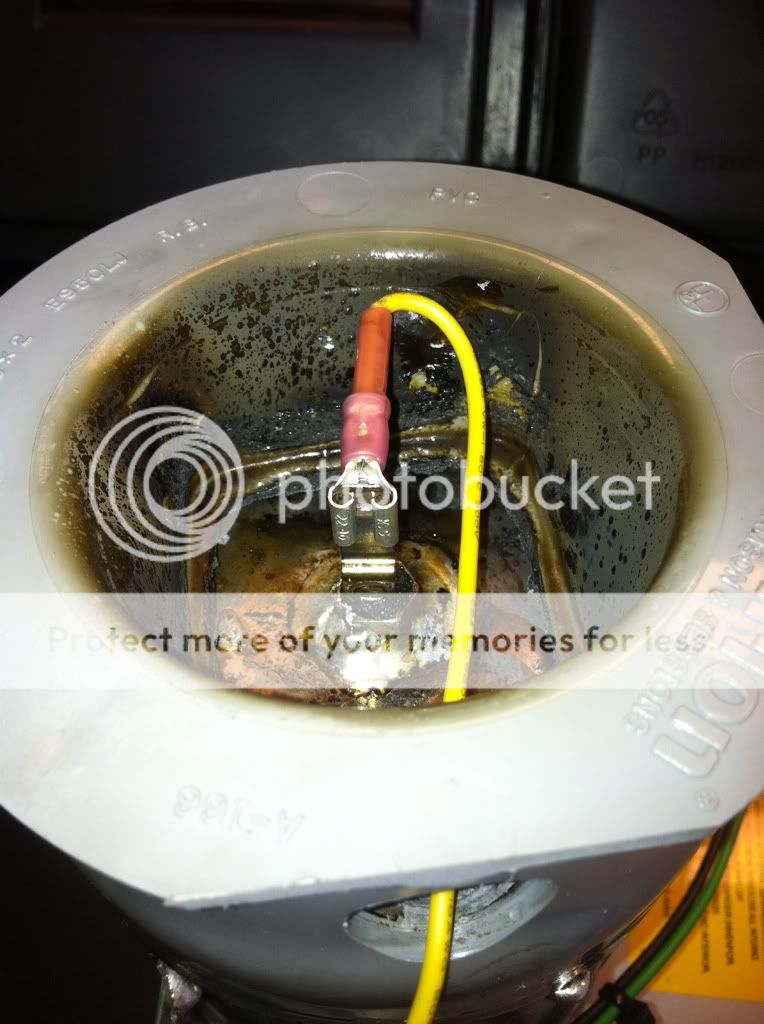
Prepping the PC power supply: power supply will supply 12 volts @ 10 amps to the glow plug when turned on. I cut all the wires out of the power supply with the exception of these wires.
1)Yellow 12v will go to the glow plug
2)Green goes to one side of a toggle switch to turn the PS on/off
3)Any black to the other side of the toggle switch for turning on the PS
4)Any Black will be secured to the side of the can to ground the glow plug
5)Color may vary on this wire, mine was brown.On the big plug, there is a orange wire on the very corner that has another wire in the same slot of that plug, follow that wire back and solder it to that same orange wire.
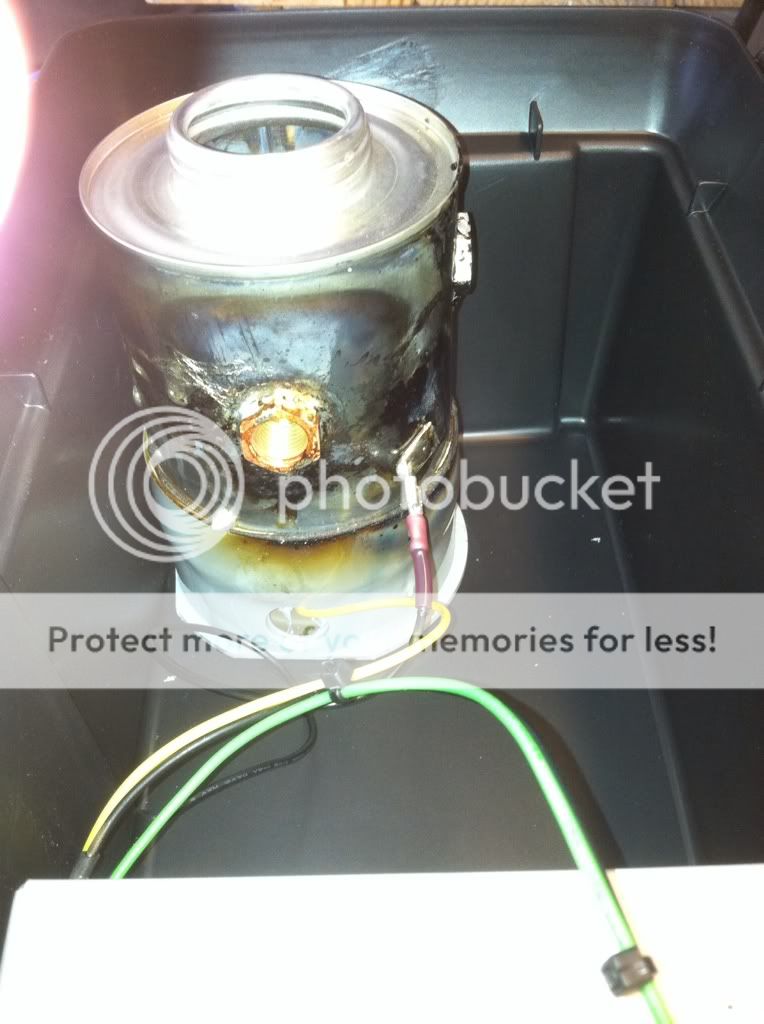
When you get done should provide 12 volts on the yellow and black, should look similar to the picture below, although I have not added my switch for the PS at this point.
Toggle switch mounted to the lid of the tool box, this is just a contact closure between any of the black wires on the power supply and the green wire.

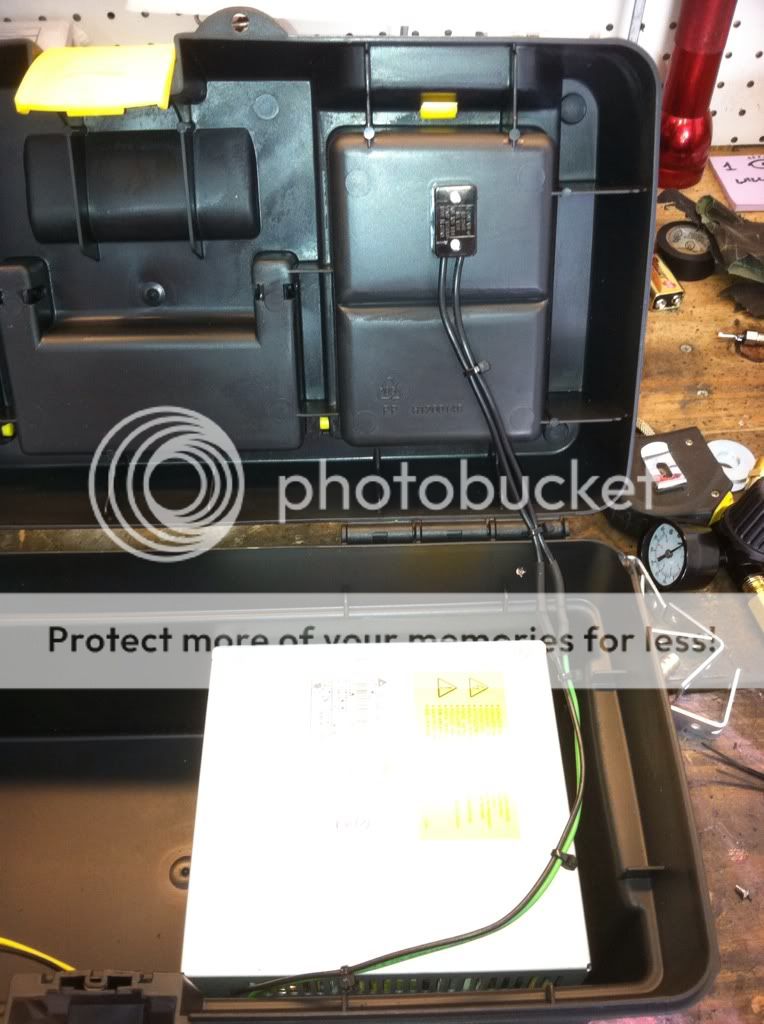
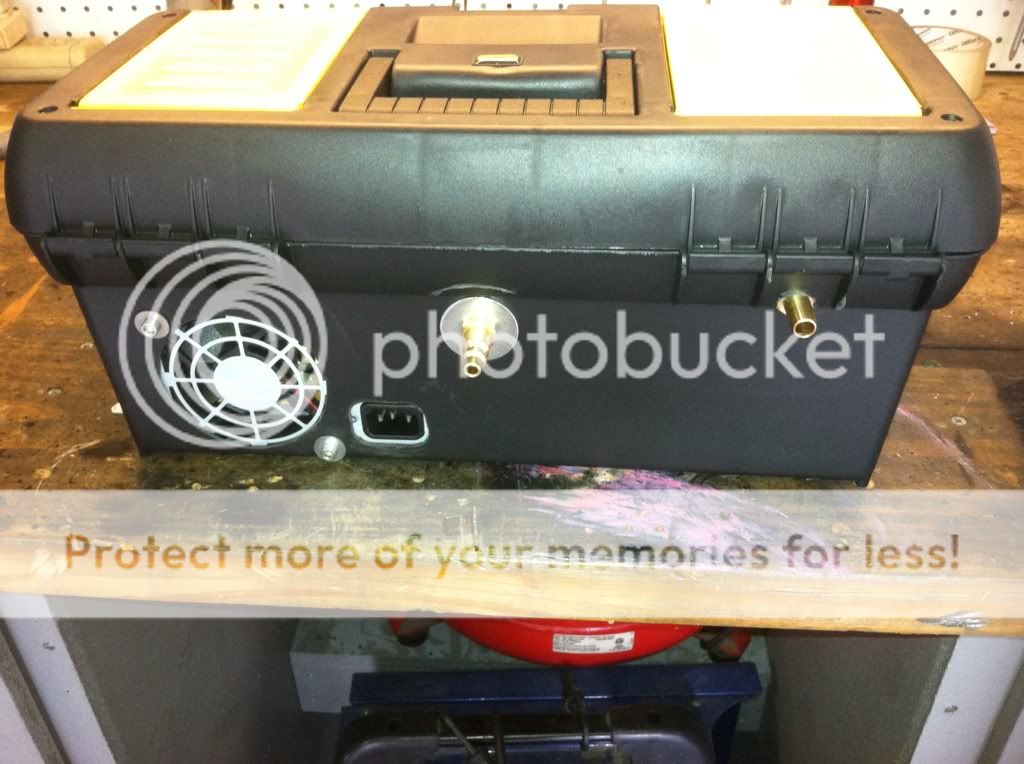
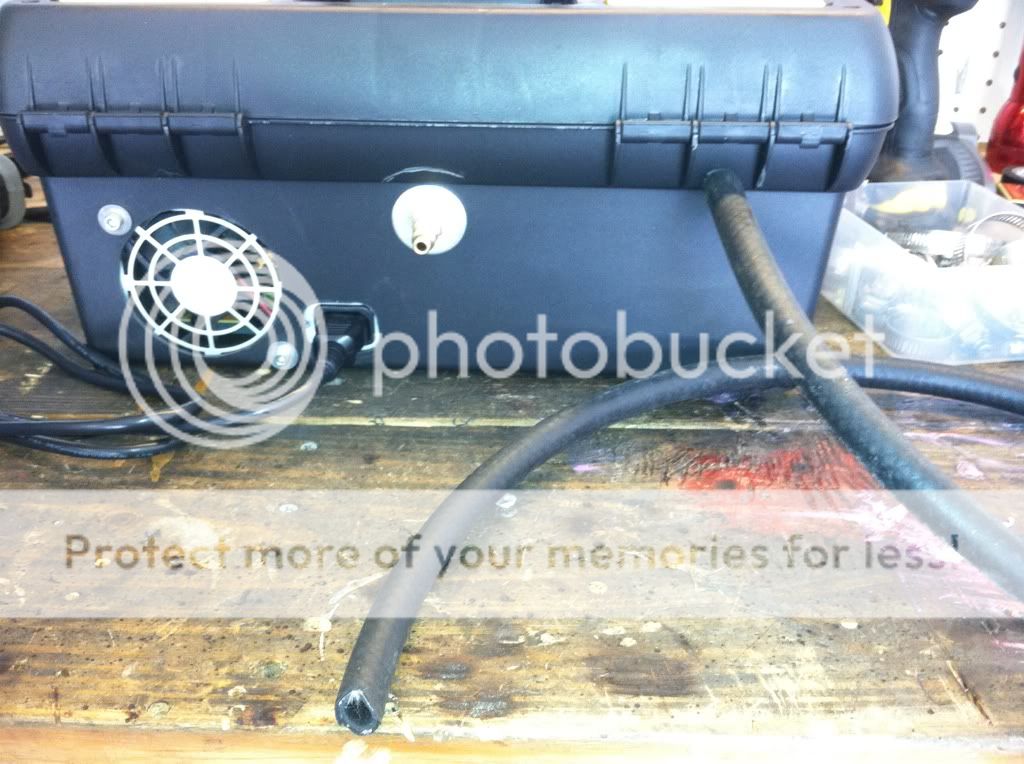
Power supply mounted inside the tool box
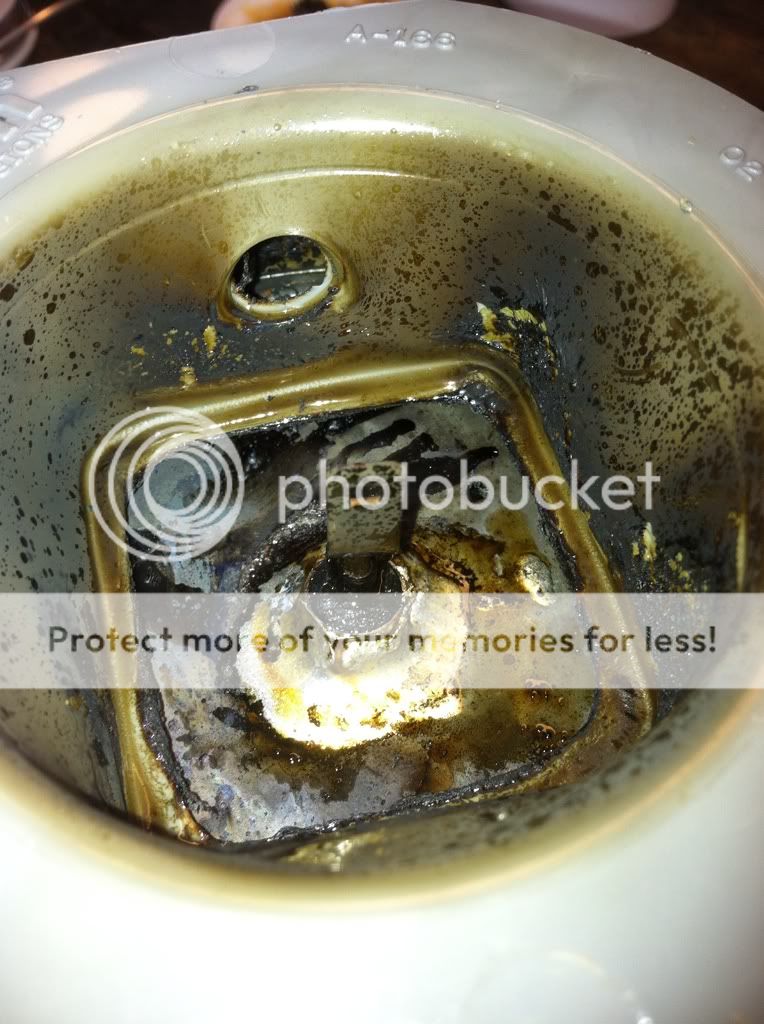
Glow plug has to come up thru the bottom of the container, so i used a 3" PVC coupler to space it off
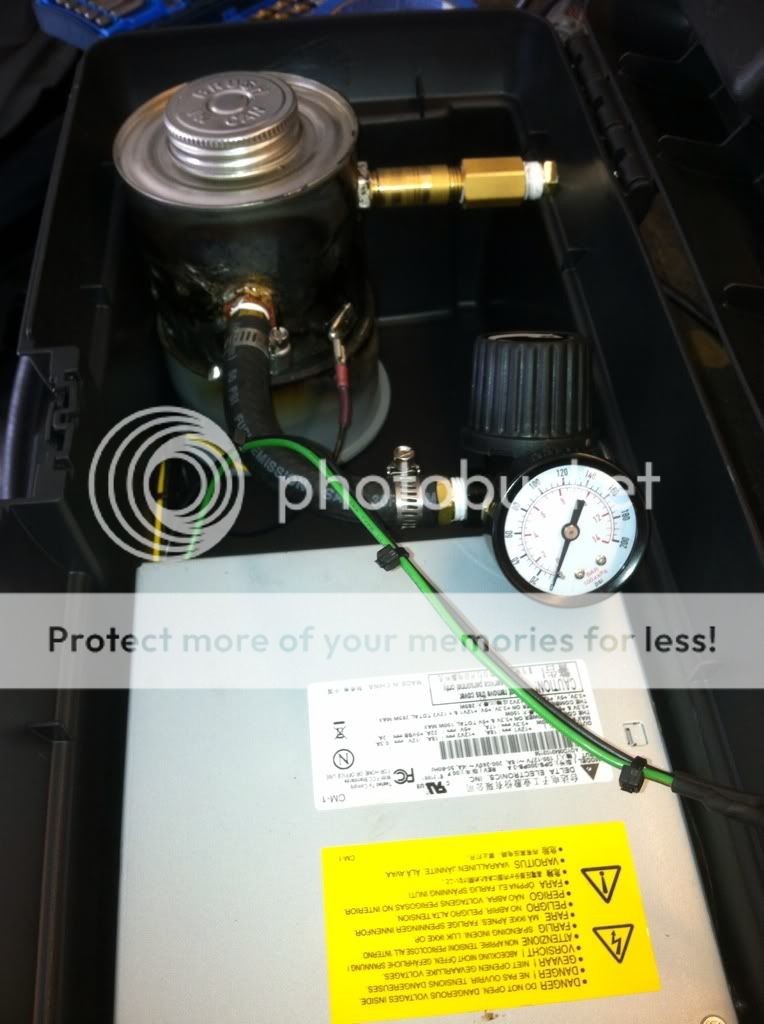
My fittings are all 1/4 MIP, so using some plumbers solder, soldered in some 3/8 to 1/4 adaptors for my compressed air inlet and outlet.also soldered in the glow plug to the bottom
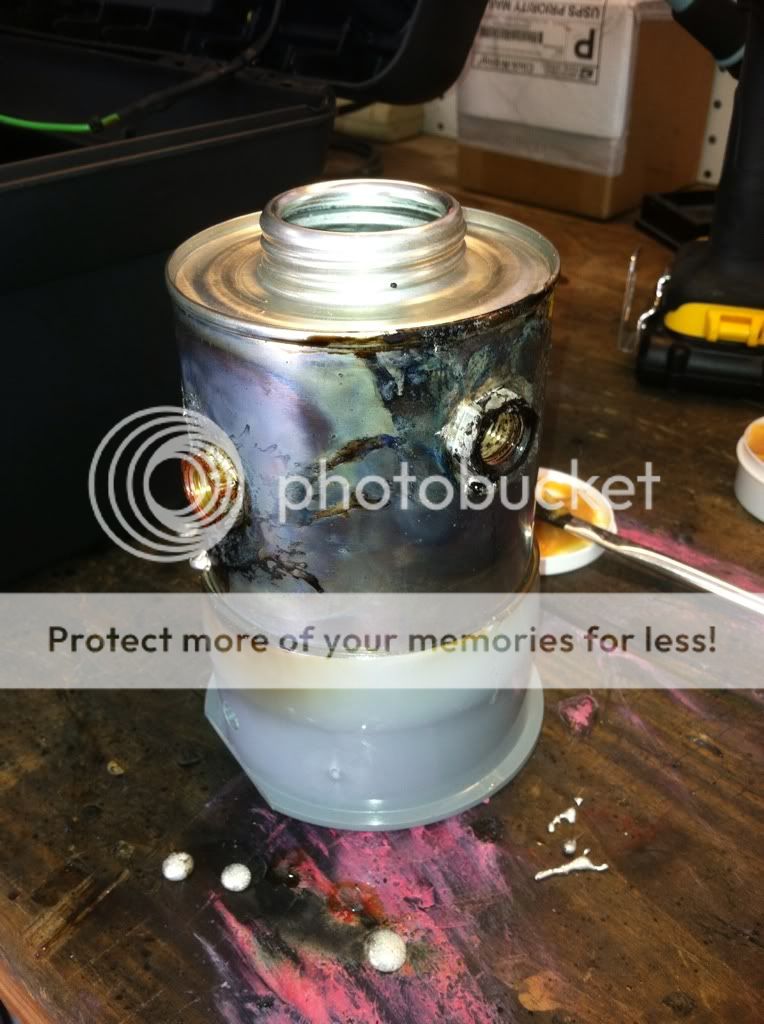
Glow plug wired up, yellow to the plug and the black I used a spade connector soldered onto the side of the container.
Reg installed,connections made

I found a few ideas on line how to build a simple working one......
The way it works: using a glow plug and a power supply from a old PC, it will heat up mineral oil ( actually using baby oil, easy to find, makes my hands soft and smells good!)to around 350-450 degrees. As it heats it will turn into white smoke. Using a air compressor set to approx 5 PSI it will force the smoke out of the hose nozzle. I will be using a cheap PC power supply to power the glow plug, it needs about 12 volts @ 10 amps.
I'm using a PVC glue can, washed it out with acetone to get it nice and clean. Mounting the glow plug in the bottom. Mounting 2 fittings in the side for compressed air and a outlet hose. All fittings sealed with plumbers solder.
Works great...takes about 3 minutes to start filling up my entire exhaust or my turbo piping/ intake......smoke is easy to spot and will pinpoint things FAST!
Parts:
60G AC Delco glow plug $8 ( only get the true AC Delco )
Air regulator $20
PC power supply, free from any old computer
PVC glue can, cleaned out with acetone $8
Cheap Tool Box to house everything $8
Baby oil $3
Misc fitting and hose $15
Prepping the PC power supply: power supply will supply 12 volts @ 10 amps to the glow plug when turned on. I cut all the wires out of the power supply with the exception of these wires.
1)Yellow 12v will go to the glow plug
2)Green goes to one side of a toggle switch to turn the PS on/off
3)Any black to the other side of the toggle switch for turning on the PS
4)Any Black will be secured to the side of the can to ground the glow plug
5)Color may vary on this wire, mine was brown.On the big plug, there is a orange wire on the very corner that has another wire in the same slot of that plug, follow that wire back and solder it to that same orange wire.
When you get done should provide 12 volts on the yellow and black, should look similar to the picture below, although I have not added my switch for the PS at this point.
Toggle switch mounted to the lid of the tool box, this is just a contact closure between any of the black wires on the power supply and the green wire.
Power supply mounted inside the tool box
Glow plug has to come up thru the bottom of the container, so i used a 3" PVC coupler to space it off
My fittings are all 1/4 MIP, so using some plumbers solder, soldered in some 3/8 to 1/4 adaptors for my compressed air inlet and outlet.also soldered in the glow plug to the bottom
Glow plug wired up, yellow to the plug and the black I used a spade connector soldered onto the side of the container.
Reg installed,connections made


")