What have you done to your mustang today?

Gabe

Whippled Coyote
Joined
Aug 7, 2011
Posts
8,471
Reaction score
1,574
Location
NC
You must have the 11-14 uca bracket to use the corresponding uca. It relocates the mounting point 1” forward.
The stock 05-09 uca is 8.5” long from cl-cl of the bolt holes. The 11-14 uca is 9.5” from cl-cl of the bolt holes. The newer(longer) uca and bracket are a direct replacement for the older(shorter) version. Doesn’t change static pinion angle at all. Reduces the amount of change as the power comes on.

I know I’m not explaining this very well. I’ll try to put some info together for you.


Sent from my iPhone using Tapatalk


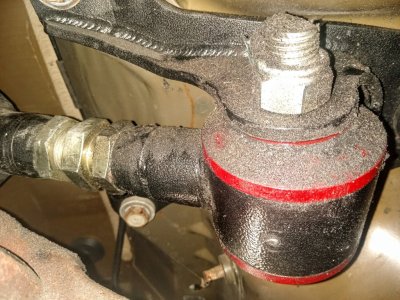
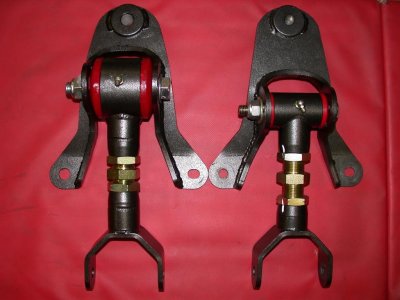
This picture should explain it pretty well.
They're both BMR upper control arms with their respective brackets.
The '11-'14 unit on the left, the earlier-cars unit on the right.
You get a longer arm but same mounting point because the bracket is different
025_zps61c8f4e3.jpg
 

Gabe

Whippled Coyote
Joined
Aug 7, 2011
Posts
8,471
Reaction score
1,574
Location
NC
Yes that is what I was talking about. My car is not lowered and chassis has 150 K on it. They were very easy miles for the most part. I replaced the rear LCAs with the 09 GT500 ones which are very similar to the originals. If I did replace that upper bushing I would probably stay with the stock rubber one to keep the NVH away. Is there a way to determine the health of that bushing? Is it toast with those miles or could it still be fine?


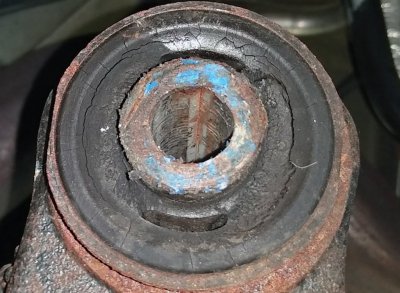
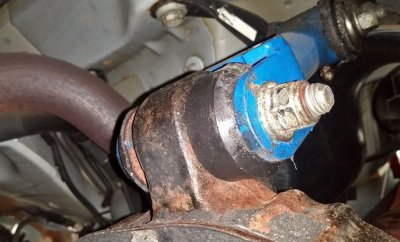
You get a great look by removing the upper control arm bolt that goes through that bushing and lifting the arm up and out of the way.
This was the OEM bushing in my wife's '08 in 2020 when I replaced it, it had about 77k miles on it at the time.

diff_bush_20200628_ford_4.jpg
 

Miker

Member
Joined
Sep 6, 2022
Posts
227
Reaction score
103
Location
96002
Wow my mileage is double that. Isn't there a metal casing that needs to be removed if I put the stock style back in there? I watched a vid from LMR that they simply remove the rubber part and install a poly bushing in the sleeve from the original I think. Or am I mistaken?
 

Gabe

Whippled Coyote
Joined
Aug 7, 2011
Posts
8,471
Reaction score
1,574
Location
NC
Wow my mileage is double that. Isn't there a metal casing that needs to be removed if I put the stock style back in there? I watched a vid from LMR that they simply remove the rubber part and install a poly bushing in the sleeve from the original I think. Or am I mistaken?

The metal casing stays, gets re-used, depending on which bushing you install.
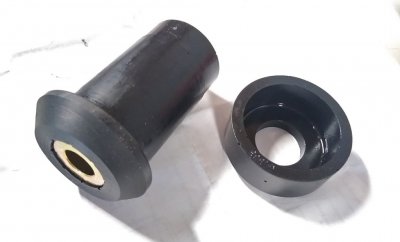
I went with the Prothane 6315-BL bushing, it's a 2-piece, one long piece goes in from one end, the other is like a "cap" goes on from the other end.

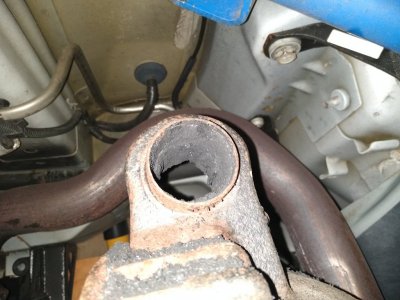
The "casing" you mentioned with a lot of rubber still to be cleaned out:

diff_bush_20200628_ford_6.jpg


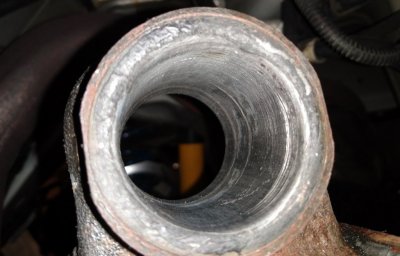
All cleaned out:

diff_bush_20200628_ford_9.jpg


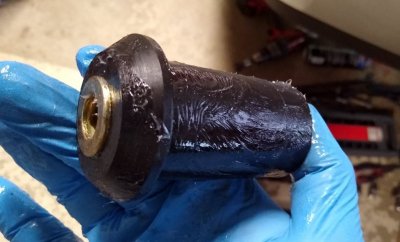
New Prothane bushing:


diff_bush_20200628_new_03.jpg


All lubed up ready to be installed:
(I made the mistake of trying to install it with the metal sleeve already inserted. This was much harder than installing the bushing first, then the metal sleeve all greased up. Live and learn, I did it the easier way the second time.

diff_bush_20200628_new_06.jpg


Installed:


diff_bush_20200628_new_13.jpg
 

Mach2burnout

05 Redfire GT
Joined
May 16, 2011
Posts
4,799
Reaction score
901
Location
Central Louisiana
The metal casing stays, gets re-used, depending on which bushing you install.
I went with the Prothane 6315-BL bushing, it's a 2-piece, one long piece goes in from one end, the other is like a "cap" goes on from the other end.

The "casing" you mentioned with a lot of rubber still to be cleaned out:

View attachment 87857


All cleaned out:

View attachment 87858


New Prothane bushing:


View attachment 87859


All lubed up ready to be installed:
(I made the mistake of trying to install it with the metal sleeve already inserted. This was much harder than installing the bushing first, then the metal sleeve all greased up. Live and learn, I did it the easier way the second time.

View attachment 87860


Installed:


View attachment 87861


This picture should explain it pretty well.
They're both BMR upper control arms with their respective brackets.
The '11-'14 unit on the left, the earlier-cars unit on the right.
You get a longer arm but same mounting point because the bracket is different

View attachment 87855


Alright, if you are going to drag race and street drive only, then the route that Gabe went is the perfect route to go. However, you've done a lot to prevent wheel hop and you've freed up the rear to pivot front to rear and up and down. Great for off the line and acceleration. But, not it will still be bound up in the turns, maybe even more so since you have the full Urethane bushing on both ends of the UCA. The Whiteline bushing can flex much more freely side to side than the BMR full bushing. Also, the Steeda rear end bushing is a full rod end style bushing. It can rotate in all directions freely. The shocking thing is how quiet this set up is when paired together.

Believe me, I tried the BMR style UCA even with the stock rear end bushing and it was still felt bound up and would pick the inside tire up on cornering.

I'll be autoxing this car this weekend and will report back on how much better it is.
 

Mach2burnout

05 Redfire GT
Joined
May 16, 2011
Posts
4,799
Reaction score
901
Location
Central Louisiana
The metal casing stays, gets re-used, depending on which bushing you install.
I went with the Prothane 6315-BL bushing, it's a 2-piece, one long piece goes in from one end, the other is like a "cap" goes on from the other end.

The "casing" you mentioned with a lot of rubber still to be cleaned out:

View attachment 87857


All cleaned out:

View attachment 87858

So, on the Steeda bushing that I am using ( see previous post with link) you remove this metal sleeve. It is a bitch to get out without the proper tool and with the rear end still in the car. I have done it on two now. On the 14 I reamed out the rubber and inner sleeve as much as possible and then took a torch and split the outer sleeve carefully. yes i had a fire extinguisher close. I wasn't happy about how much the rubber flamed up, but this was the easier way. Of course I am very experience with using a torch in this manner.
On the 05 I used a air hammer/chisel because I watched some videos that showed that method. I was much cleaner and safer, but much more of a pita! I'll use the torch method if I ever do it again.
 

Mach2burnout

05 Redfire GT
Joined
May 16, 2011
Posts
4,799
Reaction score
901
Location
Central Louisiana
To replace that bushing do you press it in?

The short answer is yes it’s a press fit.

To install the Steeda spherical bushing, remove the old bushing and thoroughly clean with Emory cloth.
I put the new spherical busing in the freezer over night, once ready to install I just pound it in with a brass hammer and a 1 3/8” socket. It didn’t take a lot of effort, but it was tight. I did put a thin layer of grease around the busing prior to install.


Sent from my iPhone using Tapatalk
 

JEWC_Motorsports

S197 Junkie
S197 Team Member
Joined
Aug 22, 2010
Posts
20,481
Reaction score
1,600
Location
Texas
The short answer is yes it’s a press fit.

To install the Steeda spherical bushing, remove the old bushing and thoroughly clean with Emory cloth.
I put the new spherical busing in the freezer over night, once ready to install I just pound it in with a brass hammer and a 1 3/8” socket. It didn’t take a lot of effort, but it was tight. I did put a thin layer of grease around the busing prior to install.


Sent from my iPhone using Tapatalk
Same.
 

GriffX

Member
Joined
Sep 28, 2017
Posts
559
Reaction score
206
You get a great look by removing the upper control arm bolt that goes through that bushing and lifting the arm up and out of the way.
This was the OEM bushing in my wife's '08 in 2020 when I replaced it, it had about 77k miles on it at the time.

View attachment 87856
Are these cracks a problem? Many are only on the surface and if one goes through what issues do you get?
Clunking?
 

Mach2burnout

05 Redfire GT
Joined
May 16, 2011
Posts
4,799
Reaction score
901
Location
Central Louisiana
Are these cracks a problem? Many are only on the surface and if one goes through what issues do you get?
Clunking?

There is really nothing wrong with that bushing shown. If it’s a daily with only a burnout etc. occasionally I’d leave as is. If you launch hard you want at least a urethane bushing to eliminate wheel hop or road course/autox then I recommend the spherical. However, I think just the feel of the spherical bearing is worth changing to it even for a daily. But, I don’t know how well they last.


Sent from my iPhone using Tapatalk
 

Gabe

Whippled Coyote
Joined
Aug 7, 2011
Posts
8,471
Reaction score
1,574
Location
NC
Are these cracks a problem? Many are only on the surface and if one goes through what issues do you get?
Clunking?

All those cracks plus the soft nature of the rubber material itself, combine to allow for a lot of axle rotation while launching.
The 2 cars I replaced this bushing on are both putting down power in the 600-650 rwhp range, running drag radials.
After replacing the factory worn bushings with the Prothane bushing, I instantly felt like the car had a more controlled rear-end, firmer but in a good way.
It's an often overlooked item but one that makes a big difference once it's replaced and especially once it's upgraded.
 

JEWC_Motorsports

S197 Junkie
S197 Team Member
Joined
Aug 22, 2010
Posts
20,481
Reaction score
1,600
Location
Texas
There is really nothing wrong with that bushing shown. If it’s a daily with only a burnout etc. occasionally I’d leave as is. If you launch hard you want at least a urethane bushing to eliminate wheel hop or road course/autox then I recommend the spherical. However, I think just the feel of the spherical bearing is worth changing to it even for a daily. But, I don’t know how well they last.


Sent from my iPhone using Tapatalk
My Steeda spherical bushing has 60k miles on it and 100s of 1/4 mile passes. It still looks new.
 

Gabe

Whippled Coyote
Joined
Aug 7, 2011
Posts
8,471
Reaction score
1,574
Location
NC
Got under it to try to get some grease into the upper control arm and realized that the zerk fitting is no longer there. Broken flush. Awesome.

IMG_20230618_115022823~2.jpg
 

Miker

Member
Joined
Sep 6, 2022
Posts
227
Reaction score
103
Location
96002
Easy to deal with on the bench On the car, what a biatch! Time to spin some wrenches or get creative and hope to get lucky. Even then you are left with why did it snap off in the first place.
 

Mach2burnout

05 Redfire GT
Joined
May 16, 2011
Posts
4,799
Reaction score
901
Location
Central Louisiana
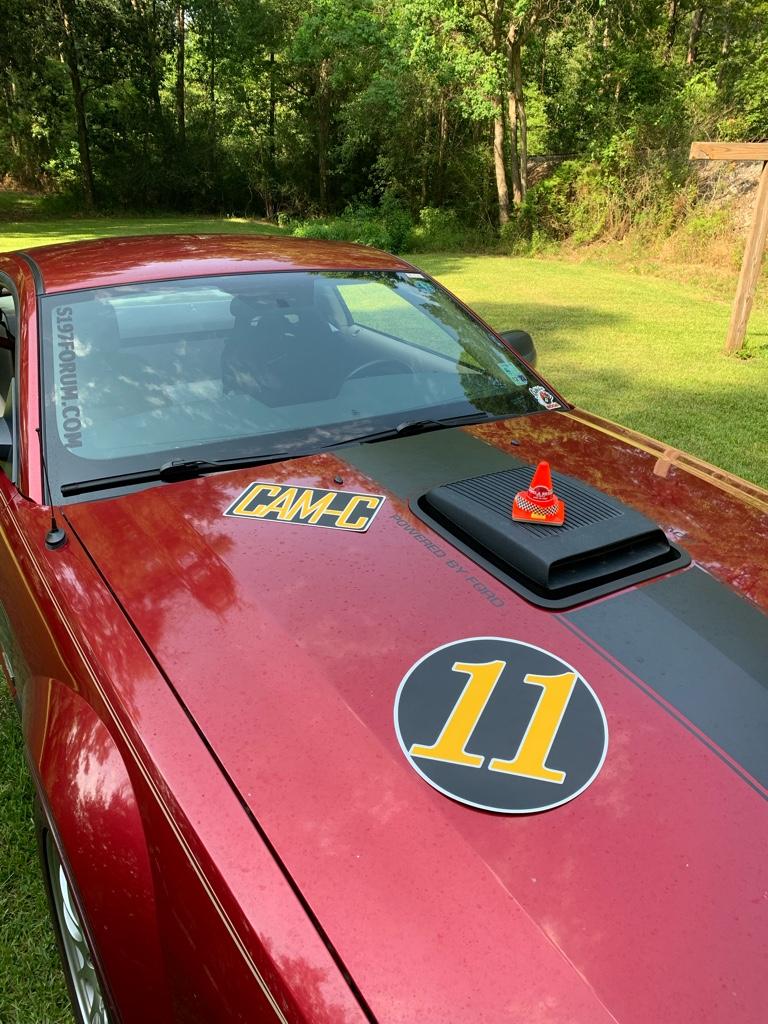
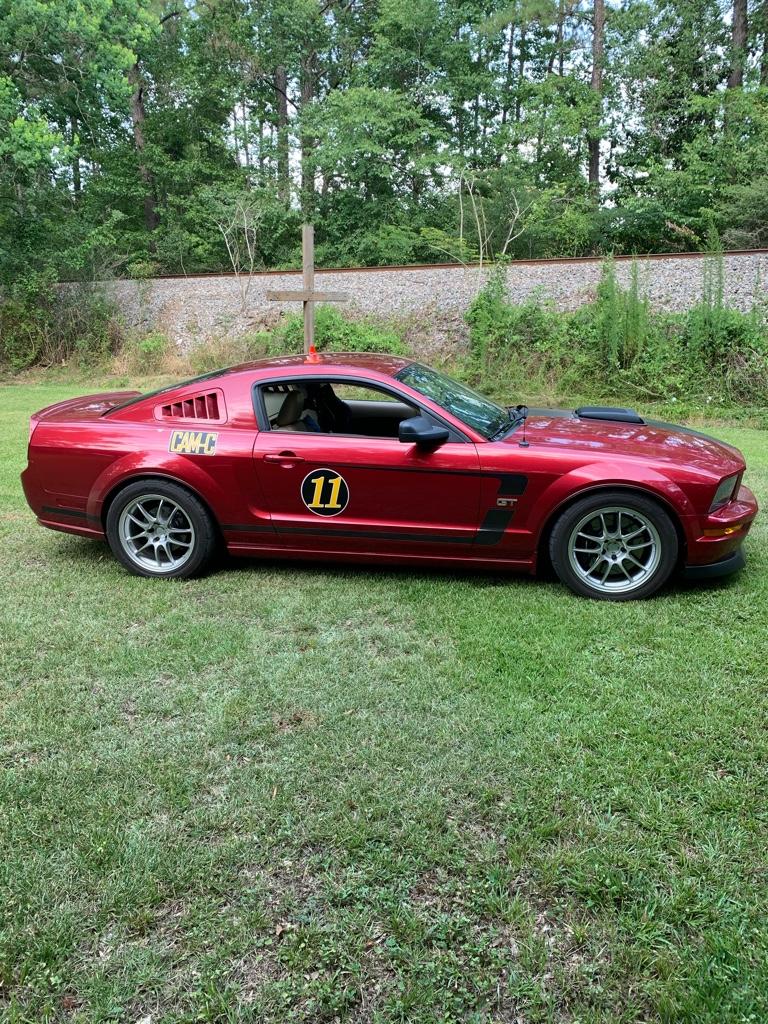
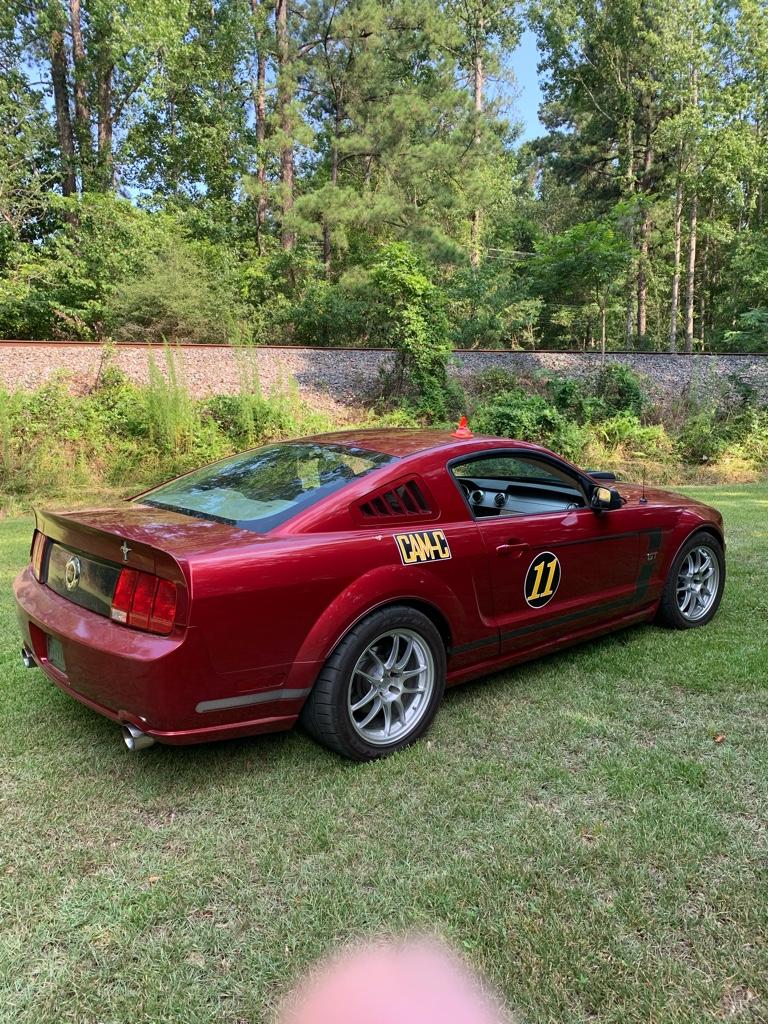
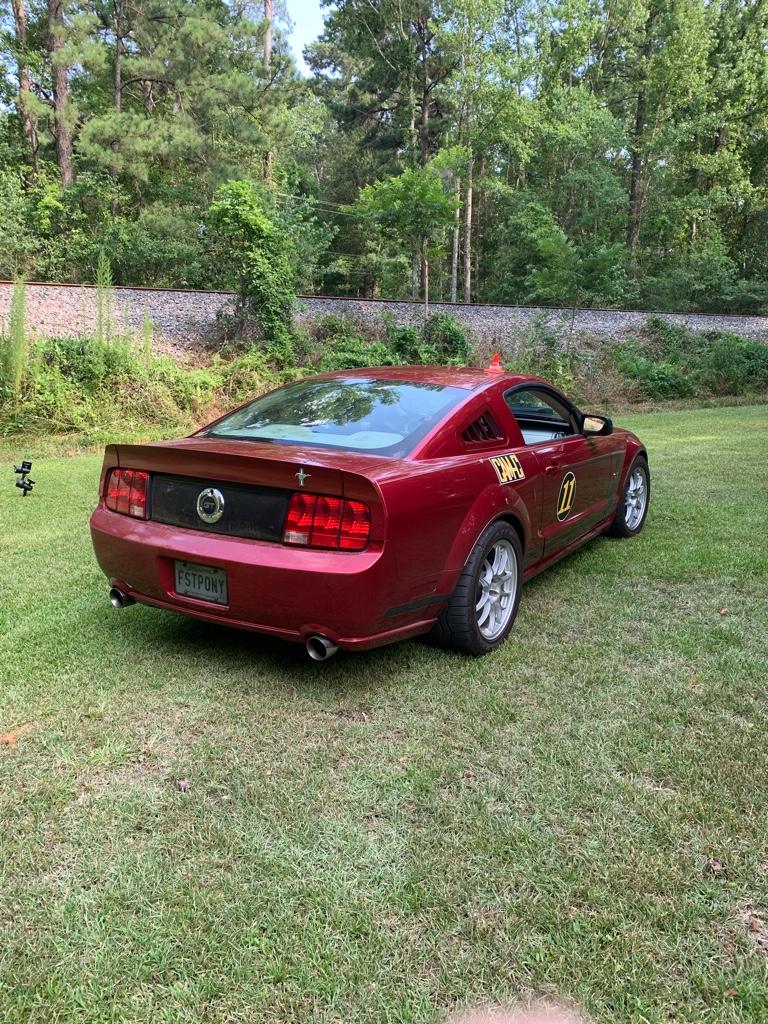
Went and beat on her a bit at autox. Brought home the goods for a change. It’s been a while! I’m happy to be the quickest mustang at the event once again. That too has been a while.

The changes to the rear of this car that I did last week made all the difference! This car rotates through the corners better than ever and is so much more predictable when it does break loose.

0a84b35d315f56a75b8aa422427998ed.jpg

38573aa3fe2ba69b36b955714adf93df.jpg

e17e02a6c2983d6b597d6c5756d30e38.jpg

c8308a107fc3b03bef3307a7492bfa13.jpg

a2836d5eb65ff5dd7632baf0d87f487f.jpg


Sent from my iPhone using Tapatalk
 

Support us!

Support Us - Become A Supporting Member Today!

Click Here For Details

Sponsor Links

Banner image
Back
Top