DiMora
More Is Better
This thread will cover the installation of the Whiteline Watts Link.
It's a long post, because that's how I roll, so grab a beer.
First things first.
I have already driven the car with this thing installed. It is awesome. Epic mod! My car is heavily modded, and this is one of my three favorite mods now up there with my supercharger and big brakes.
The best way for me to describe the difference is the rear end is now "plush" and stable. I think I have simply gotten used to the gentle steering corrections that are (were) necessary whenever you hit a bump with the rear tires.
Anyone who has studied how a panhard bar works knows that when the rear axle travels up and down, the panhard bar rear axle connection point travels in an arc, which means your rear axle is constantly shifting laterally just a little bit with every bump. The watts link eliminates that lateral movement, and trust me when I say you can really feel the difference.
The second thing is the ride is smoother. I have to assume that it is because the watts link is allowing the axle to articulate vertically with less restriction than it could with the panhard bar. The car, in all honesty, no longer feels like a solid rear axle car. It feels like it has independent rear suspension.
Lateral "slalom" moves are sure, precise, and accurate. Quick shimmies of the steering wheel hammered my lats back and forth against the side bolsters. The whole car is tight and responsive now.
A quick note that my car already had $3,000 worth of Steeda suspension upgrades on it. It already had "world class" handling, but this just raised it up to the top level. Supporting mods I already run:
• 555-8215 - Steeda Sport Springs
• 555-1050 - Steeda Front Adj. Sway Bar –
• 555-8113 - Steeda Billet Swaybar Mount
• 555-1054 - Steeda Comp Rear Swaybar with Endlinks
• 555-5726 - Billet Strut Tower Brace
• 555-8116 - Steeda Front Control Arm Relocation Kit
• 555-8106 - Steeda Bumpsteer Kit
• 555-8120 - Steeda Heavy Duty Upper Strut Mounts
• 555-4105 - Steeda Adj. Upper 3rd Link
• 555-4405 - Steeda Billet Rear Control Arms
• 555-2551 - Steeda Adj. Chrome-Moly Panhard Bar
• 555-2555 - Steeda Chrome-Moly Panhard Bar Brace
• 555-8119 - Steeda Lwr Trlng Arm Relocation Brackets
• 555-4436 - Steeda Axle End Upr 3rd Link Bushing Kit
• 555-5530 - Steeda G-Trac Brace
• 578-DSP-12 - Tokico D Spec shocks / struts
Here we go.
Arrival packaging:

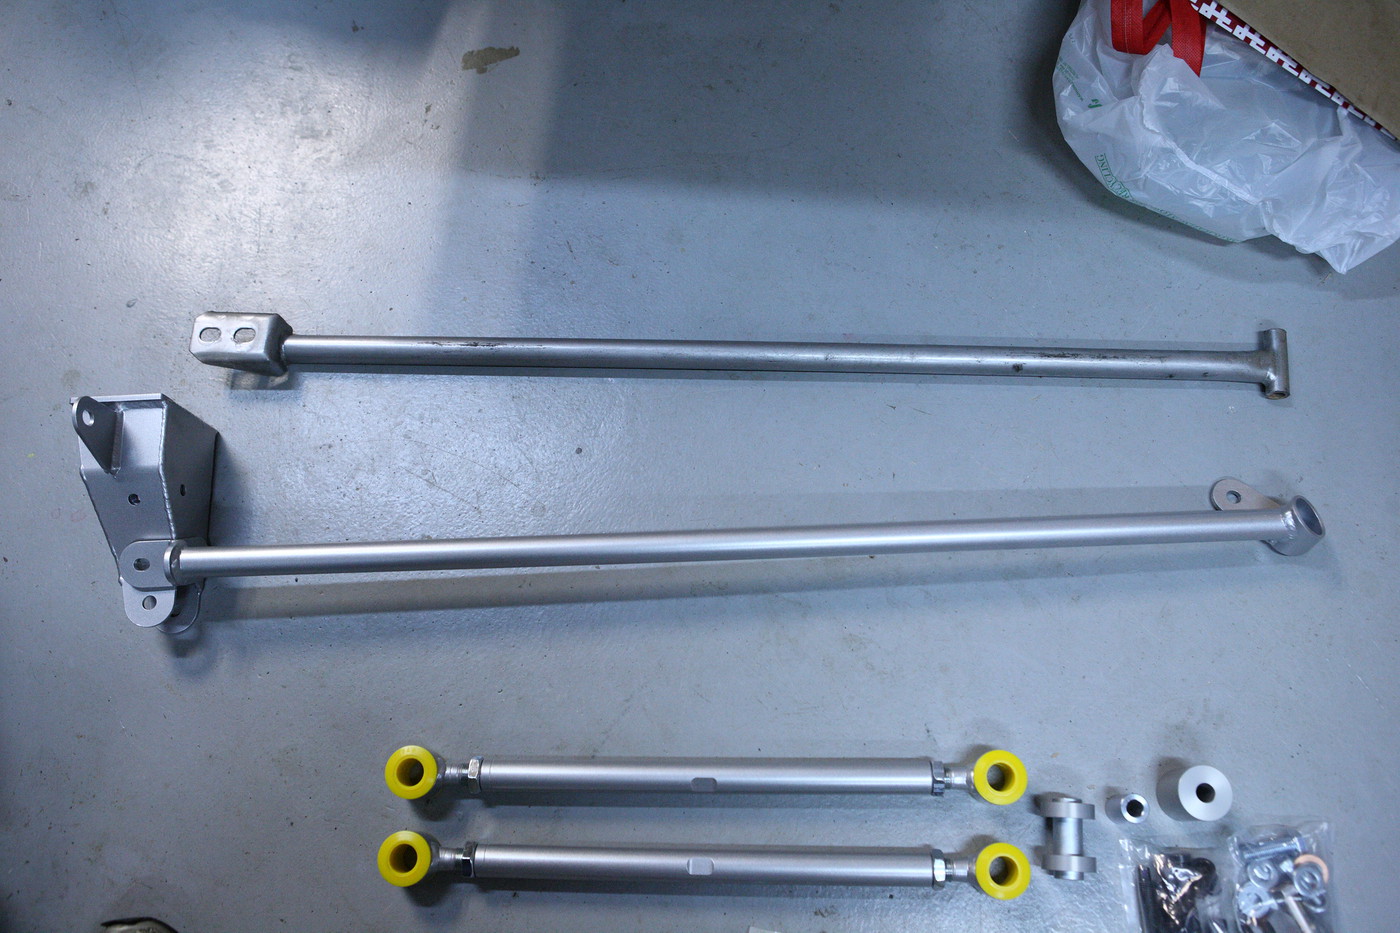
What's in the box:
Hardware:
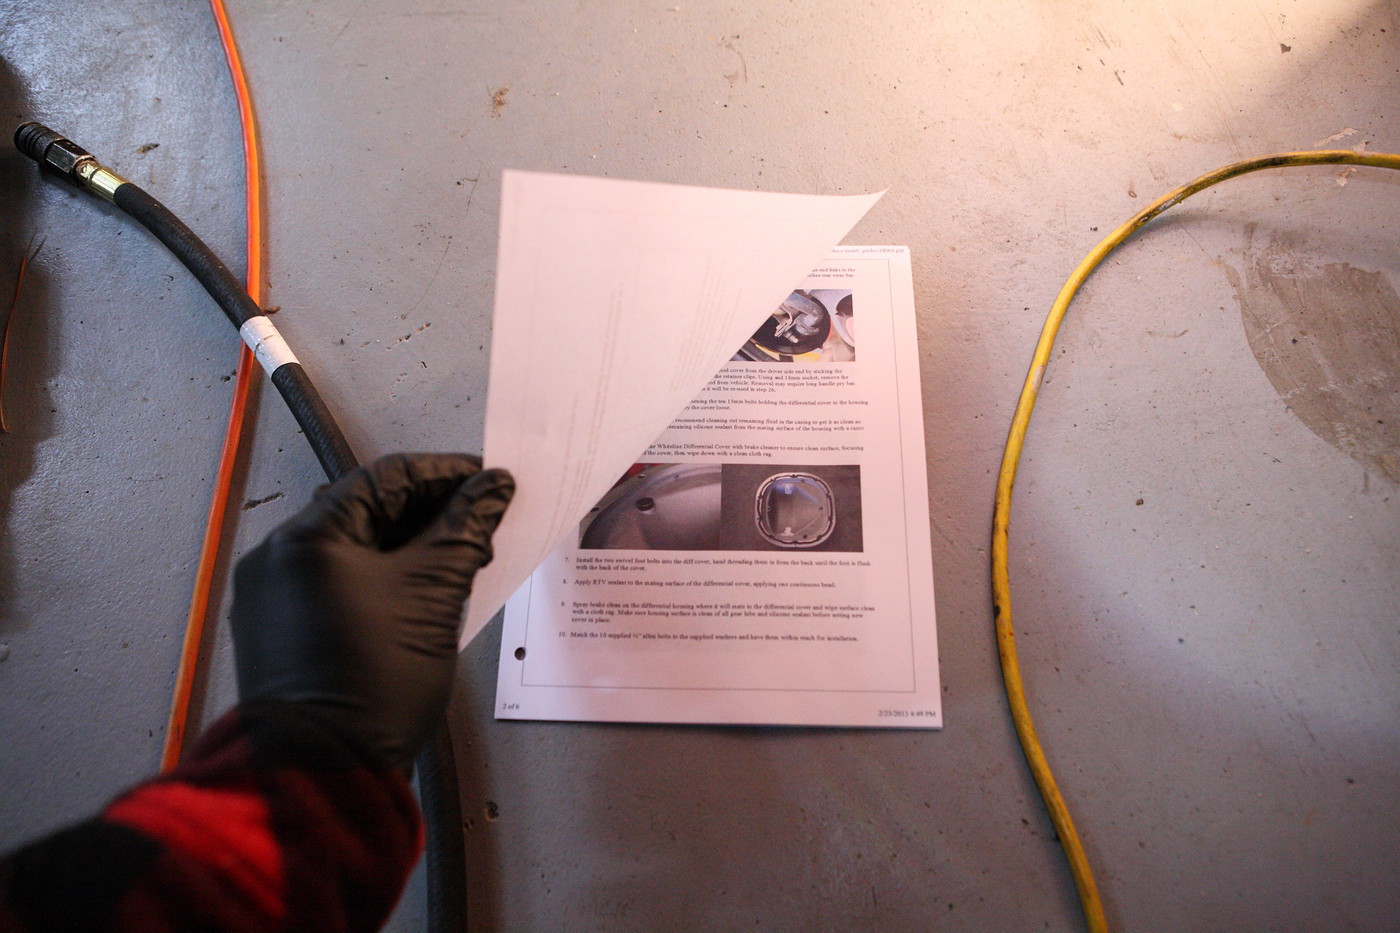
There were no directions in the box, so I printed my own from Whiteline's website:
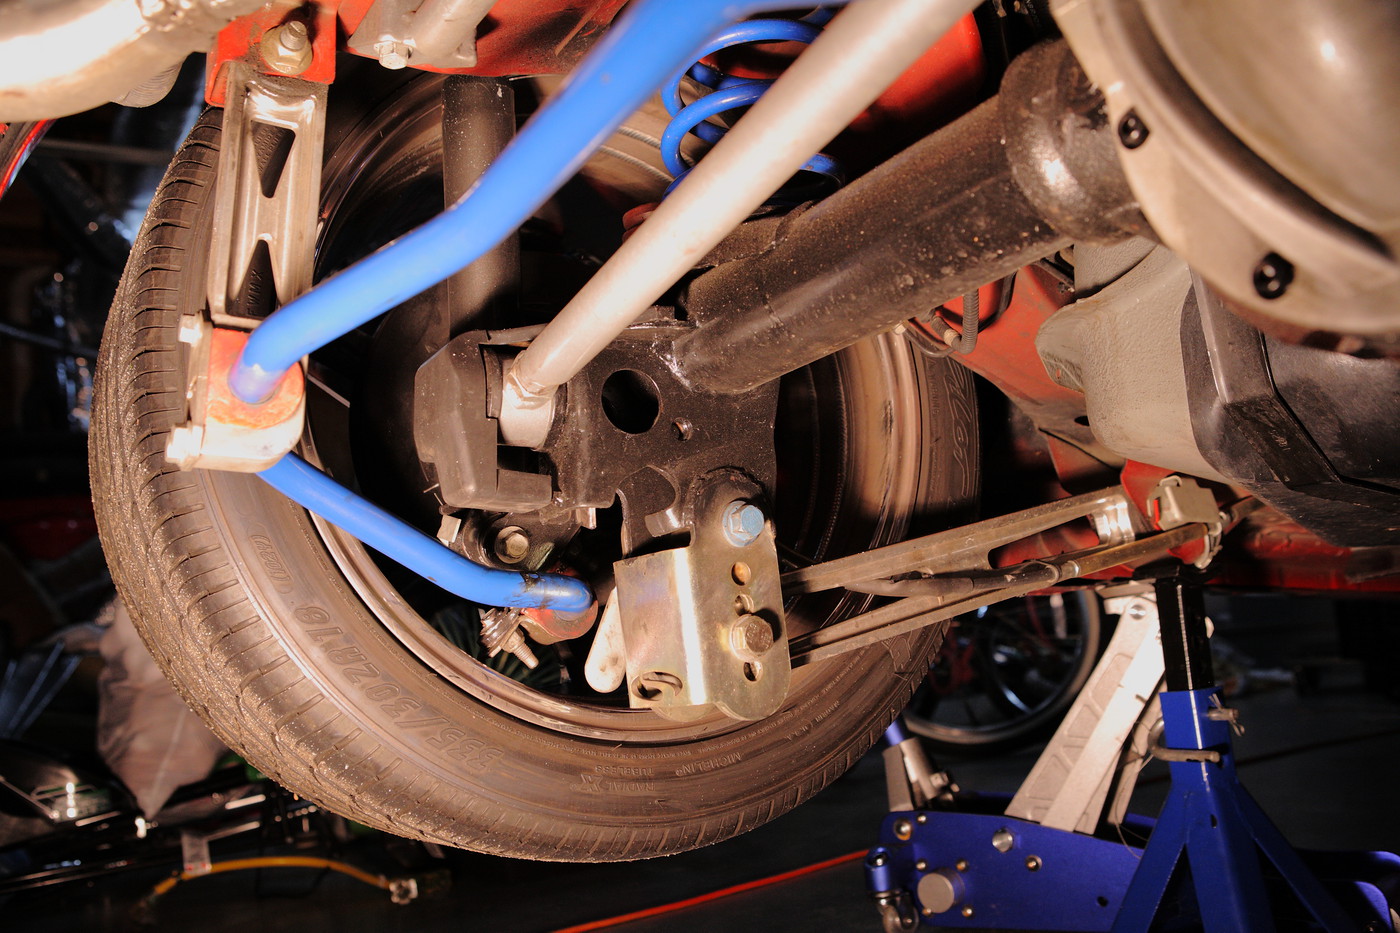
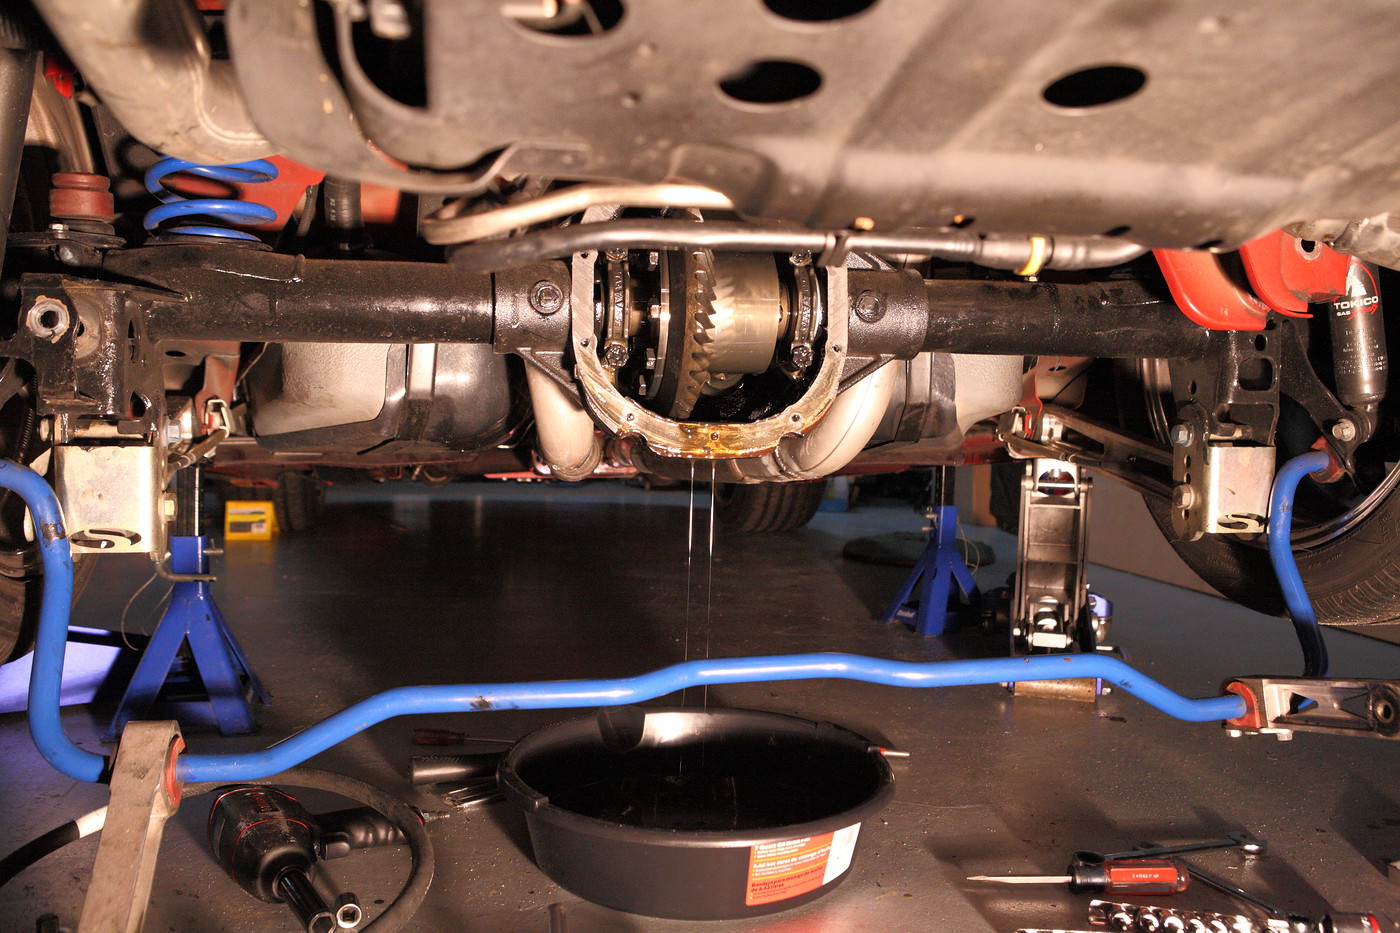
My rear end setup before the install started:
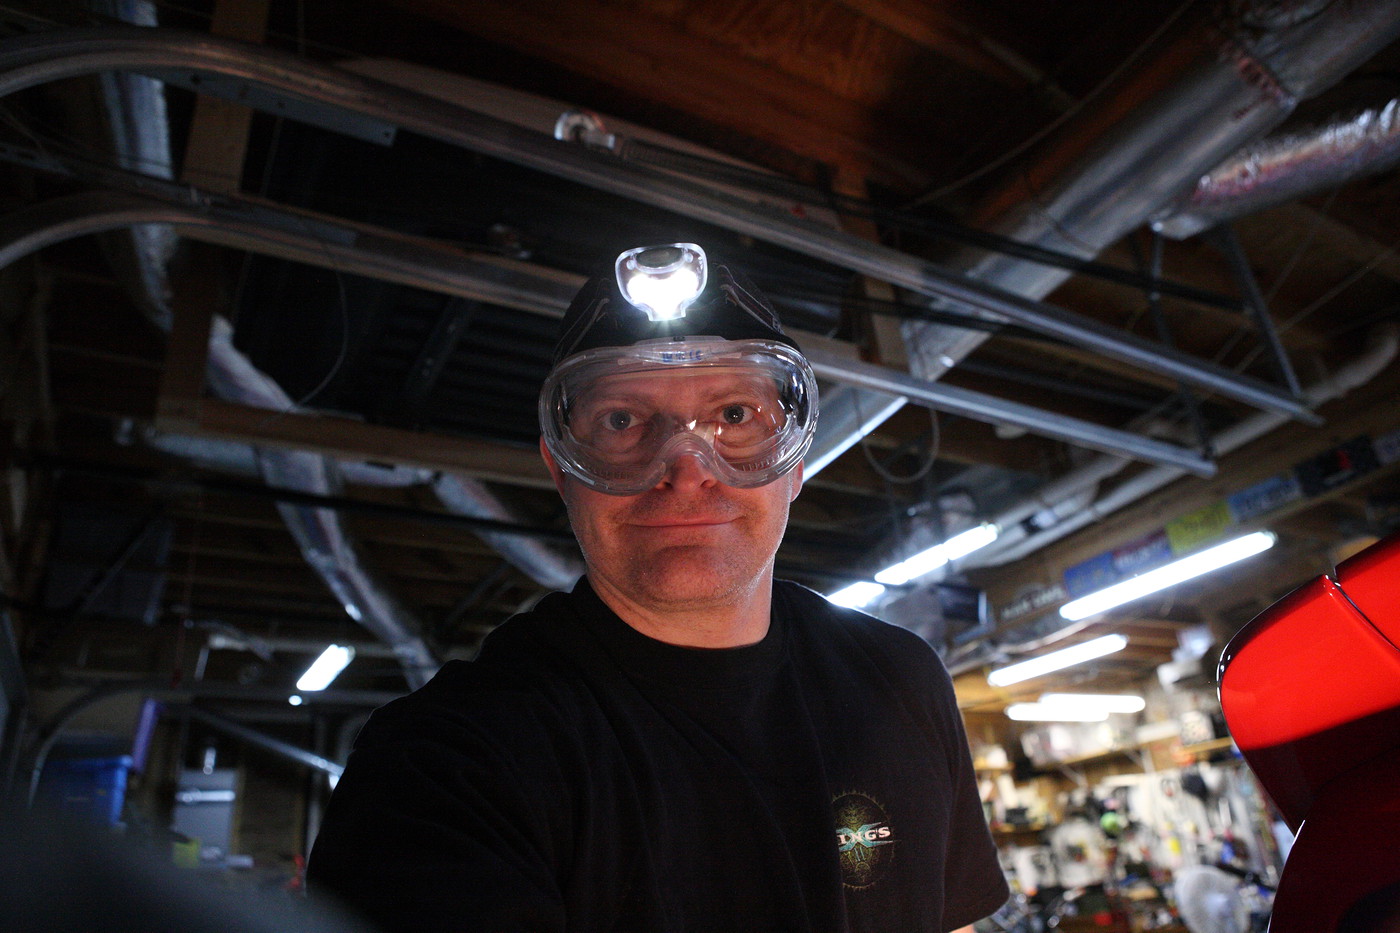
Safety first. Metal and grit in your eyes is no fun. Trust me. Ever heard of an eye drill? They exist. Protect those peepers people!
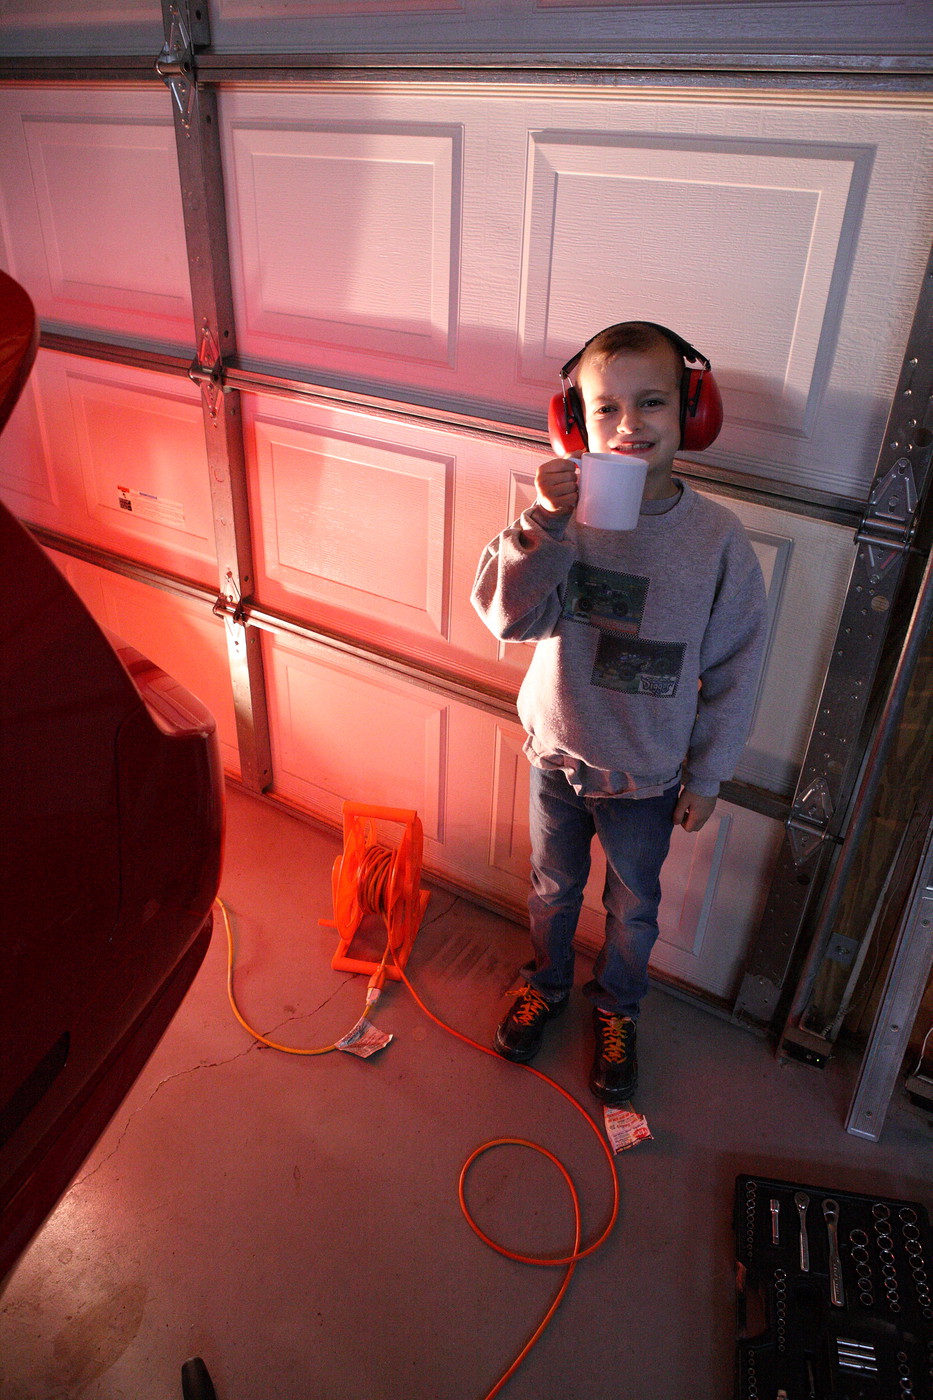
My assistant Andrew:
First, I loosened and dropped my Steeda swaybar billet end-links:

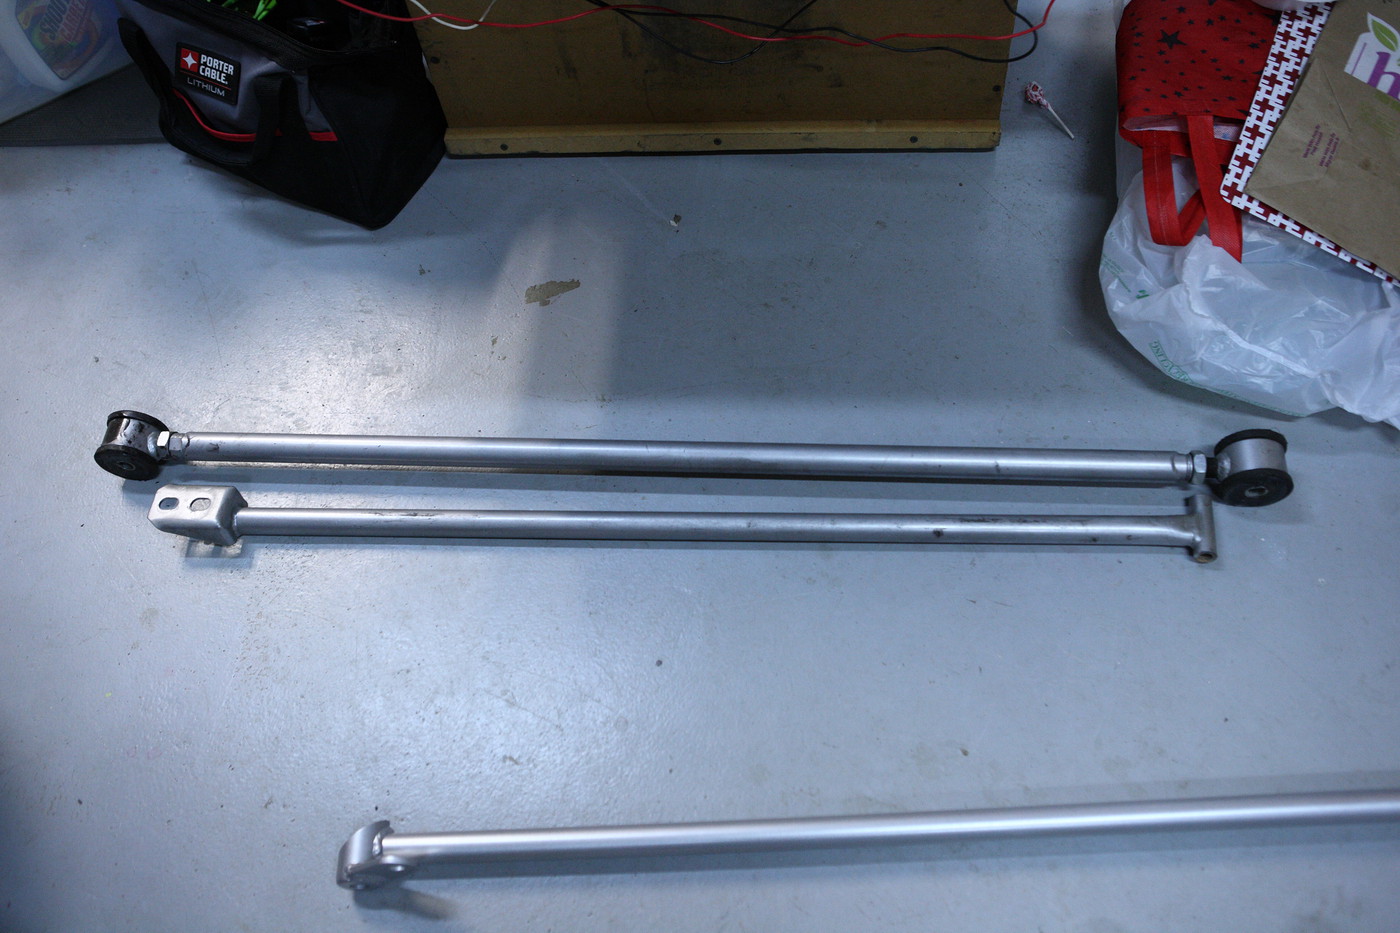
Next, I removed my Steeda panhard bar and panhard bar brace:
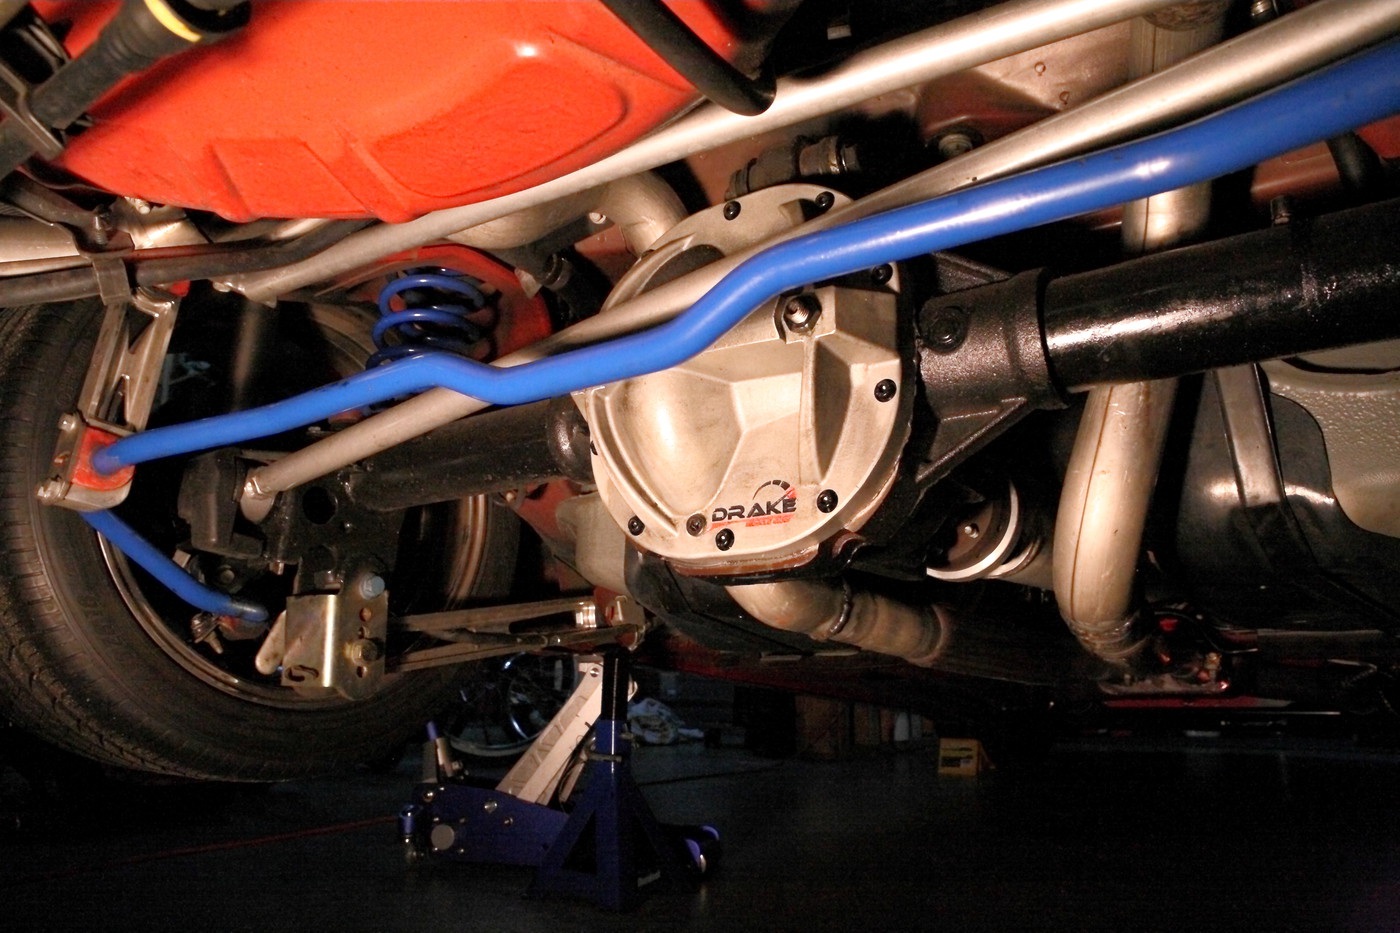
Then I unbolted my Scott Drake differential cover bolts and tightened the main bearing cap load support bolts to pull the cover off the differential housing, which broke the RTV seal and allowed the fluid to drain out:
Next, I installed the Whiteline main bearing cap load support bolts into the cover. Screw these in as far as they will go!:
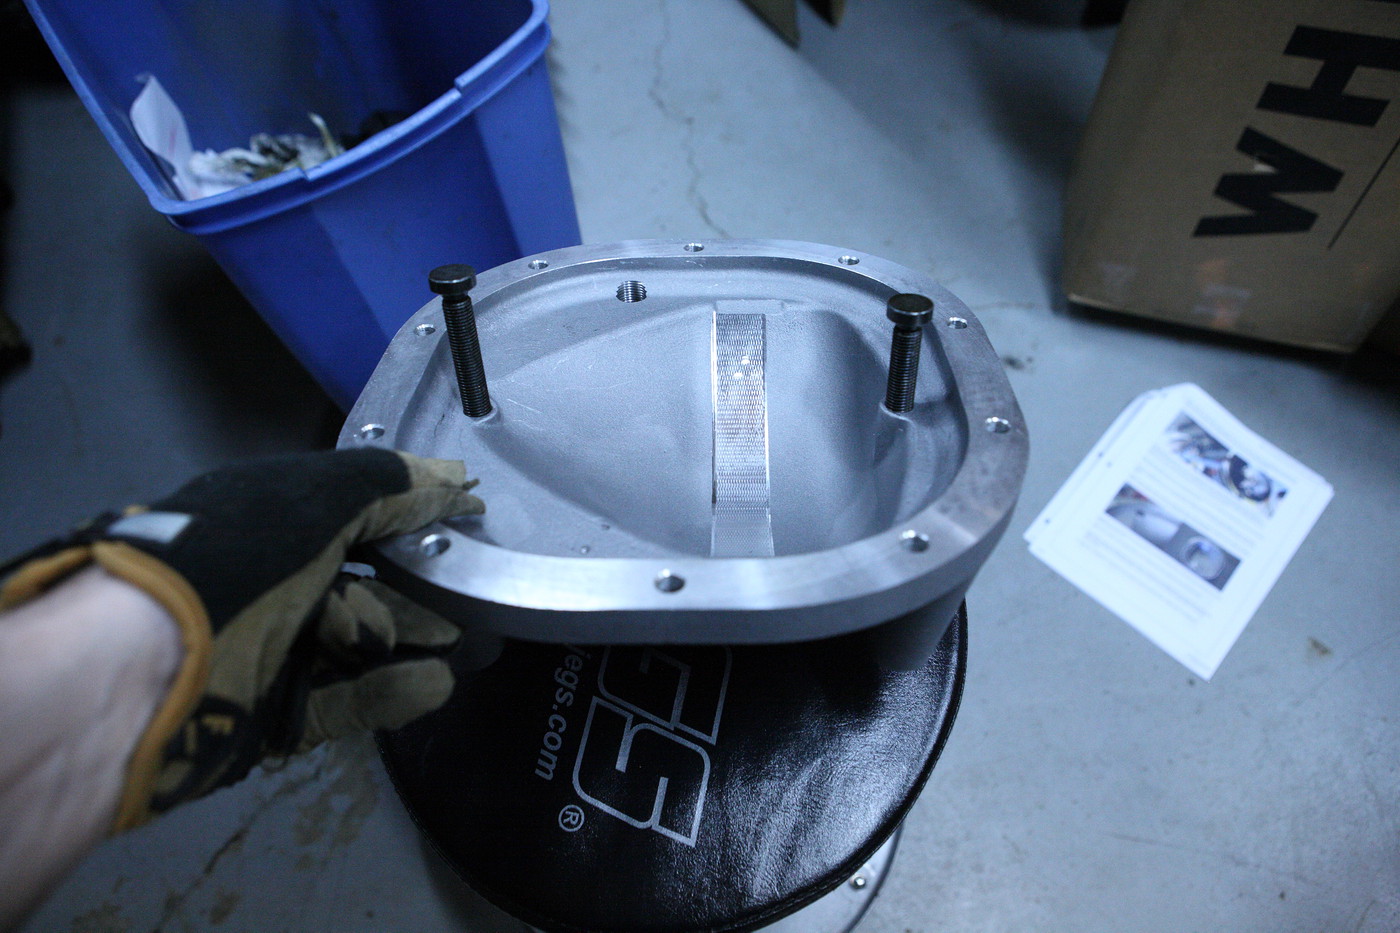
Then I bolted the cover onto the diff housing. I used some 1 minute gasket maker. Worked great! The diff gets 20 LB-FT and the bearing load cap bolts get 5 LB-FT:
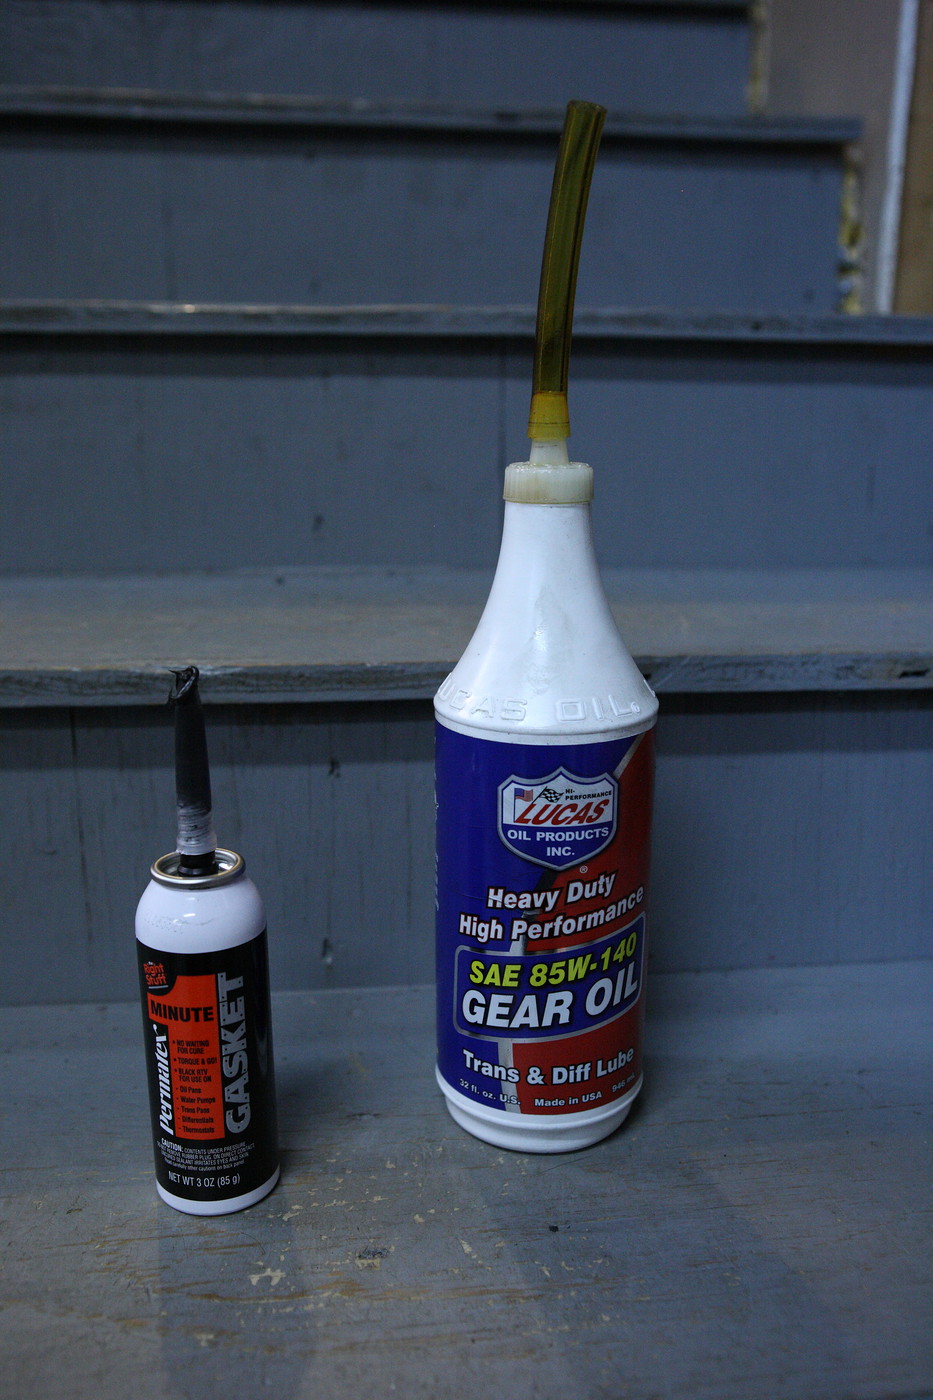
I then filled the diff with fluid through the top hole. I filled it until it poured out the factory fill hole at the REAR of the axle housing, then I plugged the OEM hole and added some more through the top hole in the Whiteline cover so that the diff has a bit more fluid. See the pic of my fill bottle above...that short hose works better than anything else I have used.
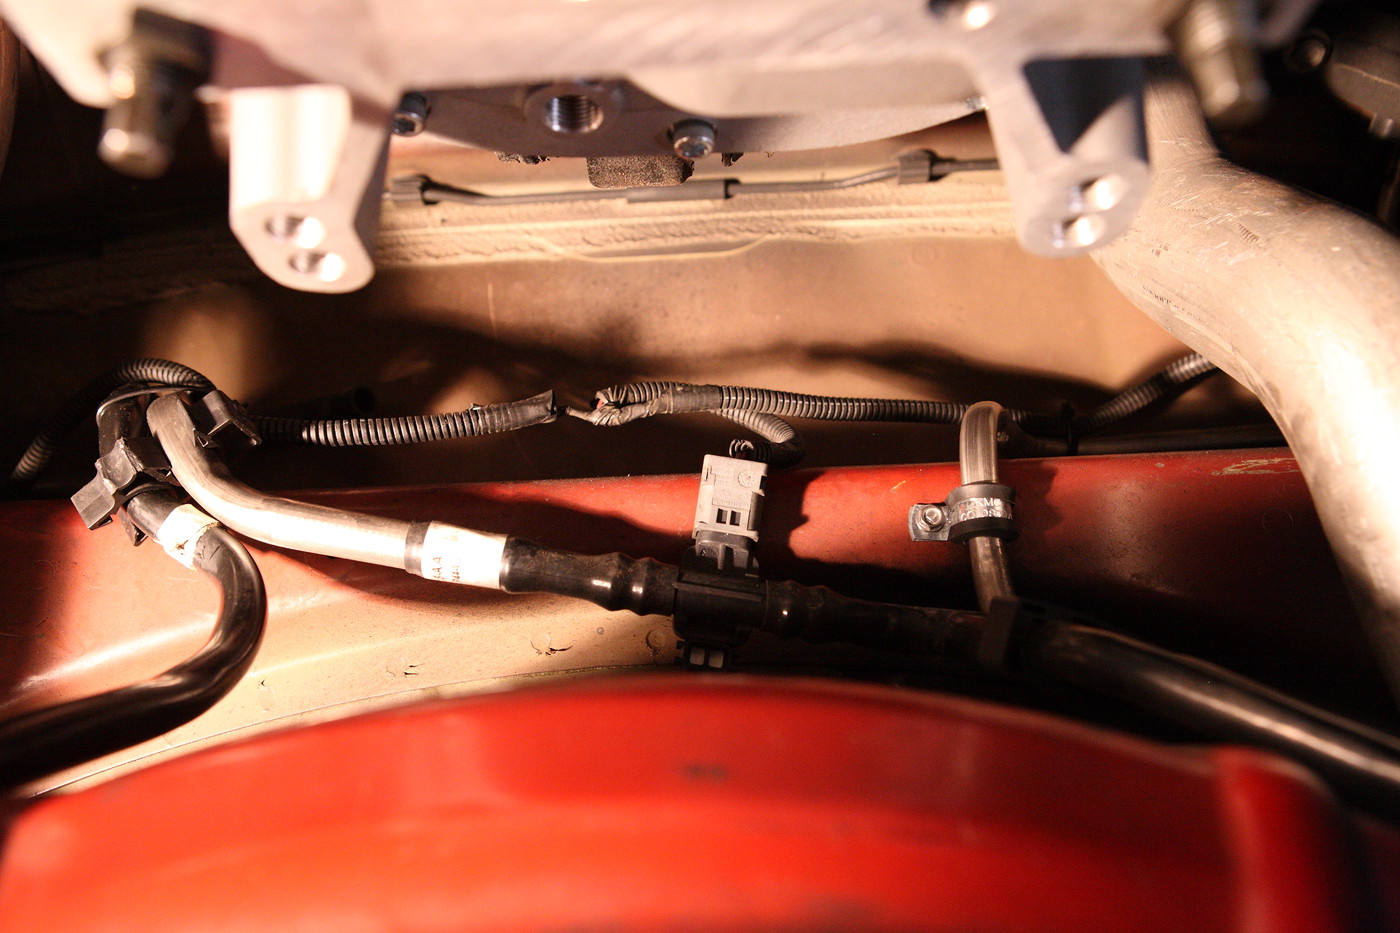
After that, I re-located the fuel tank vent line and a wiring harness, adding a Whiteline-supplied vinyl clamp and some zip-ties. You remove and discard one plastic clip, and turn the second one. I clipped off the now un-needed plastic push-pin mount plastic from the second one. All I left was enough to hold the two lines together, like this:
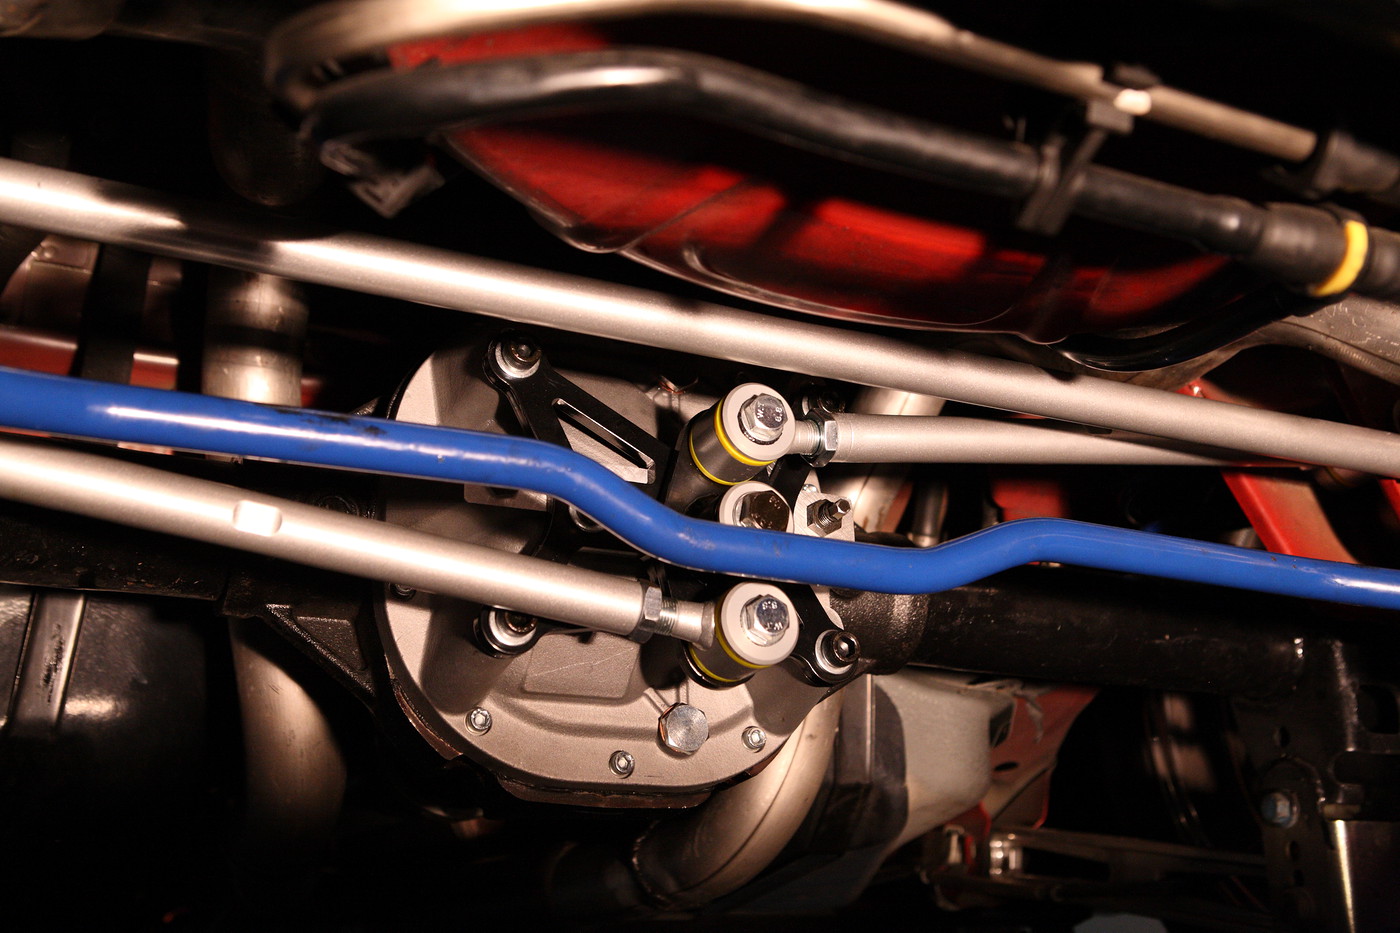
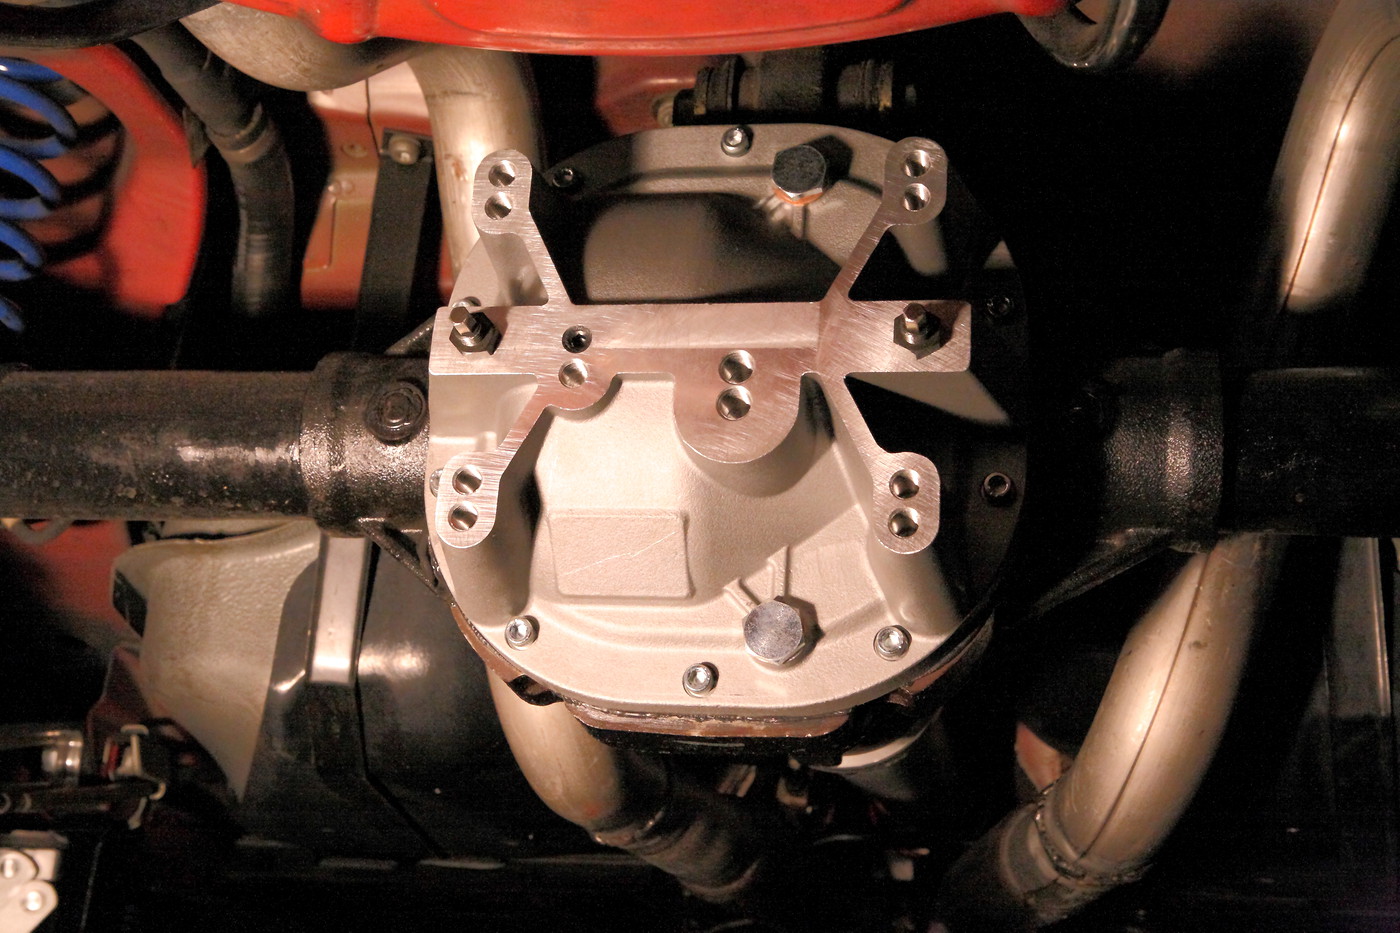
Next, I installed the main brace assembly after greasing the center pivot (some call it a propeller) and pushing it onto the brace. The Whiteline instructions say all 5 bolts that hold the brace to the diff cover get 60 LB-FT, with a dab of Lok-Tite. I did the four main (long) bolts first, then finished with the short (center-left) bolt. As I torqued, it kept spinning. STRIPPED. Damn. Fuuuuuddddggggggeeeee as Ralphie would say. Double checked my recently calibrated top-of-the-line Snap-On torque wrench. Still set precisely to 60 LB-ft. What the? So..I removed that stubby little bolt. Sure enough...aluminum threads came out of the hole. Stripping confirmed. My experience wrenching tells me that 60 LB-FT is likely too much torque for a bolt that short (not enough thread depth on the aluminum diff side to handle that value). My assessment? Bad instructions (too big a torque value). Oh well...I figured I'd call Whiteline first thing this week to seek remedy. If worse came to worse, I was going to drill out the main brace at that hole and tap the hole for a bolt the next size up, but Whiteline stepped up and they are going to send me a brand new differential cover. They said I am the second person to report stripping that bolt, so there is an issue there for sure. They are also going to contact engineering to confirm (or revise) the torque value for that bolt. I will install the new cover when it arrives and use less torque on that particular bolt.
I don't have a pic of just the support brace installed...I was a bit distracted (and frustrated) after that center bolt stripped, and picture priorities were forgotten for a moment. Fuuuudddgggeeee! But installation pressed on anyway. I figured that stubby bolt doesn't do much anyway.
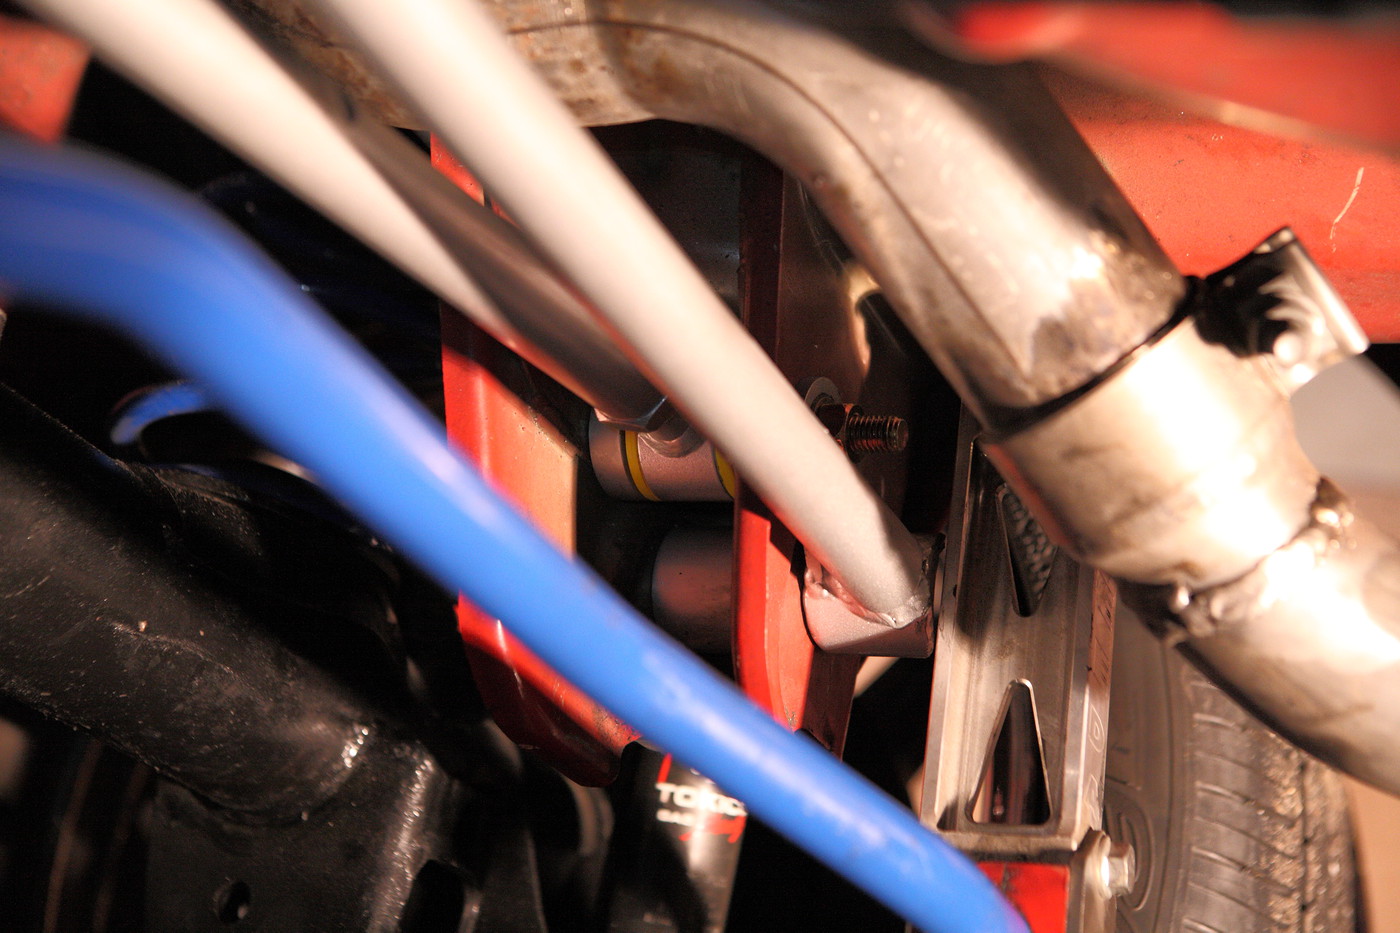
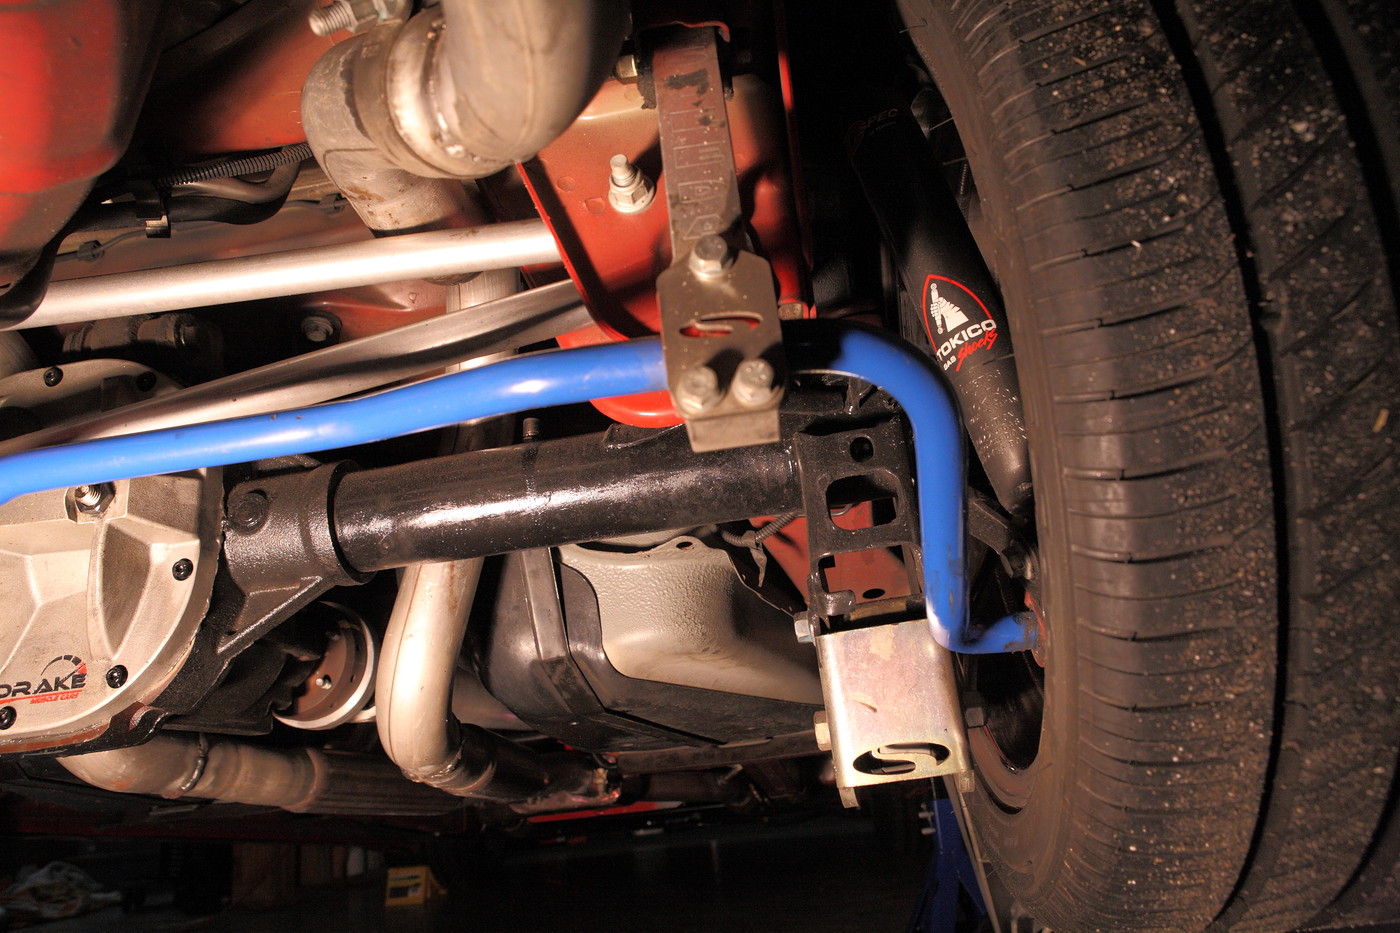
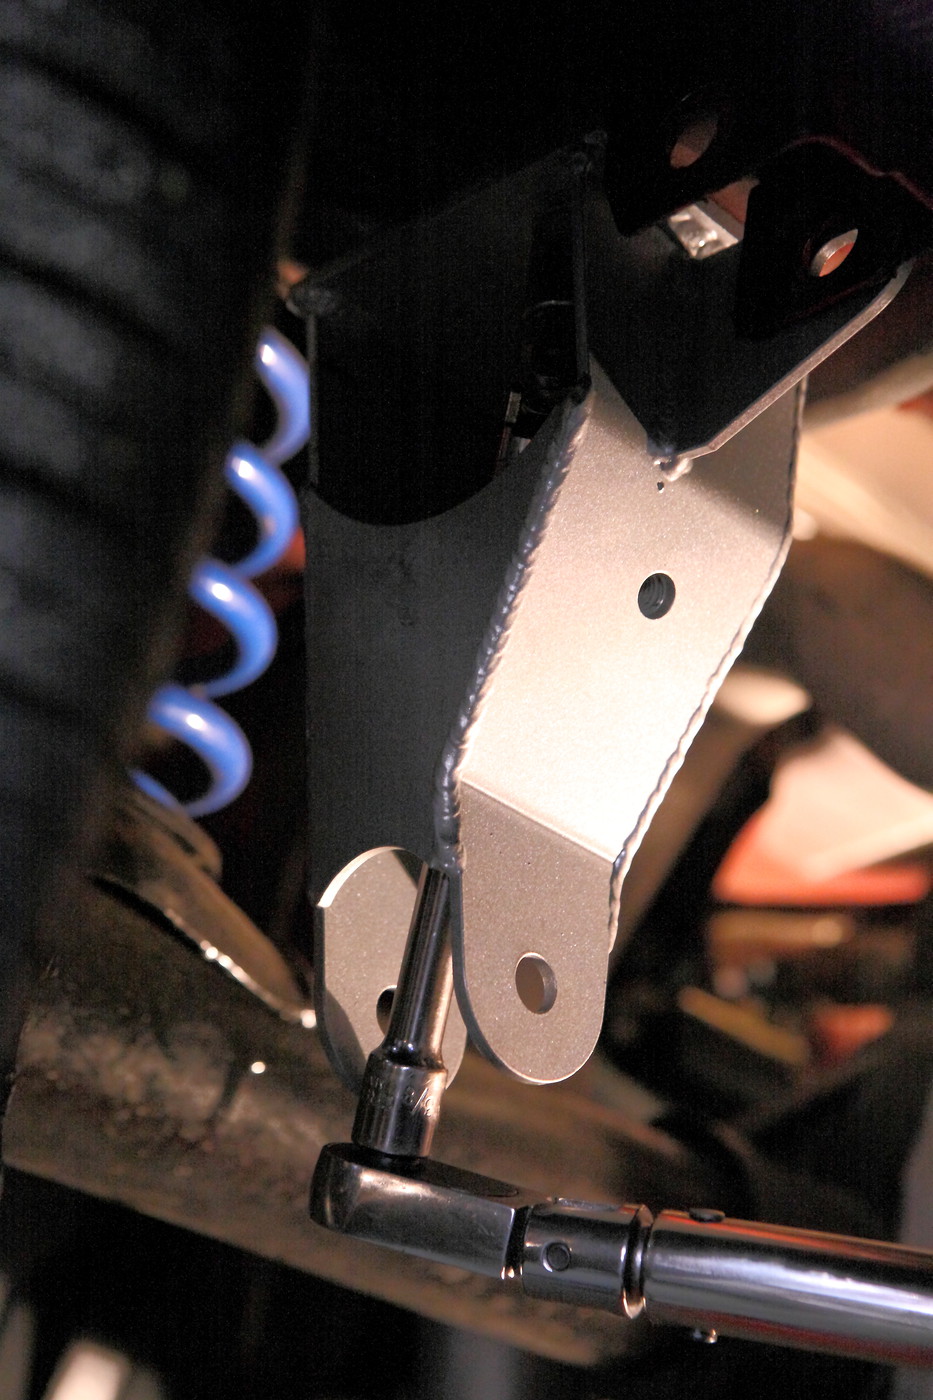
Next, I installed the driver's side drop bracket and torqued the bolts to 46 LB-FT. You need a U-joint and medium length extension to access these bolts with your torque-wrench:
Below my Steeda panhard bar brace at the top of this pic, you can see the Whiteline drop bracket and the lateral brace that bolts to it:
Bolting to driver's side in the holes formerly occupied by the panhard bar brace:
Continued next post due to pic limits...
It's a long post, because that's how I roll, so grab a beer.
First things first.
I have already driven the car with this thing installed. It is awesome. Epic mod! My car is heavily modded, and this is one of my three favorite mods now up there with my supercharger and big brakes.
The best way for me to describe the difference is the rear end is now "plush" and stable. I think I have simply gotten used to the gentle steering corrections that are (were) necessary whenever you hit a bump with the rear tires.
Anyone who has studied how a panhard bar works knows that when the rear axle travels up and down, the panhard bar rear axle connection point travels in an arc, which means your rear axle is constantly shifting laterally just a little bit with every bump. The watts link eliminates that lateral movement, and trust me when I say you can really feel the difference.
The second thing is the ride is smoother. I have to assume that it is because the watts link is allowing the axle to articulate vertically with less restriction than it could with the panhard bar. The car, in all honesty, no longer feels like a solid rear axle car. It feels like it has independent rear suspension.
Lateral "slalom" moves are sure, precise, and accurate. Quick shimmies of the steering wheel hammered my lats back and forth against the side bolsters. The whole car is tight and responsive now.
A quick note that my car already had $3,000 worth of Steeda suspension upgrades on it. It already had "world class" handling, but this just raised it up to the top level. Supporting mods I already run:
• 555-8215 - Steeda Sport Springs
• 555-1050 - Steeda Front Adj. Sway Bar –
• 555-8113 - Steeda Billet Swaybar Mount
• 555-1054 - Steeda Comp Rear Swaybar with Endlinks
• 555-5726 - Billet Strut Tower Brace
• 555-8116 - Steeda Front Control Arm Relocation Kit
• 555-8106 - Steeda Bumpsteer Kit
• 555-8120 - Steeda Heavy Duty Upper Strut Mounts
• 555-4105 - Steeda Adj. Upper 3rd Link
• 555-4405 - Steeda Billet Rear Control Arms
• 555-2551 - Steeda Adj. Chrome-Moly Panhard Bar
• 555-2555 - Steeda Chrome-Moly Panhard Bar Brace
• 555-8119 - Steeda Lwr Trlng Arm Relocation Brackets
• 555-4436 - Steeda Axle End Upr 3rd Link Bushing Kit
• 555-5530 - Steeda G-Trac Brace
• 578-DSP-12 - Tokico D Spec shocks / struts
Here we go.
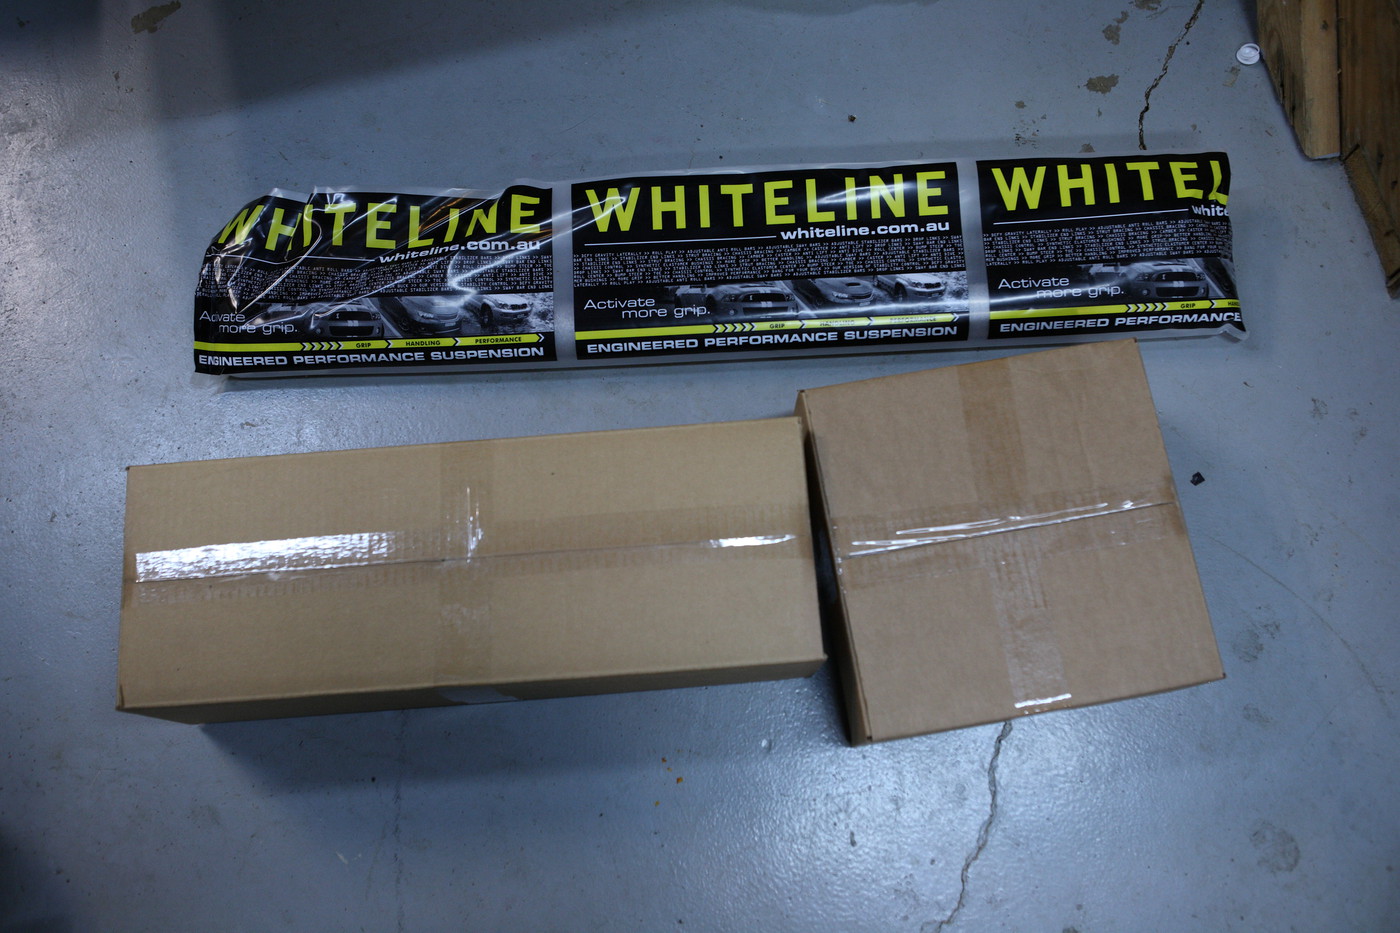
Arrival packaging:
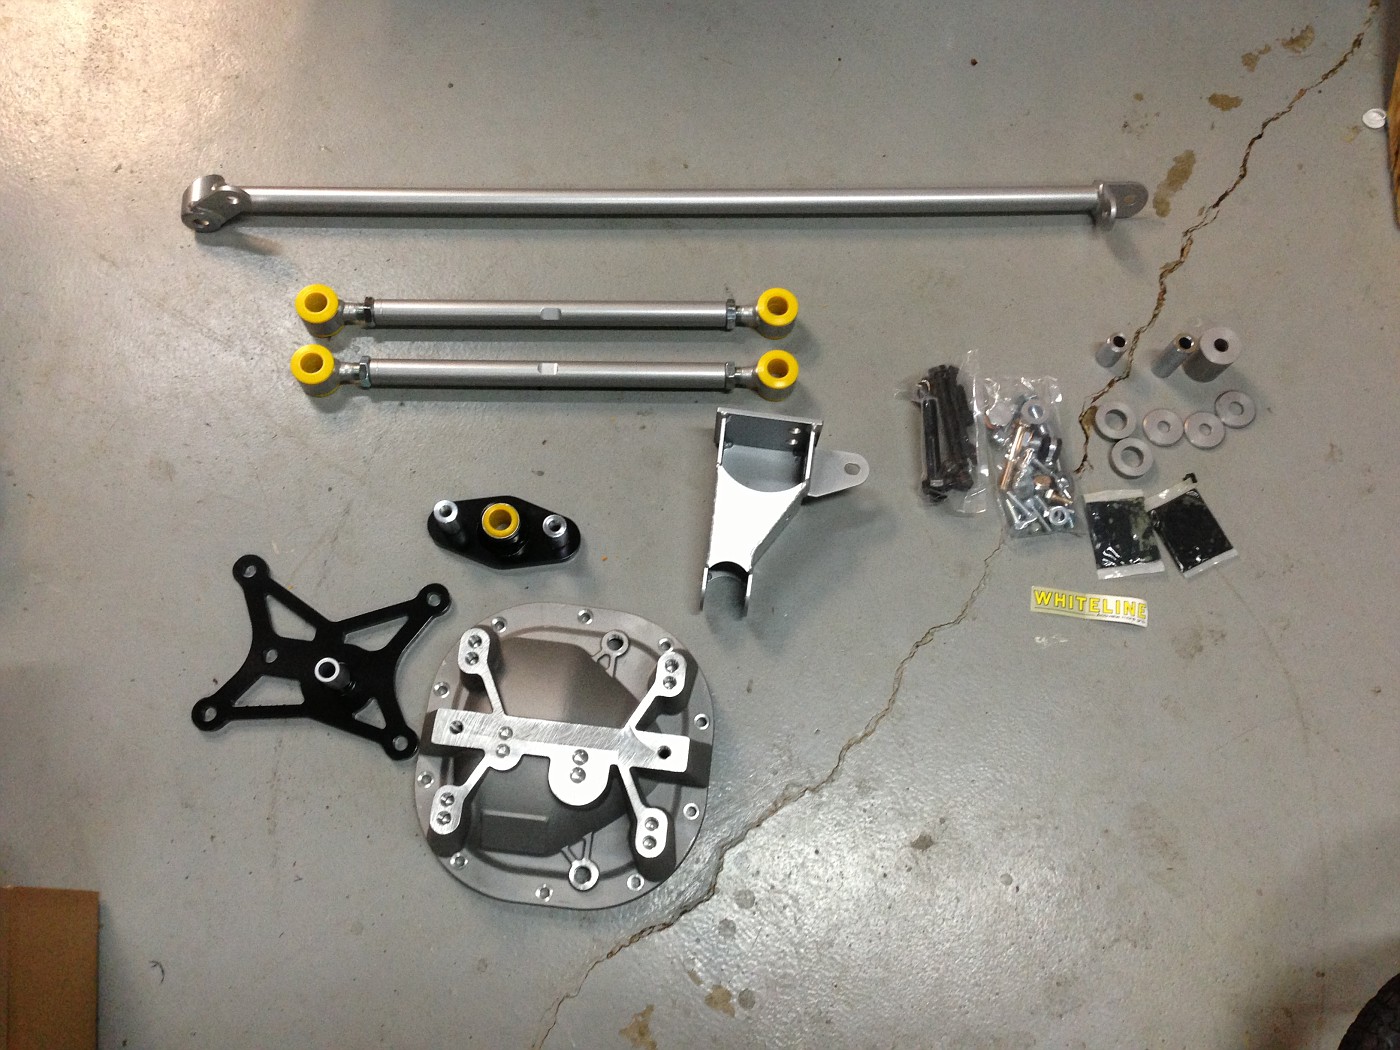
What's in the box:
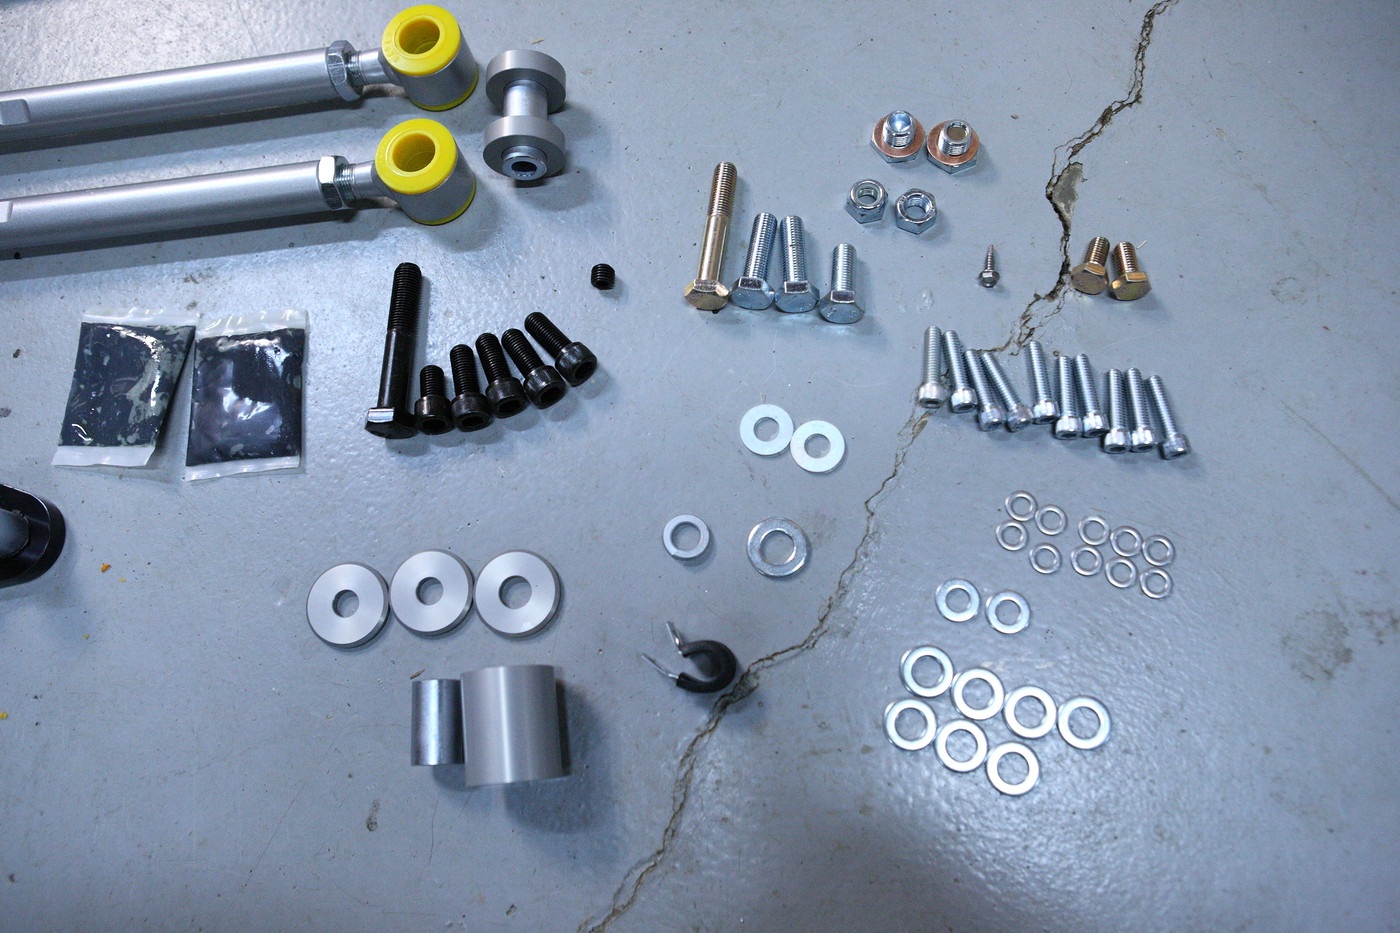
Hardware:
There were no directions in the box, so I printed my own from Whiteline's website:
My rear end setup before the install started:
Safety first. Metal and grit in your eyes is no fun. Trust me. Ever heard of an eye drill? They exist. Protect those peepers people!
My assistant Andrew:
First, I loosened and dropped my Steeda swaybar billet end-links:
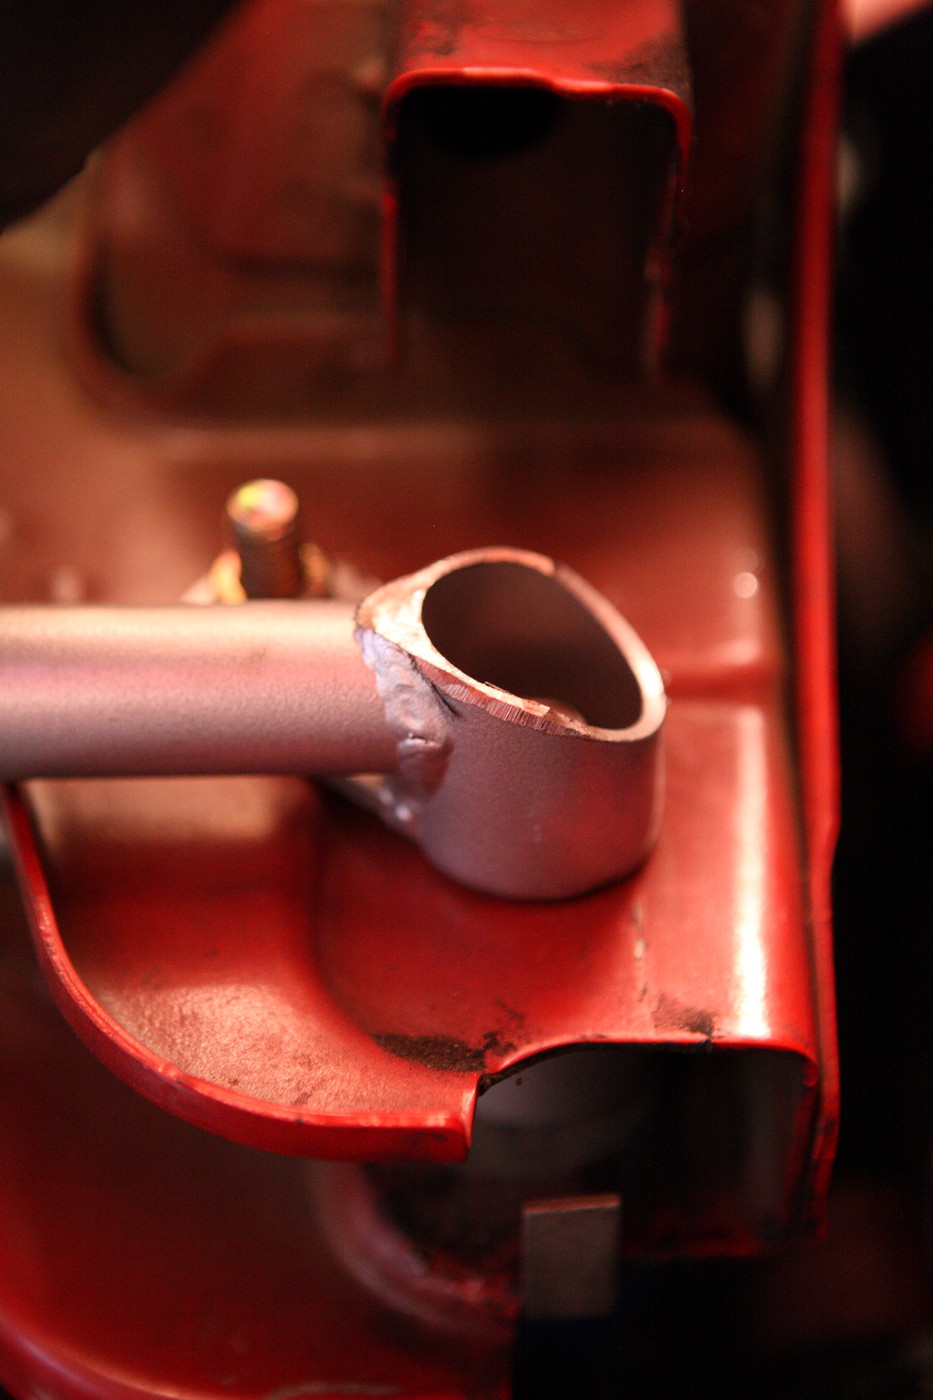
Next, I removed my Steeda panhard bar and panhard bar brace:
Then I unbolted my Scott Drake differential cover bolts and tightened the main bearing cap load support bolts to pull the cover off the differential housing, which broke the RTV seal and allowed the fluid to drain out:
Next, I installed the Whiteline main bearing cap load support bolts into the cover. Screw these in as far as they will go!:
Then I bolted the cover onto the diff housing. I used some 1 minute gasket maker. Worked great! The diff gets 20 LB-FT and the bearing load cap bolts get 5 LB-FT:
I then filled the diff with fluid through the top hole. I filled it until it poured out the factory fill hole at the REAR of the axle housing, then I plugged the OEM hole and added some more through the top hole in the Whiteline cover so that the diff has a bit more fluid. See the pic of my fill bottle above...that short hose works better than anything else I have used.
After that, I re-located the fuel tank vent line and a wiring harness, adding a Whiteline-supplied vinyl clamp and some zip-ties. You remove and discard one plastic clip, and turn the second one. I clipped off the now un-needed plastic push-pin mount plastic from the second one. All I left was enough to hold the two lines together, like this:
Next, I installed the main brace assembly after greasing the center pivot (some call it a propeller) and pushing it onto the brace. The Whiteline instructions say all 5 bolts that hold the brace to the diff cover get 60 LB-FT, with a dab of Lok-Tite. I did the four main (long) bolts first, then finished with the short (center-left) bolt. As I torqued, it kept spinning. STRIPPED. Damn. Fuuuuuddddggggggeeeee as Ralphie would say. Double checked my recently calibrated top-of-the-line Snap-On torque wrench. Still set precisely to 60 LB-ft. What the? So..I removed that stubby little bolt. Sure enough...aluminum threads came out of the hole. Stripping confirmed. My experience wrenching tells me that 60 LB-FT is likely too much torque for a bolt that short (not enough thread depth on the aluminum diff side to handle that value). My assessment? Bad instructions (too big a torque value). Oh well...I figured I'd call Whiteline first thing this week to seek remedy. If worse came to worse, I was going to drill out the main brace at that hole and tap the hole for a bolt the next size up, but Whiteline stepped up and they are going to send me a brand new differential cover. They said I am the second person to report stripping that bolt, so there is an issue there for sure. They are also going to contact engineering to confirm (or revise) the torque value for that bolt. I will install the new cover when it arrives and use less torque on that particular bolt.
I don't have a pic of just the support brace installed...I was a bit distracted (and frustrated) after that center bolt stripped, and picture priorities were forgotten for a moment. Fuuuudddgggeeee! But installation pressed on anyway. I figured that stubby bolt doesn't do much anyway.
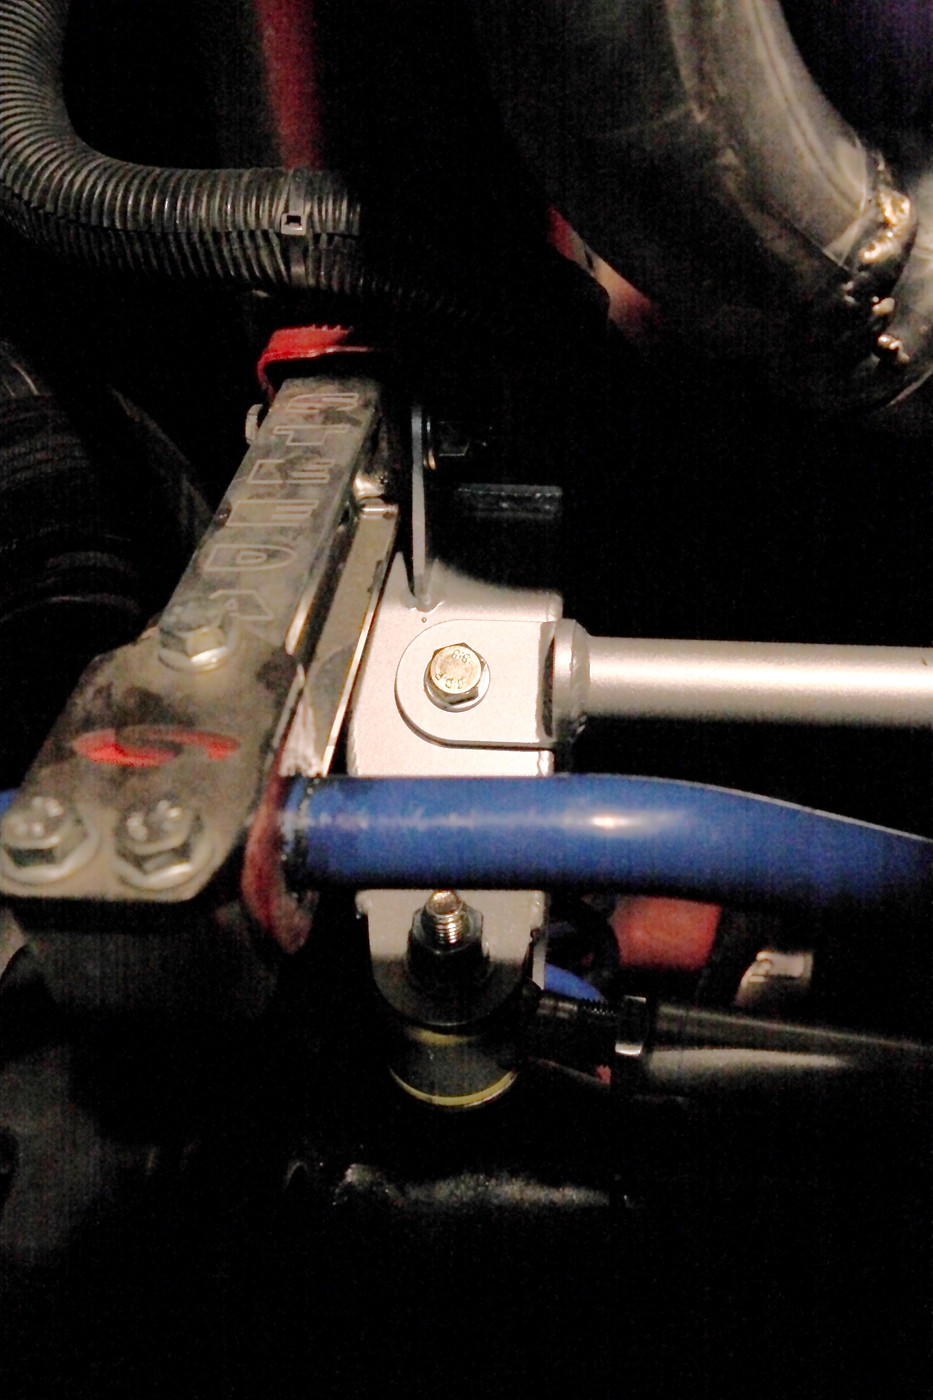
Next, I installed the driver's side drop bracket and torqued the bolts to 46 LB-FT. You need a U-joint and medium length extension to access these bolts with your torque-wrench:
Below my Steeda panhard bar brace at the top of this pic, you can see the Whiteline drop bracket and the lateral brace that bolts to it:
Bolting to driver's side in the holes formerly occupied by the panhard bar brace:
Continued next post due to pic limits...