partsbill
forum member
for anybody that wanted to keep a few tools in their car but didn't like them sliding around in the trunk or didn't want to pay big bucks for a decklid mounted tool box (like the Rousch tool kit) here's a cheap and easy diy project.
here's a quick writeup in case your interested in making your own.
Started out by tracing the interior surface of the trunk with some butcher paper and transferred the shape that I liked onto some poster board and cut it out. Layed the poster board on hardboard ($5 Home Depot) and cut my shape out (had to cut a notch for the brakelight wires that come off the lower right edge of the trunk. Fold in half and you will have the opposite side as well. This is how I determined where to drill my matching hole.)
Temporarily mounted to trunk by removing clips for brake wiring and drilled a matching 1/4" hole on the left brace of the trunk. Used plastic push pins from local auto supply to secure. Trimmed a few spots after this that were rubbing and smoothed the shape a bit.
Now to the indoor work...
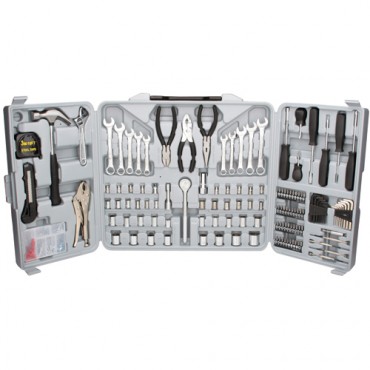
Picked up a small tool box from Sears(about $8) and drilled two 1/2" holes in the lid where it will eventually mount to the trunk lid panel.
Now, , I closed the bottom of the box, so that it is now upside down, and attached a GT logo to the bottom of the toolbox, so that it will be right-side up when I attach this to the trunk panel.
Heres the hardware I'll use to attach the box to the panel. 6 Large 1/4" washers, 2 1/4" x 1" bolts, 2 1/4" lock washers, 2 1/4" nuts, and 2 1/4" wingnuts.
Went to the local car audio shop and bought some speaker box carpet (almost identical to charcoal trunk carpeting) for $10.00. Used spray adhesive to stick the carpet to the hardboard, and wrapped the board, using hot glue to secure the edges.
From the back side, stick the bolt through a washer and mount through the panel for both inner holes.
On the front side, place a washer, lock washer, and nut on each bolt and tighten.
Toollbox holes should match up to the bolts coming through.
Place a washer, and secure each bolt with a wingnut.
Close up the box and you're ready to attach to the trunk!
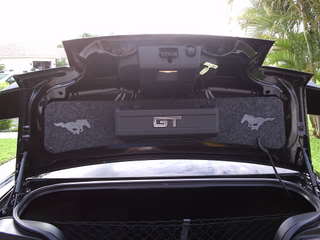
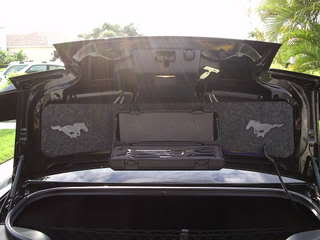
From here, you match up the holes in the panel to the holes in the trunk bracing and push in the plastic retainer clips to secure. I ended up mounting the panel with 5 push pins, 2 on the top and 3 on the bottom just to make sure it was secure. I think it finishes off the trunk really well, and I can remove the tool box by loosening the wingnuts if I need to.
Bill
sorry I did not take step by step pictures as I was doing it.<!-- / message -->
here's a quick writeup in case your interested in making your own.
Started out by tracing the interior surface of the trunk with some butcher paper and transferred the shape that I liked onto some poster board and cut it out. Layed the poster board on hardboard ($5 Home Depot) and cut my shape out (had to cut a notch for the brakelight wires that come off the lower right edge of the trunk. Fold in half and you will have the opposite side as well. This is how I determined where to drill my matching hole.)
Temporarily mounted to trunk by removing clips for brake wiring and drilled a matching 1/4" hole on the left brace of the trunk. Used plastic push pins from local auto supply to secure. Trimmed a few spots after this that were rubbing and smoothed the shape a bit.
Now to the indoor work...
Picked up a small tool box from Sears(about $8) and drilled two 1/2" holes in the lid where it will eventually mount to the trunk lid panel.
Now, , I closed the bottom of the box, so that it is now upside down, and attached a GT logo to the bottom of the toolbox, so that it will be right-side up when I attach this to the trunk panel.
Heres the hardware I'll use to attach the box to the panel. 6 Large 1/4" washers, 2 1/4" x 1" bolts, 2 1/4" lock washers, 2 1/4" nuts, and 2 1/4" wingnuts.
Went to the local car audio shop and bought some speaker box carpet (almost identical to charcoal trunk carpeting) for $10.00. Used spray adhesive to stick the carpet to the hardboard, and wrapped the board, using hot glue to secure the edges.
From the back side, stick the bolt through a washer and mount through the panel for both inner holes.
On the front side, place a washer, lock washer, and nut on each bolt and tighten.
Toollbox holes should match up to the bolts coming through.
Place a washer, and secure each bolt with a wingnut.
Close up the box and you're ready to attach to the trunk!
From here, you match up the holes in the panel to the holes in the trunk bracing and push in the plastic retainer clips to secure. I ended up mounting the panel with 5 push pins, 2 on the top and 3 on the bottom just to make sure it was secure. I think it finishes off the trunk really well, and I can remove the tool box by loosening the wingnuts if I need to.
Bill
sorry I did not take step by step pictures as I was doing it.<!-- / message -->
Attachments
Last edited: