Planning a Ford Racing “Aluminator” Build with associated mods over the winter

Scott

Senior Member
S197 Team Member
Joined
Nov 17, 2009
Posts
2,337
Reaction score
43
Location
King City, Ontario, Canada
Comp Cam Install

Cams were carefully examined for manufacturing burrs and packing coating removed with solvent. No cuts on the hands, but it was close. Cam journals, cylinder heads and cylinder head caps were liberally coated with Lubriplate 105 Engine Assemble Grease. The Comp Cams are part number 127550 and grind number XE272PH-13 (XFI SPR Ford 4.6/5.4L Modular 3V Cams – Springs and Phaser Mods Required)

RH Cam and Caps coated with Lubriplate

IMG_3482_zpsc6c26fb5.jpg


Lubriplate applied to RH Cylinder Head

IMG_3475_zps041c13fe.jpg


RH Cam set on Cylinder Head

IMG_3488_zpsef6d9a63.jpg


RH Cam Caps installed and tightened 89 in. lbs. using a 10mm socket and the Shop Manual torque sequence.

IMG_3507_zps5858a7c4.jpg


LH Cam installed using the same process followed for the RH Cam

IMG_3535_zps40cb57f7.jpg


IMG_3539_zps2353d927.jpg


IMG_3544_zpsa6243823.jpg
 

Scott

Senior Member
S197 Team Member
Joined
Nov 17, 2009
Posts
2,337
Reaction score
43
Location
King City, Ontario, Canada
Cam Phaser Install

New Phasers were included as part of the FRPP 3V Camshaft Drive Kit part number M6004-463V. The part number on the Phasers is 3L3E-6C524-KA. As detailed in post number 67 the Phasers were modified with a FRPP Cam Phaser Limiter Kit.

The Phaser Bolts are TTY and must be replaced; 3L3Z-6273-DA is the part number of the new bolts.

IMG_3517_zpsff49c679.jpg


Phasers were installed using a 15mm socket tightened to 30 ft-lbs plus an additional 90 degrees. Phasers were held in place with a Ford Rotunda Camshaft Phaser Locking Tool part number 303-1046.

RH Phaser

IMG_3529_zpsb6d8f498.jpg


LH Phaser

IMG_3550_zps378d9648.jpg


IMG_3566_zps3c950587.jpg
 

Scott

Senior Member
S197 Team Member
Joined
Nov 17, 2009
Posts
2,337
Reaction score
43
Location
King City, Ontario, Canada
Quick Update

Ready to locate TDC and check the cam timing.

IMG_3607_zpsa65fde01.jpg


Just picked up a Comp Cams Crankshaft Socket part number 4798. The socket lets you rotate the degree wheel without the risk of rotating the crankshaft. NEAT!

Stay tuned for full details on the installation of the timing components, locating TDC and checking the cam timing.

IMG_3636_zpsc7b7d8c9.jpg
 

Scott

Senior Member
S197 Team Member
Joined
Nov 17, 2009
Posts
2,337
Reaction score
43
Location
King City, Ontario, Canada
Oil Filter Adapter

Couple of new pieces for the build: Oil Filter Adapter 1L2Z-6881-AA, Gasket F65Z-6840-A and 4 Adapter Bolts N806-156-S437.

I will be using the Oil Filter Adapter to prime the engine oil system during assembly with the Pressure Tank Pre-Lube System detailed in post #50.

IMG_3644_zpsae477c77.jpg
 

Scott

Senior Member
S197 Team Member
Joined
Nov 17, 2009
Posts
2,337
Reaction score
43
Location
King City, Ontario, Canada
Modified Roller Followers

OEM Roller Followers part number 3L3Z-6564-BA on the left and modified followers on the right. The Roller Followers on the right have had their oil holes enlarged with a Dremmel to allow a 3/32 Allen key to be passed through the follower in order to adjust the Trick Flow Specialties solid Lash Adjuster part number 90100-BODY (middle) to zero lash.

IMG_3654_zps1dac6bd3.jpg


Ran into another problem, the "Head On" Piston Stop in my Trick Flow Specialties Degree Kit has the wrong piston stop in it. Checked with TFS and Comp Cams and no one makes a tool for the mid 2008 to 2010 3V heads. Looks like I may have to modify an old spark plug into a Piston Stop tool.

IMG_3662_zpsb6f350c7.jpg


Also ordered another TFS solid Lash Adjuster so I can check cylinder # 1 and cylinder # 6. Cylinders #1 and # 6 are at TDC at the same time so they can both be checked without resetting the degree wheel.
 

Scott

Senior Member
S197 Team Member
Joined
Nov 17, 2009
Posts
2,337
Reaction score
43
Location
King City, Ontario, Canada
12mm “Head-On” Piston Stop

Fabricated a 12mm Piston Stop out of an old spark plug, 8mm threaded rod and nut. Thanks Joe (GTAMC Forum / Nice86GT) for welding the nut on.

It was a PITA to say the least to get the electrode and ceramic out of the plug casing – over 2 hours easy. Tried drilling the electrode, but that was a waste of time. In the end a Dremel, hammer and small punches prevailed.

Custom 12mm Thread Piston Stop

IMG_3680_zps6f678770.jpg
 

Scott

Senior Member
S197 Team Member
Joined
Nov 17, 2009
Posts
2,337
Reaction score
43
Location
King City, Ontario, Canada
Locating “True” TDC

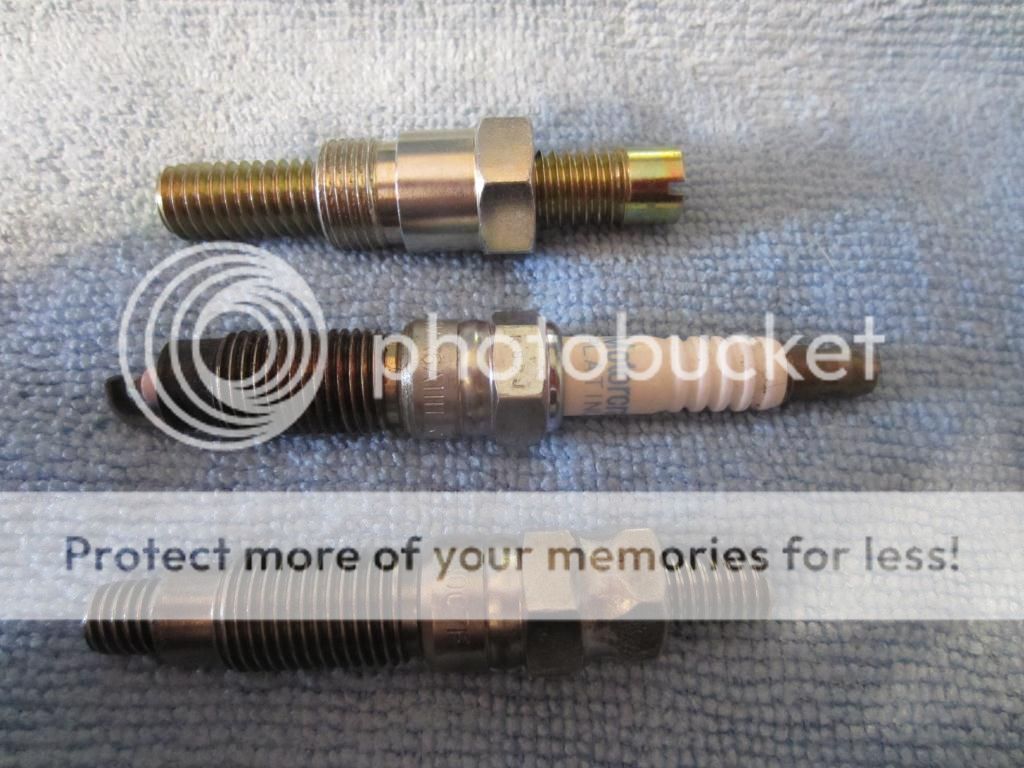
Got back to the garage today for a few minutes and made a little progress, put the fabricated 12mm thread Piston Stop to work.

Ok, I have been out of the game for a long time, let say it has been over 30 years since I degreed a cam. So needless to say this is the first 3V cams I have attempted. Basically I elected to follow the Comp Cam instructions.

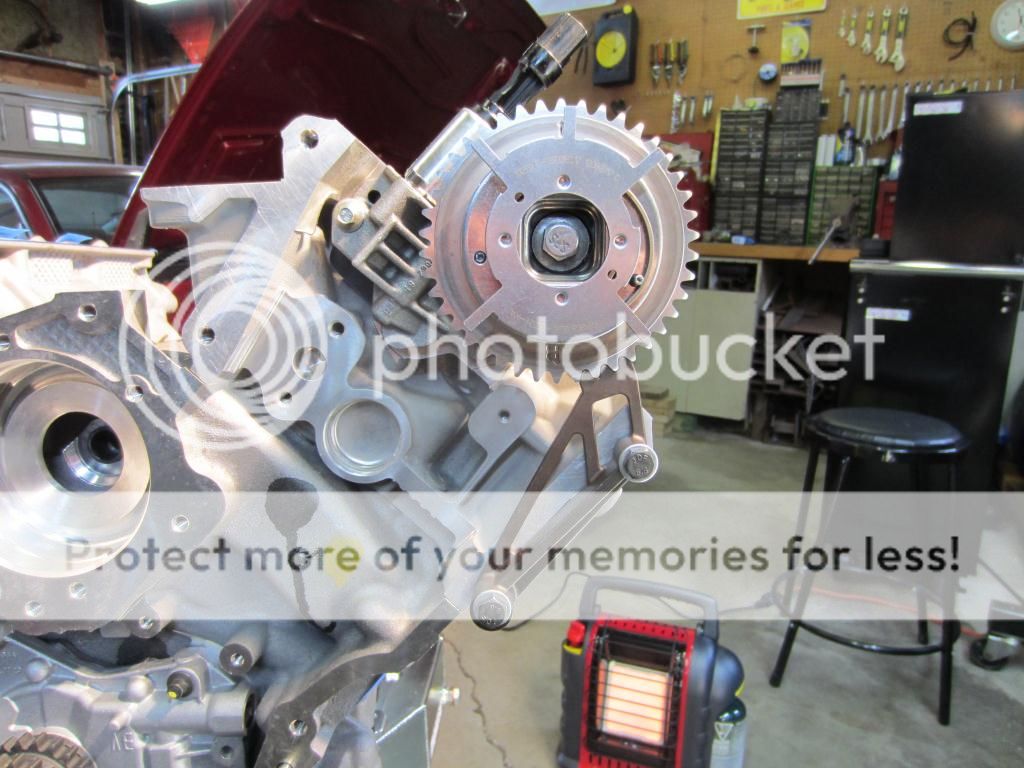
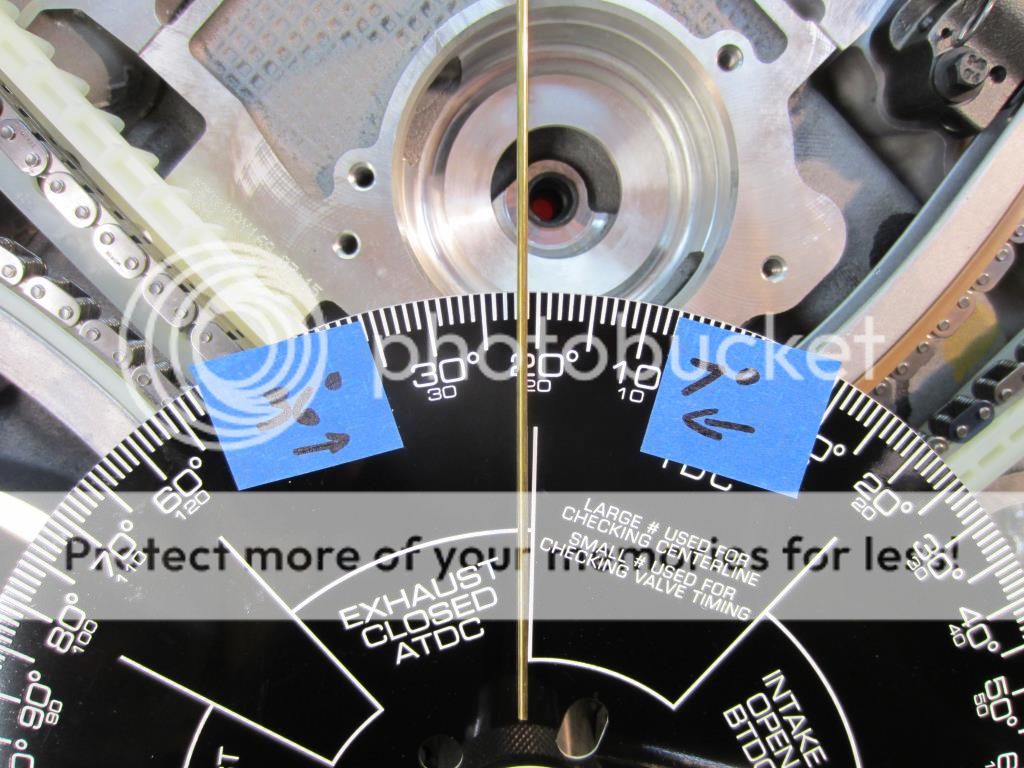
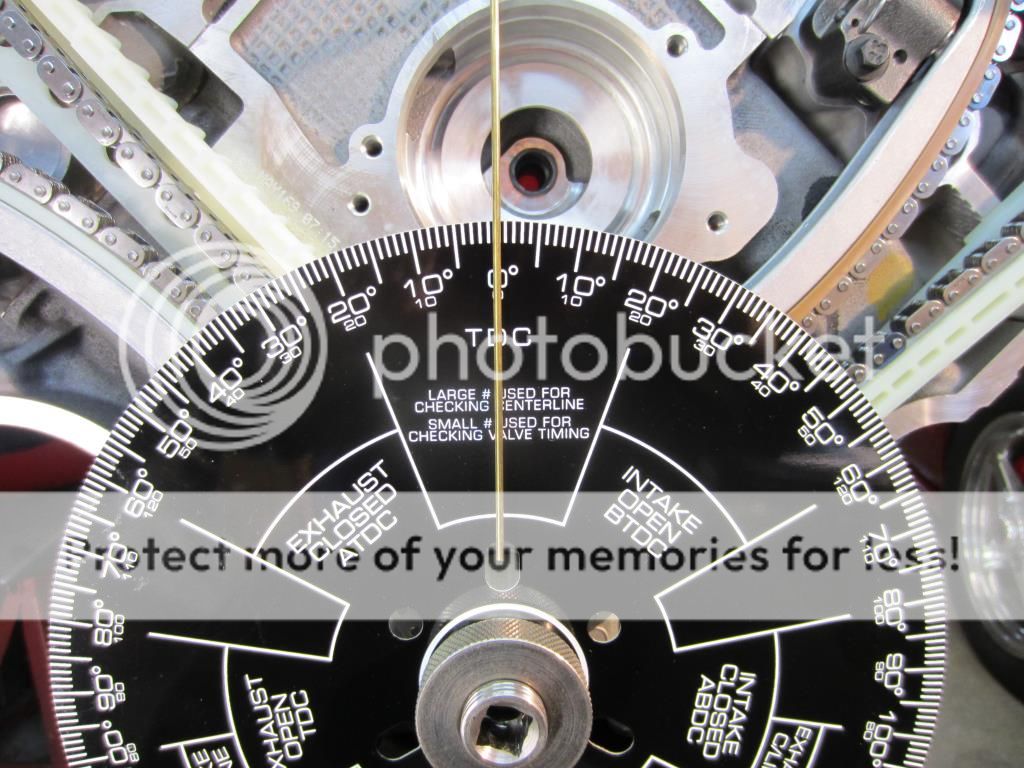
Installed the TFS Degree Wheel and a pointer. The Degree Wheel was set to zero at the pointer.

IMG_3686_zpsc278dc50.jpg


Engine was rotated counter clockwise 20 degrees and the Piston Stop was installed in #1 spark plug.

IMG_3699_zpsfeb0ebe9.jpg


Crankshaft was rotated clockwise until the piston fit the stop at which point the number indicated on the degree wheel was recorded, in my case 7 degrees, “A”

IMG_3706_zps2986dc27.jpg


The crankshaft was then slowly rotated counter clockwise until the piston fit the stop in the other direction. Again the number on the degree wheel was recorded, in my case 36 degrees, “B”.

IMG_3712_zps66453b76.jpg


Piston Stop was removed and the Crankshaft was rotated to the midpoint of the two marks on the degree wheel. In My Case 21.5, “C” = (“A” + “B”) / 2

IMG_3716_zps88fcf1ca.jpg


Without moving the crankshaft the Degree Wheel was relocated to zero degrees at the pointer.

IMG_3724_zps7dd0592b.jpg


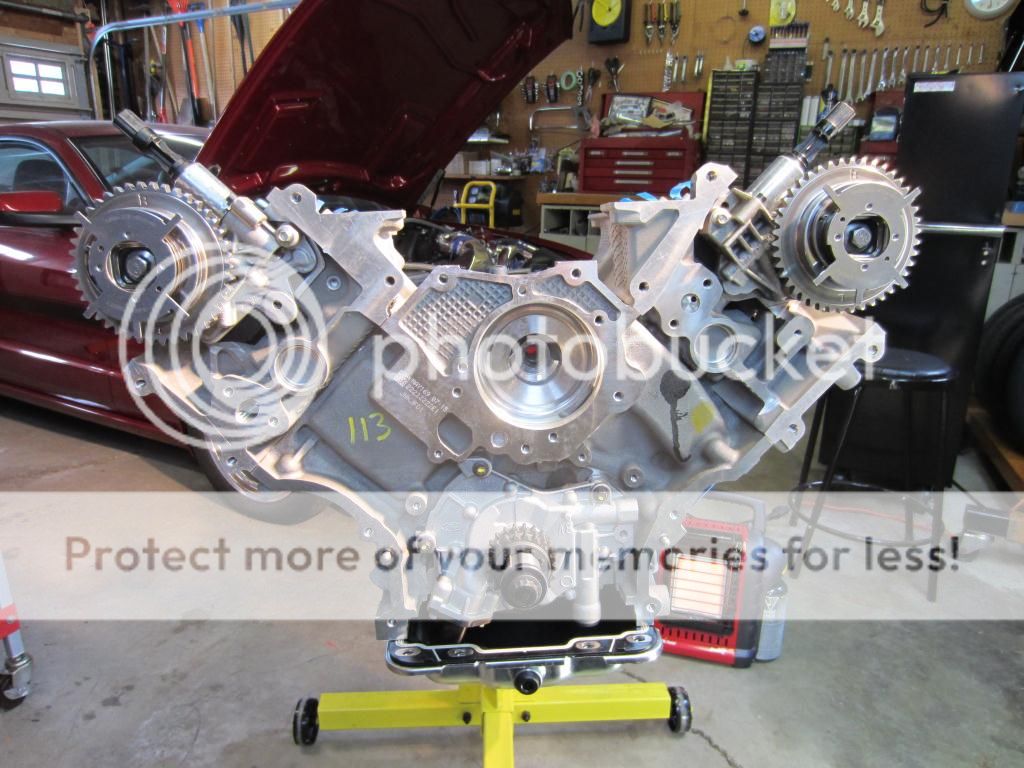
To be sure I have located true TDC I will repeat this process next garage time and then on to checking the cams. I want to do Cylinder #1 and #6 since they are both at TDC at the same time.
 

Scott

Senior Member
S197 Team Member
Joined
Nov 17, 2009
Posts
2,337
Reaction score
43
Location
King City, Ontario, Canada
Organized a few more pieces for the build.

Moroso Fabricated Aluminium Valve Covers part number 68388, thanks Matt D.


Valve Cover VCT Solenoid Seals part number 7L1Z-6C535-AA


Valve Cover Gaskets part number Right Hand 7L1Z-6584-A and Left Hand 7L1Z-6584-B


Dipstick part number 4R3Z-6750-AA and Dipstick Tube part number 4R3Z-6754-BA


Scott

Senior Member
S197 Team Member
Joined
Nov 17, 2009
Posts
2,337
Reaction score
43
Location
King City, Ontario, Canada
Parts Stock Pile

A few more pieces added to the stock pile of parts for the build.

Optima Yellow Top Battery, part number D34


TurboXS Bypass Valve, part number RBV-25 – thanks Matt D


And a Fresh set of Ford Racing Spark Plugs, part number M-12405-3V12MM – thanks Matt D


Scott

Senior Member
S197 Team Member
Joined
Nov 17, 2009
Posts
2,337
Reaction score
43
Location
King City, Ontario, Canada
Optima in the Trunk

With the help of her husband, prepared and got the first coat of paint on my daughter’s master bathroom. Oh the car build, managed to get the battery in the trunk while on coffee break.


Scott

Senior Member
S197 Team Member
Joined
Nov 17, 2009
Posts
2,337
Reaction score
43
Location
King City, Ontario, Canada
Thermostat Housing

To seat the Ford Racing Intake it is necessary to eliminate the Vortech ½” thick spacer that rotates the Thermostat Housing a few degrees clockwise buy cutting the snout on an angle, rotating it 180 degrees and welding it back on. With luck the radiator hose will now snake between the Supercharger and Throttle Body.

This shows the FRPP Intake not seating and sitting on the T-Stat Housing because of the Vortech spacer.


Housing snout cut.


Housing snout welded back on.


Scott

Senior Member
S197 Team Member
Joined
Nov 17, 2009
Posts
2,337
Reaction score
43
Location
King City, Ontario, Canada
Johanna Kaye Has Arrived

Garage time has been at a premium for the last month or so as my wife and I were expecting our first grandchild. My daughter Leslie and her husband live with us (more and more a reality in this economy) and my Honey-Do-List was extensive for the arrival of Johanna Kaye. Well the work list was completed just in time as Johanna Kaye arrived on schedule May 07th at 7:07 a.m., 8lbs 11oz and 22 inches tall/long.

Minutes after birth.


On the ride home.


And resting peacefully at home so Mom and Dad can grab 40 winks as well.


And now back to our engine assembly.
 

Latest posts

Support us!

Support Us - Become A Supporting Member Today!

Click Here For Details

Sponsor Links

Banner image
Back
Top