Project Break a Boss

Saleen304

forum member
Joined
Aug 11, 2011
Posts
451
Reaction score
2
The studs were wobbly because they didn't have any stretch on them yet. I wouldn't deviate from the installation instructions given by the manufacturer. There have been instances of cracked blocks when using ARP studs and not following procedure.
 

swflastang05

Back for More
Joined
Dec 21, 2013
Posts
2,098
Reaction score
121
Location
N. Ft. Myers, FL
^^ :crazy: Holy shit said my brain with all that math, lol!! :crazy:

Awesome write up though, really looking forward to seeing / hearing it run!
 

ford20

forum member
Joined
Dec 21, 2010
Posts
7,346
Reaction score
24
Location
White Plains,NY
^^ :crazy: Holy shit said my brain with all that math, lol!! :crazy:

Awesome write up though, really looking forward to seeing / hearing it run!

Thanks dude, me too! Unfortunately getting the cams degreed resulted in some setbacks and really took all the wind out of my sails with the engine. At least it would give me some time to get some smaller shit done and some updates.
 

ford20

forum member
Joined
Dec 21, 2010
Posts
7,346
Reaction score
24
Location
White Plains,NY
I just wanted to show some of the parts that I am getting along with updating my parts list.

I ordered a couple of non Ford parts and have been getting them in slowly and just stockpiling them until recently.

BMR A-Arm support brace - AAS-001

In talking with Kelly about these he had mentioned that for guys who are going to be drag racing their cars, they wouldn't need this as you aren't exactly putting a lot of stress on the A-Arms. For people who are going to be using their cars for road course or autocross or street driving this would make sense as you are tying the two A-arms together making them stronger and stiffer. There would be less deflection on the A-arms for improved handling.

MPR Racing Engines Billet Lower Crankshaft sprocket

20844761425_d800dc1883_b.jpg


This is made out of billet steel and is FAR stronger than the cast piece that Ford offers. On high boost applications, the factory sprocket has been known to break on cars with superchargers or turbochargers and will destroy your engine. Once this breaks, there is nothing holding the timing chains onto the crankshaft and thus your primary chains will have the potential to skip a bunch of teeth along the sprocket and will throw the timing off.

MPR Racing Engines heavy duty secondary timing chains

20799828720_f38bac844e_b.jpg


The problems with going with aftermarket cams and springs is that you may get a larger lift along with increased duration camshaft that the engineers at Ford never designed the secondary chains for. With these aftermarket cams, most will replace the valve springs that have increased spring pressure and seat pressure which will put some added stress on the secondary chains. For the most part, I think you will be ok to run the factory units but with the added RPM's and extended higher RPM's that the engine would see on a road course, I thought this would have been a good idea. I know I would have kicked myself if the cams broke on me. They feature thicker pins holding the chain links together along with thicker plates.

RGR/JPC Stage 2 heads - 1295

RGR lightweight phaser deletes - ????

20853611356_b0bf11db5c_b.jpg


These are going to delete the internals of the VCT phasers which is going to end up saving a lot of rotating mass off of your cams and timing system. While not expressly heavy, you can certainly feel the difference when you hold a stock phaser along with one of these phasers in your hand, especially with the exhaust phasers. If you are locking out the phasers, you might as well go the extra step and get these as well. Anything to gain an edge against your competition right?

RGR custom grind camshafts - ????

Well, these I can't really say much about these as the cam grinds don't belong to me. I will say however that in researching cams for the coyote in N/A form, it seems that the lift, isn't the important part. The thing you want to focus on here is the duration, as this is what is going to be making the most power with these motors. If you think about it, you are only at your maximum lift for a fraction of a second but the longer you have your valves open, the more air and fuel you can get into the combustion chamber as well as the exhaust gases out of the chamber.

Just as a point, it is possible to make cams lope in these cars. These aren't RGR cams, but I just want to point that out but it is too badass not to share haha.

https://www.youtube.com/watch?v=Q45KS7boguk

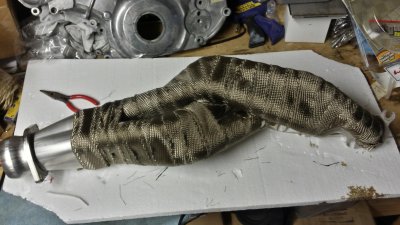
JPC Revised OAP - FDVA00002T

With the over axle pipes you are obviously removing the factory resonators but you are also gaining some power. With these you are going to gain somewhere around 7-15HP and when playing the N/A game, every little bit helps.

JPC Underdrive alternator pulley - 02020

19849374954_810f96d805_b.jpg


This is a lightweight pulley and I can tell you that when they say lightweight, they mean LIGHTWEIGHT!!! This thing feels like a feather to be honest. Anyway, this replaces the pulley on your alternator which will slow down the alternator and increase the longevity of the alternator. JPC says that they see about a 2-4HP increase with these and on a coyote stock car these would be some BIG numbers when you have to run the same equipment as everyone else. As previously stated on a N/A build, just like with the 3V every little bit counts. You are going to need a bigger belt that is 70 7/8" belt which should be NAPA 25-060703 according to JPC. I haven't had a chance to measure this so once I do, I will confirm.

JPC Black Clutch line upgrade - CLK-B

JPC -12AN PCV fittings - 02017

Recently, Darren (the car in the video above) had been posting asking about some blowby issues and one of the suggestions was to go with larger AN lines from the valvetrain to the catch can so you aren't choking the motor and getting rid of the blow by fast enough. with this in mind, I said fuck it. I might as well get these and prevent any future issues. If it works cool, if not, no biggie right? Not to mention, this is MUCH cheaper than going with the 3 vane vacuum pump setup that you would need for road race applications.

Amazon.com: Aeroquip FCU1206 #4 Startlite Racing Hose: Automotive@@AMEPARAM@@http://ecx.images-amazon.com/images/I/21TyduWH7OL.@@AMEPARAM@@21TyduWH7OL

The startlite hoses are 45% lighter than similar stainless steel hoses and IIRC they were something like 30g per foot lighter than the AQP Stainless steel hoses that Aeroquip sells. In the spirit of MattD ... weight savings bitch

Phenix Industries -12AN Compression Swivel Hose End Straight - J1200-3

Phenix Industries -12AN 90 degree compression swivel hose - J1290-3

Injector Dynamics ID100 Injectors - ID1000

20319539246_cbeea8a848_b.jpg


I know that these are way overkill for my setup but if I ever wanted to go bigger and badder with the car I will be setup injector wise, not to mention I have been talking about getting an actual fuel system for the car so this is once less thing I would have to get when I go down that route.

VMP plug and play 40amp voltage booster -VMPAMPPNP

This makes wiring the voltage booster stupid simple! Just plug everything in and you are all set and I am all about convience here! Comes with everything you see here and is stupid simple.

Ford Racing Cobra Jet Setup

Cobra Jet Cold Air Intake - M-9603-M50CJ
Super Cobra Jet Monoblade throttle body - M-9926-SCJ
Cobra Jet Intake Manifold - M-9424-M50CJ

Kooks Green Catted H-Pipe - 11413610

Since I have to comply with emissions for NYS I decided to go with the Kooks green cats H-Pipe system which will tie into the existing Kooks side pipes I have. As is, the Kooks side pipes make the car fucking loud as shit and sound amazing so I am really dying to hear how they sound with the long tubes. The important part here is that these are 49 state legal so I should be all good to go with emissions.

ARP Head studs - 256-4702


ARP Harmonic Balancer Bolt Kit - 156-2502

ARP Flywheel Bolt Kit - 156-2801

I think that is everything for now but I am almost positive that I am missing things on this list so once I can find them I will update
this.
 

ford20

forum member
Joined
Dec 21, 2010
Posts
7,346
Reaction score
24
Location
White Plains,NY
I just went ahead kept my attenion on the heads. As I said eariler, the heads come bare without followers of lash adjuters. In pricing them out, I found it cheaper to go with the newly released FRPP kits rather than buy them separately. So I went ahead and grabbed the boxes for my parts pile.

I started with the lash adjusters and put a very small amount of Comp assembly lube #103 on the lash adjuster and plopped them in their respective holes.

20658050939_8b72d032a3_b.jpg


20044891503_7d3367f3a5_b.jpg


20477822038_6b78592edf_b.jpg


20479083599_1669c903b8_b.jpg


Next thing was to grab the followers and get those into place. They are pretty easy to install, just roll them on the lash adjusters until you hear them click. Before you put them on, always remember to clean your parts even if they are brand new. As you can see here, these are straight out of the box and they are dirty.

20656787278_89a759f326_b.jpg


Followers are in now.

20222167454_e933b0f068_b.jpg


20656725270_3a0b2d4e70_b.jpg


Parts List
  • Comp Cams Assembly Lube #103 - CCA-103
  • Lash adjuster assembly - M-6500-M50
  • 5.0L Coyote Roller Finger Follower Kit - M-6465-M50
 

Doug M

Fast Cars & Freedom
Joined
Dec 15, 2009
Posts
14,574
Reaction score
3
Location
AL. Baby
Awesome looking parts! Excited for you to get it done. Hurry up. Lol
 

ford20

forum member
Joined
Dec 21, 2010
Posts
7,346
Reaction score
24
Location
White Plains,NY
Awesome looking parts! Excited for you to get it done. Hurry up. Lol

Haha you and me both!My registration is up at the end of this month and in order to register the car it has to get inspected which means the car has to be up and running by the end of the month with some sort of emissions tune so this is the month come hell or high water that the engine has to be in and running. Not a whole lot of time left for all of this.
 

ford20

forum member
Joined
Dec 21, 2010
Posts
7,346
Reaction score
24
Location
White Plains,NY
Now that I have the heads on and assembled I turned my attention towards the RGR lockouts. Now, I know there is a huge amount of what the hell are you doing when it comes to going with lockouts versus going with limiters but in talking with JPC, they didn't feel that I would be losing a lot of power with them and I could lock the cams in for higher RPM power on the race track. I have trusted them this far and I think performing as well as they do shows what they they know. Me being a complete noob at this, I have 120% faith in them on the decision. Plus they look pretty cool.

So, I grabbed the phasers out of the FRPP timing kit and went to work on them. First thing I did was mark my right & left timing marks with a magic marker. White out or scribing them probably would have been the easier and better thing to do but as long as you can mark them, thats all that matters. I found it easier to take the snap ring off first and then take the torx bolts off but don't take the last bolt out all of the way, only a couple of threads and then place it on a flat surface.

20477796428_6c0c99fd22_b.jpg


From there you can now take the last bolt off all of the way from the housing, and take off both plates.

20477800598_85a55a744e_b.jpg


20477787390_e23ec666b9_b.jpg


The next thing to do would be to remove the plastic piece along with the spring

20477789090_15a82427b2_b.jpg


From there you want to dispose of the "guts" of the phaser. You might want to grab a towel or a plastic bag and put it over the phaser and seperate the bottom part with the middle section and let the internals come out.

20477805840_9fcdac791e_b.jpg


Now you can put the phasers on. For your exhaust phaser, you take the middle section and the bigger delete plate and put those together to make the exhaust phasers. For the intake phasers, you grab the back plate and the small delete plate and put those together.

20043245594_a79e1de0ae_b.jpg


20672529911_07459cccc7_b.jpg


From here, you can now begin to put the cams in.

Parts List
  • RGR Lightweight Phaser Deletes
 

ford20

forum member
Joined
Dec 21, 2010
Posts
7,346
Reaction score
24
Location
White Plains,NY
The next thing on the list was to put the cams in. First things first, make sure you have new cam filters and make sure that you have new cam bolts as these are TTY bolts and you might not realize that. Now that we have that out of the way, we can go ahead and start with our cams. Make sure that you have them correct. The comp cams are labled RI, RE, LI & LE right on the boxes so it is pretty easy to identify which is which.

I just want to take the time to say that I have heard a couple of times that the aftermarket cams are no gun barrel drilled like the factory or CJ cams are. I'm not sure what that means but it appears that my cams are driled out in the center. I don't know if this is what is meant by that or not, but I figured I would throw that out there.

20223783363_5d606bb234_b.jpg


When you put the cams in you want to make sure that they are in the nutral position with the D hole in the following positions.

Left side

20835202482_415b7a79b4_b.jpg


Right side

20656765898_c544324ba0_b.jpg


From there you can put the new cam filters in, but remember to clean out the bores of them so they are nice and clean. This is a picture before I cleaned them. As you can see it is slightly dirty haha.

20851896501_828a75cf5f_b.jpg


Cam bolts get torqued down now once you have both cams in the heads. Don't forget to put the Comp Assembly lube on the cam journals and cam caps.

20799977518_6df9b363e2_b.jpg


This is the torque sequence for both left and right heads.

21017307129_bf8c501c03_o.jpg


Parts list
  • JPC Racing Custom grind cams - ????
  • Coyote Camshaft Drive kit - M-6004-A504 (Cam Filters)
  • N806183-S437 - Cam Cap Bolts ( You need 40 of these)

[Torque Specs]
  • Step 1 - 53lb-in
  • Step 2 - additional 45 degrees

This is where I fucked up. I snapped 2 bolts because I was looking at the torque specs for the head bolts, not the cam cap bolts so make sure you follow the specs listed and don't do something tupid like I did. I bothered Eric over at JPC about it when I realised my mistake so thank you to him for tolerating my stupidity.
 

pacettr

PJ Lover
Joined
Aug 20, 2008
Posts
3,417
Reaction score
14
Location
Yukon, OK
Now that I have the heads on and assembled I turned my attention towards the RGR lockouts. Now, I know there is a huge amount of what the hell are you doing when it comes to going with lockouts versus going with limiters but in talking with JPC, they didn't feel that I would be losing a lot of power with them and I could lock the cams in for higher RPM power on the race track. I have trusted them this far and I think performing as well as they do shows what they they know. Me being a complete noob at this, I have 120% faith in them on the decision. Plus they look pretty cool.


http://www.enginelabs.com/engine-te...project-goes-fuel-injected-with-aem-infinity/

The left-side dyno sheet is from the carbureted version of the engine, and the right-side sheet is the new Infinity-controlled version of the engine. Look at the large gains in torque across the measured rpm levels. At 5,000 rpm, the fuel-injected engine is up 15 foot-pounds, and that increases to 21 foot-pounds by 6,000 rpm and is carried throughout the rpm range. Horsepower is up as well - 14 at 5,000, 24 at 6,000 rpm, and 34.5 at the power peak of 7,800 rpm. Remember that in the first round of testing with the carburetor, the camshafts were locked solid. The additional gains in power can be attributed to the camshaft control.


I don't know which is "right" but the dyno testing seems pretty conclusive. This is a pretty aggressive build as well. Anxious to see your results as I haven't decided how radical to get with my LS yet. I'm still off-road H-pipe and tune only...
 
Last edited:

ford20

forum member
Joined
Dec 21, 2010
Posts
7,346
Reaction score
24
Location
White Plains,NY
http://www.enginelabs.com/engine-te...project-goes-fuel-injected-with-aem-infinity/


I don't know which is "right" but the dyno testing seems pretty conclusive. This is a pretty aggressive build as well. Anxious to see your results as I haven't decided how radical to get with my LS yet. I'm still off-road H-pipe and tune only...

When I spoke with Mark from StangTV he said the same exact thing to me. I guess we will find out, I know someone with a slightly different build (12.5:1 compression and 318 CI) locked his cams out and came up with 355 on pump and 577 on E85. Granted the lift on those cams is unfucking real but I am running a much larger duration that he is with a normal lift so I guess we will see what happens. Worst comes to worst, when I have to refresh the engine I will throw the VCT back in and see what I come up with.

To be honest, I don't think I ever would have gone down this path that I did unless the engine blew on me. I mean, I always wanted to do something like this but I don't think I ever would have gone this far. Probably just a set of cams and CJ intake and call it a day although I was very content with the Kooks side pipes, BMR LCA's, and tune.
 
Last edited:

ford20

forum member
Joined
Dec 21, 2010
Posts
7,346
Reaction score
24
Location
White Plains,NY
I wanted to go ahead and take a break from the top end and get the little things out of the way that the service manual says to do.

So, I went ahead and grabbed my oil filter adapter with new gasket already installed and the three bolts and torqued them down. I went ahead and grabbed my new Boss oil cooler out of the box and went ahead and installed that as well.

20749287588_9f5477f313_b.jpg


Parts List
  • Oil Filter adapter bolt x2 - 10mm - W714974 (Sorry, I don't have the last digits on this one right now)
  • Oil Filter adapter bolt x1 - 10mm - W503306 (Sorry, I don't have the last digits on this one right now)
  • Ford Racing Boss 302 oil cooler - 14mm allen key - M-6642-MB

Torque Specs
  • Step 1 - 177lb-in
  • Step 2 - Additional 60 degree turn
  • Step 3 - Put oil cooler threaded fitting in and tighten to 43 lb-ft


Next thing I did was grab the crankshaft position sensor and put that into place. This appears to be the revised one with the new O-ring installed that was addressed by the TSB.


NOTICE: The Crankshaft Position (CKP) sensor must be positioned into the fitting on the crankshaft rear seal retainer plate and be flush against the boss on the engine block before the bolt is installed. If the CKP (Crankshaft Position) sensor is installed incorrectly, the CKP (Crankshaft Position) sensor can be damaged.

20937260805_5f9fbe4c44_b.jpg


20749205450_f952d5b4ba_b.jpg


20937264275_bdd5f354aa_b.jpg


Parts List
  • Crankshaft Position Sensor - 8mm - DY-1293 (Comes with a new bolt)

Torque Specs
  • 89 lb-in


I went back to the top of the motor and grabbed the new knock sensors and went ahead and put those in as well. These point towards the rear of the engine.

20750515179_954ba4ff79_b.jpg


20937267645_d9ec7d6e24_b.jpg


20749298988_6060a0f334_b.jpg


Parts List
  • Knock Sensors - x 2 AL3Z-12A699-BA
  • Knock Sensor Bolts - x 2 - W500110-S437

Torque Specs
  • 177lb-in
 

ford20

forum member
Joined
Dec 21, 2010
Posts
7,346
Reaction score
24
Location
White Plains,NY
I worked my way down to the exhaust now as per the manual's instructions. So I went ahead and grabbed my long tubes out of the boxes.

20316238363_fc397fb52a_b.jpg


First thing I did was grab the exhaust studs. Mind you, these are 2015 heads so I am not 100% certain if the studs are interchangable or if they have the same part number as the 11-14 heads.

20937269035_e88accfce9_b.jpg


Then I went ahead and grabbed the gaskets for 2015 heads. Just a quick shot of the exhaust valves before I put them on. Very nice looking :D

20937275385_bf5d2892fa_b.jpg


20911009456_f7539ca10a_b.jpg


I put the long tubes on followed by the nuts for the studs.

20911017526_e186a5b83a_b.jpg


20937288075_5908f15a11_b.jpg


20937284035_f55fe33980_b.jpg


Parts List
  • Kooks 1 7/8 x 3 - 11412400
  • Exhaust Manifold Studs 2015 - 6mm - W714869-S431
  • Exhaust Manifold Nuts - 15mm - W714870-S430
  • Exhaust Gaskets - BR3Z-9448-A

Torque Specs
  • Exhaust Studs - 18lb-ft
  • Exhaust Nuts - 2 Steps
  • Stage 1 - 18lb-ft
  • Stage 2 - 24lb-ft


Shit, I don't know what you guys are bitching about. Installing headers is fucking cake, bunch of pansy's .....
shiftyeyesxg7.gif
 

Doug M

Fast Cars & Freedom
Joined
Dec 15, 2009
Posts
14,574
Reaction score
3
Location
AL. Baby
That's great, my friend! Can't wait to see what that beast will do.
 

ford20

forum member
Joined
Dec 21, 2010
Posts
7,346
Reaction score
24
Location
White Plains,NY
Wrapping Coyote headers isn't much fun
 

Attachments

  • 20150919_185817_Richtone(HDR).jpg
    20150919_185817_Richtone(HDR).jpg
    539.6 KB · Views: 7

Support us!

Support Us - Become A Supporting Member Today!

Click Here For Details

Sponsor Links

Banner image
Back
Top