Painting Vent Register Bezels

Charlie Sheen

Armed and Hammered
S197 Team Member
Joined
Apr 6, 2007
Posts
13,286
Reaction score
372
Location
Infernum ubi sum
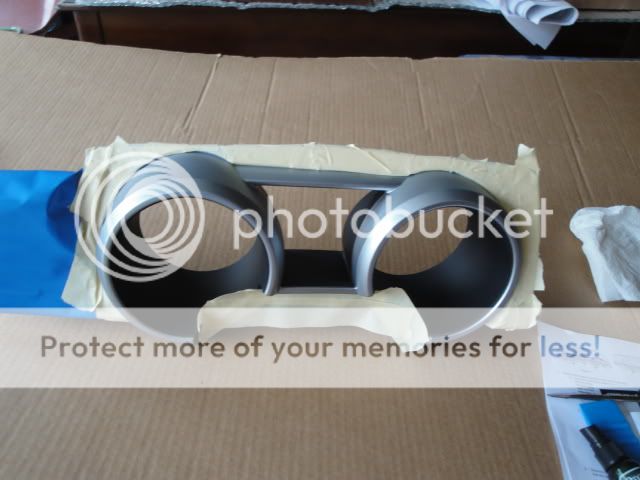
Vert + top down + chrome in your face = fail.

Remove the registers. Open the vents, stick your thumbs in there on opposite side and pull. They should pop right out.

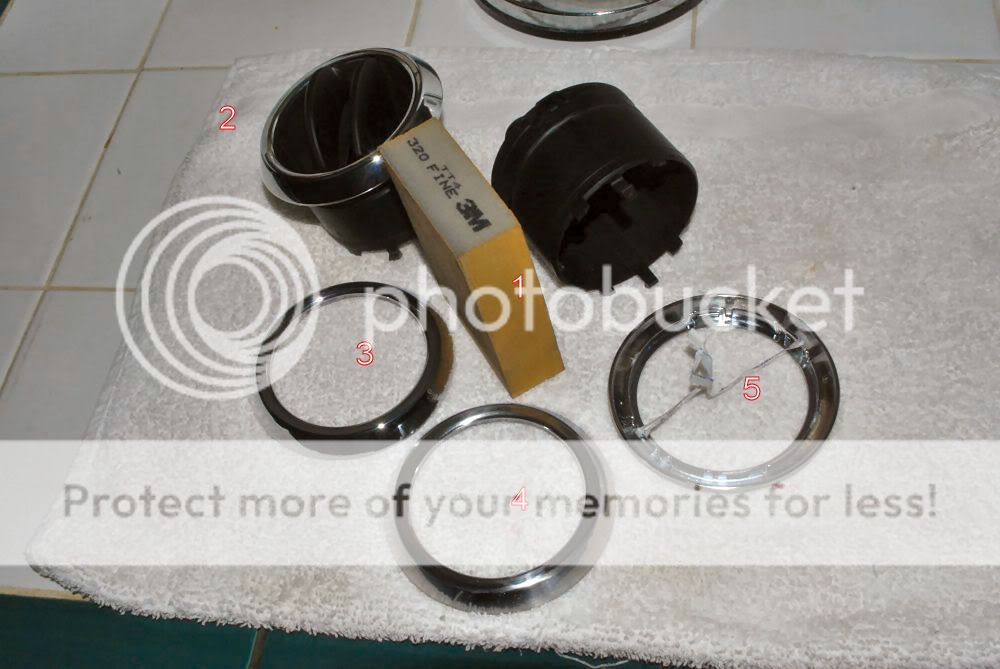
1. Get a 320 grit sanding sponge...

2. A complete register.

3. Chrome ring removed. There are four tabs holding it on. Two small screwdrivers will release the ring at one end and you're in business.

4. Shows the "shine" knocked off with the sanding sponge. Wipe it down well with a lint free cloth.

5. Some twisty-ties from a bread wrapper work wonders. Construct them as shown and you now have a way to handle the ring while painting and a good place to hang it from a hook as it dries.

Don't go nuts with the rattle-can. I used two dust coats that were completely dry before I followed up with the coverage coats.

Allow to COMPLETELY dry and pop them back in.


DSC_0046-2.jpg


042710140741.jpg
 

cdutchess78

forum member
Joined
Nov 17, 2009
Posts
321
Reaction score
2
Location
erie,pa
That was one of the first things I did when I got mine. I hated that cheap chrome look.lol. I also did my dash above the wheel as well. It pops out the same way but with a little more finesse. Good write up.
 

ZmanM3

The Evil One
S197 Team Member
Joined
Apr 6, 2007
Posts
21,617
Reaction score
209
Location
Jackson, NJ
Nice, I'm thinking redfire metallic paint for my bezels.
 

JimC

Senior Member
Joined
May 5, 2007
Posts
2,245
Reaction score
590
Looks great Mr Roper - I recently did the same thing, only I had to change the color of my vents from the silver for the IUP to black

009-1.jpg


Left side is done and right side is waiting
013.jpg


I need to sand and repaint this insert, it wasn't quite dry I discovered after reassembling so I left a thumbprint in it
012-1.jpg


018-1.jpg


The gauge cluster is next. I used a flat clear to knock down the glare on mine.
 

Preston951

Foglight delete kit!
Joined
May 14, 2009
Posts
290
Reaction score
0
This is awesome! I didn't realize it was this easy to do.

I think I like the chrome ring, but I'd love to paint the vents flat black. Thanks for the tutorial!
 

06Torch

forum member
Joined
Jun 11, 2009
Posts
955
Reaction score
2
Location
Houston, TX
Love this look. Can you give us more details on both vents and rings?

Maybe brand of paint and color, prep work, materials, etc...
Thanks,

Gerardo

009-1.jpg
 

DDTCM

Dan
Joined
Feb 18, 2010
Posts
3,691
Reaction score
1
Location
Austin Tx
The flat black vents look amazing,think I will tackle that this weekend. I like the chrome rings but can't stand the silver dash panel,I've got the black carbonfiberish lookin one that came stock.
 

JimC

Senior Member
Joined
May 5, 2007
Posts
2,245
Reaction score
590
I don't know what Mr.Roper used, but I went to the local "Hobby Lobby" store and picked up some model car paint, figuring the parts were plastic after all:

001-2.jpg


002-2.jpg


003-2.jpg


004-2.jpg


As far as prep, I cleaned them up and scuffed the vents just a little with some fine sandpaper - not much at all, just pretty much rub it across and then clean them up again. Several light coats of the flat black, then had to reposition the vanes and hit it again. Once the front was dry I flipped it over and painted from back so that it wouldn't have the silver showing when the vent is open.

Three or so light coats of the flat clear on the chrome trim rings was enough for those.
 

JimC

Senior Member
Joined
May 5, 2007
Posts
2,245
Reaction score
590
I pulled the gauge cluster today and hit it with the flat clear and added white face gauge overlays at the same time. It comes out very easy - drop the steering wheel as far as you can and pull straight back just like the vent pods.

This is after putting the white face overlays in place and putting the cluster itself back in the dash
008-2.jpg


Then just taped off the areas I needed to protect from the flat clear - I did a VERY light sanding first, not as much as Mr. Roper shows on his vent.
011-2.jpg


013-1.jpg


014-2.jpg


015-2.jpg
 

07torchgt

^MY NAME; THINGS I SAY>
Joined
Dec 28, 2007
Posts
1,055
Reaction score
4
wow, that flat silver looks great... i may have to attempt this:thumb2:
 

06Torch

forum member
Joined
Jun 11, 2009
Posts
955
Reaction score
2
Location
Houston, TX
Wow! This looks like the prototype cluster Ford makes on a concept vehicle that never makes production but everyone wants!!! It looks bad ass!!!

A few more questions please...

Do the white overlays allow the My Color lights to come through? I ask because certain icons are not visible until they light up like the airbag icon, check engine, etc... From the pic below, these appear to be covered up. Do you have pics of the cluster lit at night? Also, do you have a link to the company that sells said overlays?
Thanks,

Gerardo


014-2.jpg
 
Last edited:

Rasmus

forum member
Joined
Feb 9, 2009
Posts
2,295
Reaction score
26
+1 to the above.

All the painted bits look good, but I was also wondering how the white overlays functioned at night.
 

JimC

Senior Member
Joined
May 5, 2007
Posts
2,245
Reaction score
590
I only have one shot at night but will try to get some more tomorrow night. The My Color works - I have mine set to blue as you can see below. I did go a little brighter blue than before though because I thought it was more subdued after the white face was put on. The place I got the overlays from is www.whitegauges.net

At night they take on a "negative image" and the needles really glow. You can still see the icons on the tach side.

Without headlights on:
0043.jpg


With headlights and blue my color
005-2.jpg
 

gtothep123

forum member
Joined
Dec 2, 2009
Posts
509
Reaction score
0
I really like the air vents painted black, but I think I would keep the chrome ring.
 

06Torch

forum member
Joined
Jun 11, 2009
Posts
955
Reaction score
2
Location
Houston, TX
Holy crap that's a good price! The whole thing could be done for about... $40???

FREE shipping thru USPS too!

Gerardo


ford_mustang_2005-2007_140%20mph_ford_mustang_2005-2007_140%20mph_pic2_thumb.jpg


2005-2007 Ford Mustang 140 mph V8 White Face Gauges


<DL class=ProductDetailsGrid><DT>RRP:<DD><STRIKE>$34.99</STRIKE><DT>Your Price:<DD>$19.99 (excluding tax) (You save $15.00)<DT class=ProductSKU>SKU:<DD class=ProductSKU>0507FM-314<DT style="DISPLAY: none">Vendor:<DD style="DISPLAY: none"><DT style="DISPLAY: none">Brand:<DD style="DISPLAY: none"><DT>Weight:<DD>0.20 Ounces<DT>Rating:<DD>
IcoRating0.gif
() <DT>Availability:<DD>Usually ships in 1-2 business days. Color Changes ship within 5-7 business days.<DT>Shipping:<DD>Calculated at checkout<DT style="DISPLAY: none" class=InventoryLevel>Current Stock:<DD style="DISPLAY: none" class=InventoryLevel><DT style="DISPLAY: none">Gift Wrapping:<DD style="DISPLAY: none"></DD></DL><HR><FORM encType=multipart/form-data onsubmit="return check_add_to_cart(this, true)" method=post action=http://whitegauges.net/cart.php><INPUT value=add type=hidden name=action> <INPUT value=314 type=hidden name=product_id> <INPUT class=CartVariationId type=hidden name=variation_id> <INPUT type=hidden name=currency_id>


<DL class=ProductAddToCart><DT>Face Color:<DD class=ProductOptionList><SELECT style="WIDTH: 95%; MARGIN-BOTTOM: 4px; VISIBILITY: visible" name=variation[1] jQuery1273178077248="22"> <OPTION selected value="">Choose a Face Color:</OPTION><OPTION value=25>White Face</OPTION><OPTION value=26>Blue Face (+30.00)</OPTION><OPTION value=27>Bright Blue Face (+30.00)</OPTION><OPTION value=28>Burgundy Face (+30.00)</OPTION><OPTION value=29>Dark Grey Face (+30.00)</OPTION><OPTION value=30>Green Face (+30.00)</OPTION><OPTION value=31>Metallic Silver Face (+30.00)</OPTION><OPTION value=32>Orange Face (+30.00)</OPTION><OPTION value=33>Red Face (+30.00)</OPTION><OPTION value=34>Yellow Face (+30.00)</OPTION></SELECT><DT class=QuantityInput>Quantity:<DD class=AddCartButton><SELECT style="VISIBILITY: visible" id=qty_ class="Field45 quantityInput" onchange="" name=qty[] jQuery1273178077248="42"> <OPTION selected value=1>1</OPTION> <OPTION value=2>2</OPTION> <OPTION value=3>3</OPTION> <OPTION value=4>4</OPTION> <OPTION value=5>5</OPTION> <OPTION value=6>6</OPTION> <OPTION value=7>7</OPTION> <OPTION value=8>8</OPTION> <OPTION value=9>9</OPTION> <OPTION value=10>10</OPTION> <OPTION value=11>11</OPTION> <OPTION value=12>12</OPTION> <OPTION value=13>13</OPTION> <OPTION value=14>14</OPTION> <OPTION value=15>15</OPTION> <OPTION value=16>16</OPTION> <OPTION value=17>17</OPTION> <OPTION value=18>18</OPTION> <OPTION value=19>19</OPTION> <OPTION value=20>20</OPTION> <OPTION value=21>21</OPTION> <OPTION value=22>22</OPTION> <OPTION value=23>23</OPTION> <OPTION value=24>24</OPTION> <OPTION value=25>25</OPTION> <OPTION value=26>26</OPTION> <OPTION value=27>27</OPTION> <OPTION value=28>28</OPTION> <OPTION value=29>29</OPTION> <OPTION value=30>30</OPTION></SELECT> <INPUT alt="" src="http://whitegauges.net/templates/Automotive/images/black/AddCartButton.gif" type=image>


</DD></DL></FORM>
 
Last edited:

Latest posts

Support us!

Support Us - Become A Supporting Member Today!

Click Here For Details

Sponsor Links

Banner image
Back
Top