Planning a Ford Racing “Aluminator” Build with associated mods over the winter

Scott

Senior Member
S197 Team Member
Joined
Nov 17, 2009
Posts
2,337
Reaction score
43
Location
King City, Ontario, Canada
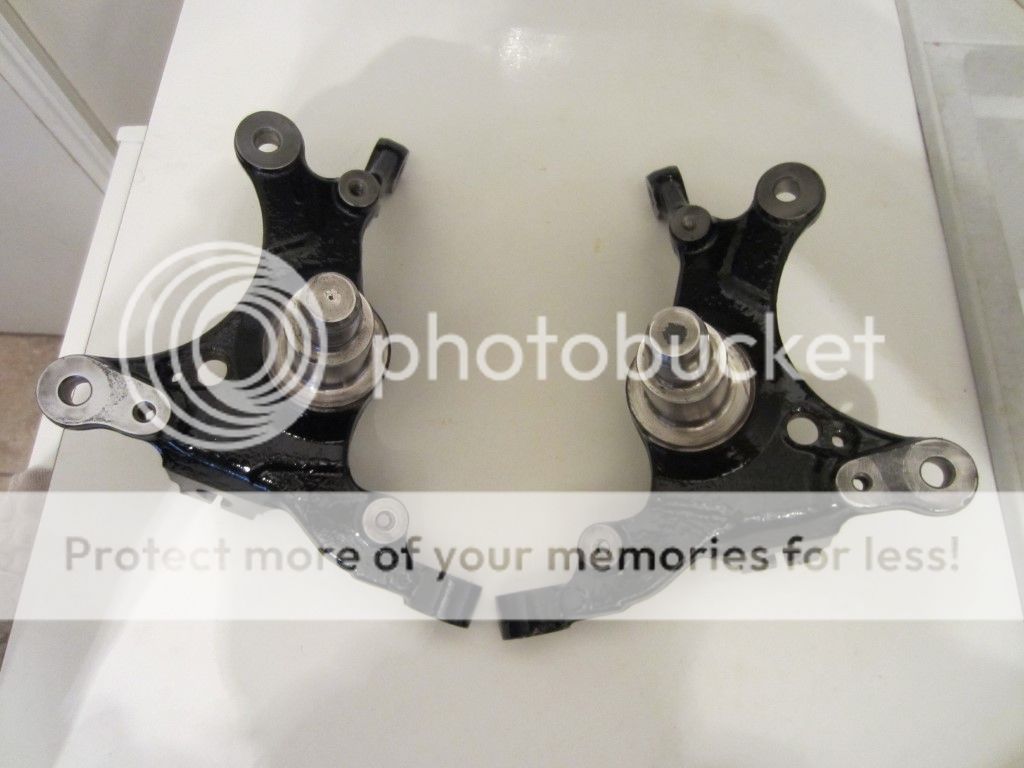
IIRC those spindle nuts torque to some insane amount like 225 ft lbs or something like that.

Always something, I will have to check out the 2011 torque specifications. Pretty sure my 1/2 wrench only goes to 200 ft-lbs.

Just checked both the 05 - 10 Shop Manuals - spindle nut 221 ft-lb.
2011 Shop Manual - spindle nut 251 ft-lb.
 

Scott

Senior Member
S197 Team Member
Joined
Nov 17, 2009
Posts
2,337
Reaction score
43
Location
King City, Ontario, Canada
Back to the Backup Camera install... running the camera wire through the trunk under the rear seat delete and into the console. Just realized if there is any reason the bumper cover needs to come off that I will need to cut all the wire ties and pull the wire all the way back and through the bumper cover to be able to remove the cover. Oh poop! Poor design by Pioneer not having a 3 foot or so lead at the camera rather than one that is 10 - 12 feet long?
 

NickD87

forum member
Joined
Sep 21, 2013
Posts
602
Reaction score
10
Location
Toronto, Canada
Back to the Backup Camera install... running the camera wire through the trunk under the rear seat delete and into the console. Just realized if there is any reason the bumper cover needs to come off that I will need to cut all the wire ties and pull the wire all the way back and through the bumper cover to be able to remove the cover. Oh poop! Poor design by Pioneer not having a 3 foot or so lead at the camera rather than one that is 10 - 12 feet long?

Scott if you want to wait and hook up one day I can solder a connection on the camera for you, I did the same on mine (very small wires for signal)
honestly though how often do you plan on taking the rear bumper off?
 

Scott

Senior Member
S197 Team Member
Joined
Nov 17, 2009
Posts
2,337
Reaction score
43
Location
King City, Ontario, Canada
Nick I do not plan on taking the rear bumper off, it was a "just in case" issue. However I have a plan to add quad tips to my car and that will mean cutting the bumper cover. I am pretty sure it can be done on the car but you never know. Thanks for the offer to solder a connector.
 

quiksilver15

forum member
Joined
Oct 12, 2012
Posts
1,069
Reaction score
0
Location
Houston
Hey Scott what was your reasoning for going with the 10-14 adjustable A arms instead of 05-09? Because you want the taller ball joint? Or is it because you had them in stock?
 

Scott

Senior Member
S197 Team Member
Joined
Nov 17, 2009
Posts
2,337
Reaction score
43
Location
King City, Ontario, Canada
Hey Scott what was your reasoning for going with the 10-14 adjustable A arms instead of 05-09? Because you want the taller ball joint? Or is it because you had them in stock?

Sorry, don't know how I did not see this question sooner.

Have had the A-Arms for almost a year now and frankly I can't remember what my reasoning was for selecting the 10-14 arms over the 05-09 arms, possibly it was for the 19mm tall ball joints. I just checked and the adjustable 18mm tall ball joint A-Arms are not currently available. Reason for getting the adjustable A-Arms was to allow narrowing the front track a 1/2" or so to move the tires in from the inner fenders with the suspension "aired out".
 

BLKBULLITT

forum member
Joined
Aug 14, 2010
Posts
2,637
Reaction score
22
Location
Calgary, Canada
Just went through this entire thread... Simply wow. The attention to detail is amazing. Is there anything that you haven't done!? The amount of money that is in this thing is unbeleivable
 

Vallee

forum member
Joined
Apr 26, 2014
Posts
126
Reaction score
40
Location
Syracuse, NY
I Agree! The attention to detail is impressive making this thread a wealth of information. I'll be referencing this for my build in the future.
 
Last edited:

Scott

Senior Member
S197 Team Member
Joined
Nov 17, 2009
Posts
2,337
Reaction score
43
Location
King City, Ontario, Canada
Just went through this entire thread... Simply wow. The attention to detail is amazing. Is there anything that you haven't done!? The amount of money that is in this thing is unbeleivable

I Agree! The attention to detail is impressive making this thread a wealth of information. I'll be referencing this for my build in the future.

Thanks guys!
 

Scott

Senior Member
S197 Team Member
Joined
Nov 17, 2009
Posts
2,337
Reaction score
43
Location
King City, Ontario, Canada
Battery Disconnect Switch

Relocated the battery to the trunk back in March 2013 and have had the disconnect switch for almost as long. Just getting around to installing the Flaming River Disconnect Switch part number FR1003-2 now.

Removed the trunk carpeting and rear plastic panel.


The disconnect switch will be centered in the back of the tire well with the push-pull rod exiting the lower section of the GT/CS bumper cover under the license plate.

Positioned the disconnect switch mounting plate and marked the three holes for drilling.


Center punched the hole marks and drilled them progressively 1/8, 1/4 and 23/64 to work with the ¼-20 blind rivets to be used to secure the mounting bracket.


Premiered the holes and installed the three 1/4-20 blind rivets.


Installed the mounting bracket and disconnect switch.


The 1 gauge positive feed to the Fuse Panel/BEC and Starter was rerouted from the battery distribution block (200 Amp fuse) to the disconnect switch.


A 1 gauge feed was routed from the other side of the disconnect switch to the battery distribution block (200 Amp fuse). This was to where the feed to the engine compartment was removed.


When the disconnect switch is “pushed-off” power from both the battery and alternator will be cut from the Fuse Panel/BEC and Starter.

Easy part is done, now to drill the back panel and bumper cover. I am keeping my fingers crossed!
 

NickD87

forum member
Joined
Sep 21, 2013
Posts
602
Reaction score
10
Location
Toronto, Canada
Why Scott? Are you going to come racing with us next year?
It's the one thing oin Andrews car I wish he hadn't done as it looks so wrong on a street car to me.
 

Scott

Senior Member
S197 Team Member
Joined
Nov 17, 2009
Posts
2,337
Reaction score
43
Location
King City, Ontario, Canada
Don't try to drill through the steel bumper behind the cover, that doesn't work too well, I learned that the hard way lol!

Kyle the plan is to avoid the steel bumper, at least I hope so! Thanks for the warning, I am guessing the steel is pretty hard.

Why Scott? Are you going to come racing with us next year?
It's the one thing oin Andrews car I wish he hadn't done as it looks so wrong on a street car to me.

Nick you never know, I do plan to get there one of these days. I am a wee bit concerned about the DD cosmetics as well. The push-pull rod will be exiting in the black portion of the GT/CS bumper cover. The rod is easily removed and something like an undercoating plug should fill the hole temporarily.
 

Wild White Pony

forum member
Joined
Mar 7, 2011
Posts
498
Reaction score
4
Location
Northwest Subs Chicago
Looks great Scott! I looked back to see the battery relocation install but didn't see that part, I think it was around the time of a new grandbaby so you may not of had done that install pic set. Your installs are so d-m clean it really is nice work and great write ups.
 

05stroker

Never enough power guy!
Joined
Mar 2, 2008
Posts
13,058
Reaction score
77
Location
Bullard Tx.
I put mine through the pass side rear taillight and its not that noticeable, but my car is not in the rain much either.
 

Scott

Senior Member
S197 Team Member
Joined
Nov 17, 2009
Posts
2,337
Reaction score
43
Location
King City, Ontario, Canada
Looks great Scott! I looked back to see the battery relocation install but didn't see that part, I think it was around the time of a new grandbaby so you may not of had done that install pic set. Your installs are so d-m clean it really is nice work and great write ups.

Kurt thanks, I was following Todd’s (tmcolegr) battery relocation thread pretty closely and he documented it very well. Basically I ran a 1 gauge 200 amp fused positive to a distribution point in the passenger tire well, a 4 gauge 150 amp fused positive directly to the alternator and a 1 gauge ground to the OEM chassis ground location. I just reviewed my build documentation and I actually relocated the battery to the trunk in May 2012, it was the Optima D34 battery I added in March 2013.

I put mine through the pass side rear taillight and its not that noticeable, but my car is not in the rain much either.

I thought about the tail light, but I have the Raxiom 2013 style and was hesitant to try drilling one.

Good thread on the disconnect. Look from the start of the thread. I used this as a guide for the way I did mine.http://www.s197forum.com/forum/showthread.php?p=991765&highlight=battery#post991765

Billy thanks for the reference to the thread!
 

Support us!

Support Us - Become A Supporting Member Today!

Click Here For Details

Sponsor Links

Banner image
Back
Top