Seats swap from 2014 to 2009 v6,4.0

20155h

Junior Member
Joined
Dec 21, 2020
Posts
11
Reaction score
5
My car, 2009 Ford Mustang, convertible, v6 4.0.

Ok, here we go. I am looking for help and or advice on my problem. Hopefully someone with experience on this could help.

The front seats on my 2009 Mustang need replacing due to their condition which are not in good shape are;
Drivers side, Some electric with airbag.
Passengers side. Manual with airbag.

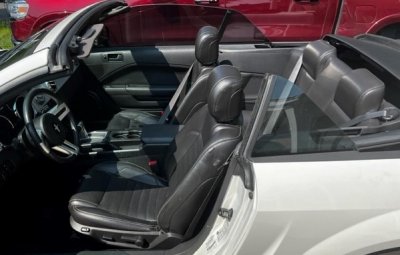
I just got a set of beautiful black leather seats from a 2014 hard top (none convertible) GT.

Hurdle ONE, I was able to install them in the car and they bolt on perfectly. Hurdle one passed.

Hurdle TWO, I was able to re-pin and swap the harness connector from the old driver side seat onto the new driver side seat. I am extremely excited because everything there works. Hurdle two passed.

Note, I would rather swap the connector on the seat side instead of messing with the permanent wiring of the car.

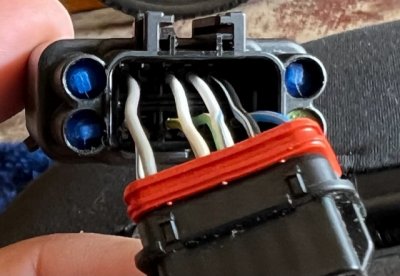
Hurdle THREE is what I am having issues with, the front passenger seat. I did not have to cut or replace the harness connector as it fit the car so I just plugged it in. I thought I was golden. Wrong. The SRS light came on so I checked for error codes. Three of them. I was able to clear two codes by re-pining the connector on seat harness. Did some comparison to the old seat which helped.

The remianing error code I get is B2290, Occupancy Classification System Module (OCSM). I think I still have some repining to do in order to get rid of the final code. I have searched all over the internet and found all sorts of stuff but can not make sense of what I found.

I have reached a point to where I do not want to go any further for concern of making something go bad. Not sure if it exists but can anyone help with a diagram for the OCSM connection from both sides of the harness. The car side and the seat side? (2009 and 2014). Of course any advice you can provide would be appreciated. If you have done this already, even better.

Thank you in advance for your help.
Homero
1_1.jpg
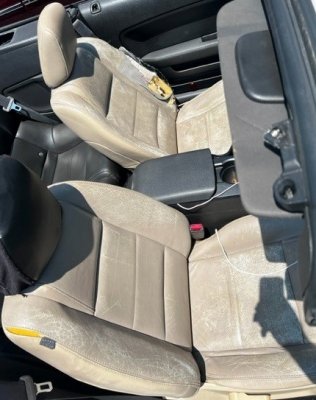
New seats

4.jpg
Passenger side seat connector

3-3.jpg
Seats being replaced. Going from Brown to Black interior.
 

Macman45

Resident Geriatric
Joined
Sep 22, 2012
Posts
1,454
Reaction score
179
Location
Atlanta / Bay Area
I can't weigh in too much but what I do know is that module might be different for 10-14, as I know the resistance of the bags is different. I'd look into the Recaro airbag plugs that deactivate the passenger bag, that would eliminate any "yellow" connections being off.

The correct way to do this is either source the 10-14 module and add it in, or perhaps try and swap bladders from your 09 seats...
 

oldVOR

forum member
Joined
Apr 9, 2015
Posts
1,782
Reaction score
488
Location
Northern Virginia
When I did this same swap of '14 seats into a '05, I had to move the occupancy sensor assembly from the '05 passenger seat into the '14 passenger seat due to the difference between the sensor outputs.

This swap entails moving the sensor pressure bag under the cushion and the sensor switch on the seat frame as a "component". It's straight forward and simple. If the '09 is similar to the '05, you'll have to drill out a rivet on the sensor switch to remove it from the '05 and then rivet it in place on the '14 seat frame.

I did a write up on here about the swap but can't seem to easily find the post.
 

tabstang

Member
Joined
May 15, 2017
Posts
119
Reaction score
43
Looks great! oldVOR, your swap process should be a sticky, I can see lots of others wanting to do this, including myself someday
 

bwilder10h

Junior Member
Joined
Jan 4, 2022
Posts
5
Reaction score
2
The coupe rear seat worked in the convertible without any issues? What about the sail panel or whatever it is called that attaches to the back of the seat?
 

Whpony96

Junior Member
Joined
Sep 2, 2022
Posts
27
Reaction score
19
Location
Idaho
When I did this same swap of '14 seats into a '05, I had to move the occupancy sensor assembly from the '05 passenger seat into the '14 passenger seat due to the difference between the sensor outputs.

This swap entails moving the sensor pressure bag under the cushion and the sensor switch on the seat frame as a "component". It's straight forward and simple. If the '09 is similar to the '05, you'll have to drill out a rivet on the sensor switch to remove it from the '05 and then rivet it in place on the '14 seat frame.

I did a write up on here about the swap but can't seem to easily find the post.

100% Correct you must move the occupancy sensor and bag from the 09 seat to the 14 seat. They are not interchangeable.
 

20155h

Junior Member
Joined
Dec 21, 2020
Posts
11
Reaction score
5
All, Thanks for your suggestions. I guess there is no way out. Changing the sensor pressure bag is a must if I want to make all the errors go away the right way.

On the back seat question. No, I did not use a coup seat for it. I found convertable back seat in black that would work for my car.

Note, seats over all are hard to come by. For the right price that is. So if you see a set that peaks your interest jump on them if you can. The front seats i got fell just a bit above my price range. Glad i got them though. A great improvement in ride and looks as far as I am concerned. I'll come back and let you all know how it turns out with the bag/sensor swap.

Any other ideas, let me know.

Again, THANKs for all of your comments and sugestions.

Homero
 

20155h

Junior Member
Joined
Dec 21, 2020
Posts
11
Reaction score
5
Hurdle THREE, Passenger seat error code B2290 message gone. No more errors. Hurdle three passed.

How did I do it? I took your advice on changing the bag. I’ll admit, I was hesitant at first but once I got started, turned out to be a piece of cake.

So passenger seat from a 2014 GT Mustang coup, I have my 2009 Ford convertible Mustang 4.0 believing the seat was made for it.

I took a risk with suggestions from folks in the forum. A risk because I have never done this. Did not know I could do it. I was stuck on re-pinning the wire harness. Should you chose follow these instructions, you do so at your own risk.

Included pictures (All at the bottom) may be mixed in my instructions below but still fit the step.


1. Started off with both seats sitting side by side in my garage. Had them off (disconnected) for a few days as I wondered how to fix hurdle THREE.

2. Removed the existing harness from both seats. Knowing I’ll have to swap 2009 harness to the 2014 seat. Do not cut anything, just remove them from the harness connectors.

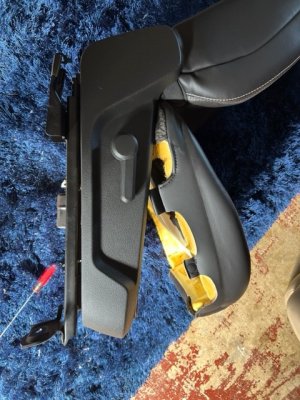
3. I began by removing the tabs on all four sides of the seat to loosen the bottom. I did not have to touch the back at all.
step 3.jpg
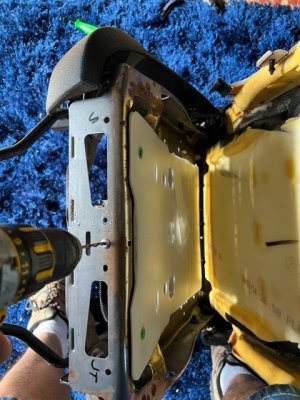
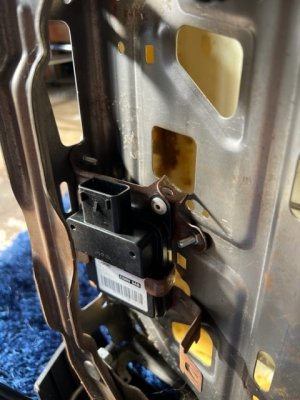
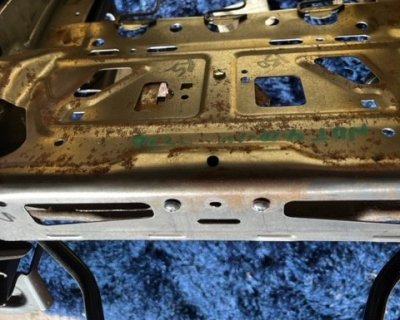
4. Drilled out rivets holding down the sensor. My old seat had 3 rivets and new seat had 2 rivets.
step 4.jpg

step 4_2.jpg
5. Once rivets are removed, carefully remove the two Christmas tree plastic plugs holding down the bag to the metal frame. You can see them in a previous picture.

6. I placed both bags side by side and compared the two. Only real difference seems to be the attached sensor.
step 6.jpg

Note. After comparing the two, my mind started to wonder. If I could just swap the sensor that might work and I get to keep the new bag. I decided against that as this might ruin the bag or pressure if any. Possibly also ruin the connection. So, I left the bag alone as a whole unit.

7. Putting the new seat back together. Put in place the old bag and sensor in the new seat. Should fit as it was installed in the old seat. I used nut and screws that fit the holes to hold the sensor onto the seat frame as I do not have a rivet set.
step 7.jpg

step 7_2.jpg

8. Pushed in the two Christmas tree plastic plugs. Made sure it fit as it should.

9. Once the bag and sensor are on and tightened accordingly, I began to re-strap the leather sides back onto the frame. In other words, tighten down the leather seat cover to the frame. All four sides. Make sure all looks good prior to moving forward with the next steps.

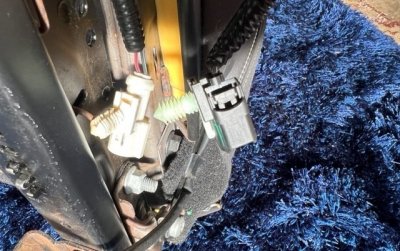
10. Begin connecting the old (09) harness to the new seat. In my case, all connections fit except for the seat belt buckle connection.
step 10 note.jpg

Note. You could probably go two different ways here. Swap the old seatbelt buckle on to the new seat. Or use the new seatbelt buckle and swap the wire connections. I chose swapping the wire connections.

11. I soldered the new connection to the old harness. Used heat shrink to protect the wires then plugged it into the seatbelt buckle connection. Done. All harness connections are connected.

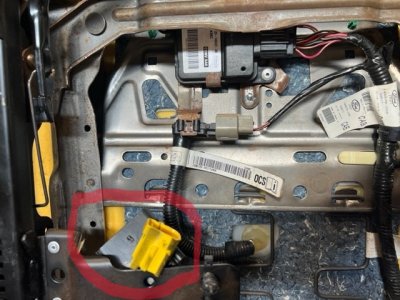
Note. I did have an extra sensor on the 2014 passenger seat. I just removed it as nothing in the harness needed to plug to it. Nothing else in the car seem to need to connect to it. Highlighted in red in picture below.
step 11 note.jpg

12. Once I felt satisfied, I was done with the seat. I installed the seat in the car. Plugged in the harnesses and tightened the 13 and 15mm screws and nuts.

step 12.jpg

13. The big review. I crossed my fingers and turned on the car. Waited a few seconds. No SRS/seatbelt light. No error codes displayed or found. All errors cleared up with the change of the bag. Of course, I went for the typical extended test drive. In the end, no SRS/seatbelt light. All back to normal.

Now on to my next project. Possibly a new style steering wheel. Hmm, how do I do that? LOL


Thank you all helping make this happen.
Homero
 

Spence340

Member
Joined
Mar 26, 2017
Posts
61
Reaction score
2
Nice clear run through of the whole process, this will help a lot of folks who are doing this conversion.
 

richie9mt

Member
Joined
Sep 26, 2021
Posts
137
Reaction score
19
Location
Western NY State
Very well done. No DTCs? When I took my seat out and replaced it, FORScan pulled up 4 or 5 DTCs. No SES light. Seat tracks, belts, sensors...I deleted them all and they never came back. Annoyed me that stuff I did with key off would still set DTCs. :(
 

Support us!

Support Us - Become A Supporting Member Today!

Click Here For Details

Sponsor Links

Banner image
Back
Top