
Will do. I still have to get some more products to try...I don't have enough to do what I need to do.Good start but using the cleaner wax should go on before the scratch x.
Next time try using the compound and swirlx instead of the cleaner wax and stratch x.
You are using an out of date browser. It may not display this or other websites correctly.
You should upgrade or use an alternative browser.
You should upgrade or use an alternative browser.
To Clay or not to clay????
- Thread starter Stndbck
- Start date
slammed 06
Member
- Joined
- Jan 22, 2009
- Posts
- 134
- Reaction score
- 0
hmm..something to think about..Will Simple green remove everything that was on the car? I like the idea of starting from a clean slate. Is that similiar to some sort of paint cleaner? Where it would remove everything down to the clearcoat?
That's right it will clean your paint to start you off fresh. I use two different pails when washing my car. The main soap one and then a rinse pail for your mitt. I wash the car really well and then start the clay bar proccess and your off and runnin.
SteveP
Modular Specialist
Will do. I still have to get some more products to try...I don't have enough to do what I need to do.
I hear ya on that one.
Story of life, eh?I hear ya on that one.

thecarter13
Member
Will do. I still have to get some more products to try...I don't have enough to do what I need to do.
What kind of product you looking to buy?
+1 on the 2 bucket system, buy a grit guard too if you can and use it to keep your mitt or mitts clean as you go. Try using a mitt for the upper half of the car and a sponge or mitt for areas on the lower end of the car. Above the wheels the mitt, below the top of the wheel is all sponge. One way to keep a good amount of swirling down.
Looking to get a compound of some sort - something good for a black car - and a good yellow wax. And/or anything that is good at getting out fairly deep scratches...and swirl marks.What kind of product you looking to buy?
thecarter13
Member
Looking to get a compound of some sort - something good for a black car - and a good yellow wax. And/or anything that is good at getting out fairly deep scratches...and swirl marks.
Question time:
how deep are the scratches? does your fingernail catch when you pass over them?
How bad are the swirls, minor, medium, or heavy?
You looking for a sealant or a carnauba (show or durability)?
Do you have a machine (rotary, DA, orbital)?
Do you have pictures showing the severity? that be the best way to pinpoint problems.
Sorry for the mass questions but i figure i need to ask to get a little more info and point you in the proper direction.

how deep are the scratches? does your fingernail catch when you pass over them?
There are a few where my fingernail catches.
I'd say minor-medium...the ScratchX did a decent job, but there are still some fine swirls.How bad are the swirls, minor, medium, or heavy?
Durability - I don't get around to waxing too often unfortunately.You looking for a sealant or a carnauba (show or durability)?
I have a Porter Cable orbital.Do you have a machine (rotary, DA, orbital)?
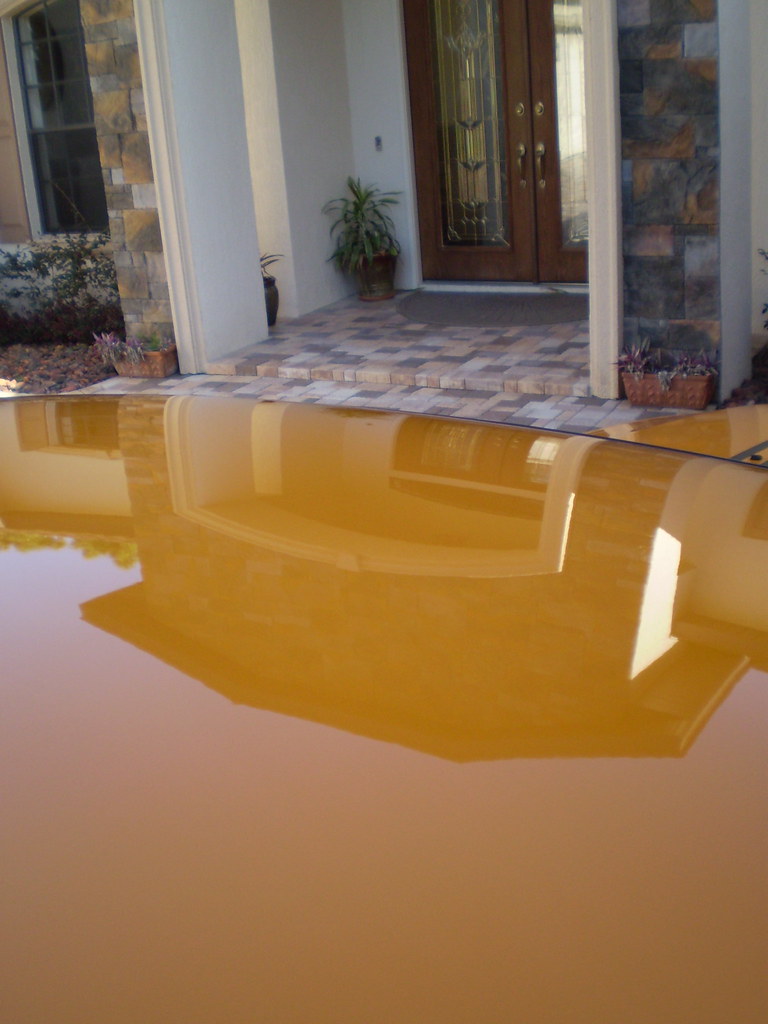
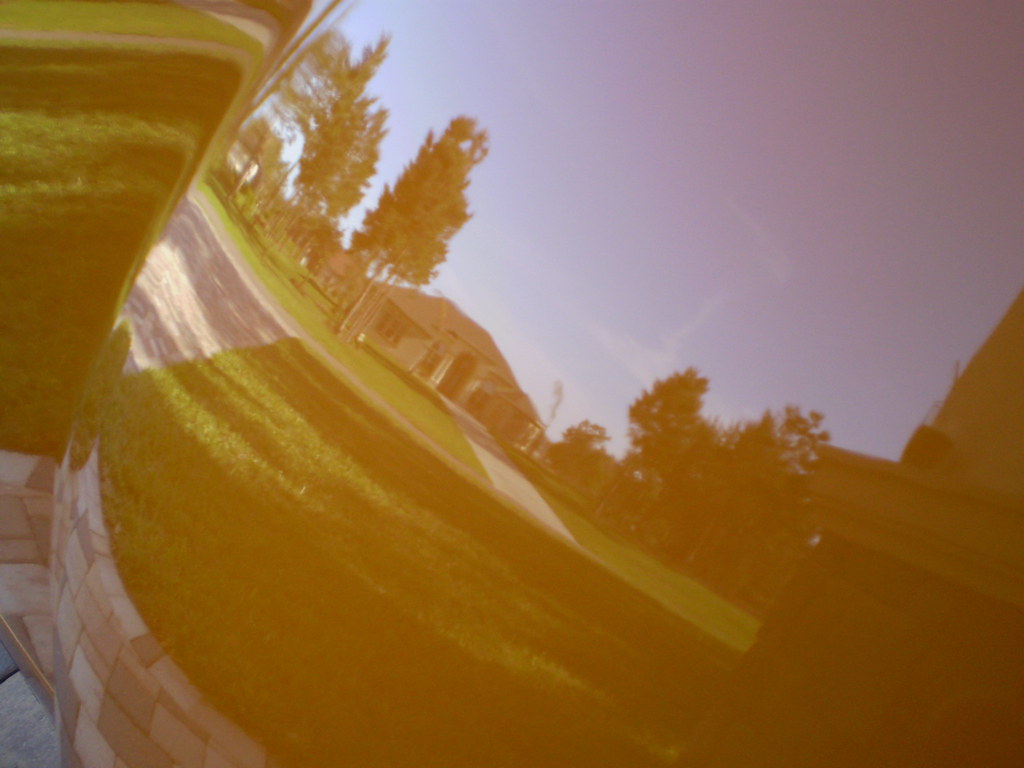
See attachments...I will take better shots.Do you have pictures showing the severity? that be the best way to pinpoint problems.
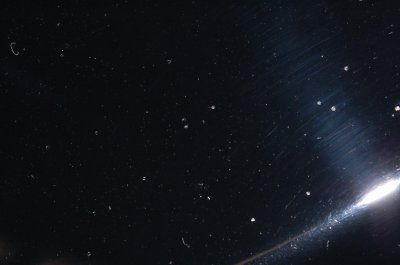
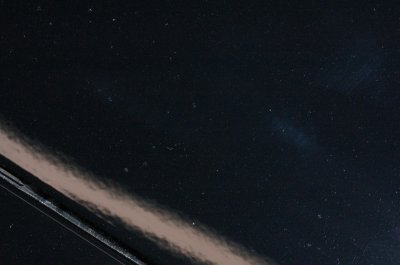
The attached photos are of some crud I picked up on the road. Don't know when; don't know how; don't know what. It's in there pretty good, and it takes some effort w/ a fingernail to pick it off. I have no idea what I should use to remove it.
The bumper is not factory, and as such, the swirls are more severe on there. The fender, too, was repaired and repainted and had bad swirls, but the ScratchX too most of that out. I haven't used the ScratchX on the bumper yet.
The 2nd and 3rd photos are of the hood (the second one shows the crap that got on it)...it's kind of dirty, so excuse the dust/dirt. Black is a bitch to keep clean.
No, I understand...I don't attempt to answer questions either unless I know all the info that is needed. I appreciate the help.Sorry for the mass questions but i figure i need to ask to get a little more info and point you in the proper direction.

Attachments

thecarter13
Member
Alright Bingo,
Here is a quick list of what I might try first as a test spot.
That is a quick test process i would try first. Choose a small 2x2 area and conduct a test with the said process. Go from the least aggresive to the most aggresive. Now if you figure out what step your are starting from you procceed in a varied manner depending on the starting step, you might need a one step polish or a two step polish.
If starting at step 3 just continue to waxing, No need to polish as Megs #82 is a polish and leaves a glossy finish
If starting at step 4 you should be able to go straight to waxing. #105 actually finish really well since it is formulated with diminishing abbrasives, very minimal hazing if any, and almost none when used on a white pad.
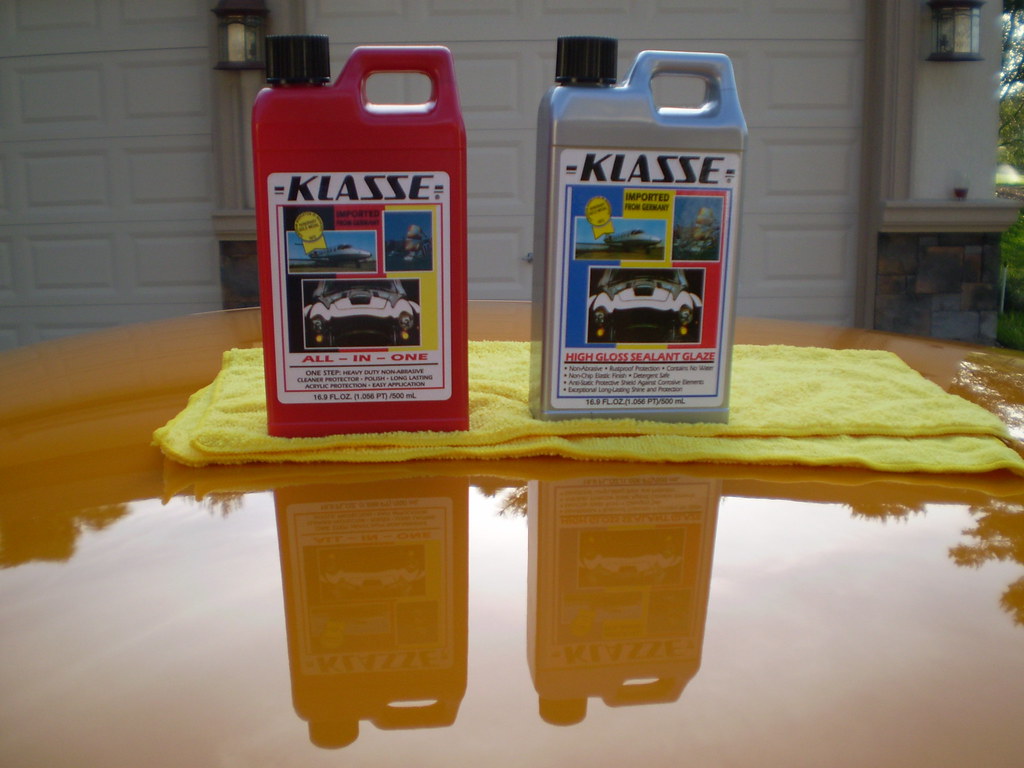
If starting at step 5, you will most likely need to grab a polish pad and some polish and go back over because there will most likely be some slight hazing. You could use #82 or the Klasse All In One Polish, then continue to waxing.
Hope that points you in a couple directions i know its long but i figured i try and get some what in depth and what not.
Last little thing you can order samples of megs products from here. Link
- The scratches were your fingernail catches i would suggest wet sanding however if you do not want to wet sand or what not, i have labeled another possible route. Wet sanding is a tedious process and can take some practice and you can really damage the paint if you are not careful. So i figured before going to wet sanding i would find another route, while i have never tested this, I have only heard good things about it. It is called Quixx Scratch Remover and they make a nifty little kit. The reason i outlined this kit is because it includes a small 3,000 grit piece of sanding paper and you can use it if needed. I also included some good videos explaining wet sanding. Link there are five videos so you will notice on the side they are there below.
- I would grab some Meguiars #82 Swirl Free Polish, it seems to work farely well but i am not sure how well it will work with an orbital. If that doesn't work since you have the PC go ahead and grab some Meguiars #105 Ultra Cut. With an orbital and a orange cut padding it should remove the most amount of swirls, do however be careful with 105 it is cut aggresive if not the most. I would actually try a white pad (polish pad) with 82 first then go to 105 and white pad, and if that doesnt work, up it 105 plus orange pad (cutting). The only reason i throw 105 in the mix is because it is one of the few compounds i have been able to cut with on mustang/ford paint, they had to make it hard as rocks. I apolgize for my weakness in pad + product on an orbital haven't used one in quite some time.
- Durability wise i would look to Klasse, if your feeling good about it do a coat of Klasse All In One Polish and follow with a coat of Klasse High Gloss Sealant. That will last you a good 6 months ++. Klasse i find to leave really good results too, so its kinda of a bonus there. I also suggest layering Klasse, so when you lay that sealant down wait a good 10 hours or so for curing (say the next morning) and throw an extra coat on for protection. The All In One Polish might actually be able to hide several swirls and scratches so keep that in consideration. Now granted that is not removal of swirls but you can always go ahead and hide them. With how hard the paint is you might just wanna shoot that route up to you really. (hate to say that) Lastly you don't need the polish just the sealant if you want but it will hide the slightest imperfections/swirls/scratches and provide even more depth and durability. Link
- Covered the orbital in my previous post. All i can say is grab an orange pad for cutting, probably 1-2 white polishing pads, and another black or blue pad for applying wax. I tend to use 4" pads on my rotary but 6-6.5 is plenty fine and going smaller on a Orbital can be funky so...
- 5. Hmm im really not sure what that is, but you said it can be removed. I would suggest using a diluted degreaser solution and grabbing a stronger clay such as clay magic blue clay, or even a red bar from clay magic and spraying a little degreaser on and trying that. If that doesnt work get back to me and ill figure out something else.
Here is a quick list of what I might try first as a test spot.
- Claying using heavier grade bar (clay magic blue/red) and degreaser to get out the crud
- Go over scratches either wetsanding, or using the Quixx Scratch Removal Kit
- Any last swirls try Megs #82 with polish pad, check results. I would use an isopropyl alcohol and water mix 1:1 and wipe down using that in conjunction with a microfiber.
- If that doesnt work step up to Megs #105 and a white polish pad, again check results in same manner.
- If still not doing anything, step up up to Megs #105 and orange cut pad, again do a check.
That is a quick test process i would try first. Choose a small 2x2 area and conduct a test with the said process. Go from the least aggresive to the most aggresive. Now if you figure out what step your are starting from you procceed in a varied manner depending on the starting step, you might need a one step polish or a two step polish.
If starting at step 3 just continue to waxing, No need to polish as Megs #82 is a polish and leaves a glossy finish
If starting at step 4 you should be able to go straight to waxing. #105 actually finish really well since it is formulated with diminishing abbrasives, very minimal hazing if any, and almost none when used on a white pad.
If starting at step 5, you will most likely need to grab a polish pad and some polish and go back over because there will most likely be some slight hazing. You could use #82 or the Klasse All In One Polish, then continue to waxing.
Hope that points you in a couple directions i know its long but i figured i try and get some what in depth and what not.
Last little thing you can order samples of megs products from here. Link
Steedman07
Classified's Moderator:)
Alright Bingo,
Here is a quick list of what I might try first as a test spot.
- The scratches were your fingernail catches i would suggest wet sanding however if you do not want to wet sand or what not, i have labeled another possible route. Wet sanding is a tedious process and can take some practice and you can really damage the paint if you are not careful. So i figured before going to wet sanding i would find another route, while i have never tested this, I have only heard good things about it. It is called Quixx Scratch Remover and they make a nifty little kit. The reason i outlined this kit is because it includes a small 3,000 grit piece of sanding paper and you can use it if needed. I also included some good videos explaining wet sanding. Link there are five videos so you will notice on the side they are there below.
- I would grab some Meguiars #82 Swirl Free Polish, it seems to work farely well but i am not sure how well it will work with an orbital. If that doesn't work since you have the PC go ahead and grab some Meguiars #105 Ultra Cut. With an orbital and a orange cut padding it should remove the most amount of swirls, do however be careful with 105 it is cut aggresive if not the most. I would actually try a white pad (polish pad) with 82 first then go to 105 and white pad, and if that doesnt work, up it 105 plus orange pad (cutting). The only reason i throw 105 in the mix is because it is one of the few compounds i have been able to cut with on mustang/ford paint, they had to make it hard as rocks. I apolgize for my weakness in pad + product on an orbital haven't used one in quite some time.
- Durability wise i would look to Klasse, if your feeling good about it do a coat of Klasse All In One Polish and follow with a coat of Klasse High Gloss Sealant. That will last you a good 6 months ++. Klasse i find to leave really good results too, so its kinda of a bonus there. I also suggest layering Klasse, so when you lay that sealant down wait a good 10 hours or so for curing (say the next morning) and throw an extra coat on for protection. The All In One Polish might actually be able to hide several swirls and scratches so keep that in consideration. Now granted that is not removal of swirls but you can always go ahead and hide them. With how hard the paint is you might just wanna shoot that route up to you really. (hate to say that) Lastly you don't need the polish just the sealant if you want but it will hide the slightest imperfections/swirls/scratches and provide even more depth and durability. Link
- Covered the orbital in my previous post. All i can say is grab an orange pad for cutting, probably 1-2 white polishing pads, and another black or blue pad for applying wax. I tend to use 4" pads on my rotary but 6-6.5 is plenty fine and going smaller on a Orbital can be funky so...
- 5. Hmm im really not sure what that is, but you said it can be removed. I would suggest using a diluted degreaser solution and grabbing a stronger clay such as clay magic blue clay, or even a red bar from clay magic and spraying a little degreaser on and trying that. If that doesnt work get back to me and ill figure out something else.
That is a quick test process i would try first. Choose a small 2x2 area and conduct a test with the said process. Go from the least aggresive to the most aggresive. Now if you figure out what step your are starting from you procceed in a varied manner depending on the starting step, you might need a one step polish or a two step polish.
- Claying using heavier grade bar (clay magic blue/red) and degreaser to get out the crud
- Go over scratches either wetsanding, or using the Quixx Scratch Removal Kit
- Any last swirls try Megs #82 with polish pad, check results. I would use an isopropyl alcohol and water mix 1:1 and wipe down using that in conjunction with a microfiber.
- If that doesnt work step up to Megs #105 and a white polish pad, again check results in same manner.
- If still not doing anything, step up up to Megs #105 and orange cut pad, again do a check.
If starting at step 3 just continue to waxing, No need to polish as Megs #82 is a polish and leaves a glossy finish
If starting at step 4 you should be able to go straight to waxing. #105 actually finish really well since it is formulated with diminishing abbrasives, very minimal hazing if any, and almost none when used on a white pad.
If starting at step 5, you will most likely need to grab a polish pad and some polish and go back over because there will most likely be some slight hazing. You could use #82 or the Klasse All In One Polish, then continue to waxing.
Hope that points you in a couple directions i know its long but i figured i try and get some what in depth and what not.
Last little thing you can order samples of megs products from here. Link
Thats some damn good advice you gave right there..Right in line with what I learned Sunday..And Bingo he is right..start with the least aggresive and keep inspecting before you go further..And if you wet sand anything, dont just use you fingers and sand paper! MAke sure you use a foam block or something...I have a couple areas on my car that need attention too..
I really appreciate you outlining all that...I'm glad you mentioned all the different products - I know there's so much stuff out there, but I don't know what should be used for each circumstance.Alright Bingo,
- The scratches were your fingernail catches i would suggest wet sanding however if you do not want to wet sand or what not, i have labeled another possible route. Wet sanding is a tedious process and can take some practice and you can really damage the paint if you are not careful. So i figured before going to wet sanding i would find another route, while i have never tested this, I have only heard good things about it. It is called Quixx Scratch Remover and they make a nifty little kit. The reason i outlined this kit is because it includes a small 3,000 grit piece of sanding paper and you can use it if needed. I also included some good videos explaining wet sanding. Link there are five videos so you will notice on the side they are there below.
- I would grab some Meguiars #82 Swirl Free Polish, it seems to work farely well but i am not sure how well it will work with an orbital. If that doesn't work since you have the PC go ahead and grab some Meguiars #105 Ultra Cut. With an orbital and a orange cut padding it should remove the most amount of swirls, do however be careful with 105 it is cut aggresive if not the most. I would actually try a white pad (polish pad) with 82 first then go to 105 and white pad, and if that doesnt work, up it 105 plus orange pad (cutting). The only reason i throw 105 in the mix is because it is one of the few compounds i have been able to cut with on mustang/ford paint, they had to make it hard as rocks. I apolgize for my weakness in pad + product on an orbital haven't used one in quite some time.
- Durability wise i would look to Klasse, if your feeling good about it do a coat of Klasse All In One Polish and follow with a coat of Klasse High Gloss Sealant. That will last you a good 6 months ++. Klasse i find to leave really good results too, so its kinda of a bonus there. I also suggest layering Klasse, so when you lay that sealant down wait a good 10 hours or so for curing (say the next morning) and throw an extra coat on for protection. The All In One Polish might actually be able to hide several swirls and scratches so keep that in consideration. Now granted that is not removal of swirls but you can always go ahead and hide them. With how hard the paint is you might just wanna shoot that route up to you really. (hate to say that) Lastly you don't need the polish just the sealant if you want but it will hide the slightest imperfections/swirls/scratches and provide even more depth and durability. Link
- Covered the orbital in my previous post. All i can say is grab an orange pad for cutting, probably 1-2 white polishing pads, and another black or blue pad for applying wax. I tend to use 4" pads on my rotary but 6-6.5 is plenty fine and going smaller on a Orbital can be funky so...
- 5. Hmm im really not sure what that is, but you said it can be removed. I would suggest using a diluted degreaser solution and grabbing a stronger clay such as clay magic blue clay, or even a red bar from clay magic and spraying a little degreaser on and trying that. If that doesnt work get back to me and ill figure out something else.
Here is a quick list of what I might try first as a test spot.
- Claying using heavier grade bar (clay magic blue/red) and degreaser to get out the crud
- Go over scratches either wetsanding, or using the Quixx Scratch Removal Kit
- Any last swirls try Megs #82 with polish pad, check results. I would use an isopropyl alcohol and water mix 1:1 and wipe down using that in conjunction with a microfiber.
- If that doesnt work step up to Megs #105 and a white polish pad, again check results in same manner.
- If still not doing anything, step up up to Megs #105 and orange cut pad, again do a check.
That is a quick test process i would try first. Choose a small 2x2 area and conduct a test with the said process. Go from the least aggresive to the most aggresive. Now if you figure out what step your are starting from you procceed in a varied manner depending on the starting step, you might need a one step polish or a two step polish.
If starting at step 3 just continue to waxing, No need to polish as Megs #82 is a polish and leaves a glossy finish
If starting at step 4 you should be able to go straight to waxing. #105 actually finish really well since it is formulated with diminishing abbrasives, very minimal hazing if any, and almost none when used on a white pad.
If starting at step 5, you will most likely need to grab a polish pad and some polish and go back over because there will most likely be some slight hazing. You could use #82 or the Klasse All In One Polish, then continue to waxing.
Hope that points you in a couple directions i know its long but i figured i try and get some what in depth and what not.
Last little thing you can order samples of megs products from here. Link
I think I'll try the buffing you specified before I try wet sanding - may as well exhaust all my non-potentially-paint-killing options first.
(also subscribing so I can find this later)
Thanks again.
(Looking on that AutoGeek.com site, there are SO MANY damn products.
)thecarter13
Member
yeah, second about the sand block i didn't include (totally forgot) it but thought it might be in the videos.
There are a lot of products but if you ever need to be pointed in the right direction give me a holla i keep buying um and have such a surplus, almost too much now. Every product works differently depending on paint harndess, color, etc etc.
Our paint is considered a hard paint. I have been able to achieve super good results using Meguiars #105, Menzerna Power Gloss, Menzerna Super Intensive Polish, and a couple other down the line. For our paint in terms of polish/compound look to those lines. Waxes/Sealants are split into several categories such as depth, gloss, durability and applicability. Sealants are similar to a wax but loss some of their gloss and depth but often have long life. Carnauba or strictly waxes normally only last 2-3 months sometimes less and provide maximum shine and depth. Each can be tricky to apply and pull off. I can list out a detailed list containing every product i have used and how i rate it compared to our cars or another similar car.
LuckyH
Senior Member
+1 to what thecarter13 was saying
Jetrails on roof
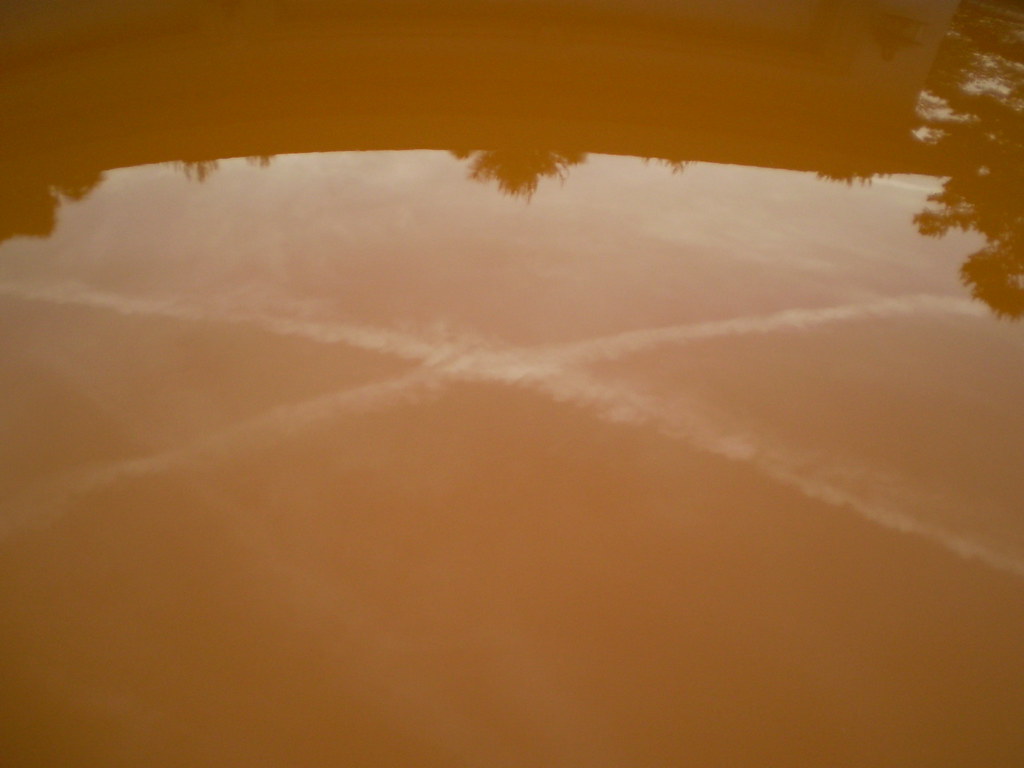
Rear Fender
I use Klasse products and they do hide light swirling/scratches very well. The only thing is that the Klasse All In One is a cleaner. Do not use this after you have put wax/glaze down as it will remove it. Also from what i understand AIO cannot be layered only the sealent glaze (SG). However once the cleaner (AIO) is used you can use products to bring out the depth, i would suggest using natty's (or another quality color/depth enhancer). I've seen great results with natty's when used on dark cars, it really brings out the depth (if you have a light color car it's near impossible to get the depth of dark color cars, normally your paint will just look more shiny or "wet"). And then top with SG. I live in florida and during the summer months Meguiars gold class, meg. high tec yellow #26, and NXT 2.0 have not been nearly as durable as the SG. Another thing is a lot of your off the shelf waxes will have some sort of cleaner in them. These can and will take sg (and whatever is below it i.e. nattys) off. I've done it with NXT 2.0 within the past month just to try it out and see how well the NXT 2.0 holds up in comparison. Also some car wash soaps can do it as well (the mr. clean has been the worst in my experience, takes wax off within a few uses), i would recomend using meguiars gold class, it foams really well and seems to provide good lubrication. Like others said, to keep the swirl marks minimal i would use the "two bucket method". Go get two 5gal. buckets from lowes/home depot. Use one for soap and the other to rinse your sponge/rag of dirt . Also they sell grit guards which will keep the dirt from agitating and keep it at the bottom when you use either bucket.
Jetrails on roof
Rear Fender
I use Klasse products and they do hide light swirling/scratches very well. The only thing is that the Klasse All In One is a cleaner. Do not use this after you have put wax/glaze down as it will remove it. Also from what i understand AIO cannot be layered only the sealent glaze (SG). However once the cleaner (AIO) is used you can use products to bring out the depth, i would suggest using natty's (or another quality color/depth enhancer). I've seen great results with natty's when used on dark cars, it really brings out the depth (if you have a light color car it's near impossible to get the depth of dark color cars, normally your paint will just look more shiny or "wet"). And then top with SG. I live in florida and during the summer months Meguiars gold class, meg. high tec yellow #26, and NXT 2.0 have not been nearly as durable as the SG. Another thing is a lot of your off the shelf waxes will have some sort of cleaner in them. These can and will take sg (and whatever is below it i.e. nattys) off. I've done it with NXT 2.0 within the past month just to try it out and see how well the NXT 2.0 holds up in comparison. Also some car wash soaps can do it as well (the mr. clean has been the worst in my experience, takes wax off within a few uses), i would recomend using meguiars gold class, it foams really well and seems to provide good lubrication. Like others said, to keep the swirl marks minimal i would use the "two bucket method". Go get two 5gal. buckets from lowes/home depot. Use one for soap and the other to rinse your sponge/rag of dirt . Also they sell grit guards which will keep the dirt from agitating and keep it at the bottom when you use either bucket.
Last edited:
thecarter13
Member
Lucky that looks great just so you know
+1 to Lucky also about Klasse
I really like the SG but don't care to much for the AIO. Its more of a filler so if your really trying to remove scratches and swirls its not the route to go. However it will work really good as a paint cleansing lotion. It will fill the smaller imperfections and swirls and provide an extremely smooth surface to add a wax or what not. I suggest going this route if your leary about how much clear is left and afraid of removing too much.
+1 Again, Natty's is a good wax and there are actually two of them one for dark colored cars (the blue) and one for lighter cars (the regular version.) I think this stuff is better than NXT, although I have never been a fan of NXT at least for its price range and what it yields.
There are plenty of waxes and sealants out there and everyone has its drawbacks and pluses. Its all dependent on what you want. As a detailer I offer quite a few different options for waxes or sealants. I do this because there are so many variables that you encounter while on a job. I like to know what my customer wants then apply what I know will work to gurantee I achieve the desired results.
If your not feeling Klasse look to Collinite 845, stuff is great, and really well priced plus it will last 4-5 months at least.
Lastly Lucky made a good point of drawing attention to car soap, it is extremely important to use a good auto shampoo. This will keep from having to do heavy paint correction every so often and keep the level of swirls down. It is definitely worth spending top dollar for auto shampoo and supplies because you will yield fewer swirls if any at all and keep from having to spend 300 at the bare minimum or more for a full paint correction sometime down the road. Most auto shampoos will also contain some bit of wax in them so it will actually add depth, dish soap does not count  .
.
Btw Lucky where you located in FL?
+1 to Lucky also about Klasse
I really like the SG but don't care to much for the AIO. Its more of a filler so if your really trying to remove scratches and swirls its not the route to go. However it will work really good as a paint cleansing lotion. It will fill the smaller imperfections and swirls and provide an extremely smooth surface to add a wax or what not. I suggest going this route if your leary about how much clear is left and afraid of removing too much.
+1 Again, Natty's is a good wax and there are actually two of them one for dark colored cars (the blue) and one for lighter cars (the regular version.) I think this stuff is better than NXT, although I have never been a fan of NXT at least for its price range and what it yields.
There are plenty of waxes and sealants out there and everyone has its drawbacks and pluses. Its all dependent on what you want. As a detailer I offer quite a few different options for waxes or sealants. I do this because there are so many variables that you encounter while on a job. I like to know what my customer wants then apply what I know will work to gurantee I achieve the desired results.
If your not feeling Klasse look to Collinite 845, stuff is great, and really well priced plus it will last 4-5 months at least.
Lastly Lucky made a good point of drawing attention to car soap, it is extremely important to use a good auto shampoo. This will keep from having to do heavy paint correction every so often and keep the level of swirls down. It is definitely worth spending top dollar for auto shampoo and supplies because you will yield fewer swirls if any at all and keep from having to spend 300 at the bare minimum or more for a full paint correction sometime down the road.
Most auto shampoos will also contain some bit of wax in them so it will actually add depth, dish soap does not count .Btw Lucky where you located in FL?
Vapour Trails
The Renaissance Man
Looking for advice to detail my car. I have a PC 7424 on order, along with white/orange and buffing pads.
I don't think my paint has much in the way of contamination, it's spent a lot of time garaged, so want to skip the claybar this time.
What I want to do is:
1. Remove swirls
2. Wax
I currently have a bottle of Megs Gold Class Wax, and I'd like to use that up before I buy more products.
What steps do you suggest? I'm a bit confused by the use of three products, ie polish, seal, wax. I thought sealant was just synthetic wax? Are three steps necessary? I want to do a good job, but I also don't have tons of time.
Thanks
LuckyH
Senior Member
Lucky that looks great just so you know
+1 to Lucky also about Klasse
I really like the SG but don't care to much for the AIO. Its more of a filler so if your really trying to remove scratches and swirls its not the route to go. However it will work really good as a paint cleansing lotion. It will fill the smaller imperfections and swirls and provide an extremely smooth surface to add a wax or what not. I suggest going this route if your leary about how much clear is left and afraid of removing too much.
+1 Again, Natty's is a good wax and there are actually two of them one for dark colored cars (the blue) and one for lighter cars (the regular version.) I think this stuff is better than NXT, although I have never been a fan of NXT at least for its price range and what it yields.
There are plenty of waxes and sealants out there and everyone has its drawbacks and pluses. Its all dependent on what you want. As a detailer I offer quite a few different options for waxes or sealants. I do this because there are so many variables that you encounter while on a job. I like to know what my customer wants then apply what I know will work to gurantee I achieve the desired results.
If your not feeling Klasse look to Collinite 845, stuff is great, and really well priced plus it will last 4-5 months at least.
Lastly Lucky made a good point of drawing attention to car soap, it is extremely important to use a good auto shampoo. This will keep from having to do heavy paint correction every so often and keep the level of swirls down. It is definitely worth spending top dollar for auto shampoo and supplies because you will yield fewer swirls if any at all and keep from having to spend 300 at the bare minimum or more for a full paint correction sometime down the road.
Btw Lucky where you located in FL?
Thanks.
I'm actually a little north of Tampa. Spring Hill to be specific.
Yeah some people are finicky about paint correction. I lean towards the side of "If i cant see it, it's not there". Which is probably why i like using very mild correction and then using fillers. I want to keep as much clear on there as i can, I never know when i might get a scuff or something, and i want as much as i can have there to work with.
We asked them about how to correct a few things we saw in a parking lot under fluorescent lights. And their exact words were "stop chasing ghosts", and we asked well how would you fix it and they said "don't park there anymore". We got a good laugh and it's true. You can only do so much and have to realize when done is done.
Last edited:
thecarter13
Member
Looking for advice to detail my car. I have a PC 7424 on order, along with white/orange and buffing pads.
I don't think my paint has much in the way of contamination, it's spent a lot of time garaged, so want to skip the claybar this time.
What I want to do is:
1. Remove swirls
2. Wax
I currently have a bottle of Megs Gold Class Wax, and I'd like to use that up before I buy more products.
What steps do you suggest? I'm a bit confused by the use of three products, ie polish, seal, wax. I thought sealant was just synthetic wax? Are three steps necessary? I want to do a good job, but I also don't have tons of time.
Thanks
A sealant often is a synthetic wax. They are designed to provide longevity and still offer shine. Carnuabas are a traditional wax and still yield more shine and depth than sealants but do not often last very long. Some people like to put a sealant on, then top with wax to provide depth and offer more shine. You do not have to do this however, I tend not too but I normally wax at least once a month and probably do 2 - 3 layers at a time so I have plenty of protection there (i think
ha)Steps coincide with the product and goal they are trying to achieve. A lot of detailers will say a 2 step polish or 3 step polish. The first step is often a heavy duty compound or polish able to remove all of the major defects. When a heavy grade compound/polish is used there will often be a haze left over. To remove this haze the 2nd step in polishing will come into effect. The goal of this step is now to remove the haze and restore gloss back to the car. Most of the time a wax or sealant (one in the same imo) is considered an LSP or last step product. This will be the last and final step of any detail, except for windows most of the time.
Now that you got that PC you need some Megs 105 and Megs 205 for a 2 step polish, however you might be able to just do a one step Via Megs 105. Pair M105 with an orange pad and do all the correction work, you may have to come back over an area with a 2nd or 3rd pass with how hard mustang paint is. After you are done and remove the majority of heavy defects and what not, switch up to a white pad and 205 and try to bring the gloss back. 205 has very little cutting ability so you might wanna go with a orange and see how that does.
I should have asked first but what do you have in the way of product? If you have some other stuff you might wanna give that a whirl before going to M105 and M205. This is just the usual route I go on hard paints.
Me being me, I still would clay, It will gurantee that there are no contaminants still present and provide for a super clean surface to work on.
S
smokinjoe32927
Guest
Where do you purchase Mag's #26 Yellow Wax these days? I even looked on the Meguiar's site and could not find it. Thank you.
thecarter13
Member
You can find #26 at autozone sometimes or another parts store but, you can search HERE to find a Meguiars Dealer. If not you can try quite a few places online, Autogeek, Detailers Domain, Auto Detailing Solutions, Detailed Image or Proper Auto Car
S
smokinjoe32927
Guest
Thank you
Similar threads
- Replies
- 12
- Views
- 542
- Replies
- 7
- Views
- 458
- Replies
- 6
- Views
- 445
Support us!
Support Us - Become A Supporting Member Today!
Click Here For Details