I really, REALLY hope that there is a lot of lateral bracing in there that we aren't seeing in this picture . . .
Norm
See all that plywood. That's a LOT of lateral bracing.
I really, REALLY hope that there is a lot of lateral bracing in there that we aren't seeing in this picture . . .
Norm
No, all that plywood is in the car's longitudinal direction which is fine for that direction (only).See all that plywood. That's a LOT of lateral bracing.

Never, never, NEVER put one end of a car on ramps of any kind and then jack up the other end.I noticed only a handful of ramps shown here have enough room for a wheel choke. If you put the front of the car up on the ramps, keep in mind that the taller the ramps, the more likely the car is going to roll back on you when you jack up the rear of the car.
If you are making a pair of ramps, leave some length on the top shelf for some kind of wheel choke. It doesn't needs a lot, but there should be something there to keep the tires from rolling.
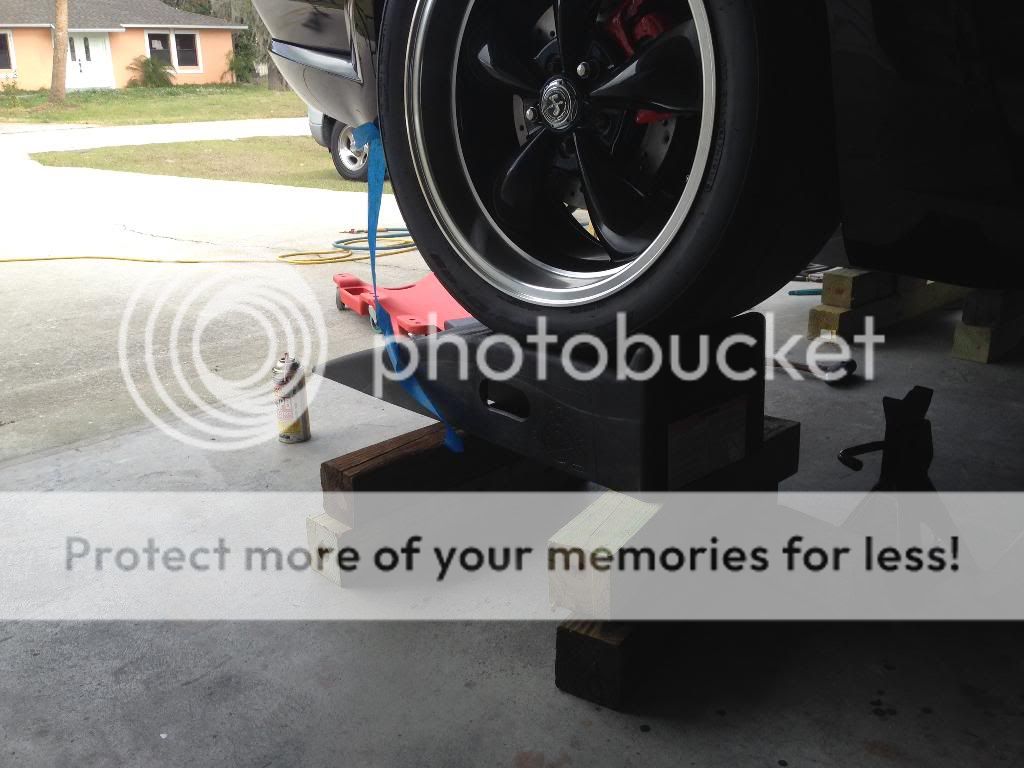
Those concerned about the weight on my design I have had by friends F350 dually on those ramps, front and rear wheels. All pieces assembled are glued and screwed.
I had a chock for the tire that the pegs held in but they recenlty got misplaced.
I will be making another set soon that will be 3" taller. That design is ok for oil changes but anything else and it's a little cramped under there.
I really hope he's got the kind of metal ramps that have metal bracing down near the bottoms of both sides running between the inclines and the vertical support end. The ones that don't have this have been known to collapse (age and abuse may have played a part, but that's what can happen).My dad has had metal ramps since the late 80's early 90's, but they aren't that wide for the factory tires. I usually get a bit worried that they may kick out from under the car one day.
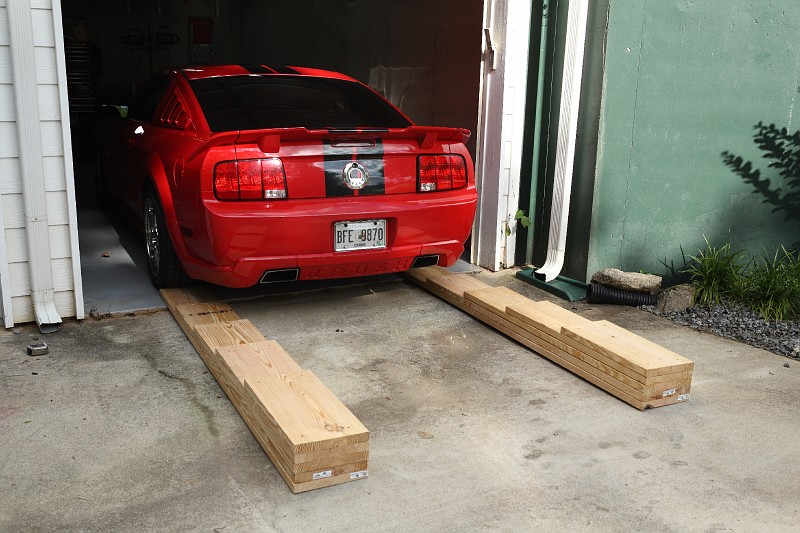
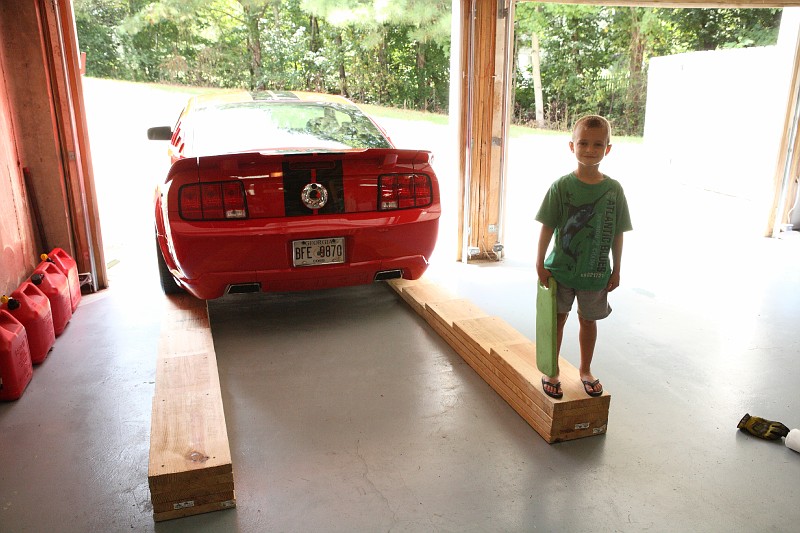
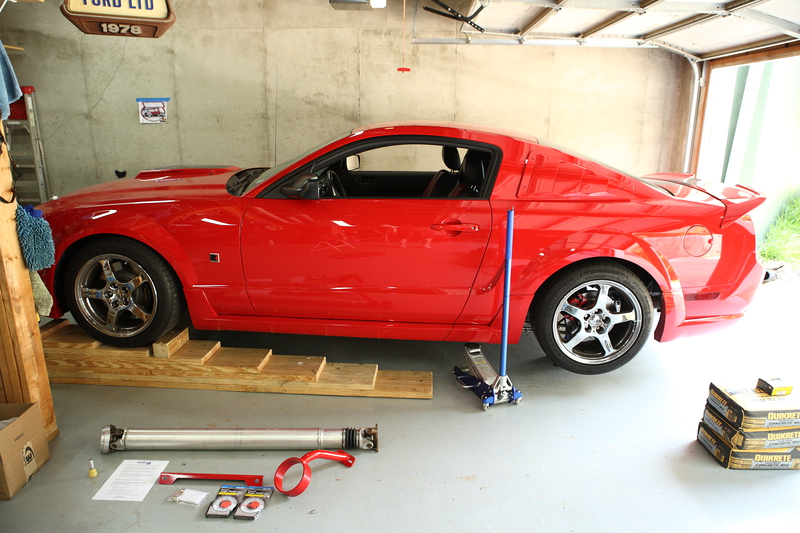
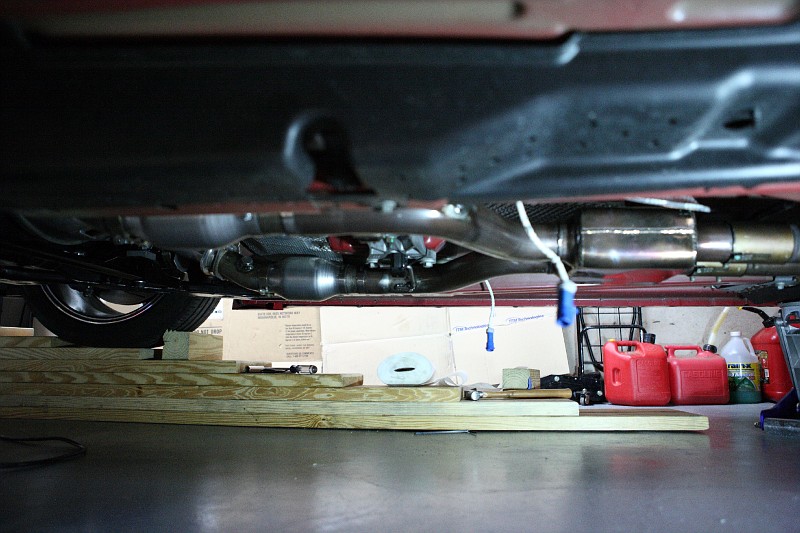
An idea I've been working on. Raises the car just over 13". About $400 in material by my estimation. The flat level section is just over 10 feet and the ramp is just over 8 feet for a nice gradual rise for lowered cars. It's mostly 2x12. The little wedges on the left are for really low cars to get the nose up. The little triangle is just a chock. Width is 19".
I really hope he's got the kind of metal ramps that have metal bracing down near the bottoms of both sides running between the inclines and the vertical support end. The ones that don't have this have been known to collapse (age and abuse may have played a part, but that's what can happen).
Even the good ones are still too narrow for today's performance tires - the set I've had since the early 1970's can barely accept 235/50's and won't take 255/45's without the tire riding up on the ridge on one side. Forget anything wider than that.
Norm
I don't know if some of you have had problems with your ramps wanting to slide forward as you're trying to pull up on them, but I have. My garage floor is the typical very smooth garage cement. So I drilled a couple holes through the ramps into the cement floor to help lock in the ramps so they never move when I'm pulling up on them. Each ramp has an exact location marked on the floor so I know exactly where to place them. The drilled holes are all slightly larger than the 4.6L main bolts I drop into them (I had them laying around). It's a very inexpensive but effective way of getting a lowered car up in the air quickly.
In this pic you can barely see the bolt head just below the 3rd tier. These were made from 2x12's.