DOB help needed.

Uncle Buck

forum member
Joined
Jan 5, 2014
Posts
57
Reaction score
0
I was watching your YouTube videos last night and left a comment about the intercooler hoses, was wondering if you have any pictures on how you routed them to the heat exchanger.

I'll post some pics here for you but there is no science to it. I just routed them down the passenger side. One went to the top of the tank and the other dropped down to the heat exchanger. Key is to keep any bends gentle and don't introduce any extra fittings.
 

Racer47

Doesn't have much to say
S197 Team Member
Joined
Sep 11, 2009
Posts
1,065
Reaction score
324
Location
SE Wis
The internet would crash if I listed all the stuff I've screwed up.:omfg::helpme:

Yeah, the same here. But most of us started messing around with small stuff, pedal bikes, dirt bikes, rc cars, whatever. Not stripping threads in $2k heat exc or installing a supercharger as a beginner.

Blacllkllsi, there is a certain feel you acquire after you've stripped many threads. You know by feel whats simply tight versus forcing together incompatible threads. Plus there are a certain amount of terms you need to know. What you called a taper is really a chamfer. Pipe threads are slightly bigger dia at the base than at the end, thats a taper. Plus there are dozens of other similar but different issues that will come up. Sure the internet is useful. Sure there are people that will post help. But there is no substitute for your own hands on experience.

Good luck with the install but if I were you I'd look for local, live in person help.
 

skwerl

tree hugger
Joined
Aug 6, 2011
Posts
16,197
Reaction score
1,145
Location
central Florida
Based on the wrench imprints on those fittings, I'm gonna go out on a limb and say that you have many fittings way over tightened. Aluminum doesn't like to be forced like that and it's possible to introduce small cracks that can grow larger with heat cycling.

When your manifold starts leaking in 6 months, don't be calling up complaining to DOB for selling you a piece of shit. He cannot warranty against your abuse and over torquing fittings to the point of cracking the manifold.
 

blacllkllsi

forum member
Joined
Jan 24, 2009
Posts
311
Reaction score
0
Based on the wrench imprints on those fittings, I'm gonna go out on a limb and say that you have many fittings way over tightened. Aluminum doesn't like to be forced like that and it's possible to introduce small cracks that can grow larger with heat cycling.

When your manifold starts leaking in 6 months, don't be calling up complaining to DOB for selling you a piece of shit. He cannot warranty against your abuse and over torquing fittings to the point of cracking the manifold.
I didn't crack anything.......yet. Picked up new fittings locally, manifold going on today.
 

Wes06

forum member
Joined
Jan 21, 2012
Posts
5,383
Reaction score
59
You even had them threaded all the way in and we said they look good.

Need to just sit back a minute, and go over the full directions one more time
 

Wes06

forum member
Joined
Jan 21, 2012
Posts
5,383
Reaction score
59
so were the threads on the manifold fine or have to chase them?

got the new fitting for the IC loop and replaced correctly?
 

blacllkllsi

forum member
Joined
Jan 24, 2009
Posts
311
Reaction score
0
so were the threads on the manifold fine or have to chase them?

got the new fitting for the IC loop and replaced correctly?

I didn't have to chase the threads, new connectors went in ok and are on the correct tapered side.


AndrewNagle

forum member
Joined
Jun 20, 2008
Posts
4,272
Reaction score
1,351
Location
Mountains of NC
I didn't have to chase the threads, new connectors went in ok and are on the correct tapered side.


Looks good, as others have said take your time breath and don't force things. If you had test fitted your AN red and blue fittings with the black you should have been able to tell what end went into the manifold
 

Wes06

forum member
Joined
Jan 21, 2012
Posts
5,383
Reaction score
59
The bad thing is he has a picture of them screwed in correctly, and you can even see the blue part of the 90* threaded on.

Why it came up to flip them when already assembled I have no idea
 

blacllkllsi

forum member
Joined
Jan 24, 2009
Posts
311
Reaction score
0
The bad thing is he has a picture of them screwed in correctly, and you can even see the blue part of the 90* threaded on.

Why it came up to flip them when already assembled I have no idea

It was just a misunderstanding on my part, I am not familiar with -an and npt threads. The npt side looks like the "straight" side to me and the "tapered" side looks like the -an side. That's why when DOB said put the tapered end in I flipped it and put the -an side in because let's face it, that -an side is more tapered than the npt side. It's all clear to me now though. All the pictures were mine, the instruction have no pictures on this.
 

Wes06

forum member
Joined
Jan 21, 2012
Posts
5,383
Reaction score
59
Yea I just meant Your picture showed correct, plenty of use said its fine and wouldnt leak, then the misunderstanding of the threads made you take it apart. Rip that first thread
 

hammeron

forum member
Joined
Apr 15, 2008
Posts
502
Reaction score
11
It was just a misunderstanding on my part, I am not familiar with -an and npt threads. The npt side looks like the "straight" side to me and the "tapered" side looks like the -an side. That's why when DOB said put the tapered end in I flipped it and put the -an side in because let's face it, that -an side is more tapered than the npt side. It's all clear to me now though. All the pictures were mine, the instruction have no pictures on this.

i just want to say nicely done for sticking with it and getting the job done! i was confused as well reading the posts and seeing the pictures, i did not know what end should go in, as well.

anyhow the folks on this forum are the best of the best. when i had troubles, i got help from BruceH.

good luck and i hope it is smooth sailing from here on out.
 

blacllkllsi

forum member
Joined
Jan 24, 2009
Posts
311
Reaction score
0
i just want to say nicely done for sticking with it and getting the job done! i was confused as well reading the posts and seeing the pictures, i did not know what end should go in, as well.

anyhow the folks on this forum are the best of the best. when i had troubles, i got help from BruceH.

good luck and i hope it is smooth sailing from here on out.
Thanks man. Yeah, BruceH is a good guy. I've bought some things from him and he knows his stuff. Lots of good people here.
 

blacllkllsi

forum member
Joined
Jan 24, 2009
Posts
311
Reaction score
0
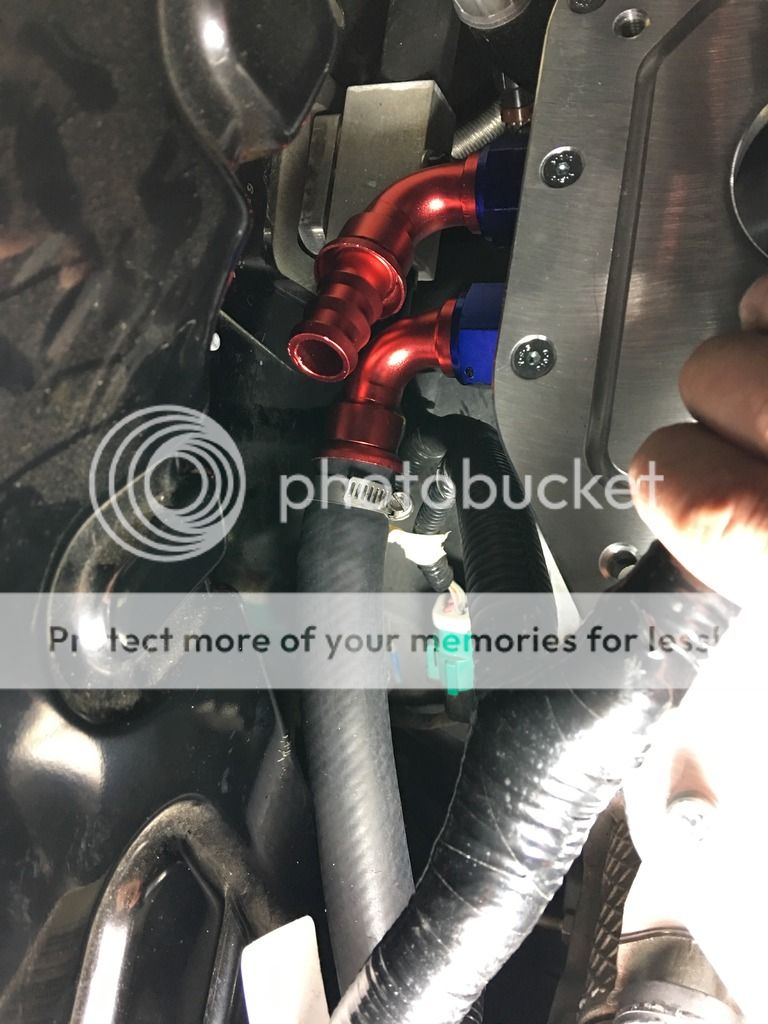
Got the 90 degree fittings on after I torqued the manifold down and ran the 3/4in lines to the heat exchanger and degas bottle area. Thanks to Unclebuck for the visual. The fitting on the right is very close to that block on the firewall no matter how I clock it so I will have to keep an eye on it. Pics because I don't think any exist and it may help someone.


Wrapped the metal lines against the firewall with 3/8in rubber hose to prevent anything from rubbing prior to putting the maifold on, also wrapped the manifold in DEI heatshield.


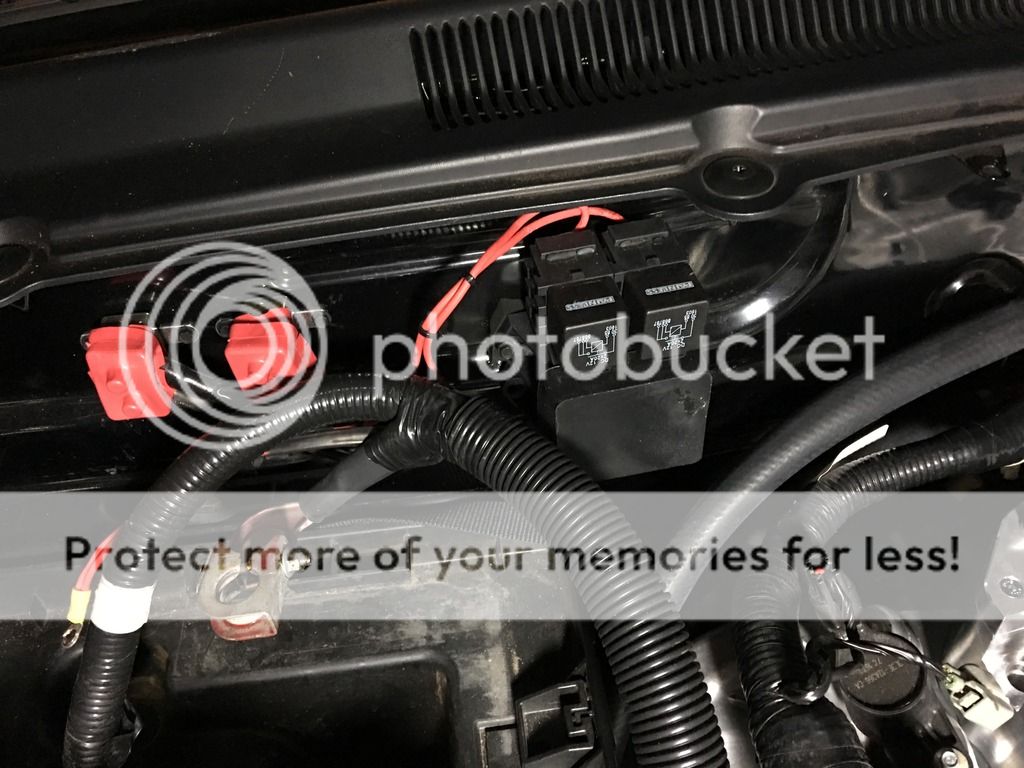
Pics of the painless wiring kit installed, it added 7 key on power sources/2 relays and 2 circuit breakers. I used it to hook up my gauges and digital shift a few weeks ago. I will be using it to wire my intercooler pump.


eighty6gt

forum member
Joined
May 9, 2011
Posts
4,299
Reaction score
405
When you get the NPT in the manifold fixed you may want to go with tape instead of sealant as the tape will help fill thread clearance a bit better than the sealant will.

I do a lot of NPT tapping as I hate press fit fittings and built my own pcv inlet setup for my blower elbow. You have to be conservative and leave things with a few threads visible.

Good luck with the project. I wish I had a DOB setup!

edit: whoops, didn't see the second page. Damn it! So old.
 

ghunt81

New parts on old junk!
S197 Team Member
Joined
Jan 20, 2016
Posts
1,078
Reaction score
162
Location
Clarksburg, WV
Well I managed to get the fittings in but they will not seat all the way and one is in further than the other. I had torque the heck out of them to get them in that far. I hope it does not leak.


Oh God this picture makes me cringe a little.

FYI, for future reference NPT fittings do not (and probably should not) get tightened until they are flush. NPT thread is tapered and the taper is part of what helps it seal. These fittings only need sealant and then tightened until they feel very snug, it is normal for some threads to still be showing.

Tightening them this far is a good way to strip threads or crack whatever you are putting the fitting into. I cracked an aluminum remote filter mount doing this one time and almost blew up my engine due to oil loss/lack of oil pressure.
 

Latest posts

Support us!

Support Us - Become A Supporting Member Today!

Click Here For Details

Sponsor Links

Banner image
Back
Top