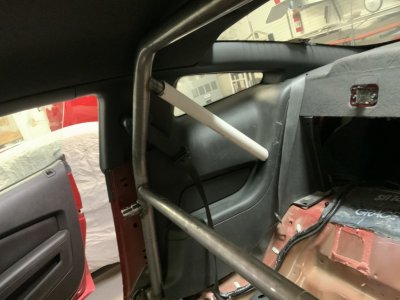
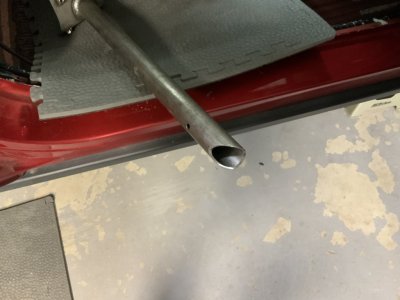
What are you going to use to make sure those holes don't rust?
You are using an out of date browser. It may not display this or other websites correctly.
You should upgrade or use an alternative browser.
You should upgrade or use an alternative browser.
Maximum Motorsports Roll Bar install in a 2010 GT
- Thread starter Midlife Crises
- Start date
Midlife Crises
Senior Member
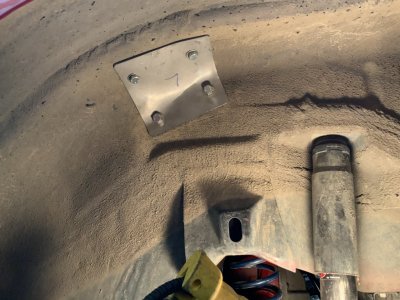
I figure I’ll just use a couple coats of rattle can enamel on the holes, scraped areas and the backup plates. Sealant on the bolts in the wheel wells might be a good idea.
Time to modify the plastic rear quarter panels. Start by drawing a parallel line 4 3/4” back from the front edge of the plastic panel. The instructions show where to make a mark 3/8” from that line. This is the center of the first 1 3/4” hole. Hole saw the hole and then cut the panel in two along the line. I used a fine cut hand saw.
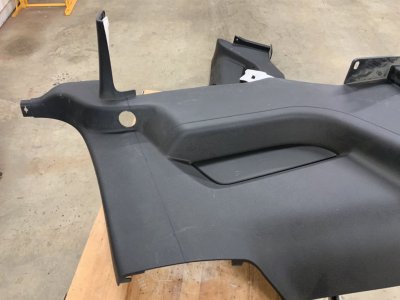
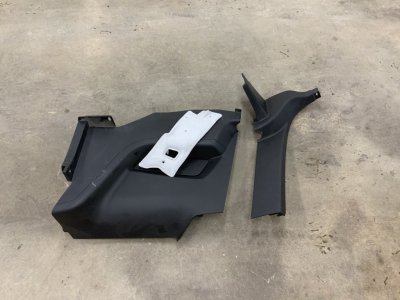
Time to modify the plastic rear quarter panels. Start by drawing a parallel line 4 3/4” back from the front edge of the plastic panel. The instructions show where to make a mark 3/8” from that line. This is the center of the first 1 3/4” hole. Hole saw the hole and then cut the panel in two along the line. I used a fine cut hand saw.


Midlife Crises
Senior Member
Midlife Crises
Senior Member
After tracing around the plastic pipe swap the panels and braces around and mark the other side. Now drill the marked areas with a 2” hole saw. Cut the panel straight down from the back of the hole.
Congratulations! These panels cost over $300.00 dollars each to replace if you buy new from Ford. You might try to find a used set from a salvage yard if you don’t want to modify the originals.
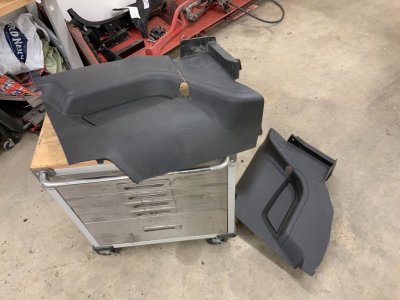
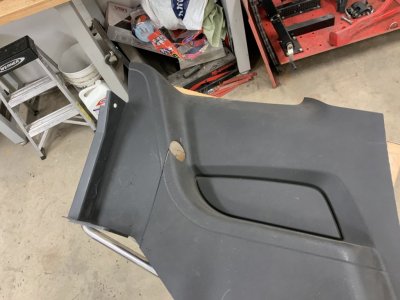
Congratulations! These panels cost over $300.00 dollars each to replace if you buy new from Ford. You might try to find a used set from a salvage yard if you don’t want to modify the originals.


Midlife Crises
Senior Member
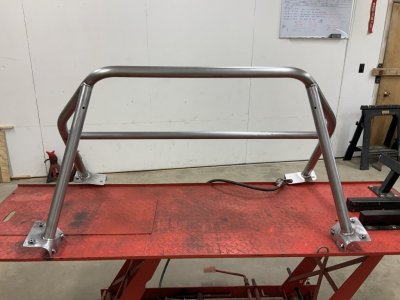
Now I will completely assemble the bar with backup plates and all fasteners snugged up. This will prove everything fits and lock the back braces in place so I can weld them. That’s all for now.
Rustoleum's zinc in a spray can works superb, dries extremely fast, for multiple coats.What are you going to use to make sure those holes don't rust?
Midlife Crises
Senior Member
That is good stuff, I have used it before.Rustoleum's zinc in a spray can works superb, dries extremely fast, for multiple coats.
DieHarder
Senior Member
- Joined
- Nov 9, 2019
- Posts
- 1,467
- Reaction score
- 758
My back declared there would be no bending or twisting today. I did stop buy the paint store and order PPG Urethane that matches the body color. Candy Dark Red (U6). This is a tri-coat color and the guy behind the counter thought I was nuts.
Just be sure to order the stock color/tone primer. Being a semi-transparent using anything else will be near impossible to make the color match. Ask me how I know...
I tried every other brand, sold by local machine shops..and most of it turned to rust.That is good stuff, I have used it before.
This rustoleum stuff is the bomb. The can is taller, and cheaper..and local home depot has loads of it. Zero problems with rust. I also use it for non automotive applications. I used it on a bunch of welds I had done, on the underside of the mustang..and also where the welding was done for the rear strut brace..in the trunk. Drys stupid fast.... so multiple coats can be applied.
Midlife Crises
Senior Member
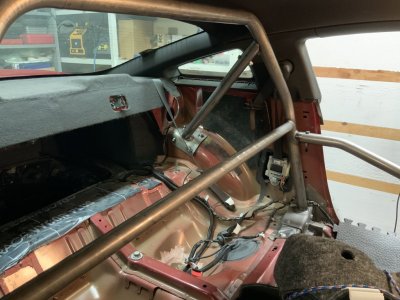
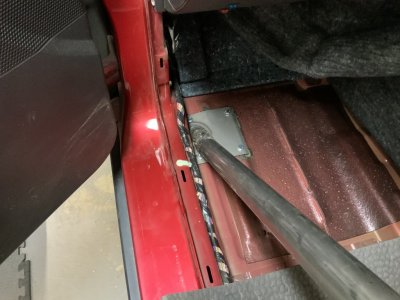
With all the bolts run into the holes I tightened the fasteners on the main hoop and back braces. Then pulled up the bolts that index the back braces to the stubs on the main hoop. I put the bolts in the door bar mounts loosely just to prove the fit. I did have to use a rat tail on a couple backup plate holes in one wheel well.


Midlife Crises
Senior Member
AHaze
Member
Anyone know why the door bars are bent the way they are? A straight bar between the mounting points would be lighter, stronger and make entry/exit easier.
Nice work on the trim panels! That is clean.
I was thinking of putting in one of these roll bars for occasional track day use, but I wouldn't use the one with door bars because I drive the car so much on the street. I'm glad to see you can keep the interior trim.
I was thinking of putting in one of these roll bars for occasional track day use, but I wouldn't use the one with door bars because I drive the car so much on the street. I'm glad to see you can keep the interior trim.
I bought every brand of 'zinc in a spray bomb' here in town, at every machine shop/industrial supplier we have locally. They all showed rust after a few months. Cans were shorter..and more expensive vs rustoleum. The rustoleum brand, bought at local home depot, still shows zero rust where I had all the welding done on the mustang. Still looks like I applied it yesterday.Rustoleum's zinc in a spray can works superb, dries extremely fast, for multiple coats.
I used it for other applications, on largish steel plates, same deal, zero rust. However, prior to application, I sanded off any existing surface rust the best I could...or in some cases, used a wire brush.
AHaze
Member
I think I found the answer to my own question.Anyone know why the door bars are bent the way they are? A straight bar between the mounting points would be lighter, stronger and make entry/exit easier.
The door bar has to pass the driver no lower than the midway point between their shoulder and elbow. A straight door bar would likely be fine for me at 6'5" with the seat pushed back against the harness bar as low as I can get it but would be too low for a shorter driver with the seat moved forward and up.
I think I found the answer to my own question.
The door bar has to pass the driver no lower than the midway point between their shoulder and elbow. A straight door bar would likely be fine for me at 6'5" with the seat pushed back against the harness bar as low as I can get it but would be too low for a shorter driver with the seat moved forward and up.
That is correct. RH racecars measured with me in the driver's seat so that the bar would pass between the elbow and the shoulder.
With the Maximum motorsports bar being universal, they put that bar coming off the main hoop straight so that it can fit a larger variety of drivers.
Midlife Crises
Senior Member
oldVOR
forum member
Looking really great at this point.
Any plans to plug weld the bolt holes on the rear down bars?
Any plans to plug weld the bolt holes on the rear down bars?
Midlife Crises
Senior Member
The rules say no grinding on welds so I think I will put a bolt in the hole.
Midlife Crises
Senior Member
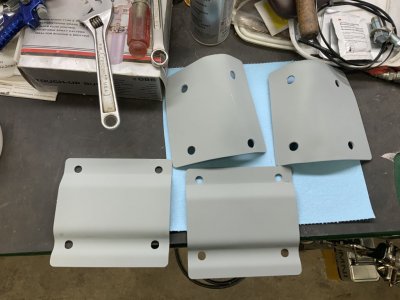
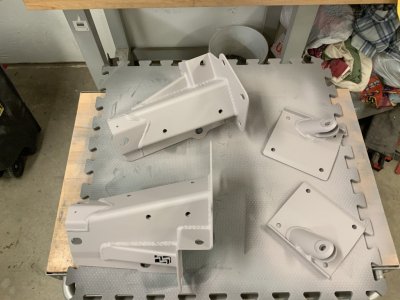
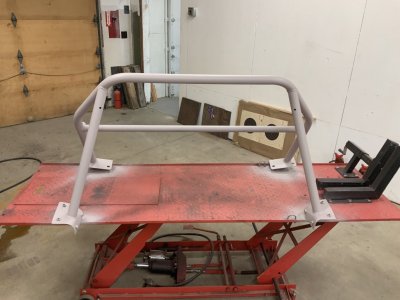
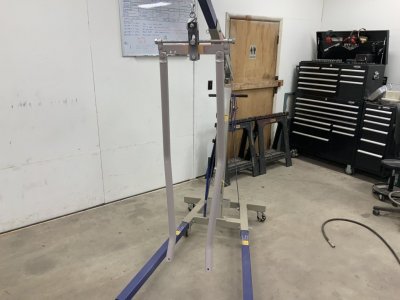
Moving on with the painting process all of the bars and mounting plates have been sanded with 120 grit on a random orbital sander. I used 150 wet or dry paper to reach the tight spots and wiped everything down with lacquer thinner and clean rags. The backup plates have two coats of Rustolium cold galvanize and will get sprayed with black rattle can enamel. The rest of the roll bar and gussets have been treated to two coats of PPG 2K Urethane surfacer and left to dry over night. I also used the galvanize spray on the holes I drilled in the floor pans and wheel wells.


Similar threads
- Replies
- 4
- Views
- 2K
Support us!
Support Us - Become A Supporting Member Today!
Click Here For Details


