Driveshaft balancing the Ford way?

Miker

Member
Joined
Sep 6, 2022
Posts
226
Reaction score
99
Location
96002
For me an impact wasn't going to do it. The angle is wrong and there was too much movement of the driveshaft which cushioned the impacts. I think I only got one loose with it and that was after heat and PB Blaster. For me what worked was having the car in first gear and using a long breaker bar setup so I could push on it with my foot. This worked.
I did mine on jack stands. If I had the car on a lift I am sure I could have used my arms but on the ground there wasn't enough room to get the leverage.
In the end I broke a 12 point socket and the bolts were mangled up enough that I bought a new set for the install.
 

JC SSP

Senior Member
Joined
Nov 8, 2022
Posts
1,079
Reaction score
466
Location
FL
Just the surrounding area…. A little heat goes a long way. Not on the bolt but on the steel flange area. If you’re concerned wrap a wet rag around the pinion bearing area of the differential housing.
 

JC SSP

Senior Member
Joined
Nov 8, 2022
Posts
1,079
Reaction score
466
Location
FL
Go with the proper socket and extend bar (leverage is your friend). Also try another high powered impact gun. If that doesn’t work a little heat.
 

GriffX

Member
Joined
Sep 28, 2017
Posts
536
Reaction score
183
For me an impact wasn't going to do it. The angle is wrong and there was too much movement of the driveshaft which cushioned the impacts. I think I only got one loose with it and that was after heat and PB Blaster. For me what worked was having the car in first gear and using a long breaker bar setup so I could push on it with my foot. This worked.
I did mine on jack stands. If I had the car on a lift I am sure I could have used my arms but on the ground there wasn't enough room to get the leverage.
In the end I broke a 12 point socket and the bolts were mangled up enough that I bought a new set for the install.
It looks always so easy on youtube.... Not sure if my breaker bar fits straight on it, I have an eazycarlift, so I'm on my back. Thanks for the hint with new bolts, pretty sure Ford Germany will not have them. They even do not have a plastic clip for the fender.
 

Miker

Member
Joined
Sep 6, 2022
Posts
226
Reaction score
99
Location
96002
My local Napa had a set of the bolts. Also I was able to reach over the tail shaft from under the car and move the shifter linkage from 1st to neutral and back. Made a huge difference not needing to climb out from under the car for each bolt when torqueing them down for my aging body.
 

GriffX

Member
Joined
Sep 28, 2017
Posts
536
Reaction score
183
My local Napa had a set of the bolts. Also I was able to reach over the tail shaft from under the car and move the shifter linkage from 1st to neutral and back. Made a huge difference not needing to climb out from under the car for each bolt when torqueing them down for my aging body.
Rural Germany, all Hardware stores gone with not the wind but the lockdown.....
My breaker bar fits not good, but I can reach them. Will do it tomorrow, it's 8:30 pm here.

For your ageing body I have the appropriate video for you ;)

PS: Bolt No
N800594-S101
is also used on the S550, so my Ford dealer will have it (for the 10fold price I guess)
 
Last edited:

Pentalab

forum member
Joined
Mar 5, 2013
Posts
5,216
Reaction score
1,104
For me an impact wasn't going to do it. The angle is wrong and there was too much movement of the driveshaft which cushioned the impacts. I think I only got one loose with it and that was after heat and PB Blaster. For me what worked was having the car in first gear and using a long breaker bar setup so I could push on it with my foot. This worked.
I did mine on jack stands. If I had the car on a lift I am sure I could have used my arms but on the ground there wasn't enough room to get the leverage.
In the end I broke a 12 point socket and the bolts were mangled up enough that I bought a new set for the install.
A 6 point socket is a lot stronger.... and the only thing that should be used on any impact wrench. Oops, just see u have 12 point bolts, wtf?
 

Miker

Member
Joined
Sep 6, 2022
Posts
226
Reaction score
99
Location
96002
A 6 point socket is a lot stronger.... and the only thing that should be used on any impact wrench. Oops, just see u have 12 point bolts, wtf?
I think they made them 12 point bolts because there is such a limited access angle to them. I think I used a 2 foot 1/2 breaker bar, a 1/2 to 3/8 adapter, a 3/8 wobbly, and a short 12 point 12mm socket.

And yes I too was taught to use only 6 point sockets with an impact and preferably an impact socket. I did break 1 12 point with the impact trying to remove them.
 

GriffX

Member
Joined
Sep 28, 2017
Posts
536
Reaction score
183
They are 12.9 grade steel 12pt bolts M12 at the transmission flange and should be torqued with 103 Nm. I think with a 6 point bolt you would not be able to put a socket on it.
 

GriffX

Member
Joined
Sep 28, 2017
Posts
536
Reaction score
183
Got it out, with 2ft breaker bar, workshop drowned them in green glue. Penetration oil stopped right at the glue, so useless.

PS: Cleaning the threads will take some time :(
 
Last edited:

GriffX

Member
Joined
Sep 28, 2017
Posts
536
Reaction score
183
Question: I'm a very unexperienced "welder", if you do a spot weld at the edge of two sheets like here, to find the weld parameters, do I have to add the thickness of both sheets? Let's say one has 1 mm, so I go to the 2 mm thickness values in the table for the MIG welder?
Thanks!
 

GriffX

Member
Joined
Sep 28, 2017
Posts
536
Reaction score
183
Did it. To install the modified driveshaft under my car I needed 2h with cleaning all of the threads from the glue and so on (used blue Loctite now). Longest part was to get the two bolts at the carrier bracket in again. I measured the U-joint angle at the transmission to 2.6 deg. All in all I needed 3 evenings.

I also found this yesterday:
 
Last edited:

DieHarder

Senior Member
Joined
Nov 9, 2019
Posts
1,467
Reaction score
758
Did it. To install the modified driveshaft under my car I needed 2h with cleaning all of the threads from the glue and so on (used blue Loctite now). Longest part was to get the two bolts at the carrier bracket in again. I measured the U-joint angle at the transmission to 2.6 deg. All in all I needed 3 evenings.

I also found this yesterday:

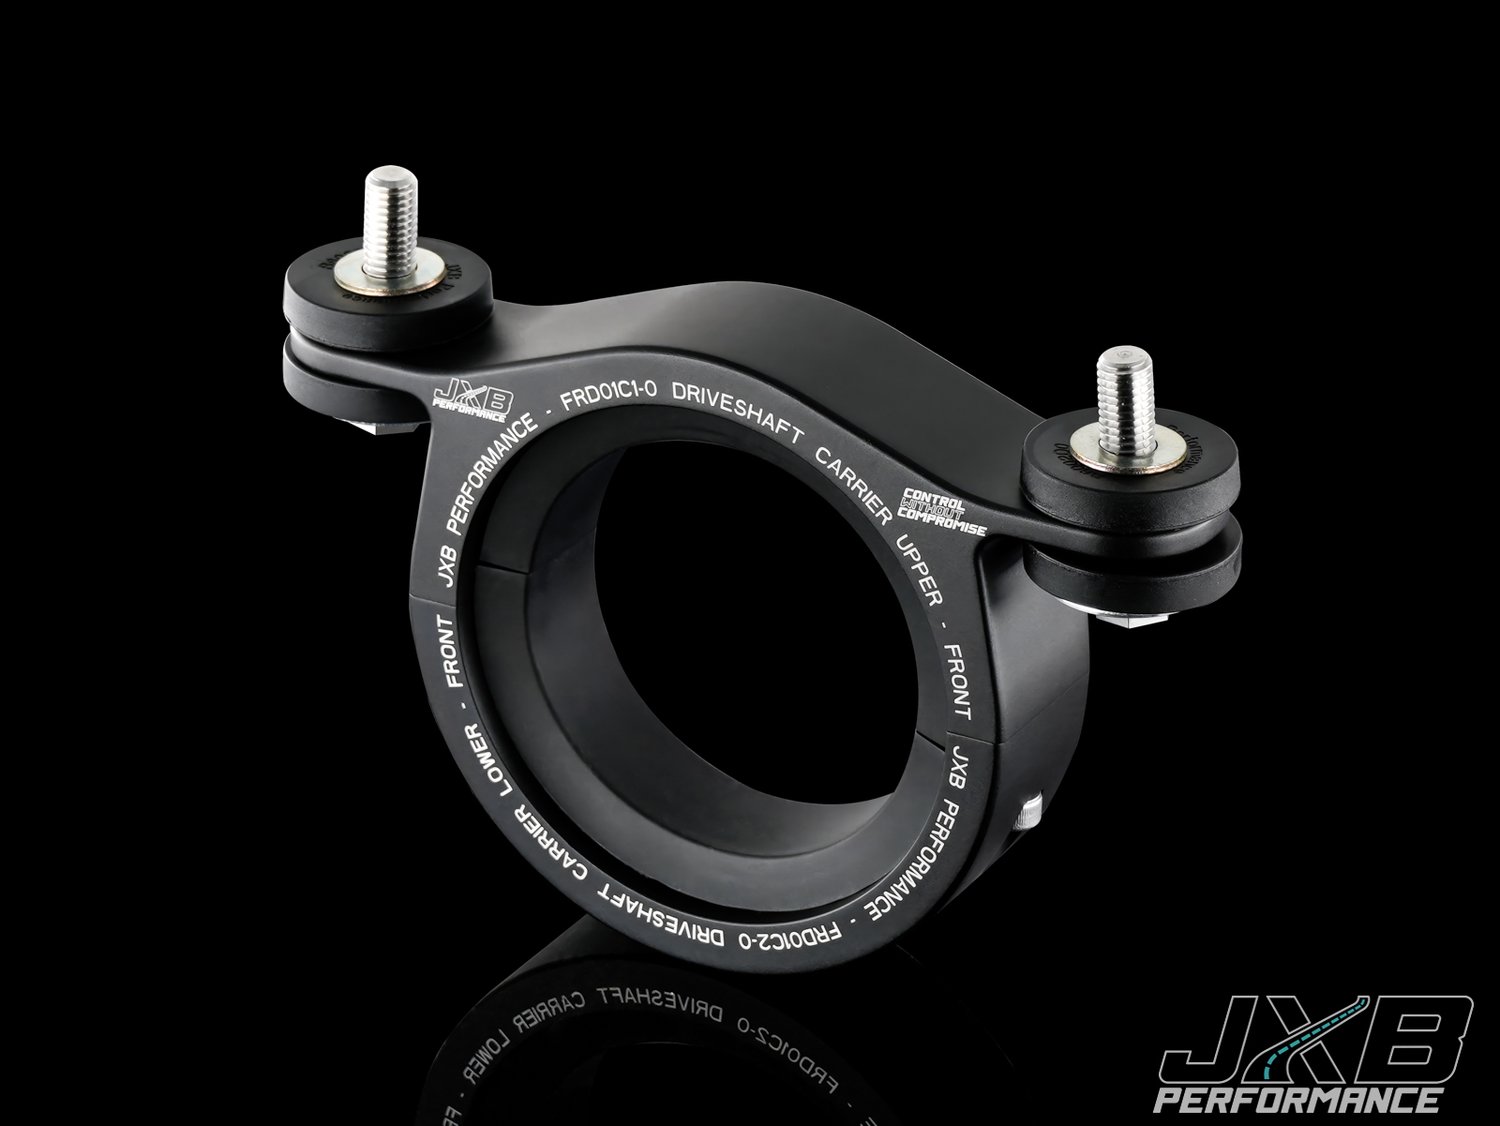
Looks like the best/easiest method to fix the problem and doesn't require removal of the driveshaft to boot. Not cheap but avoiding all the hassle is worth it (at least in my opinion). :snoopy
 

GriffX

Member
Joined
Sep 28, 2017
Posts
536
Reaction score
183
Looks like the best/easiest method to fix the problem and doesn't require removal of the driveshaft to boot. Not cheap but avoiding all the hassle is worth it (at least in my opinion). :snoopy
Yes, expensive but this method I did is really not recommended for doing it in a driveway. I have seen this product too late and I have an other option now if my work doesn't lead to success.

One Caveat for people who want to change it, I have seen that you can twist the bracket when you torque the bolts to spec and the bracket is not perpendicular to the shaft anymore afterwards.
 

DieHarder

Senior Member
Joined
Nov 9, 2019
Posts
1,467
Reaction score
758
Yes, expensive but this method I did is really not recommended for doing it in a driveway. I have seen this product too late and I have an other option now if my work doesn't lead to success.

One Caveat for people who want to change it, I have seen that you can twist the bracket when you torque the bolts to spec and the bracket is not perpendicular to the shaft anymore afterwards.

I went ahead and ordered one since I'm sure mine is overdue (18 yrs on original carrier bearing and ~130K). I'll take some pics when it gets here but they indicated on the order they're not shipping until April. Must be manufacturing these in batches or supply chains are still slow for some parts.
 

GriffX

Member
Joined
Sep 28, 2017
Posts
536
Reaction score
183
I went ahead and ordered one since I'm sure mine is overdue (18 yrs on original carrier bearing and ~130K). I'll take some pics when it gets here but they indicated on the order they're not shipping until April. Must be manufacturing these in batches or supply chains are still slow for some parts.
In their install video they cut the bracket in half, the 4 tack welds on top are very easy to grind of instead, no need for the big 'uns.
 

Pentalab

forum member
Joined
Mar 5, 2013
Posts
5,216
Reaction score
1,104
Are you folks taking abt that bearing, where the oem 2 piece DS joins in the middle ?
 

GlassTop09

Senior Member
Joined
May 24, 2019
Posts
1,145
Reaction score
526
Location
Farmington, NM
Did it. To install the modified driveshaft under my car I needed 2h with cleaning all of the threads from the glue and so on (used blue Loctite now). Longest part was to get the two bolts at the carrier bracket in again. I measured the U-joint angle at the transmission to 2.6 deg. All in all I needed 3 evenings.

I also found this yesterday:
Thanks for posting this...................have also ordered 1 myself w\ both sets of durometer inserts to see which set I'll like installed.

FYI..............I contacted JXBPerformance as to why w\ the 10-14 S197's you reuse the OEM spacers but w\ the 05-09 S197's you don't........was informed that their carrier assembly is designed to the 10-14 S197 carrier housing dimensions (makes this approx 1\2" taller bearing center-to-flange than the 05-09 housing) thus w\ the 05-09 S197's the OEM spacers aren't needed to return driveshaft to correct alignment.

Didn't know that the DS center carrier housings were not identical dimension-wise between 1st Gen vs 2nd Gen S197..........good info to know.
 

GriffX

Member
Joined
Sep 28, 2017
Posts
536
Reaction score
183
Are you folks taking abt that bearing, where the oem 2 piece DS joins in the middle ?
To be precise more about the rubber around the bearing holding the driveshaft in place. Mine was lying around like a cooked noodle and had some bad vibes from 65-70. Hope they are gone now .....
 

Support us!

Support Us - Become A Supporting Member Today!

Click Here For Details

Sponsor Links

Banner image
Back
Top