swflastang05's build thread

weather man

Persistance Is A Bitch
S197 Team Member
Joined
Mar 3, 2012
Posts
13,335
Reaction score
152
Location
MN
So is this essentially the same as paying for a stage 2/stage 3 porting job from a speed shop?

Stage 3 plus custom hand porting. He went way beyond my Foxlake porting.
 

JeremyH

3V Fuel Guru
S197 Team Member
Joined
Jan 10, 2009
Posts
20,857
Reaction score
197
Location
Virginia Beach
Any thought on the change in combustion chamber size and what affect that will have on compression, just a thought.
 

05stroker

Never enough power guy!
Joined
Mar 2, 2008
Posts
13,058
Reaction score
77
Location
Bullard Tx.
Any thought on the change in combustion chamber size and what affect that will have on compression, just a thought.

I CCed my heads after the gutting/porting. Then I milled them till they came back down to 48CC.
 

swflastang05

Back for More
Joined
Dec 21, 2013
Posts
2,098
Reaction score
121
Location
N. Ft. Myers, FL
Good work! They look great. Where did you learn to do that kind of work? I have done some very light two stroke porting work but I had a template and reference pictures....you are making me want to pick up a set of used heads to play with. Are you using any kind of template or guide?

Rm

Thanks, I used to do a LOT of porting work back in the 90's when we we're running the fox body cars, we used to run f150 truck intakes with a custom dual throttle body inlet. This required a ton of welding and porting to redo the intake runners. I used to do this work in exchange for car parts lol. In short, I have a lot of seat time at the porting bench. The only template I used was my exhaust gaskets and intake o-rings.

Any thought on the change in combustion chamber size and what affect that will have on compression, just a thought.

There isn't much change in my combustion chambers, just unshrouded the intake valves, the rest is pretty much OEM just sand paper rolled smooth.
 

swflastang05

Back for More
Joined
Dec 21, 2013
Posts
2,098
Reaction score
121
Location
N. Ft. Myers, FL
Finished at last! 2.5 more hours tonight, for a total of about 11 hours for the right head, again the left took longer so I would estimate a total of 23-24 hours, I think it will be worth it though.


My new Manley 35mm ss intake valves arrived today. These are single groove style locks, supposedly much stronger than OEM triple groove.


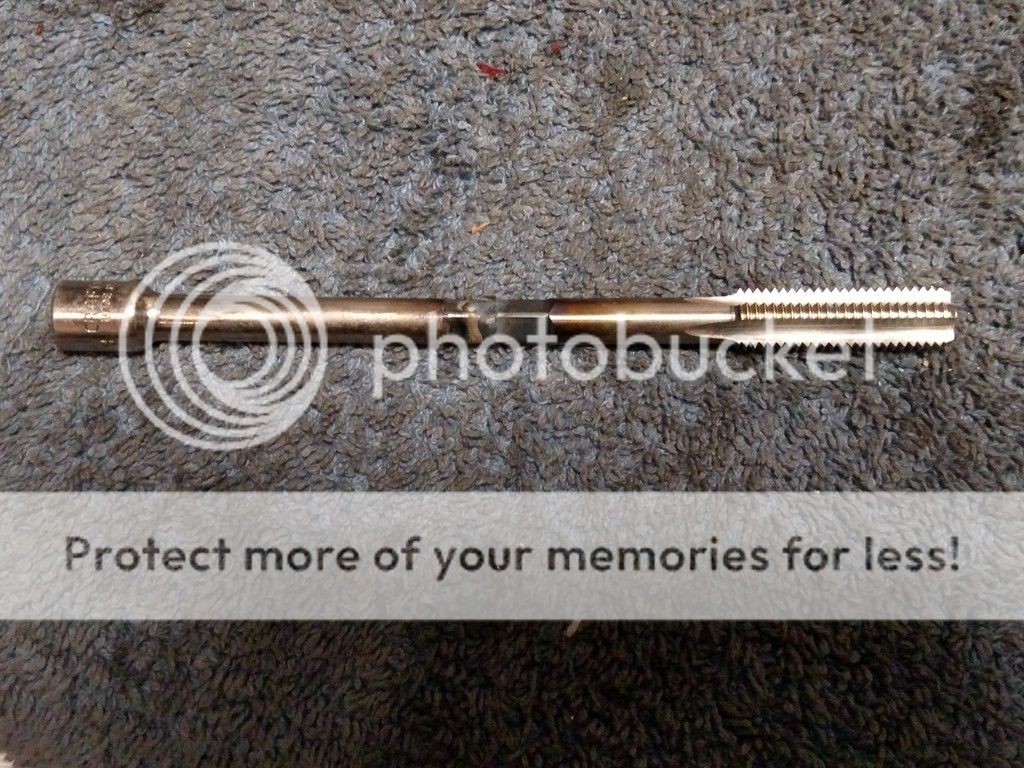
Now back to block prep, I ordered an 11mm x 1.5 bottom tap that finally came in, I welded an extension to it so it can reach the bottom of the head stud threads. I have about half of the holes that need to be tapped to allow the new studs to screw in completely by hand.
 
Last edited:

roberts

forum member
Joined
Jul 19, 2011
Posts
1,481
Reaction score
1
Location
Bonne Terre, Missouri
Those heads!! Where do i send mine to and how much! And also going to text u today or tomorrow! if u dont hear from me by sunday text me!
 

swflastang05

Back for More
Joined
Dec 21, 2013
Posts
2,098
Reaction score
121
Location
N. Ft. Myers, FL
Here's the bottom tap with the extension welded onto it. Problem is it apparently has the wrong thread tolerance since I have one hole that won't tap out, I can run the tap down to the bottom with my fingers but the stupid stud wont go! (it goes fine in other holes, and other studs won't go in this last hole) My luck strikes again, twice even since I found one of my brand new ARP 2000 studs is defective! Argh! One of the threads about .250 from the bottom is kind of crushed / deformed. This is the type of stupid shit that only happens to me! Now I need another new stud and another new tap, and another extension.


The good news is from the best I can tell the OEM intake o-rings will fit just right, if I went any bigger there would be an issue though. Travis there's your roll bar in the background lol


The next issue is I found that now my FRPP intake is a restriction. It used to have larger ports than my heads but now it's the other way around. I'm considering removing some material around the o-rings but IDK, I would just get a sniper intake if it wasn't such a POS. Maybe the new bolt together version will be good, it's supposedly coming out in the next month or so. Or if anyone has a JPC intake laying around they want to sell feel free to let me know (I know that would be like winning the lottery)

There is a little bit of material that can be removed..hmm decisions
 
Last edited:

roberts

forum member
Joined
Jul 19, 2011
Posts
1,481
Reaction score
1
Location
Bonne Terre, Missouri
Yea I see it back there. Just sell me the heads and I'll send u mine in part trade lol. Just bare heads is fine lol


Sent from my iPhone using Tapatalk
 

swflastang05

Back for More
Joined
Dec 21, 2013
Posts
2,098
Reaction score
121
Location
N. Ft. Myers, FL
After mocking up the intake several times and marking the o-ring outlines with oil, I confirmed they will work, and I decided not to mess with the FRPP intake. Obviously its only plastic so I don't want to weaken it since I'll be pumping 20+ psi through it.

After alternating the tap and stud in and out of the hole about 150 times I finally got it to an acceptable looseness, really weird that I had such a hard time with it but nonetheless it's finally okay.

Also decided it's probably time for new lash adjusters and followers for this motor, since my old set has been in three motors.


Pretty much just waiting on my pistons to arrive now, which should happen next week, then everything goes to the machine shop.
 

travelers

Senior Member
Joined
Apr 6, 2007
Posts
3,028
Reaction score
79
Location
Eastern Pa
Did you find out what was causing the problem with taping that hole? Just dirt, alum, factory defect.
 

swflastang05

Back for More
Joined
Dec 21, 2013
Posts
2,098
Reaction score
121
Location
N. Ft. Myers, FL
Did you find out what was causing the problem with taping that hole? Just dirt, alum, factory defect.

No, not really. It's extremely bizarre. I just ran the tap and stud into it about 100 times and it finally loosened up enough to be acceptable. It's still tight at the bottom, but only finger tight 2-3 turns out which is where I have it during assembly.
 

swflastang05

Back for More
Joined
Dec 21, 2013
Posts
2,098
Reaction score
121
Location
N. Ft. Myers, FL
I learned something else really crazy, when removing my old pistons from the rods I found all 8 were seized up inside the piston pin bores to where I had to tap them out with a mallet and plastic driver. The rod bearing / bushing was good but both sides on all 8 pistons were seized pretty good. I then measured them and found all the pins are bent! Bent like an hour glass! WTF! Those pins were the standard grade Manley that came with my previous set of pistons, I didn't think the upgraded pins were necessary, WRONG!!! Well it's a damn good thing my new pins are made of H13 tool steel and are .200 thick.

Also I called ARP yesterday re the new stud I received with defective threads, I gave them the info on the box and they said I would have a replacement stud today, I was thinking yeah right, they're in California and I'm in Florida, which usually takes a week, but I was wrong about that too, in a good way, when I received the replacement stud today, literally less than 24 hours after I called them, now that's great service IMO.
 
Last edited:

travelers

Senior Member
Joined
Apr 6, 2007
Posts
3,028
Reaction score
79
Location
Eastern Pa
It looks like everything has to be up graded when going to high boost. Good idea on the tool steel pins. Wow that's a lot of things going south. I think, at least the guys that are reading your posts are learning a few valuable tips.

That's some really good service from ARP
 

Wes06

forum member
Joined
Jan 21, 2012
Posts
5,383
Reaction score
59
Yea I dont forsee going all out like you, but I figured the thicker wall wrist pins was worth it, just 1 more thing thats stronger, and it didnt cost that much to upgrade
 

Support us!

Support Us - Become A Supporting Member Today!

Click Here For Details

Sponsor Links

Banner image
Back
Top