2011 GT vert rebuild

LikeabossTM

forum member
Joined
Sep 30, 2015
Posts
870
Reaction score
413
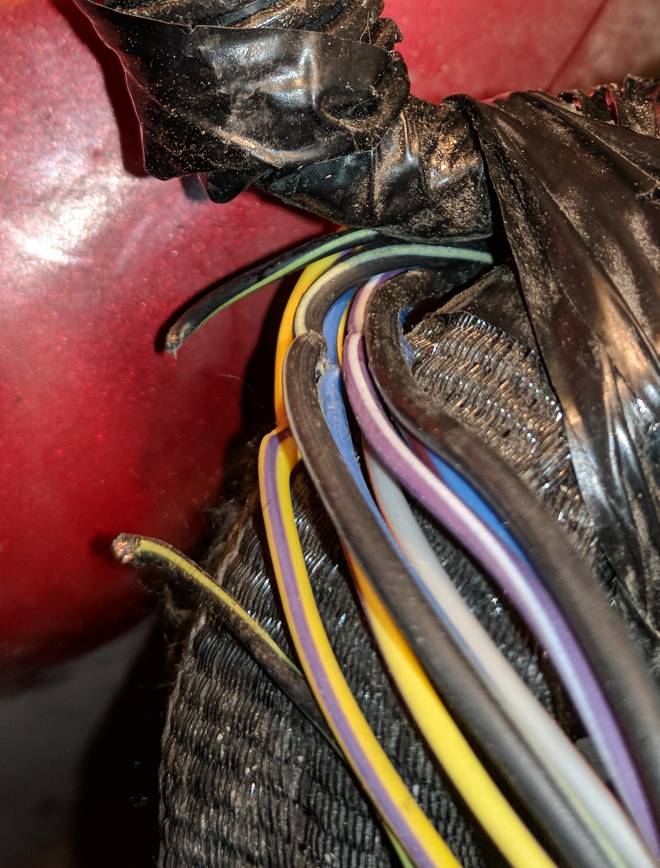
Installed the trunk components (latch and wiring/2014 modules) and trim, and buttoned up the remainder of the interior as well. Have two outstanding issues there; the amp isn't sending out the signal to the left front speakers (will look for a new amp) and the driver airbag recall needs to be completed (service scheduled for this Tuesday).

Re-stalled the vert rear subframes, mounted the axle backs and tightened up all of the exhaust, and buttoned the rocker guards up as well. I know that some folks omit the subframes to make suspension work easier without them in the way, but I read somewhere that the subframes add 12% rigidity versus without, so figured I may as well keep them.
607ce698264f17a552c3ff4ba1db1026.jpg
73449f106e985766921ff47e3843a276.jpg
 

LikeabossTM

forum member
Joined
Sep 30, 2015
Posts
870
Reaction score
413
You may remember that I had an engine whine. I picked up a mechanics stethoscope and tracked it down to that AC unit bearing that I'd repaired. After removing the belt the whine disappeared, so I'll have to decide whether to buy a new bearing or just get a whole new unit before the summer arrives.

Prior to getting the safety inspection, I had two more items I wanted to sort out. The alignment was clearly off (toe out of maybe 4°, with the steering wheel off center by about 25°). As well, the right front turn signal wasn't working.

I picked up a cheap camber guage from Amazon, and set up a string rig to check/set the toe. I'm within spec on camber and set toe to just a hair in from 0°. Keep in mind that the rear wheelbase is nearly an inch wider than the front if you're doing this yourself (front and rear measurements to the strings will be different).

WRT the turn signal - I measured a good signal in to the bulb socket, but nothing back to ground. Tracing the wires back revealed that the loom had been crushed a little in the crash, and that the ground wire had parted. Repaired that wire and I was all set for the safety inspection.

f37811841c6d42b5ef69ed1ae8fc2a20.jpg
859ec9adbfdfe6e95d7cb85ee8f285bc.jpg
40fcf19e11af2dc2e5a946c6c3539dcb.jpg
 

LikeabossTM

forum member
Joined
Sep 30, 2015
Posts
870
Reaction score
413
So where am I now? Safety inspection complete, insured, registered and plated as fit, and on the road!

I've been driving it for about two weeks, and the only issue I've had is that I get a small Evap leak code after I come onto it hard. I've fiddled with the fuel filler flap to no avail. I suspect that one of the hoses has a pinhole in it something, will chase that down after the weather settles in the spring. After the code clears it's fine again till I make another hard pull.

I was missing the lower radiator stone shield - Ford wanted $275 CAD up here for it, but rock auto offers an aftermarket supplier unit for less than $100 USD. Even after shipping and FX difference it arrived at my door for under $175 CAD. Installed that yesterday.


I also came across a set of mint Vogtland springs cheap, which I'll install in the spring when I'm down for a paint job anyway.

I may also fiddle with upgrading the cluster and PCM to 2014 spec, but that's another spring project. I'm good for now the way it is (no manu-matic shifting or cruise control).

3627fe93045467f9abe611f75cf8f63b.jpg
 

LikeabossTM

forum member
Joined
Sep 30, 2015
Posts
870
Reaction score
413
And that's it till the spring. I'll usually garage it to extend the roof longevity, and otherwise drive it year round. It's now my <$14,000 CAD GT vert beater vehicle. Not bad for what it is.

I have a boatload of spare parts to unload, will post it all up sometime soon.

Cheers


4ad086611a9a5e0c505b10def4cc9de1.jpg
a36f0865dc8e45c6954d50cfa783c348.jpg
2e17df91564268c6632186936a791118.jpg
 

Sky Render

Stig's Retarded Cousin
S197 Team Member
Joined
Feb 24, 2011
Posts
9,463
Reaction score
357
Location
NW of Baltimore, MD
This makes me want to rebuild a wrecked car.

Also, that's not really a stone shield; it's for aerodynamics.

Nice work. You going to paint it or wrap it?

EDIT: Do you have a link to that camber gauge? That's spiffy.
 

LikeabossTM

forum member
Joined
Sep 30, 2015
Posts
870
Reaction score
413
This makes me want to rebuild a wrecked car.

Also, that's not really a stone shield; it's for aerodynamics.

Nice work. You going to paint it or wrap it?

EDIT: Do you have a link to that camber gauge? That's spiffy.

Yep, it's enjoyable as a hobby with no deadlines.

The piece is listed as a stone deflector, though I agree that it helps with aerodynamics, even moreso critical to keeping the trailing edge of the bumper cover secure.

I haven't decided if I'll wrap or paint, but I have some contacts for painting at cost, so it'll be tough to pass that up.

The camber tool is very well built and solid, magnet is strong. I'm glad I picked it up. Here's a link to the unit...

Qiilu Universal Adjustable Car Magnetic Gauge Tool https://www.amazon.com/dp/B074PR467Q?ref=yo_pop_ma_swf

...I zeroed it at each wheel with a carpenter square before taking the reading at that particular wheel (there's a knob on the bottom to adjust to zero, so it's accurate even if the ground isn't level, as long as you have a square or suitable alternative to zero against).
 

LikeabossTM

forum member
Joined
Sep 30, 2015
Posts
870
Reaction score
413
I decided to just go with the AC system as is. Reason being the whine isn't too bad, the bearing seems good by hand, and it makes the noise when free-wheeling, so it's the pully bearing, not the main compressor bearing.

I unbolted the various refrigerant tube fittings, swapped in new o-rings, torqued everything back together, and reinstalled the belt last night. Had it up at the garage today and had them pull a vacuum, top up the oil, and put a fresh charge of refrigerant into it. They said it's holding well but added dye just in case it leaks down later on - at least then we can see from where.

So far, so good, it's blowing cold. Which is good because we've gone from about 40° a week ago to nearly 80° over the last couple of days.

Hopefully I can find time this weekend to install the vogtland springs and j&m LCAs, along with those Firestone Indys that I'd picked up.
 

LikeabossTM

forum member
Joined
Sep 30, 2015
Posts
870
Reaction score
413
Well, I got the Vogtland springs and Firestones on, but not the LCAs. I cracked the rear bolts on the stock LCAs but spent about an hour twisting the forward left bolt with no success. Rather than end up with a bigger problem, and running out of time, I put the aftermarket LCAs back on the shelf for this weekend.

I used the Moog eccentric camber bolts, with adjustability set to full '+' on the front. This worked out well, I'm at -0.5 left and -0.4 right. Should be able to get to my target -1.0 without issue. Toe is maybe 1° positive, but I'll get the alignment shop to do the final adjustments and fix that up.

I'll have to pick up an adjustable panhard bar. With the 1.25" ish drop the rear axle has shifted off-center and is about a 1/2" over further to the left now.

It sure does feel tighter and handles better. I haven't carved any corners yet, I plan to take it easy until I break the tires in. Great news right off though, no more front dive under heavy breaking! I hated that. Also, the rear was riding about 5/8" higher on the right in the rear before, now it's dead level. I'm guessing that issue was a combination of a poorly clocked rear spring along with a blown out spring/shock kitty corner on the front.

All in all a successful weekend.
 

LikeabossTM

forum member
Joined
Sep 30, 2015
Posts
870
Reaction score
413
Dropped and locked. Decided to amp it up a little and have them aim for -1.5.
79b6318425cbb17fabedfbd9c08dc6af.jpg
 

Latest posts

Support us!

Support Us - Become A Supporting Member Today!

Click Here For Details

Sponsor Links

Banner image
Back
Top