- Joined
- Jul 30, 2012
- Posts
- 1,456
- Reaction score
- 36
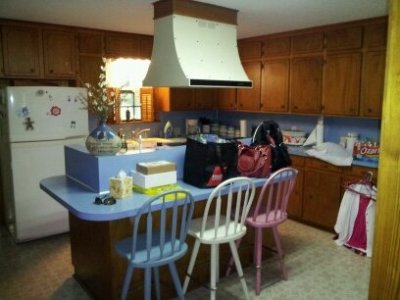
PLEASE tell me you're gonna take down that wall in the kitchen and open that space up.
I was going to say the same thing. Maybe extend the counter/cabinets out a little.
PLEASE tell me you're gonna take down that wall in the kitchen and open that space up.
PLEASE tell me you're gonna take down that wall in the kitchen and open that space up.
My Dad bought a 1200' temp building and gutted it and built back the way he wanted it. At one point you could see everywhere in the house, he ripped out all the sheet rock, moved the walls to shape interior the way he wanted it. THe crazy thing about it was, he worked for he phone company. He did a knowcked out job. I will find some pics and post them.....you won't believe it.
He passed away in '05 and I really miss him. I have 3 younger sisters, talking about a estrogen high environment....lol.
PLEASE tell me you're gonna take down that wall in the kitchen and open that space up.
I was going to say the same thing. Maybe extend the counter/cabinets out a little.


Coming along nicely, Gabe. I'm enjoying the hell out of watching your progress.
On the floor, can you set the depth on your Skil saw and cut strips across the room so the floor may come up in strips without splintering so much?
Great work Gabe! You have been busy brotha, your home will be looking super in no time!
")
Gabe,
Great job on keeping us up to date, this is my morning read with coffee....


Gabe just keep things plumb square and level and you'll be just fine. If not crap In crap out lol


On the bathroom, what are you putting down after the cleanup? If you're using tile again then it doesn't need to be perfect, thinset covers a multitude of sins. Can you break up the old thinset with a hammer? The wood floor should flex more than the thinset theoretically. Either that or don a face mask and hit it with a concrete grinding disc on your 4.5" offset grinder.