Sky Render's Build Thread

Sky Render

Stig's Retarded Cousin
S197 Team Member
Joined
Feb 24, 2011
Posts
9,463
Reaction score
357
Location
NW of Baltimore, MD
Winter update.

I've been spending the cold months mainly doing maintenance items necessary on a 50k-mile car: changing fluids, replacing wiper blades, cleaning rod ends, greasing poly bushings.

Mrs. Sky Render continued to enable my carbon fiber addiction with a couple more bits:

20161227_213728.jpg


20161228_184327.jpg


I've also ordered a set of the Bob's Autosports catch cans, which I'll be installing in the next couple weeks.
 

Sky Render

Stig's Retarded Cousin
S197 Team Member
Joined
Feb 24, 2011
Posts
9,463
Reaction score
357
Location
NW of Baltimore, MD
Standard hardware. AN fittings were not worth the $200 premium to me. Plus, the standard hardware is much easier and cheaper to maintain or replace, if necessary.
 

kona302

forum member
Joined
Mar 24, 2012
Posts
161
Reaction score
0
Location
south texas
Just picked up a watson Oil separator, I thought about the bobs as well. It looked like a nice piece.
 

Sky Render

Stig's Retarded Cousin
S197 Team Member
Joined
Feb 24, 2011
Posts
9,463
Reaction score
357
Location
NW of Baltimore, MD
Changed the oil and installed the Bob's Auto Sports catch cans today. I took a bunch of pictures, so it's time for a review!

IMG_20170218_131509.jpg


Here they are. I chose the matte black ones so they didn't stick out like a sore thumb, but there are a lot of other colors available. The vacuum line nipples are already installed, and they used some sort of pipe dope on them to seal them properly.

With my love of carbon fiber, you may be wondering why I didn't get their hydrodipped carbon finish. Easy: hydrodipped carbon looks like shit.

IMG_20170218_131634.jpg


I'm very impressed with the build quality on these things. The insides are properly baffled using a steel wool. This maximizes surface area and helps to condense all of the oil vapor out of the PCV lines.

You can see the baffling here:

IMG_20170218_131649.jpg


Here's one of the mounting brackets. They're beautifully machined and finished, and already installed.

IMG_20170218_131700.jpg


There is a valve on the bottom of each one for draining:

IMG_20170218_131710.jpg


Onto the installation. The longer bracket is used on the passenger side. You remove one of the ground bolts, and install the bracket there using a longer bolt that Bob's Auto Sport provides.

IMG_20170218_132952.jpg


The next step is to remove the factory PCV line and carefully cut along the side of it to remove this 90° elbow. The PCV valve is already in the valve cover; this is just an elbow to make it easier to route. Note that although the OEM line is hard plastic, those 90° elbows actually have fittings on them for lines. Hmmmm...

IMG_20170218_133333.jpg


Next, you need to cut the vacuum lines they send you to the correct length. This is some high-quality, fiber-reinforced multipurpose line from Eaton. It seems OEM quality and should last a long time. The instructions recommend using masking tape to help prevent the lines from fraying while cutting.

IMG_20170218_133804.jpg


Next, you clamp the line onto one of those elbows you cut out of the stock hardline.

IMG_20170218_134009.jpg


This first line took the longest, because it is extremely short, but I didn't want to make it too short. So I ended up trimming it down several times. Note that the valve cover line goes to the bottom port on the catch can. This is so engine vacuum pulls the air up through the steel wool baffle and out, leaving the condensed oil vapor to fall to the bottom

IMG_20170218_134544.jpg


The next line runs to the intake manifold using another one of those OEM quick-release elbows.

IMG_20170218_135344.jpg


Now we move onto the driver's side. This catch can actually requires removing that stupid sound tube. (Mine's already been ditched.) It mounts to the underside of one of the sound tube's mounting holes using a set of washers, nut and bolt provided with the kit. This thing was a bit of a pain in the butt to mount, simply because I was afraid of dropping a washer or nut and never seeing it again.

IMG_20170218_141219.jpg


The driver's side OEM hardline has this foam heat insulation around it. You cut that off, and it's the exact same as the passenger side's underneath. It's here I'd like to point out that the quick-release fitting on my airbox tube fought me and ended up completely snapped in two. Fortunately, it's a straight (180°) fitting, so I could just clamp the vacuum line right onto the port.

IMG_20170218_141302.jpg


Here are the driver's side lines installed:

IMG_20170218_142320.jpg


And the finished product:

IMG_20170218_143450.jpg
 

Sky Render

Stig's Retarded Cousin
S197 Team Member
Joined
Feb 24, 2011
Posts
9,463
Reaction score
357
Location
NW of Baltimore, MD
So obviously I haven't driven enough to see how well they work yet, but I have noticed some pros and cons already:

PROS
+Very well-built with proper baffling design
+OEM-quality hoses
+Kit is complete and has all necessary hardware

CONS
-Worm gear clamps look like shit.
-Hose routing gets in the way of the oil filler cap. Although it can easily be moved out of the way while filling oil, it's still a bit of a pain.
-The drains on the bottom of the cans are very difficult to access, and there isn't much room underneath. I think I'll have to cut the bottom off a water bottle and use it as a cup to drain them.

Overall, I'm pretty satisfied with them. I'm going to try to find some better-looking clamps, though.
 

RazorbackMustang

MT82 Lover
Joined
Oct 28, 2010
Posts
3,826
Reaction score
1
Location
Springdale, AR
So obviously I haven't driven enough to see how well they work yet, but I have noticed some pros and cons already:

PROS
+Very well-built with proper baffling design
+OEM-quality hoses
+Kit is complete and has all necessary hardware

CONS
-Worm gear clamps look like shit.
-Hose routing gets in the way of the oil filler cap. Although it can easily be moved out of the way while filling oil, it's still a bit of a pain.
-The drains on the bottom of the cans are very difficult to access, and there isn't much room underneath. I think I'll have to cut the bottom off a water bottle and use it as a cup to drain them.

Overall, I'm pretty satisfied with them. I'm going to try to find some better-looking clamps, though.

I added a short hose nipple to mine to give a better directed flow when emptying. I cut open a water bottle to hold underneath while emptying. Great minds!
 

Sky Render

Stig's Retarded Cousin
S197 Team Member
Joined
Feb 24, 2011
Posts
9,463
Reaction score
357
Location
NW of Baltimore, MD
Those worm gear clamps were driving me nuts, so I ordered a few of these from Summit Racing:

IMG_20170225_091747.jpg


They're made by Earl's, and they're basically just worm gear clamps with a black cover on them:

IMG_20170225_091755.jpg


Much better.

IMG_20170225_093044.jpg


IMG_20170225_094612.jpg
 

Macman45

Resident Geriatric
Joined
Sep 22, 2012
Posts
1,446
Reaction score
174
Location
Atlanta / Bay Area
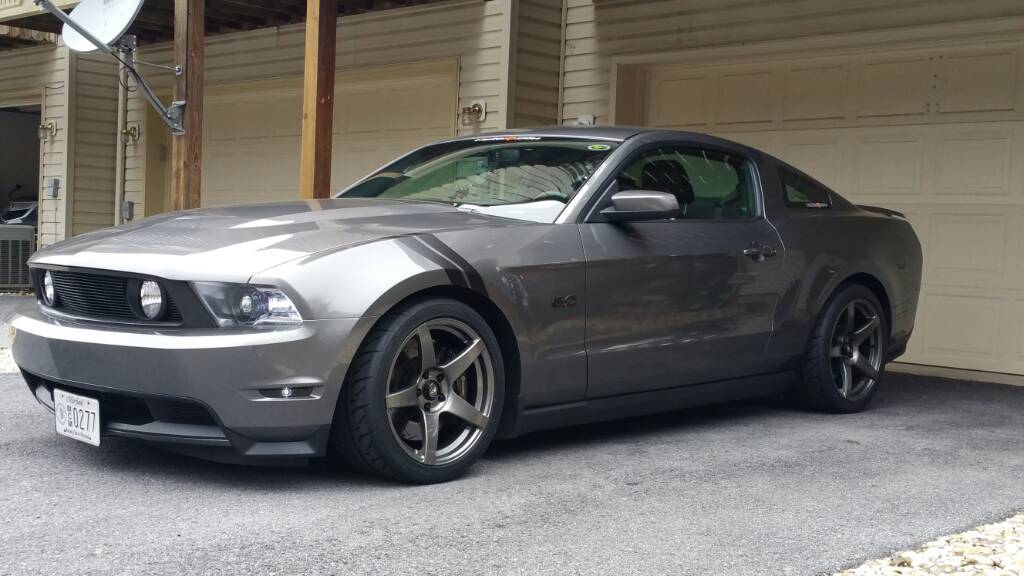
Fender gap isn't as bad as I thought it would be.

f9b7603d8b8526ca52442c5b2290e3b3.jpg


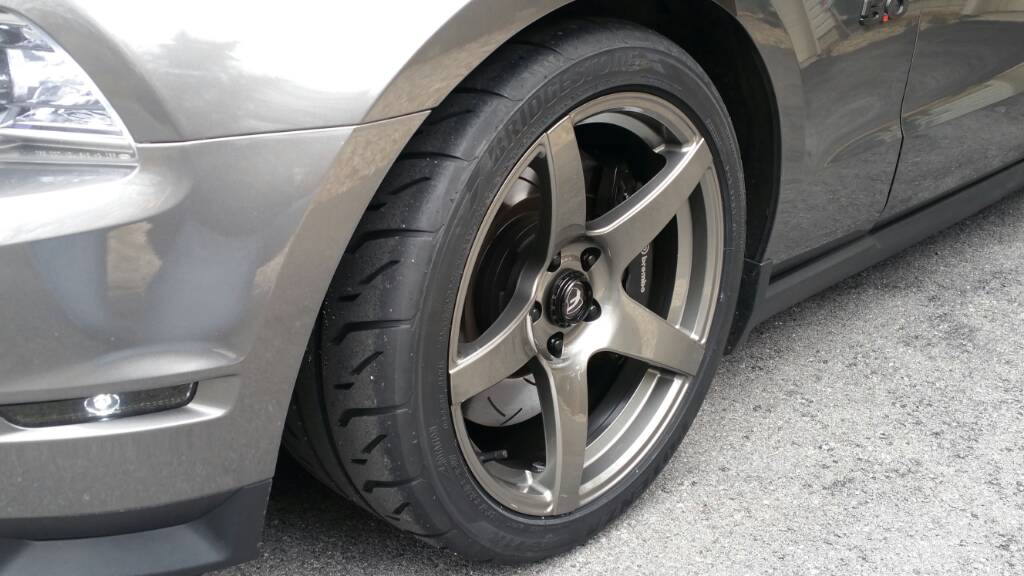
Huge caliper clearance.

de51f013f9561e7847a6f100620343af.jpg


be72ea630f55f48493f7be4d3c0f2b00.jpg


ce2a0bf560f019aee60ec7671fa6d1ff.jpg


Sent from my Samsung Galaxy Note 4 using Tapatalk

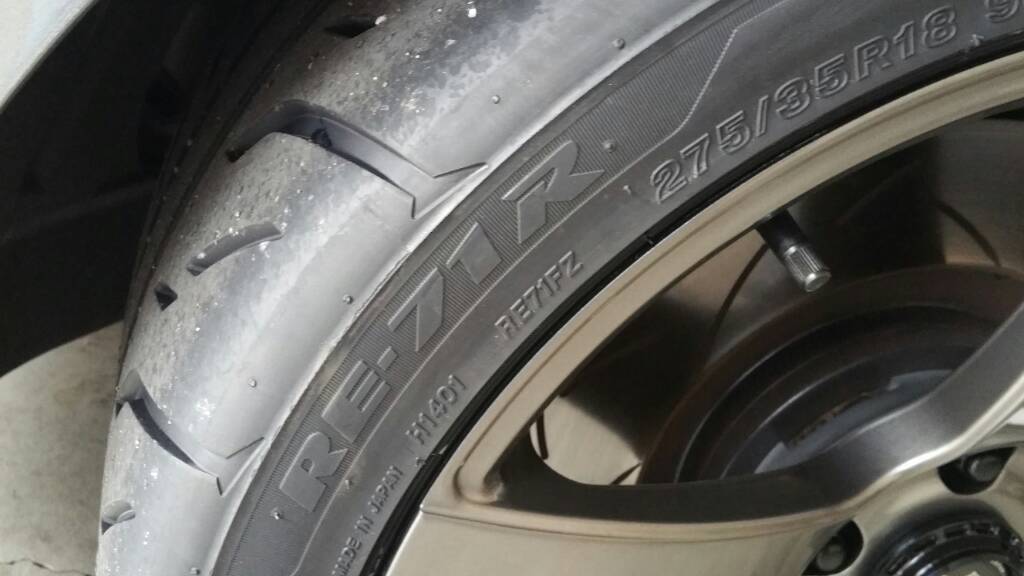
Do you like those Bridgestone Potenza's? Need to do tires and want something decent all around. Costco recommended those
 

Support us!

Support Us - Become A Supporting Member Today!

Click Here For Details

Sponsor Links

Banner image
Back
Top