
You are using an out of date browser. It may not display this or other websites correctly.
You should upgrade or use an alternative browser.
You should upgrade or use an alternative browser.
Planning a Ford Racing “Aluminator” Build with associated mods over the winter
- Thread starter Scott
- Start date
travelers
Senior Member
He's got more trophies then the trophie shop.......
Congrats Scott. Again
Congrats Scott. Again
Scott
Senior Member
Ordered production numbers radiator and dash plaques from Facebook. Her is the radiator plaque. Dash to follow.
Thanks to Chris Gillard for the close up.

Thanks to Chris Gillard for the close up.
Scott
Senior Member
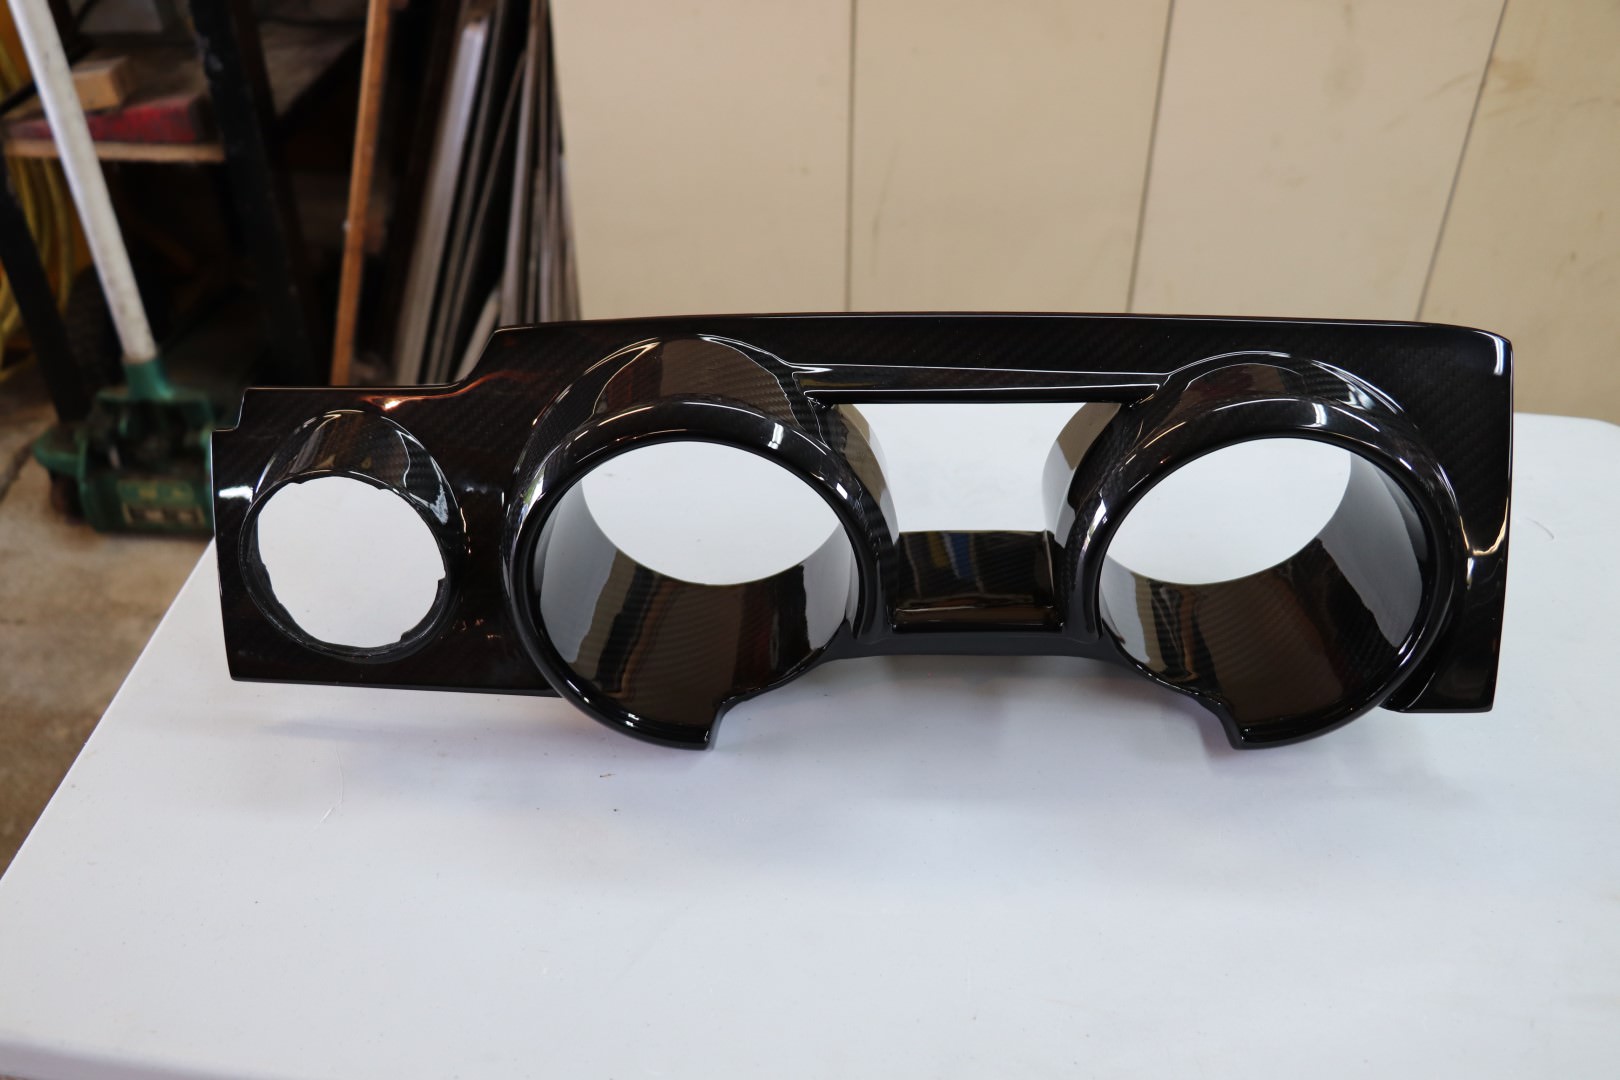
APR Performance Carbon Fiber Gauge Cluster and AC Vents
Continuing with the Carbon Fiber interior install I ordered ARP Performance Instrument Cluster Cover, Center AC Vent Panel and Passenger AC Vent Panel. ARP does not manufacture a passenger Air bag Cover in Carbon Fiber and I assume it is because of potential liability issues. It took a little over six weeks for the pieces to arrive and when they did they were very well packaged.
I started by removing the instrument cluster cover. Moved the steering wheel to the full down position and with a plastic panel tool carefully pried the left side of the cluster up starting from the bottom, and then the right side. Pretty easy to remove the cluster cover.
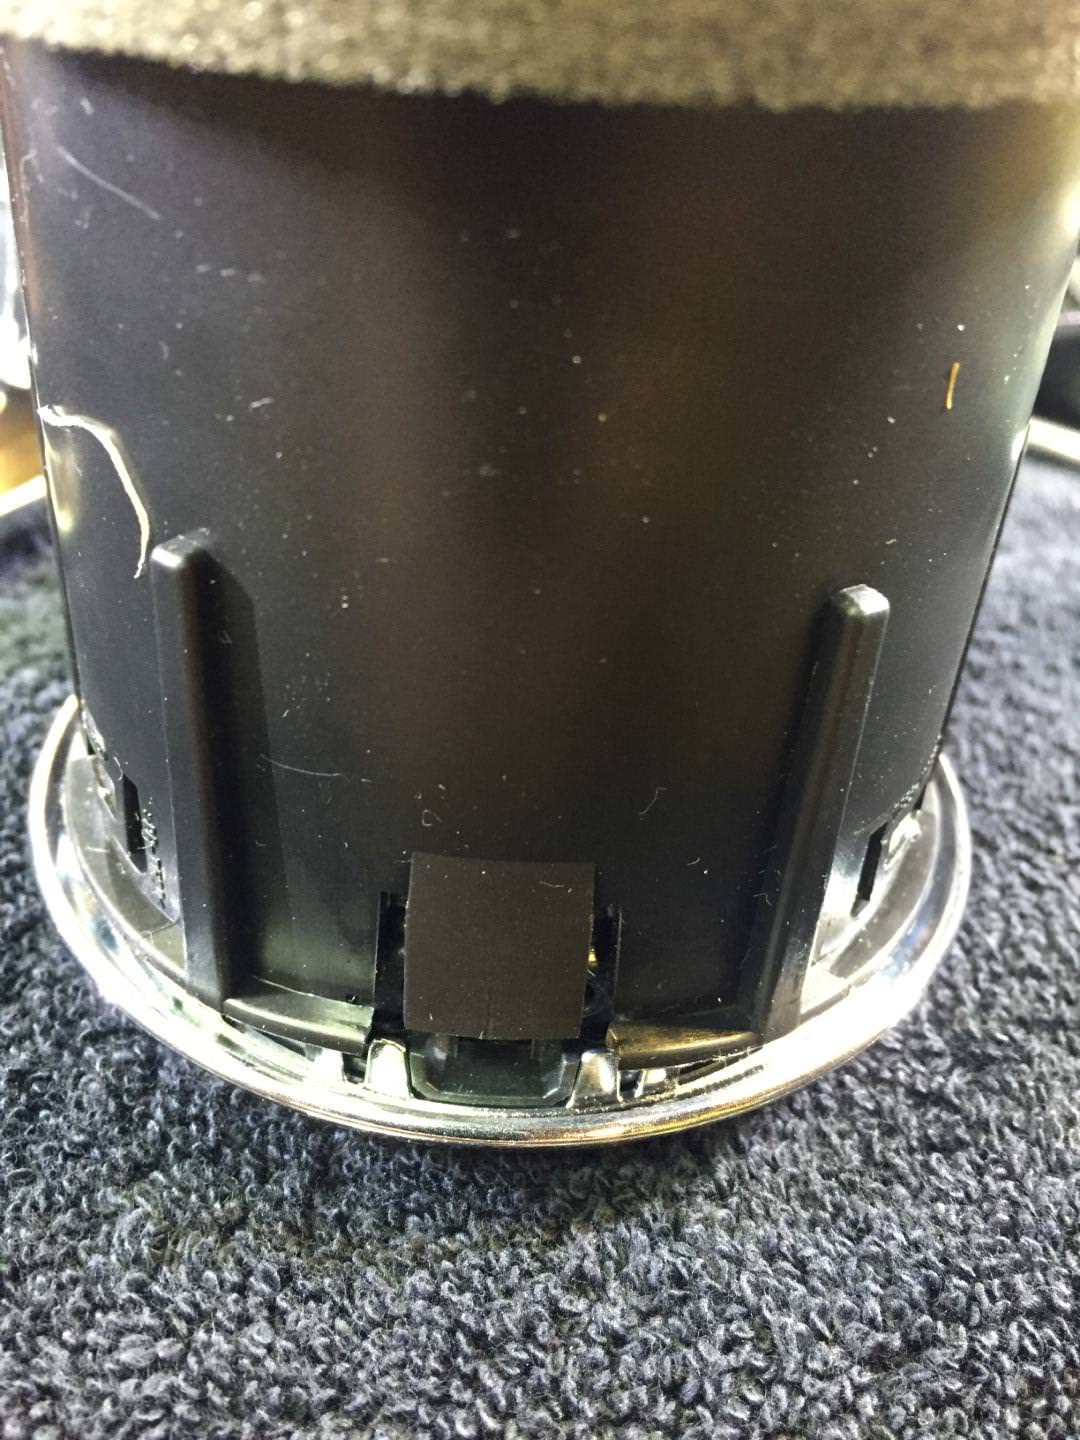
The AC Vents have three plastic tabs that need to be compressed individually with a flat blade screwdriver and wiggled out. The first AC Vent I tried of course took the longest to remove until I learned the secret to remove the hardest one to reach first (buried in the plastic).
Example of the plastic tabs
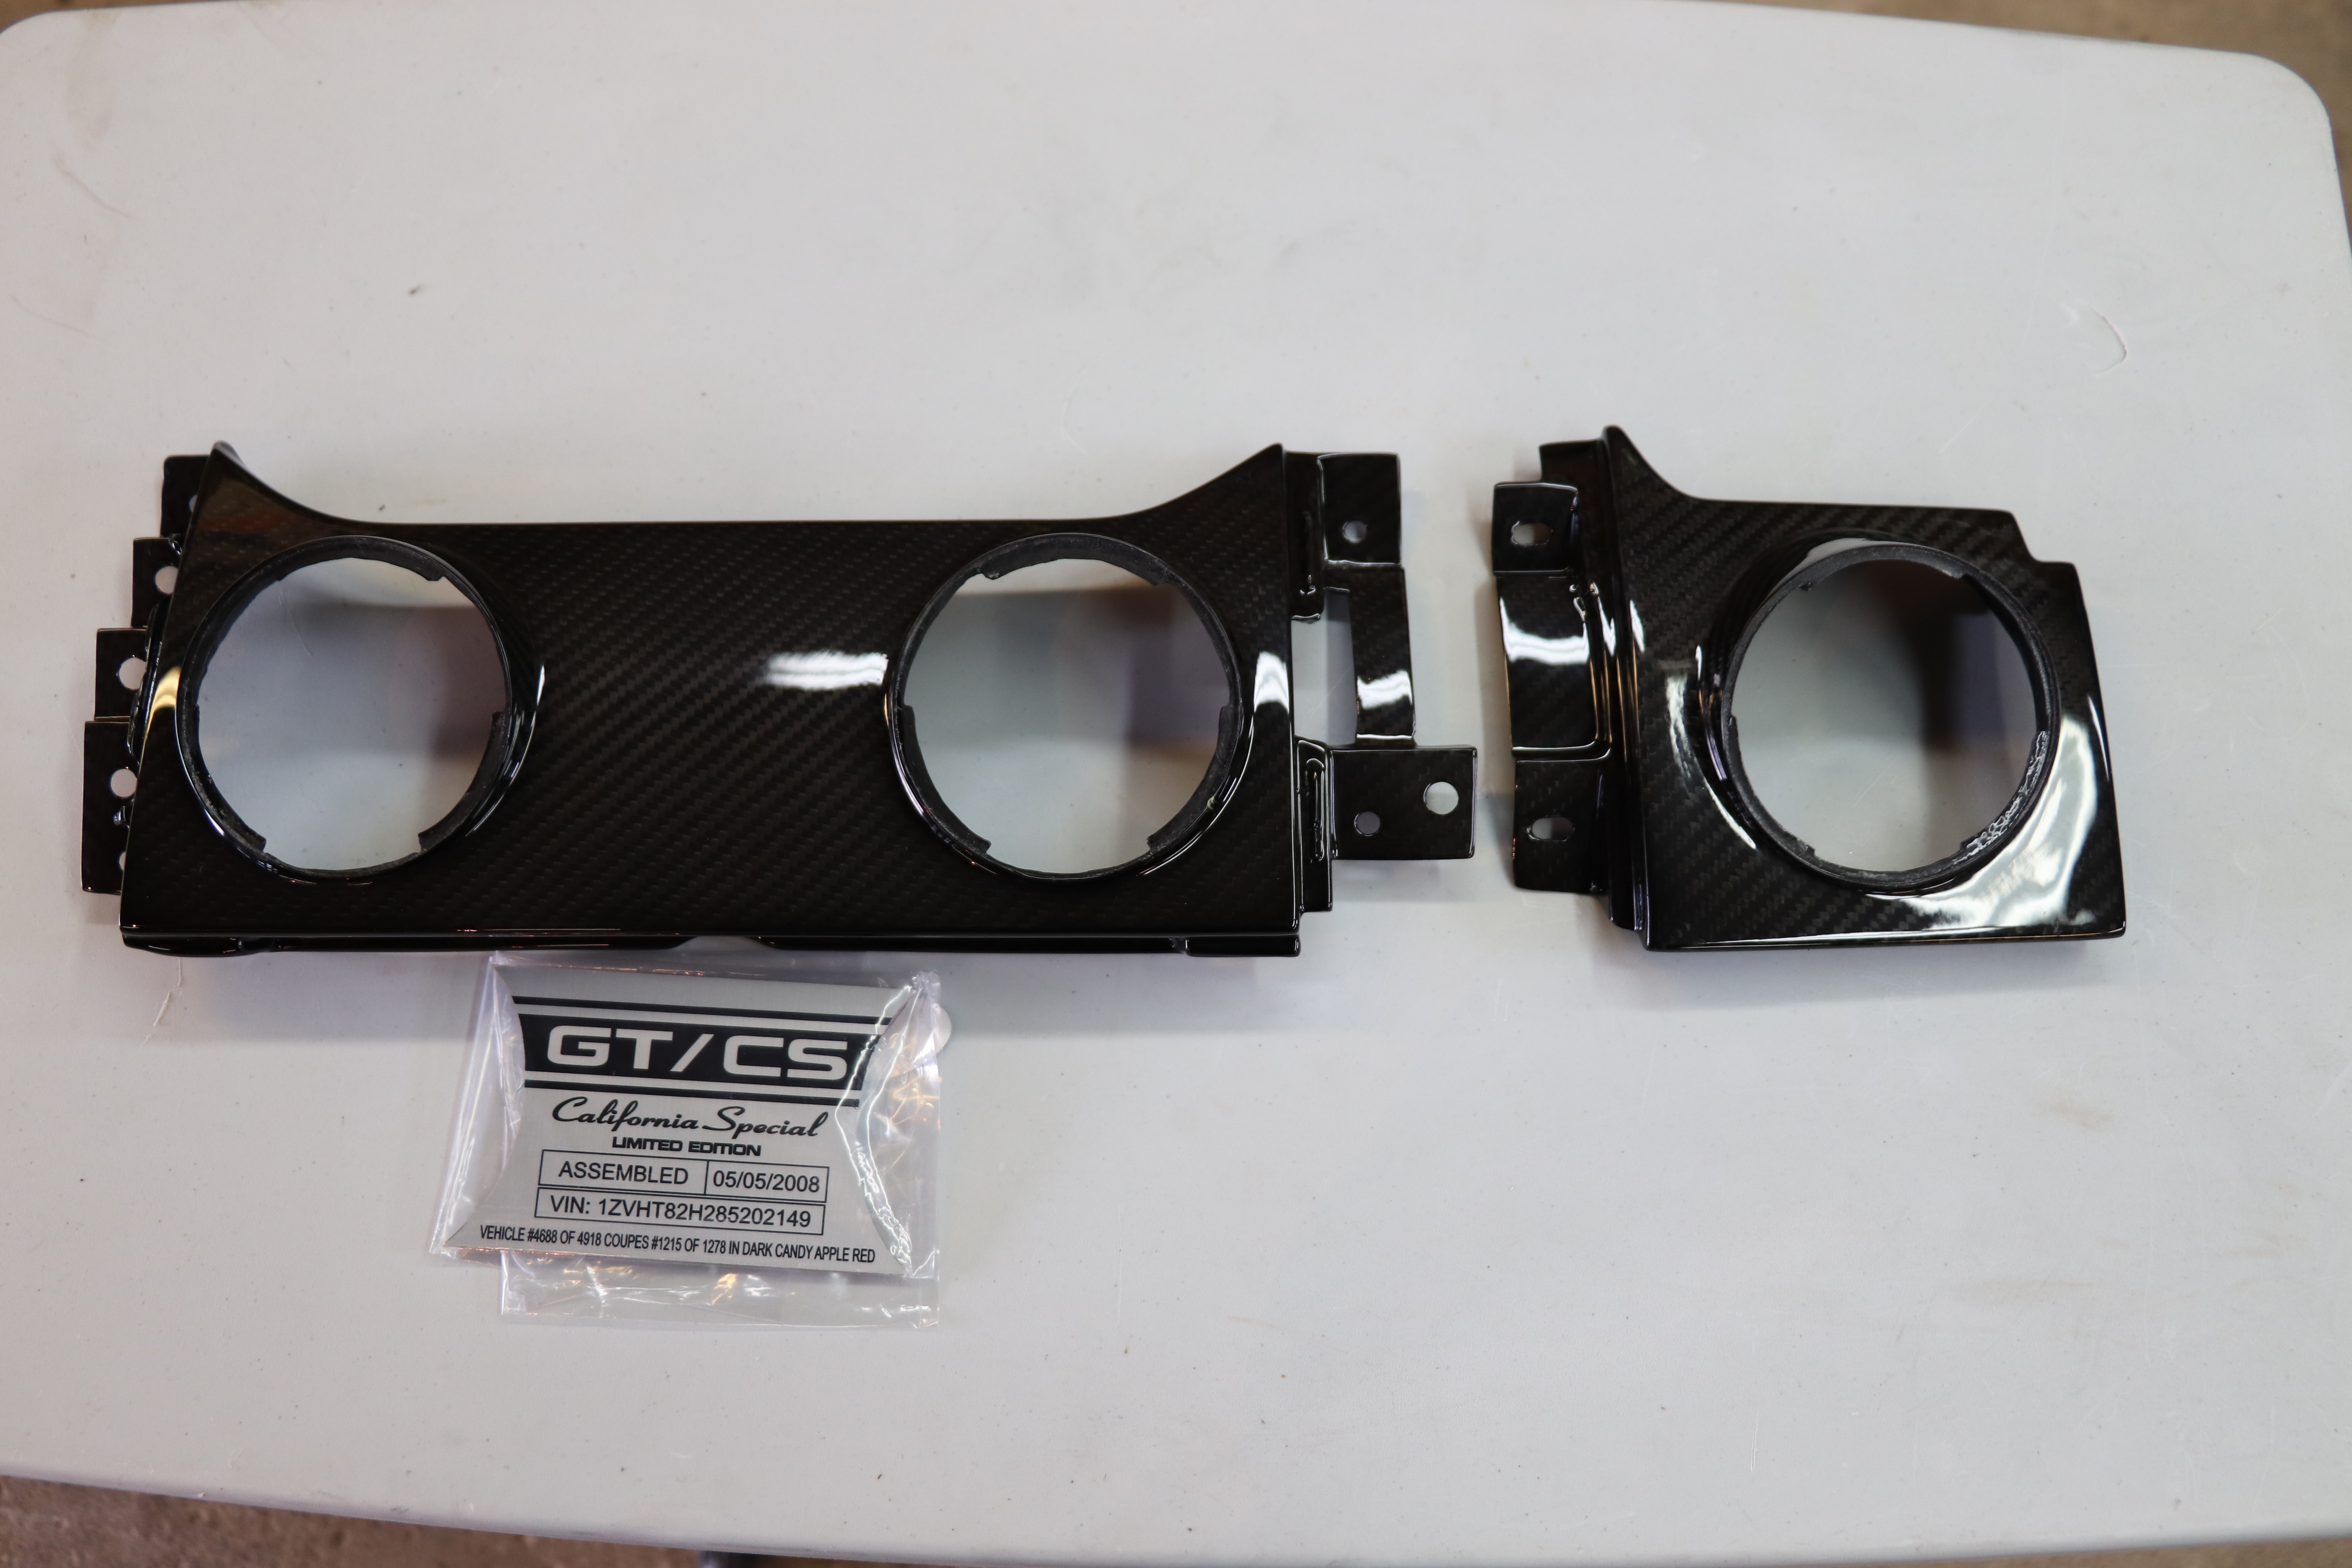
Next the six push retainers had to be transferred from the OEM panel the CF panel.
Remove the pins counter clockwise.
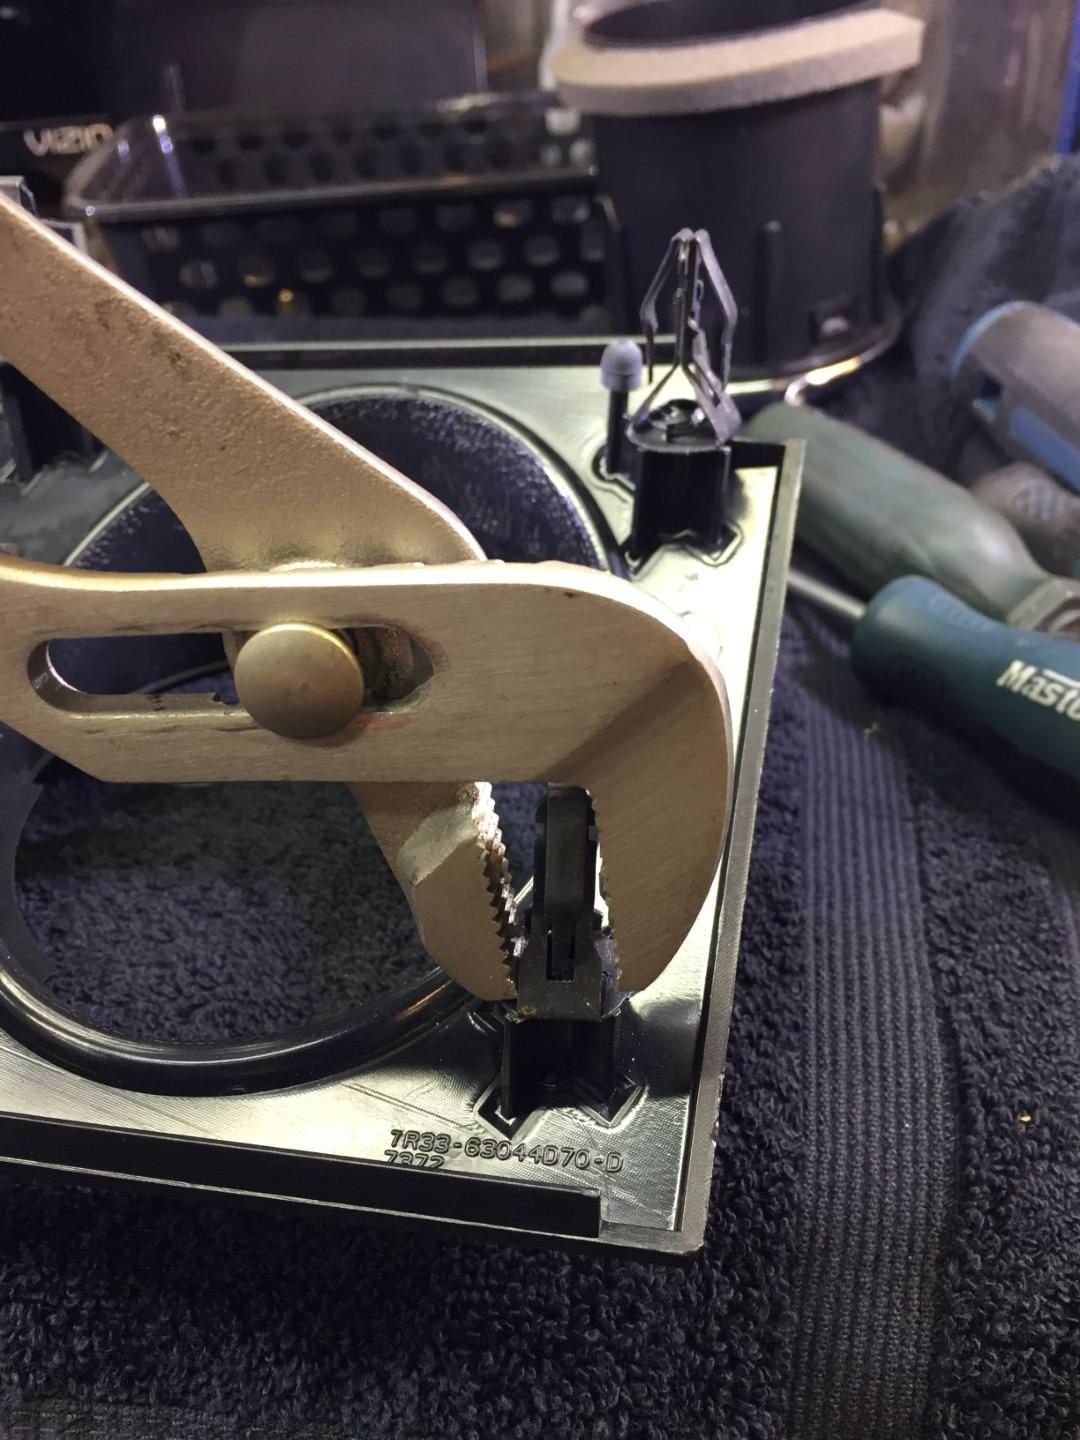
And install them clockwise being careful not to overtighten them.
Instrument Cluster Cover all ready to be installed.
While still in the drivers seat I removed the two screws securing the left side of the center AC panel with a 7mm socket.

Moving to the passenger seat, using a 7mm socket I removed the four bolts that secure the bottom of the glove box and removed it. This made the two bolts with 8mm heads that secure the Air Bag accessible.
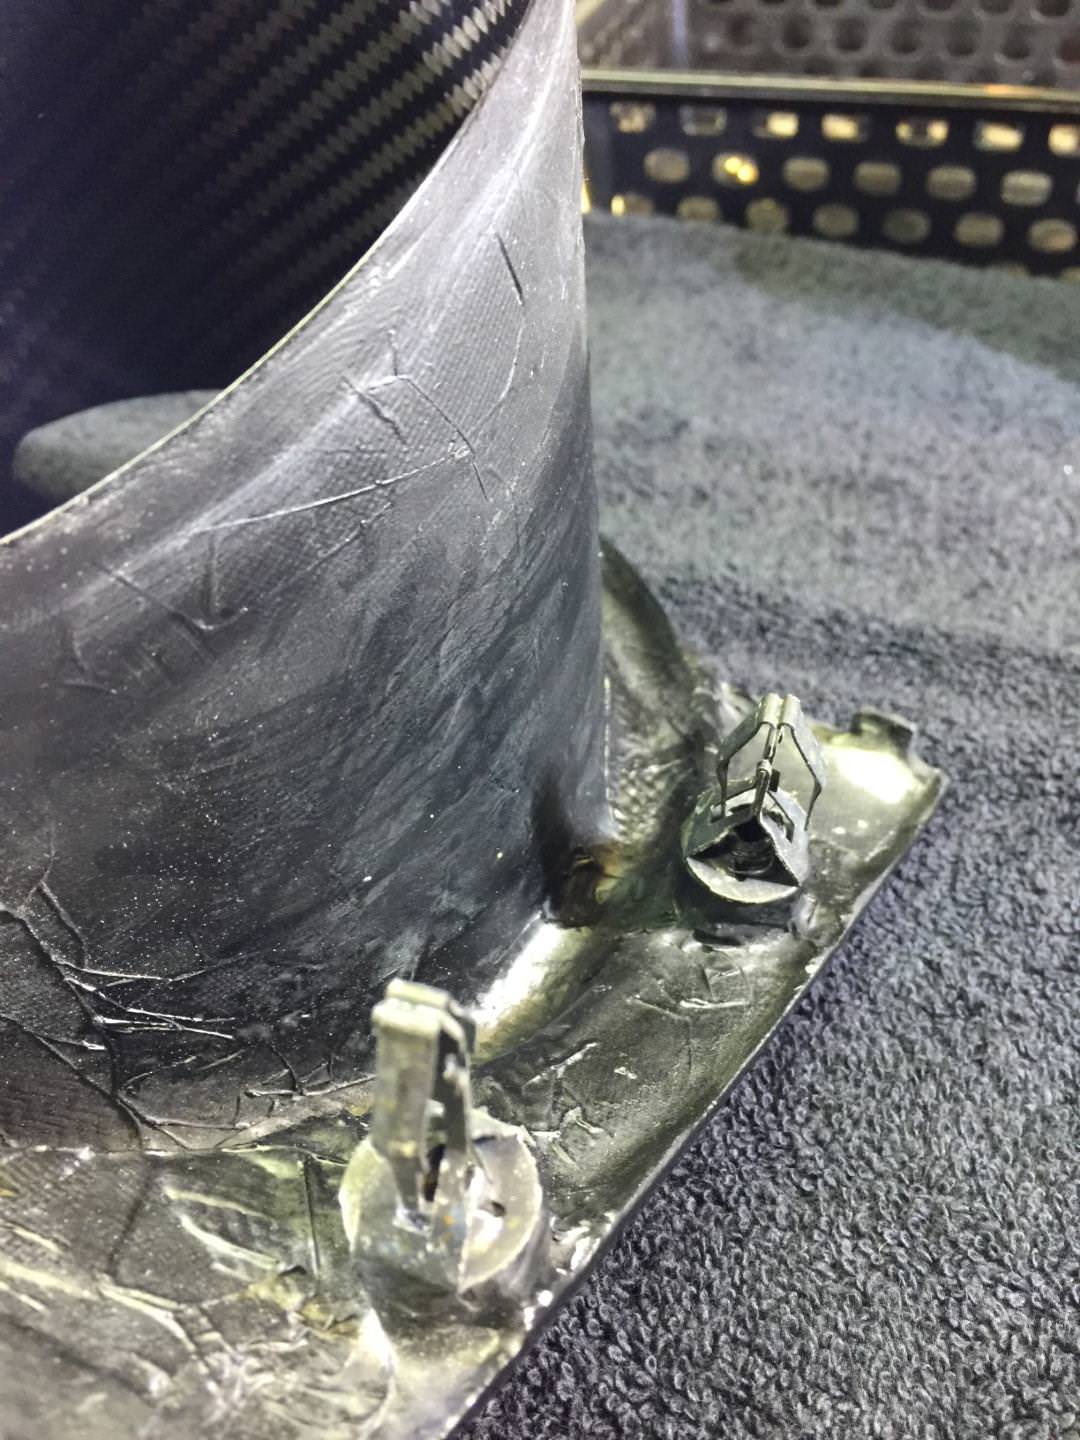
After removing the Air Bag bolts, I used a panel tool to release the clips on the bottom, sides and finally the top. The cover was gentle jiggled from side to side to slip the Air Bag out. It was not necessary to disturb the wiring harness.
The two screws retaining the passenger AC Vent were removed with a 7mm socket and the vent panel pulled off.
On the bench the AC Vent and two push retainers were removed and transferred to the CF panel.
AC Vent was re-installed and secured with the two screws.
The two screws retaining the right side of the center panel were removed with a 7mm socket.
To release the center panel, it was necessary to raise the console top and remove the inner kick panels. Two Philips head screws at the rear of the console were removed and the console lifted at the front. The top was positioned to right to remove the left panel and then positioned left to remove the right kick panel.
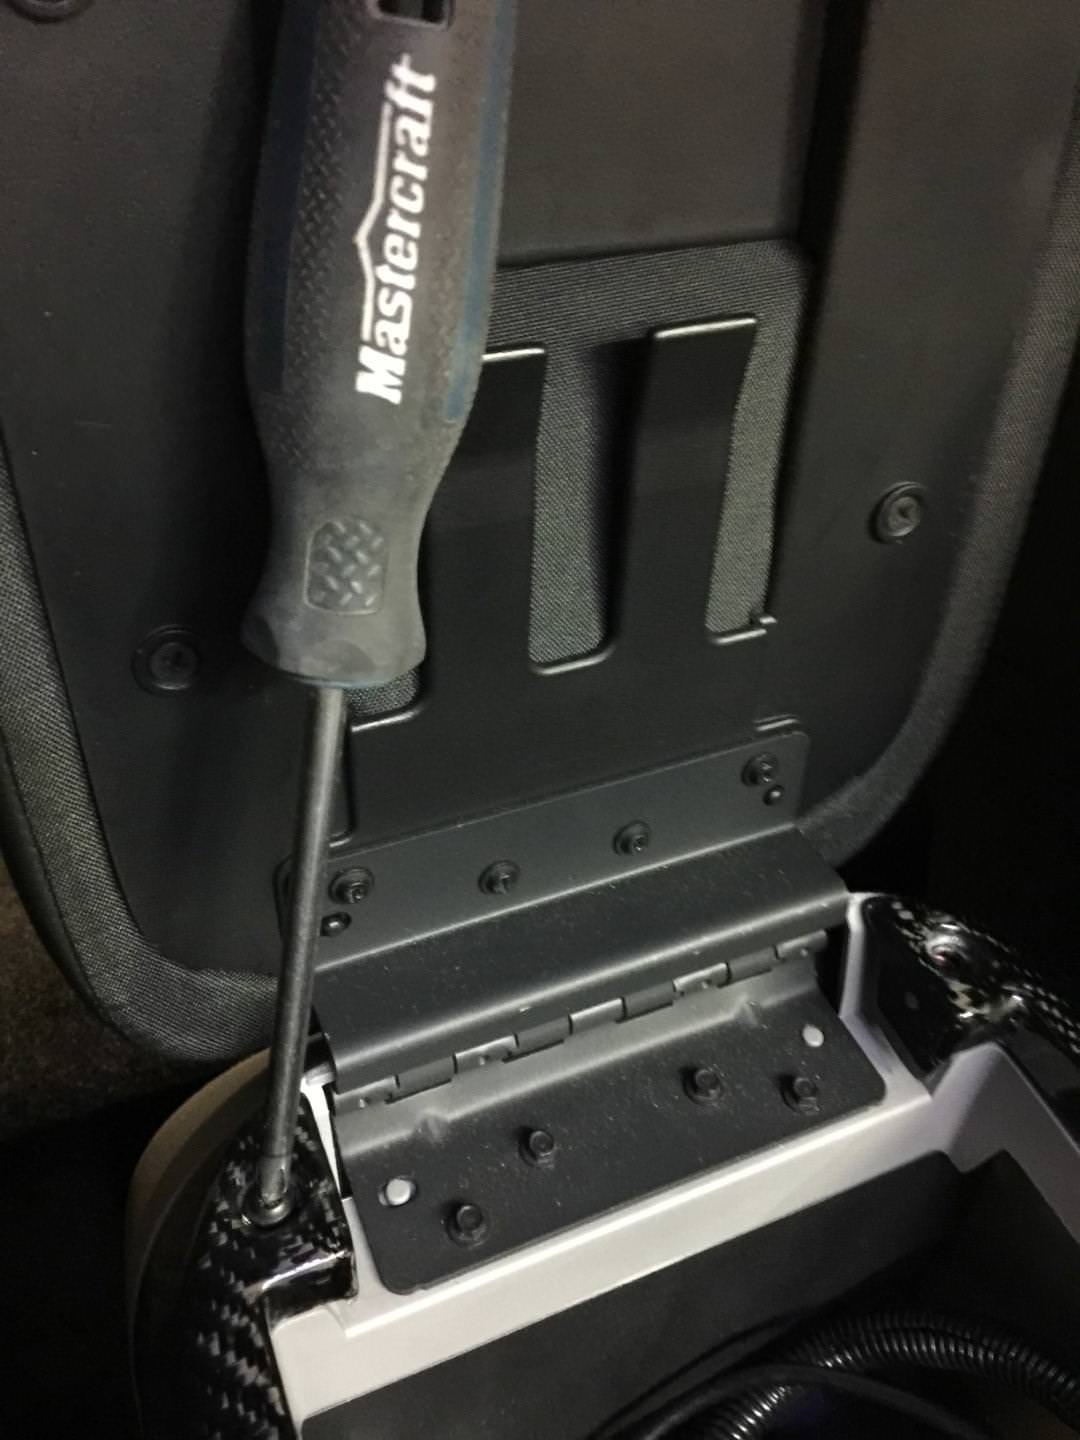
To remove the AC Vent, it was necessary to remove the four (two on each side) screws that retain the radio bezel with a 7mm socket.
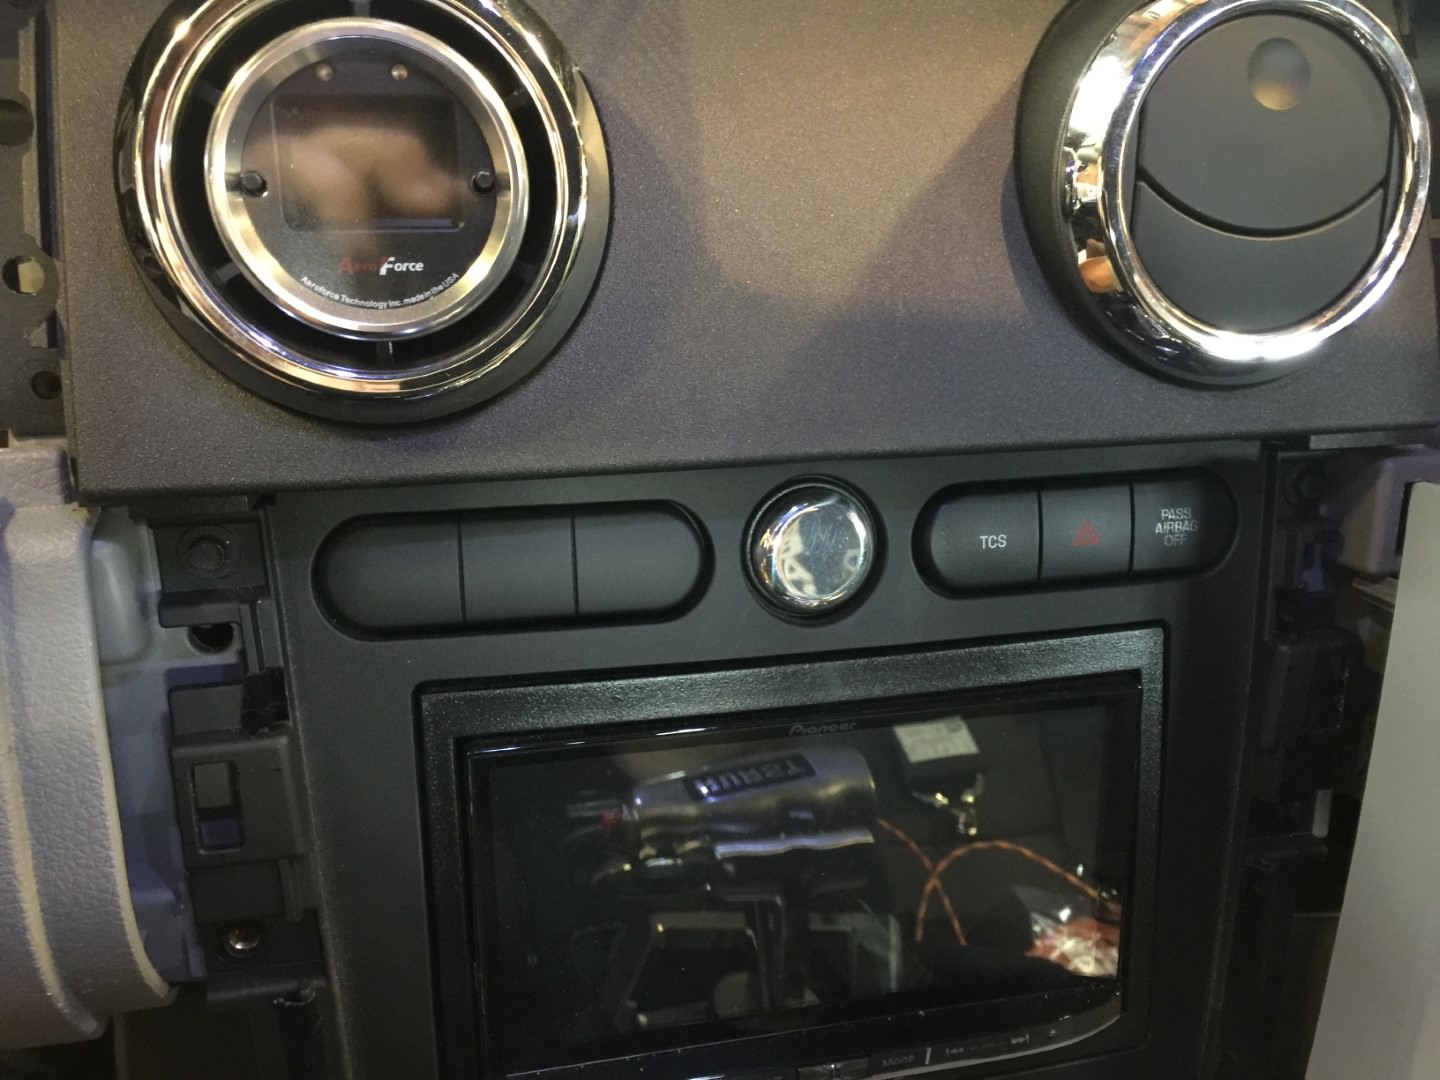
Center panel was carefully pulled out.
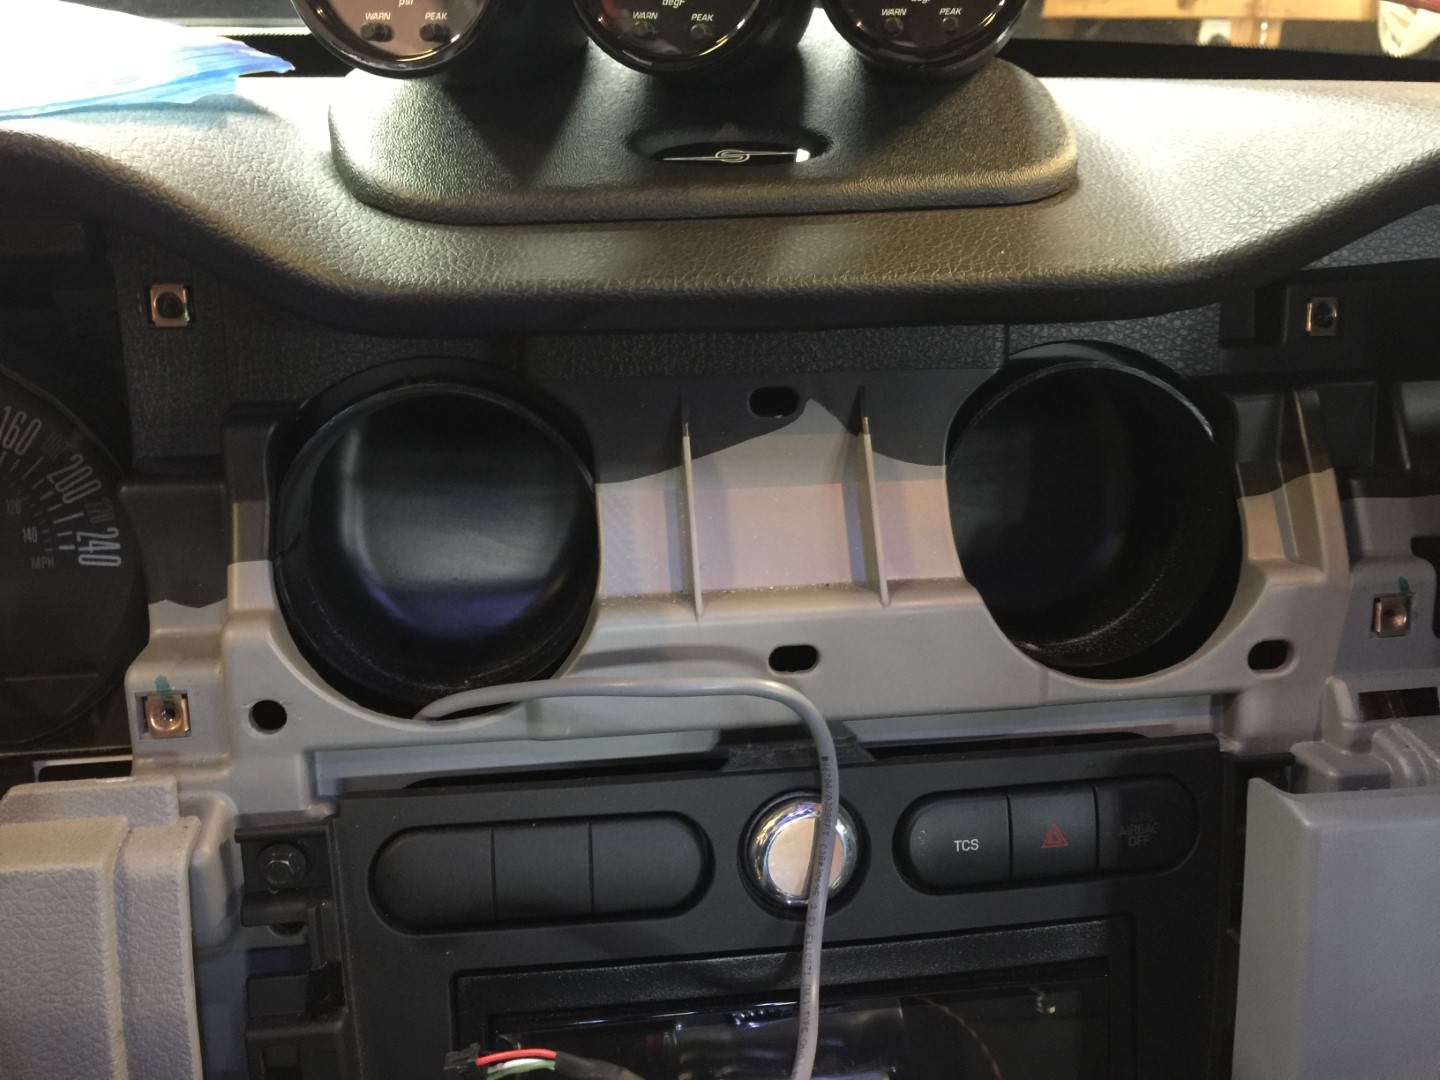
Two push retainers, Roush Vent Pod and the AC Vent were transferred over to the CF panel.
Center AC Vent was pushed into place and the screws replaced on the radio bezel (4) and AC Vent (4).
Kick panels slid back on, center console top positioned, and rear secured with the two Philips screws.
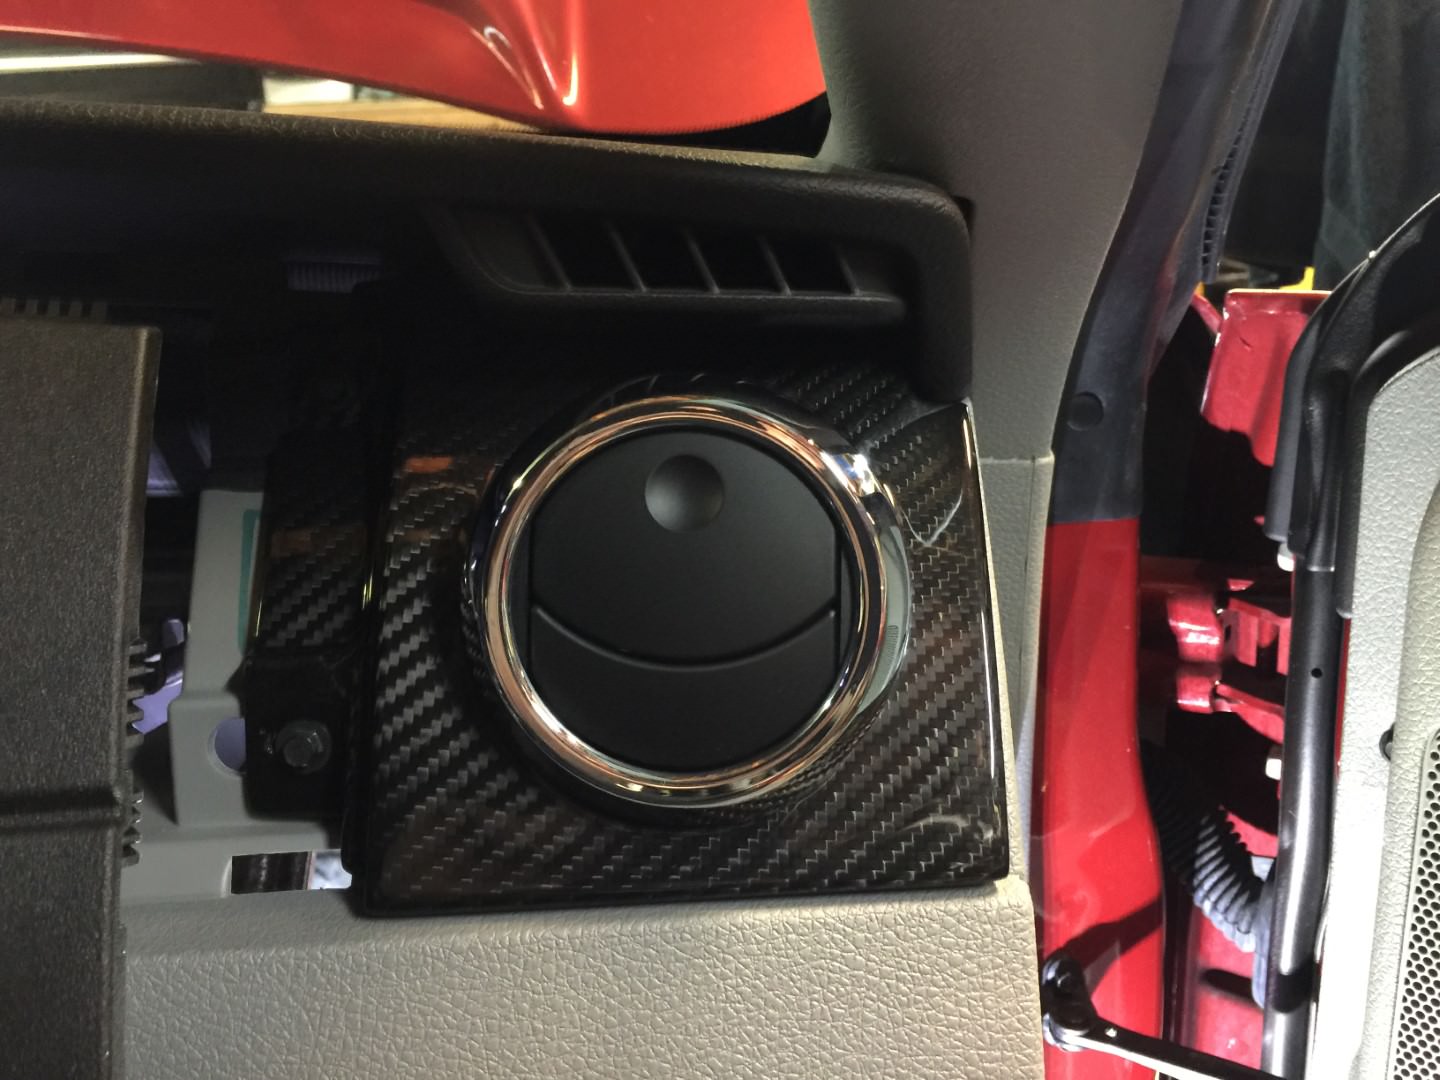
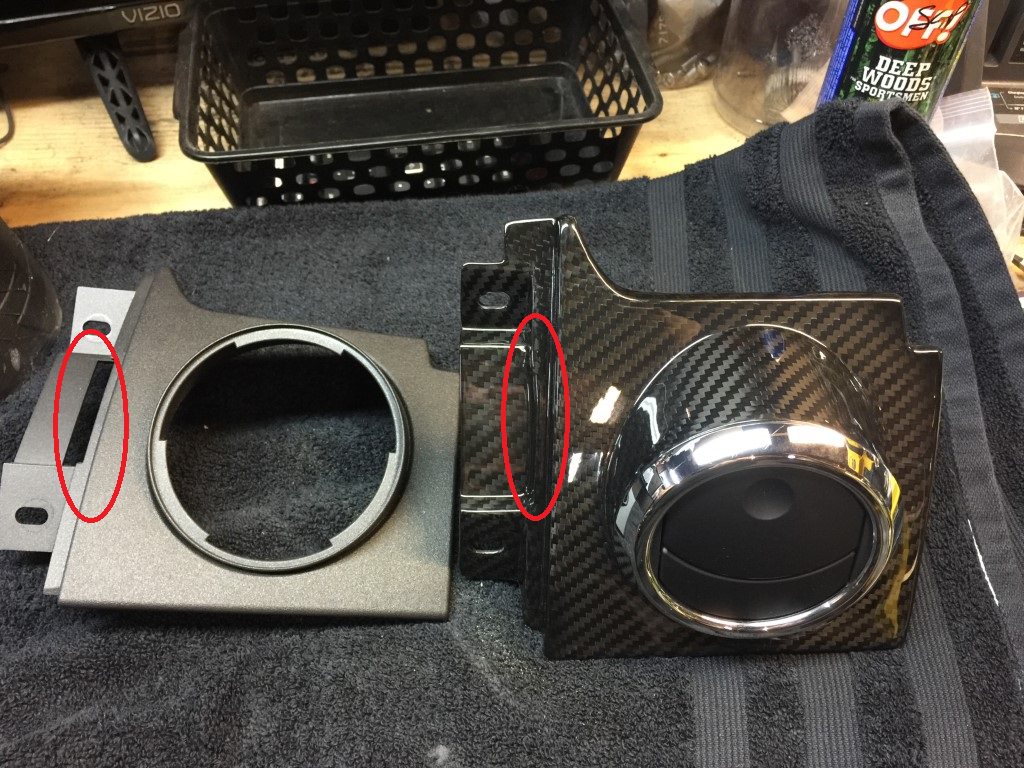
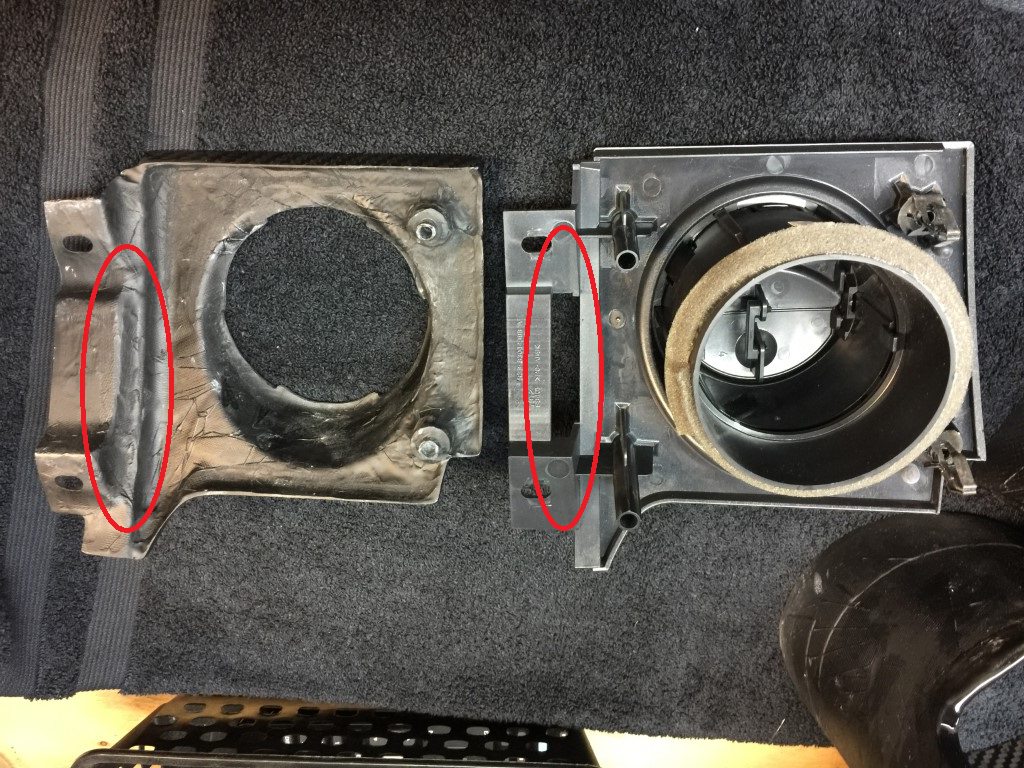
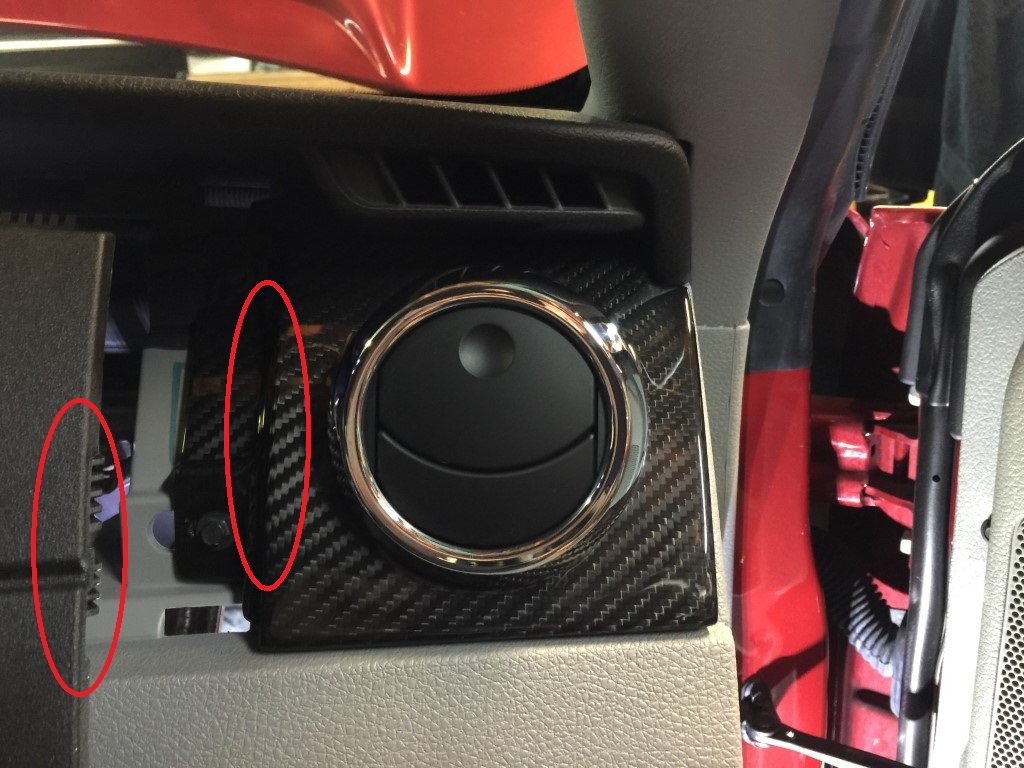
All was going well until it was time to slip the air bag back into place. This is when I noticed the passenger single vent was missing a cut-out that was present in the OEM panel. The missing cut-out prevented the air bag cover from seating properly and engaging the rubber clips. While I could notch the cover with a Dremel I decided to email APR Performance first to see what they say.
Continuing with the Carbon Fiber interior install I ordered ARP Performance Instrument Cluster Cover, Center AC Vent Panel and Passenger AC Vent Panel. ARP does not manufacture a passenger Air bag Cover in Carbon Fiber and I assume it is because of potential liability issues. It took a little over six weeks for the pieces to arrive and when they did they were very well packaged.
I started by removing the instrument cluster cover. Moved the steering wheel to the full down position and with a plastic panel tool carefully pried the left side of the cluster up starting from the bottom, and then the right side. Pretty easy to remove the cluster cover.
The AC Vents have three plastic tabs that need to be compressed individually with a flat blade screwdriver and wiggled out. The first AC Vent I tried of course took the longest to remove until I learned the secret to remove the hardest one to reach first (buried in the plastic).
Example of the plastic tabs
Next the six push retainers had to be transferred from the OEM panel the CF panel.
Remove the pins counter clockwise.
And install them clockwise being careful not to overtighten them.
Instrument Cluster Cover all ready to be installed.
While still in the drivers seat I removed the two screws securing the left side of the center AC panel with a 7mm socket.
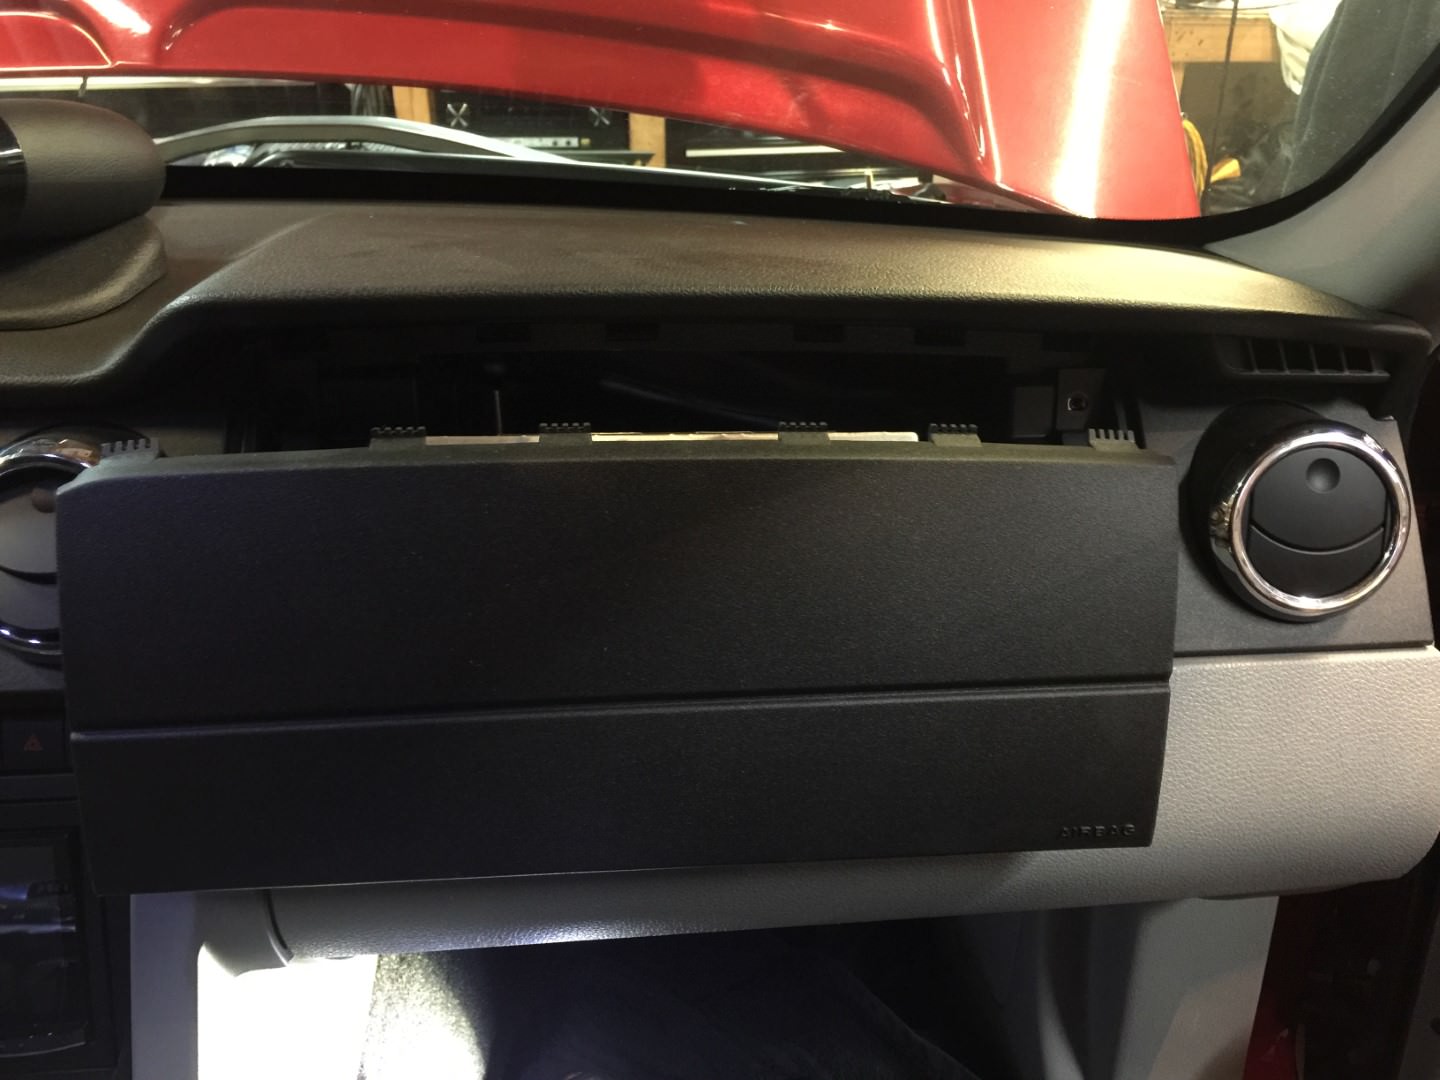
Moving to the passenger seat, using a 7mm socket I removed the four bolts that secure the bottom of the glove box and removed it. This made the two bolts with 8mm heads that secure the Air Bag accessible.
After removing the Air Bag bolts, I used a panel tool to release the clips on the bottom, sides and finally the top. The cover was gentle jiggled from side to side to slip the Air Bag out. It was not necessary to disturb the wiring harness.
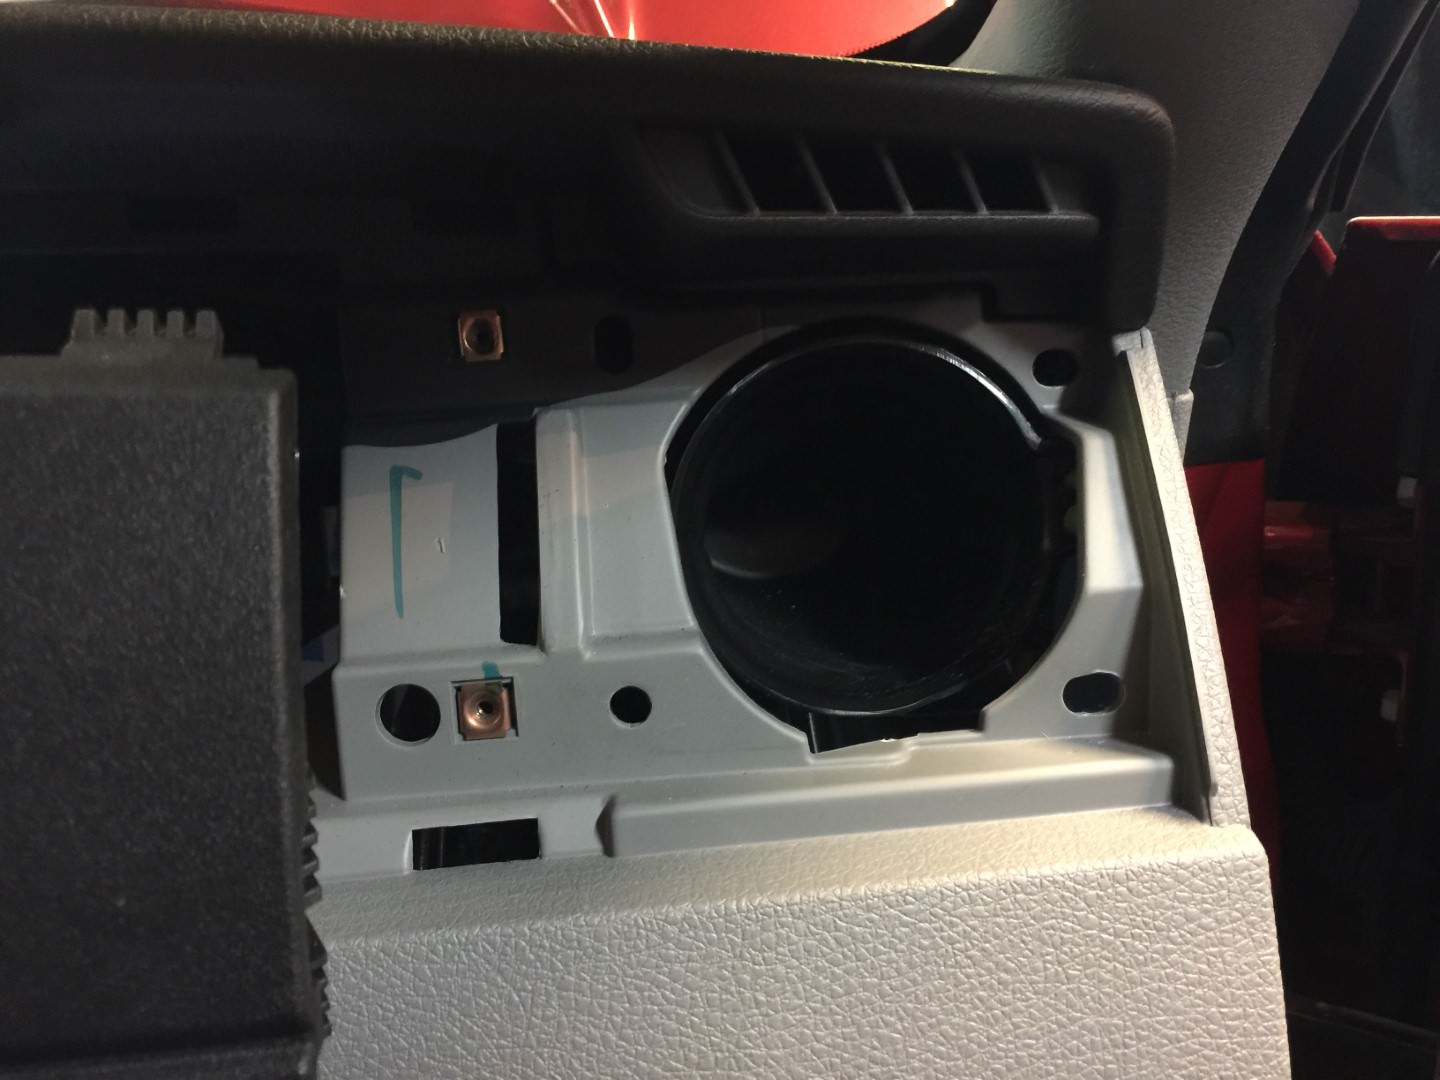
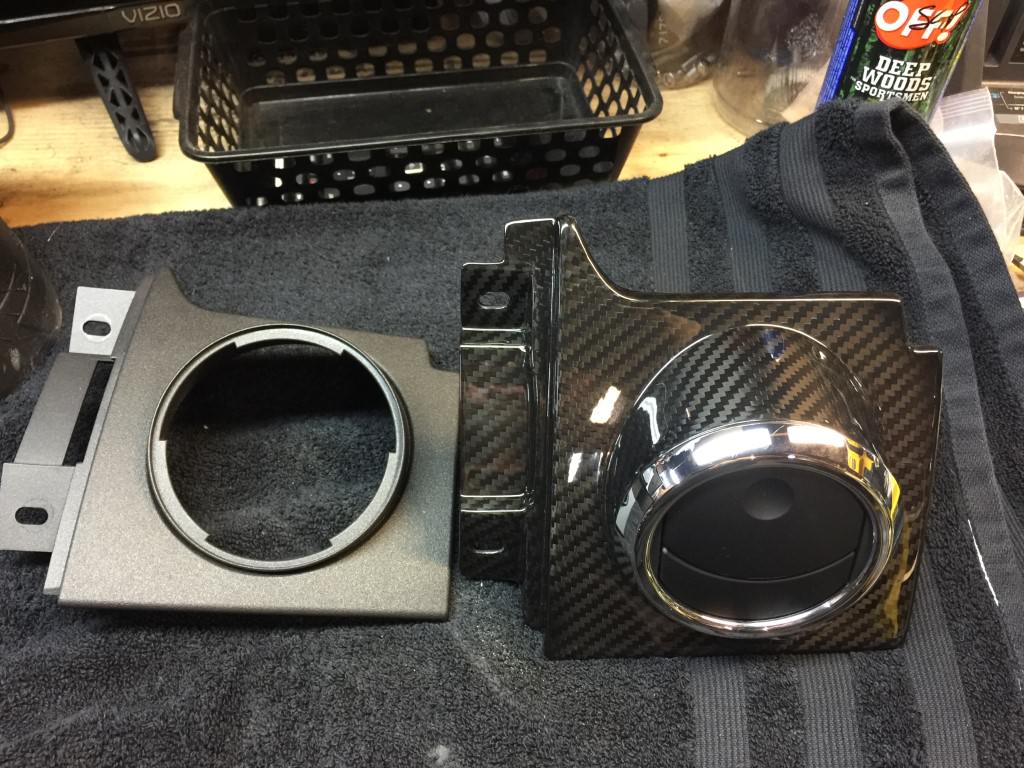
The two screws retaining the passenger AC Vent were removed with a 7mm socket and the vent panel pulled off.
On the bench the AC Vent and two push retainers were removed and transferred to the CF panel.
AC Vent was re-installed and secured with the two screws.
The two screws retaining the right side of the center panel were removed with a 7mm socket.
To release the center panel, it was necessary to raise the console top and remove the inner kick panels. Two Philips head screws at the rear of the console were removed and the console lifted at the front. The top was positioned to right to remove the left panel and then positioned left to remove the right kick panel.
To remove the AC Vent, it was necessary to remove the four (two on each side) screws that retain the radio bezel with a 7mm socket.
Center panel was carefully pulled out.
Two push retainers, Roush Vent Pod and the AC Vent were transferred over to the CF panel.
Center AC Vent was pushed into place and the screws replaced on the radio bezel (4) and AC Vent (4).
Kick panels slid back on, center console top positioned, and rear secured with the two Philips screws.
All was going well until it was time to slip the air bag back into place. This is when I noticed the passenger single vent was missing a cut-out that was present in the OEM panel. The missing cut-out prevented the air bag cover from seating properly and engaging the rubber clips. While I could notch the cover with a Dremel I decided to email APR Performance first to see what they say.
Scott
Senior Member
APR Performance emailed me back and asked for pictures of the issue.
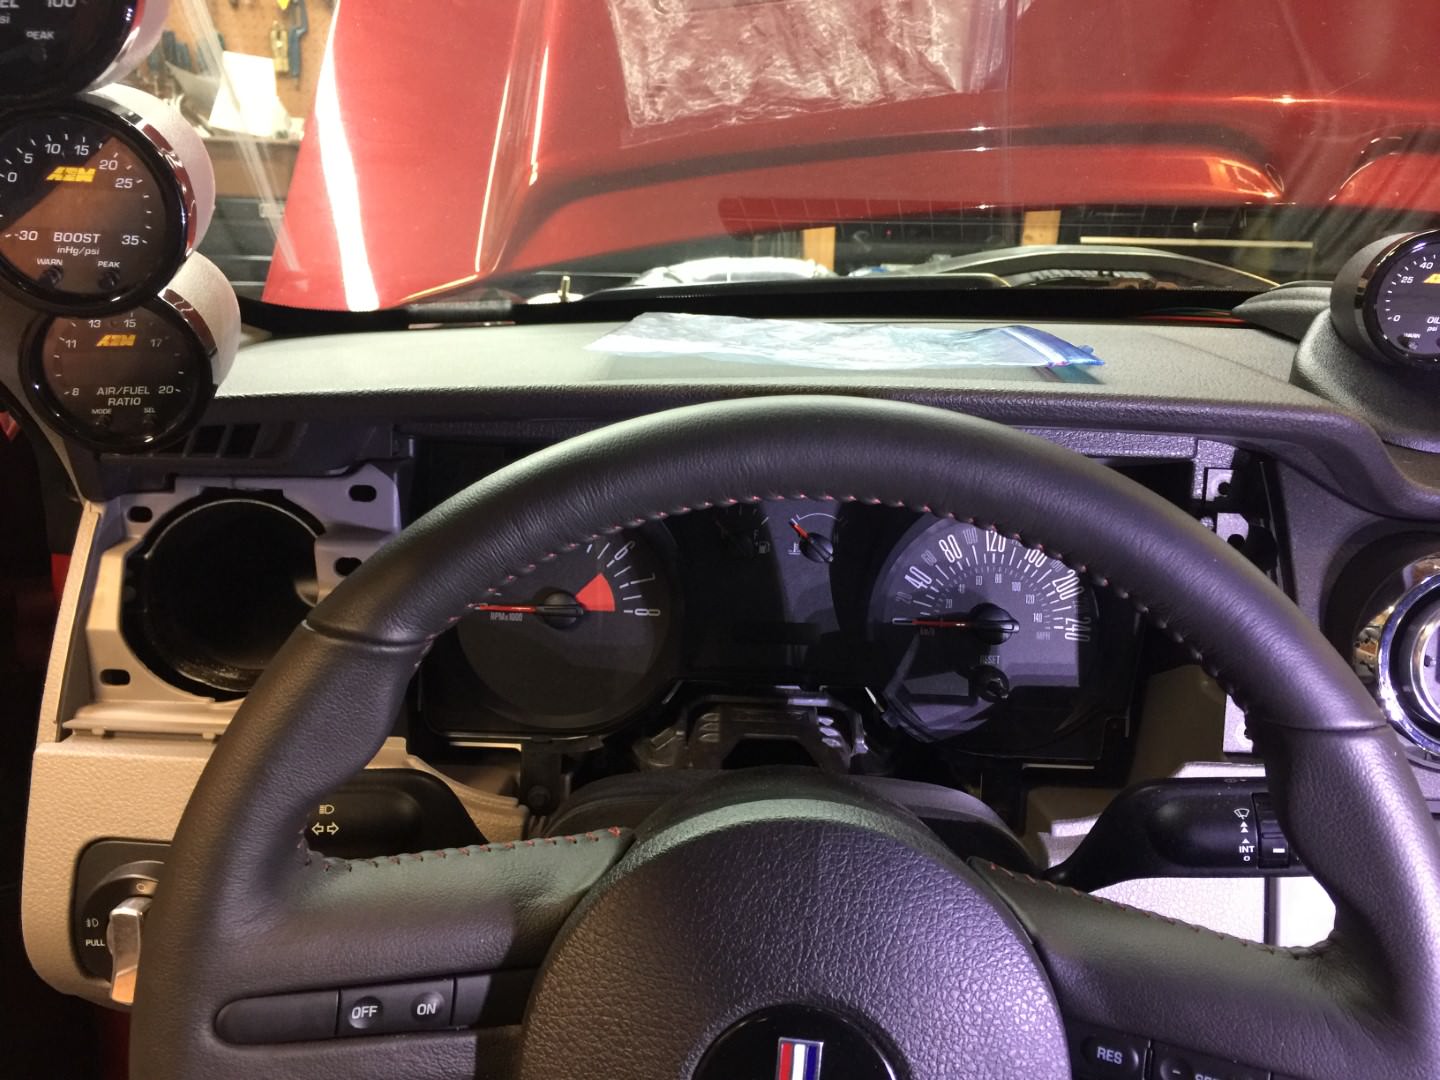
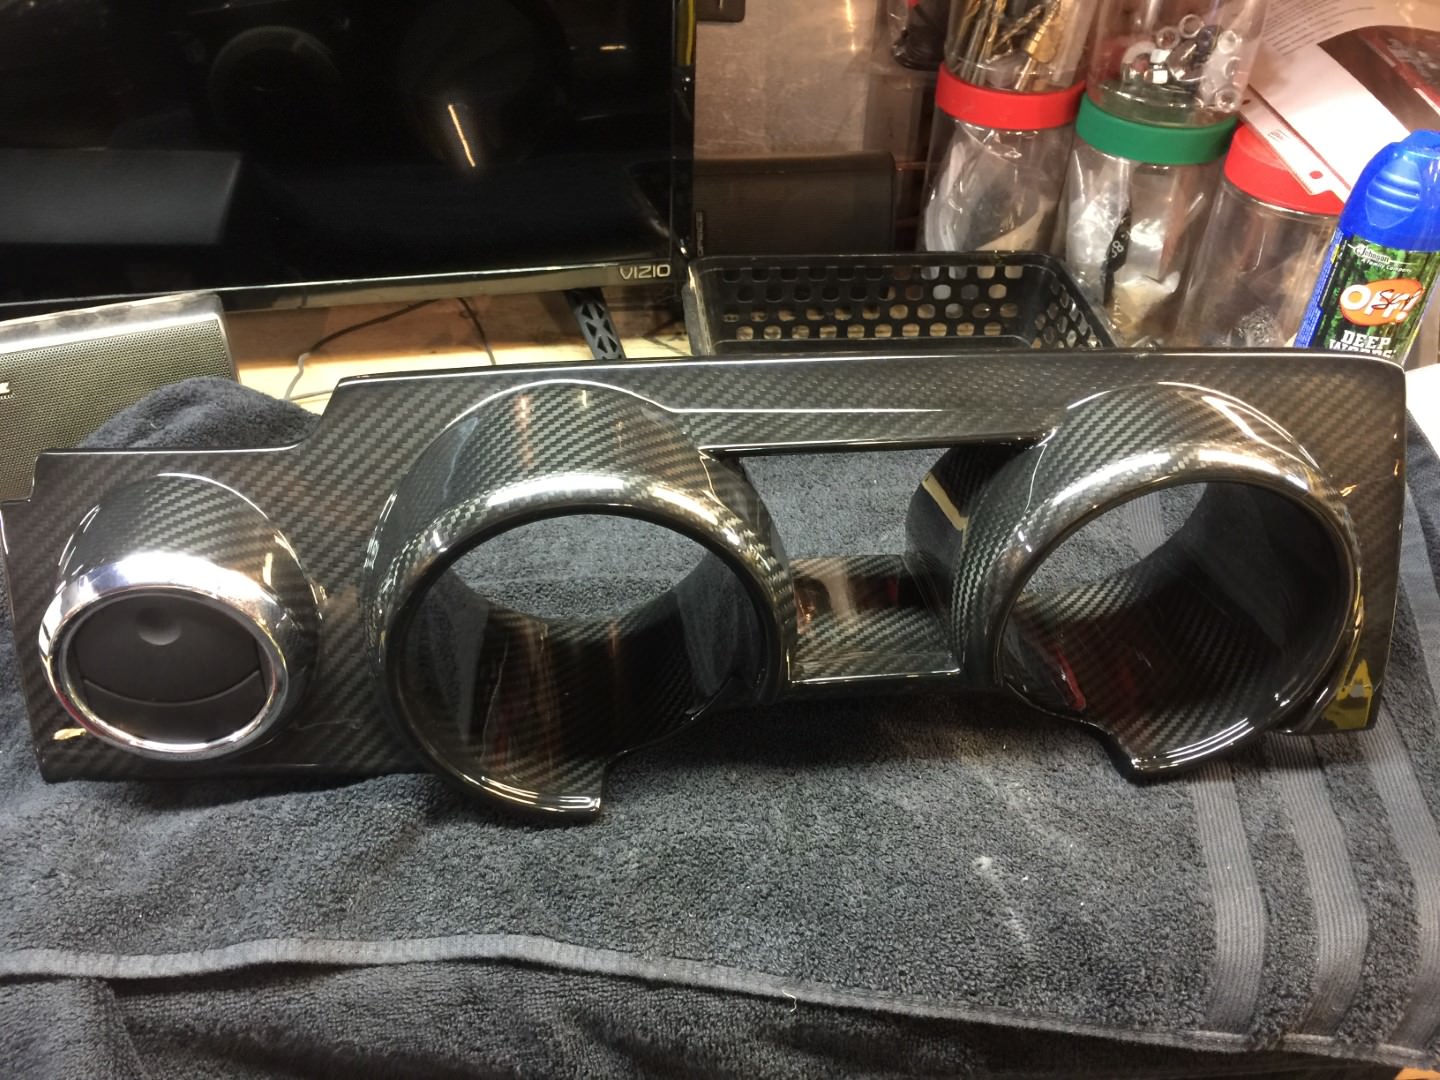
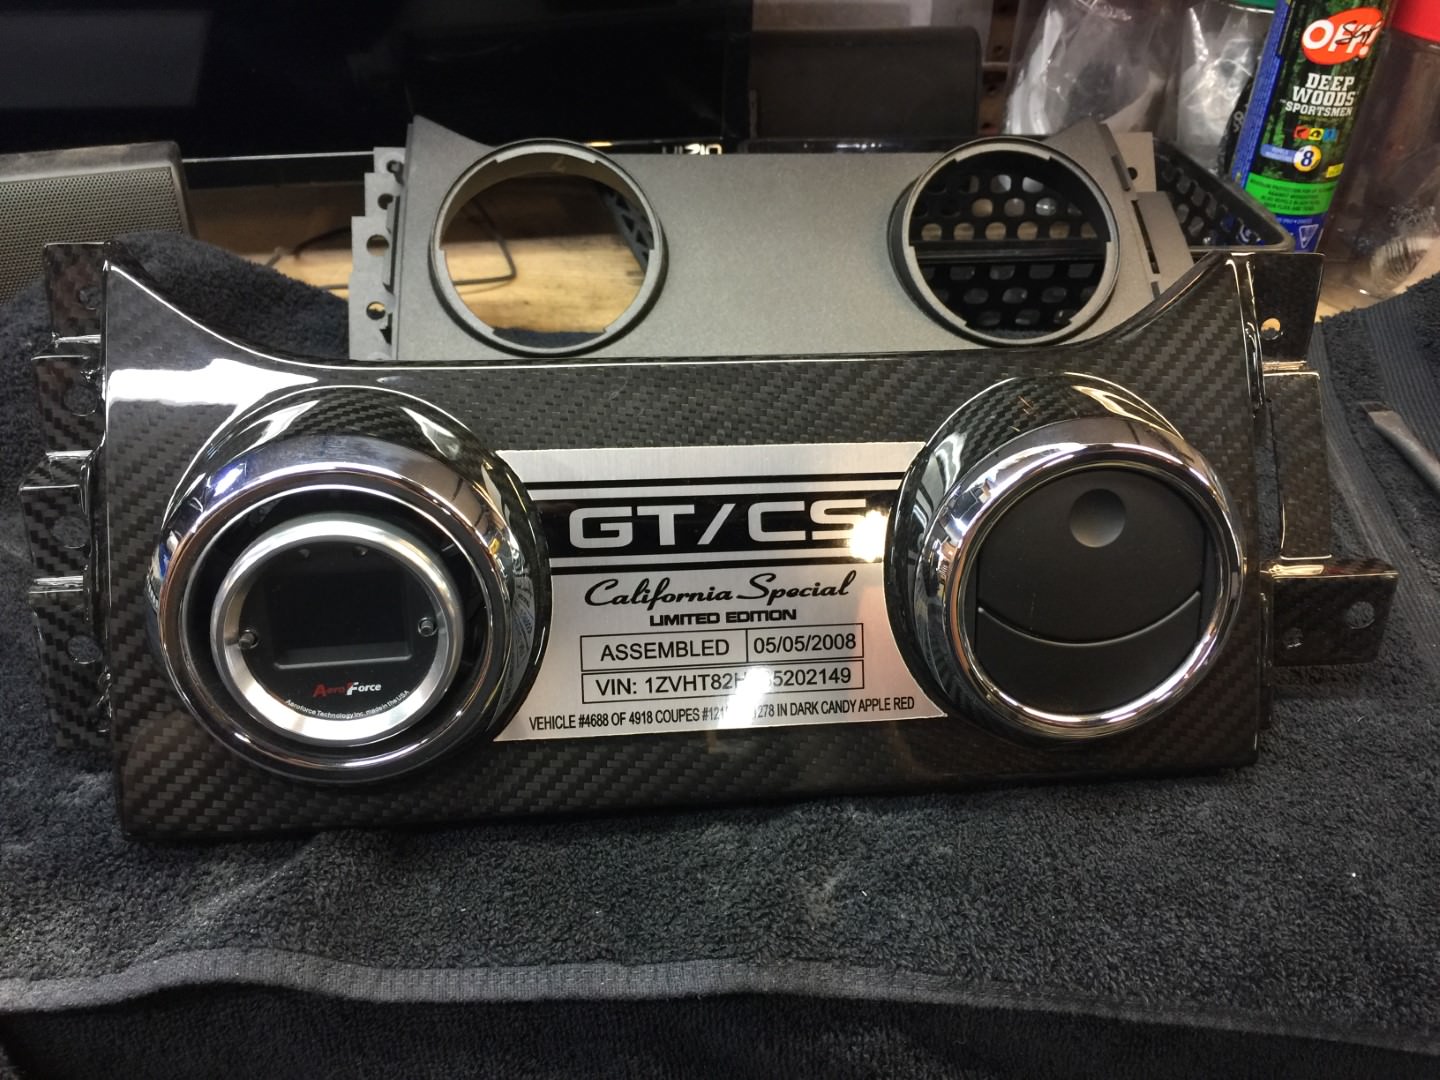
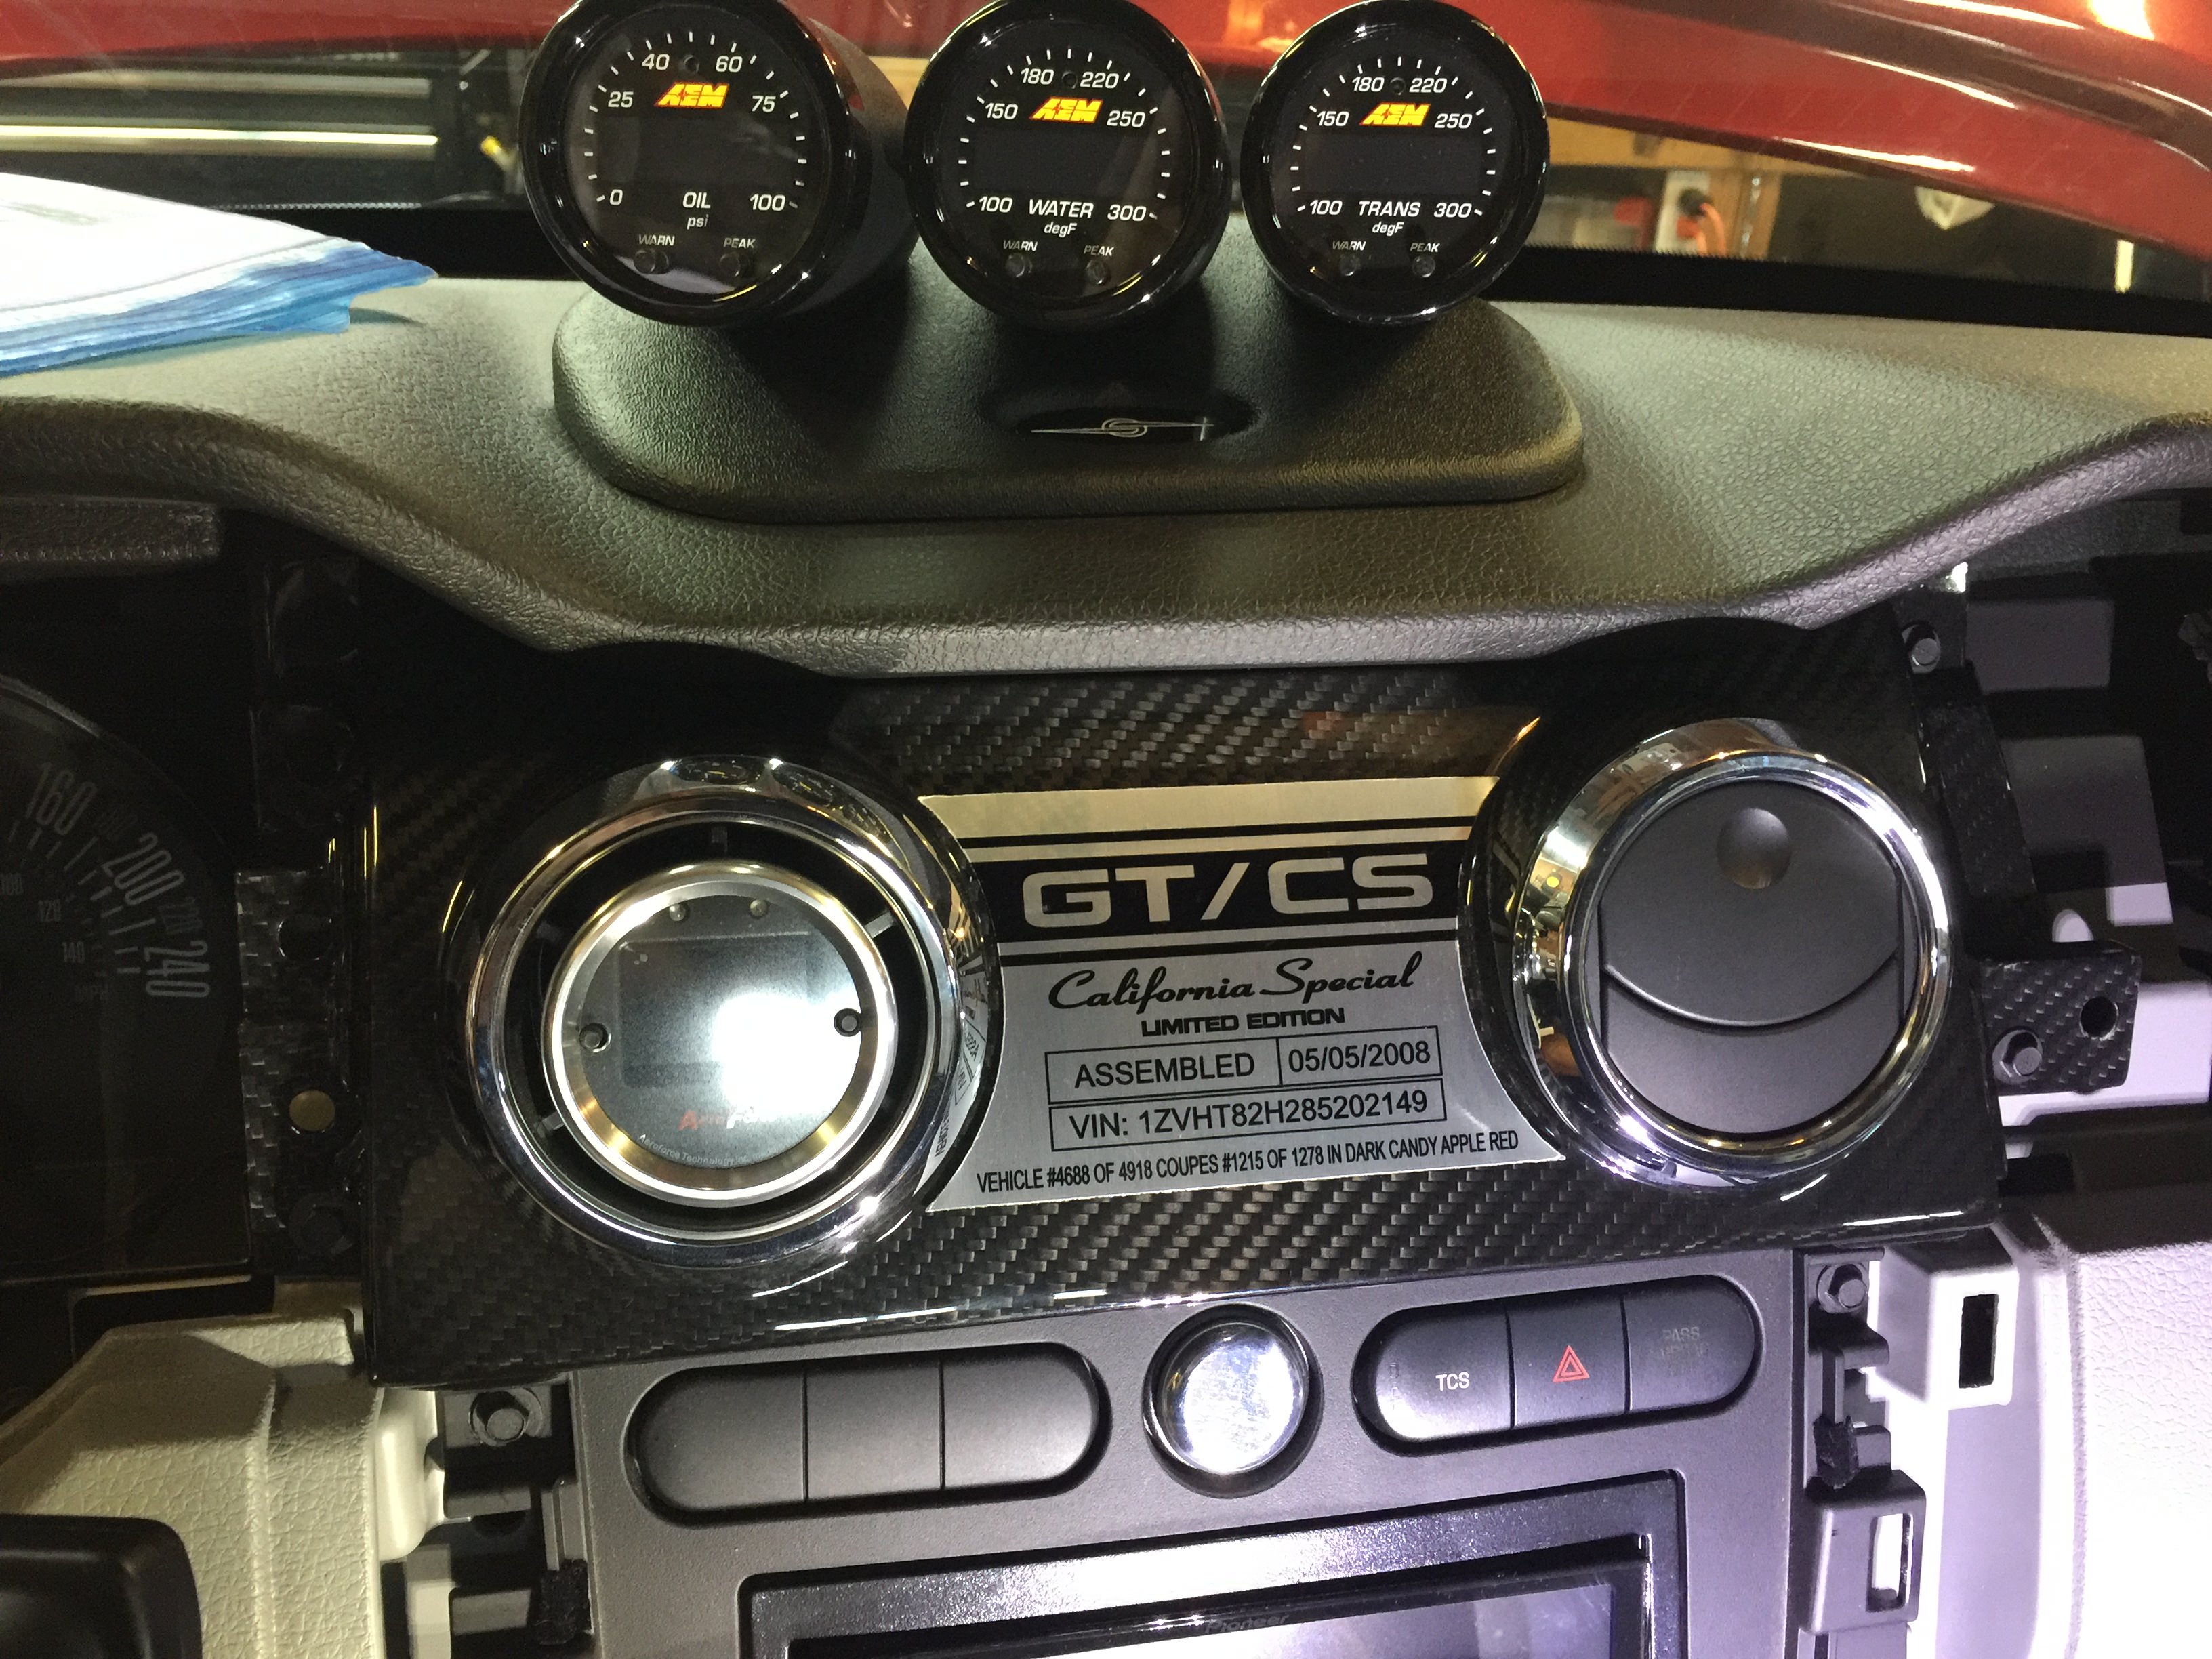
While not finished, this is roughly what it is going to look like.
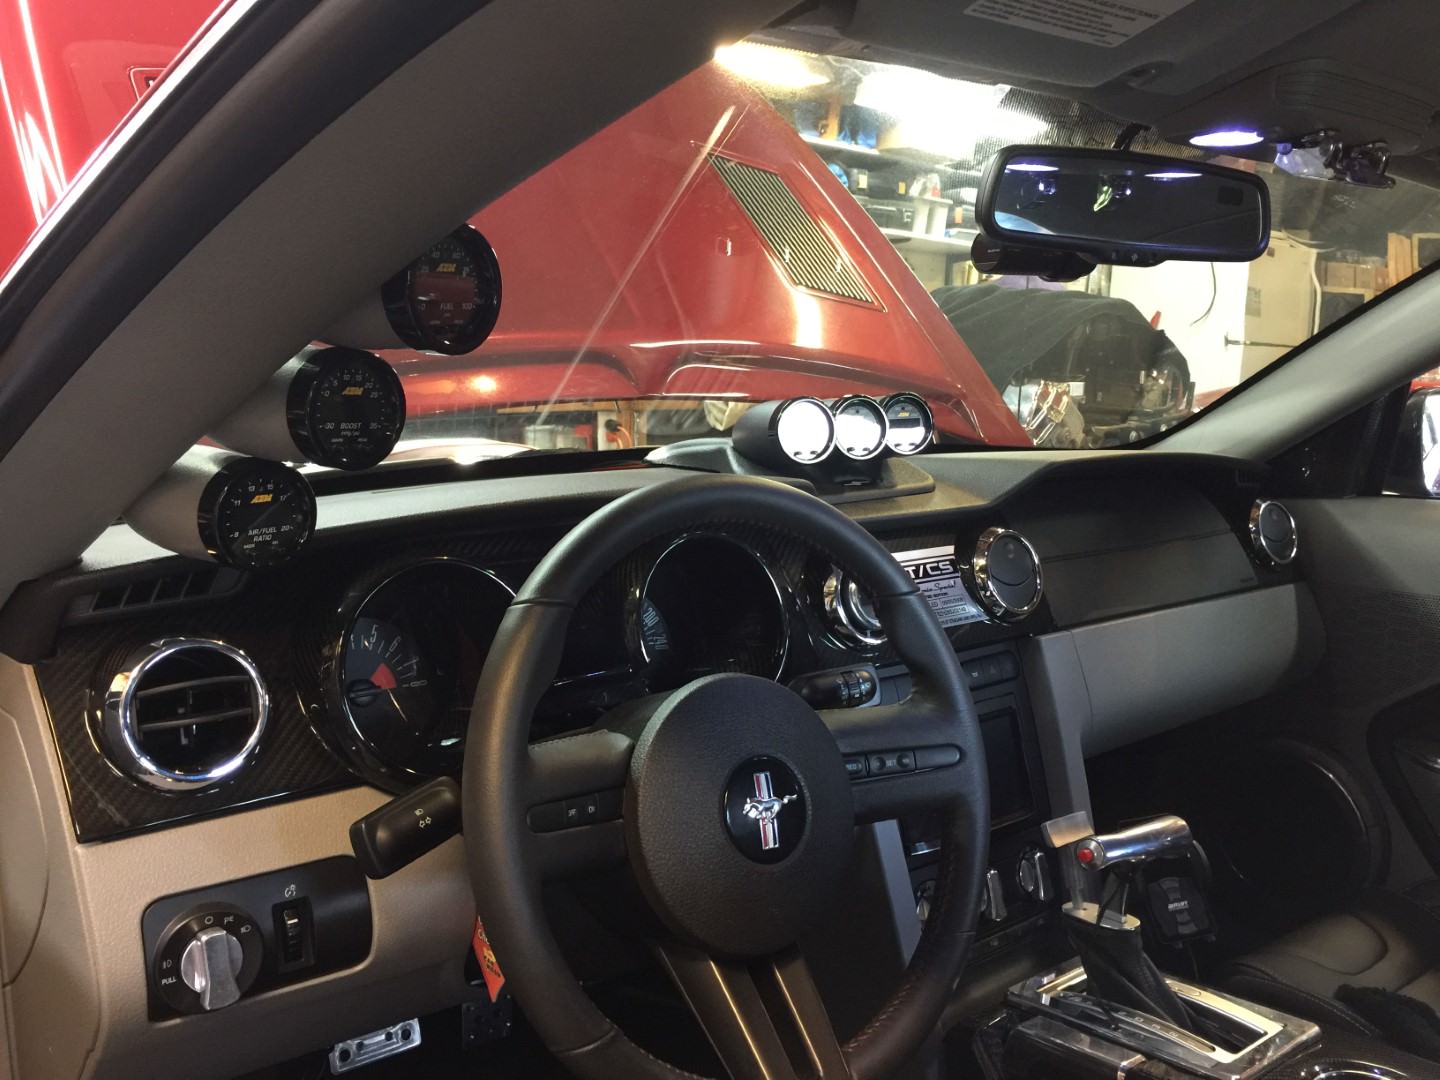
While not finished, this is roughly what it is going to look like.
travelers
Senior Member
That's going to look great when your done. Great details on the install as usual. It's a shame they can't make the air bag piece and then perforate it so it will open when the air bag is deployed.
Scott
Senior Member
Replacement passenger air vent arrived from APR Performance when I was on vacation. Installed now and all good!
Kipp07GT
Slug Box
Interior looks great!!! I have tossing around the idea of doing some carbon fiber interior accents on mine. I bought a fiberglass rear deck lid cover to wrap in raw carbon fiber to see how easy or hard it will be. Then I may move onto covering some of my interior parts myself if I can successfully do the deck lid. Keep up the great work Scott!!
Scott
Senior Member
Interior looks great!!! I have tossing around the idea of doing some carbon fiber interior accents on mine. I bought a fiberglass rear deck lid cover to wrap in raw carbon fiber to see how easy or hard it will be. Then I may move onto covering some of my interior parts myself if I can successfully do the deck lid. Keep up the great work Scott!!
Thanks! Good luck with the deck lid wrap. Remember we need pictures!
Macman45
Resident Geriatric
Ordered production numbers radiator and dash plaques from Facebook. Her is the radiator plaque. Dash to follow.
Thanks to Chris Gillard for the close up.
OHH I like this big time. Did you just order the plaque from facebook or did you get the edge to edge carbon radiator shield as well? I need both honesty
Scott
Senior Member
OHH I like this big time. Did you just order the plaque from facebook or did you get the edge to edge carbon radiator shield as well? I need both honesty
Radiator cover is from Trufiber, part number TC10024-LG50. The cover is not a perfect fit, at the very front edge on each side the carbon fiber sticks up to high and rubs on the hood. I can live with it but I am sure some people likely could not.
For the GT/CS radiator cover and dash plaque, I believe the individual on FB was David Jacobelli.
Scott
Senior Member
Back in September 2014 my goal with the 4.6L “Aluminator” was to break 600 at the wheels through the slush box 5R55 automatic. I came close at 585 RWHP but no cigar!
Well I finally met my goal and made 605 RWHP earlier this month thanks to the addition of an Anderson Ford Motorsports Power Pipe (draw through MAF), Vortech 8-Rib conversion (3.4” SC pulley) and an ATI 12% Overdrive Balancer.
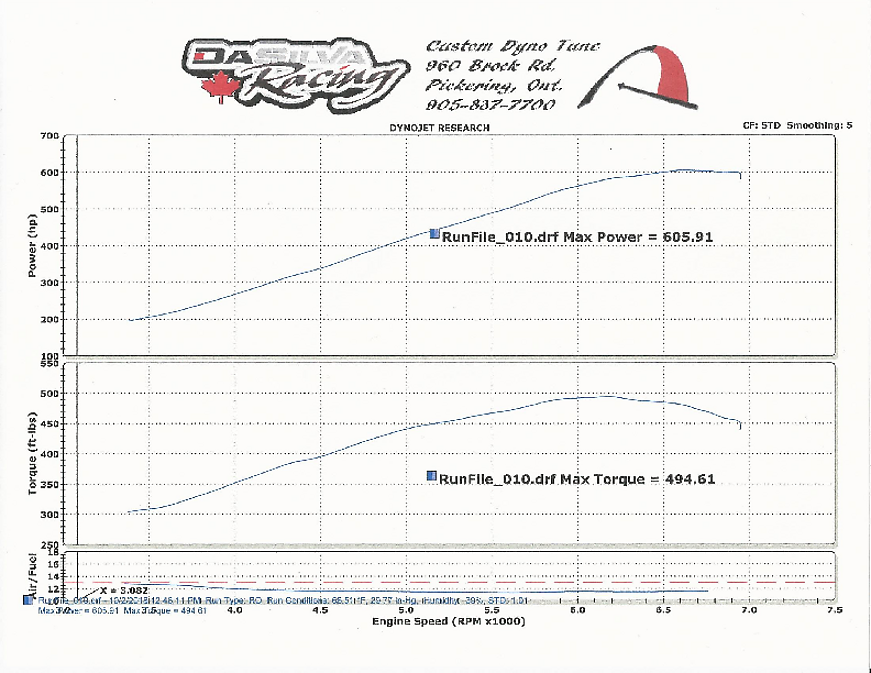
Well I finally met my goal and made 605 RWHP earlier this month thanks to the addition of an Anderson Ford Motorsports Power Pipe (draw through MAF), Vortech 8-Rib conversion (3.4” SC pulley) and an ATI 12% Overdrive Balancer.
AndrewNagle
Senior Member
Congrats!Back in September 2014 my goal with the 4.6L “Aluminator” was to break 600 at the wheels through the slush box 5R55 automatic. I came close at 585 RWHP but no cigar!
Well I finally met my goal and made 605 RWHP earlier this month thanks to the addition of an Anderson Ford Motorsports Power Pipe (draw through MAF), Vortech 8-Rib conversion (3.4” SC pulley) and an ATI 12% Overdrive Balancer.
ILW84U
Senior Member
Congratulations.
swflastang05
Back for More
Congrats Scott!
SOS fan I seeAPR Performance emailed me back and asked for pictures of the issue.
While not finished, this is roughly what it is going to look like.

looking good Scott, enjoy!
Scott
Senior Member
SOS fan I see
looking good Scott, enjoy!
Thanks, yes SOS pods were one of my first mods. Unfortunately I am on my second set of gauges. Original Nexus Series were failing so I replaced them with AEM X-Series.
Scott
Senior Member
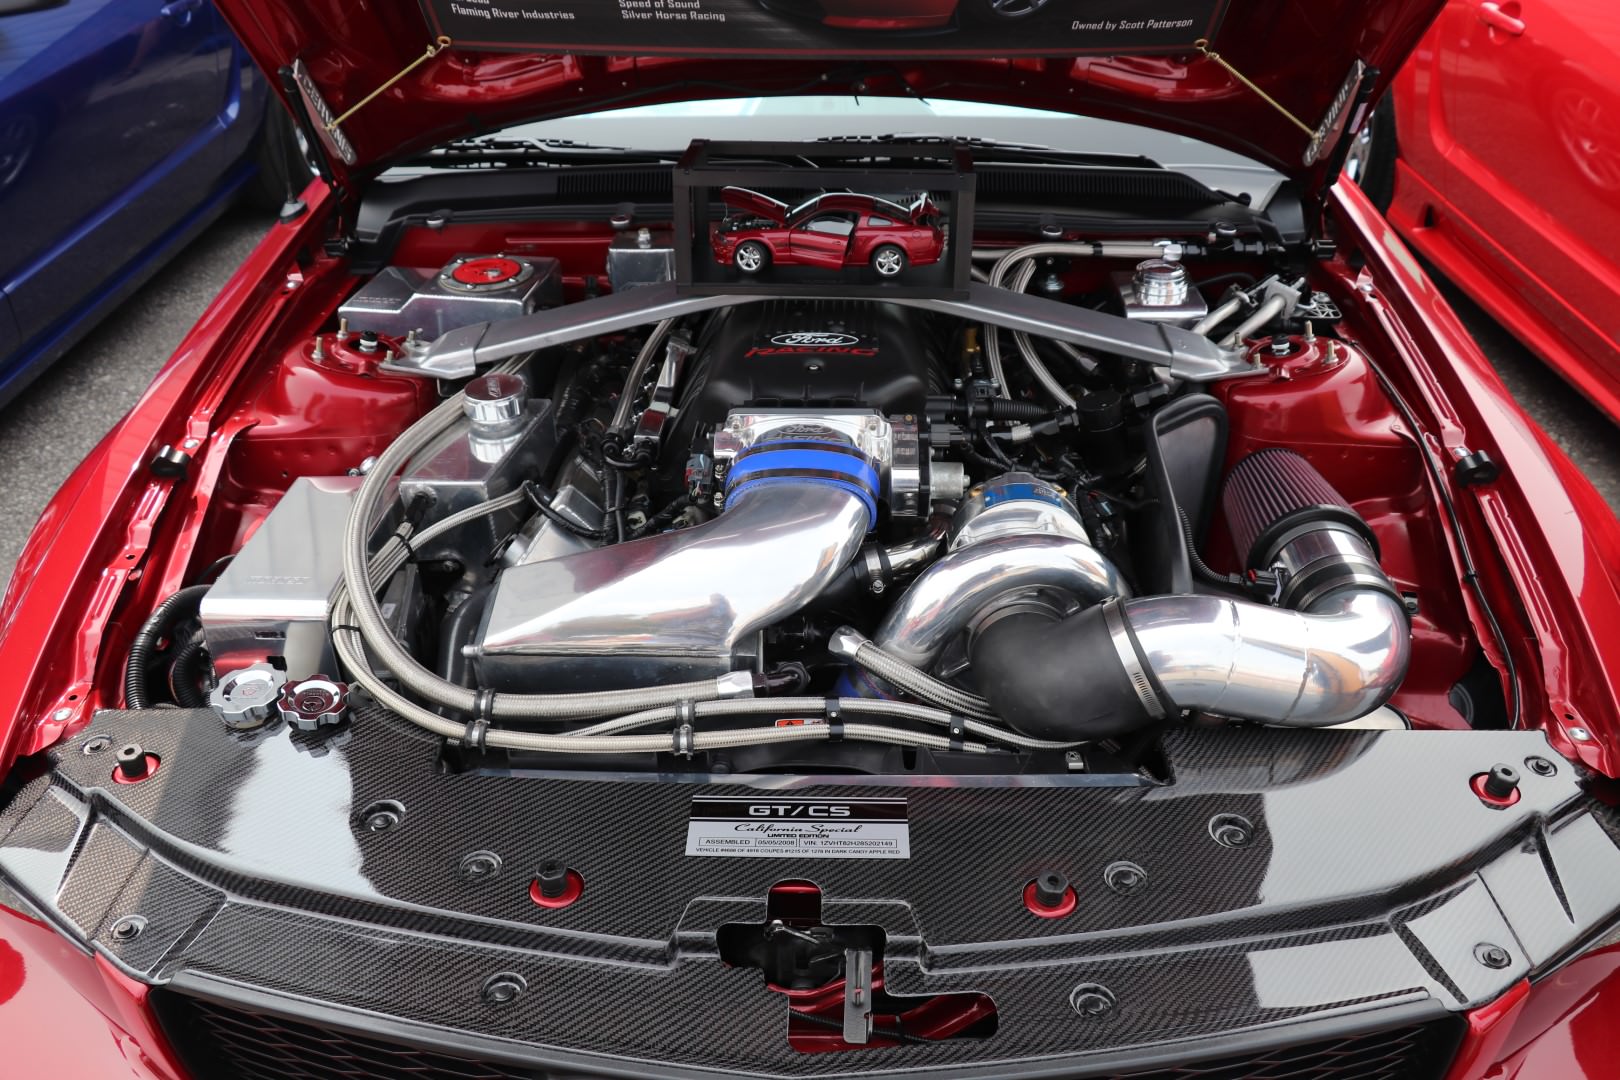
When I pulled my Ford Racing intake to relocate the IAT sensor from the MAF location to an intake runner I was very shocked at the amount of oil that had accumulated in the intake.
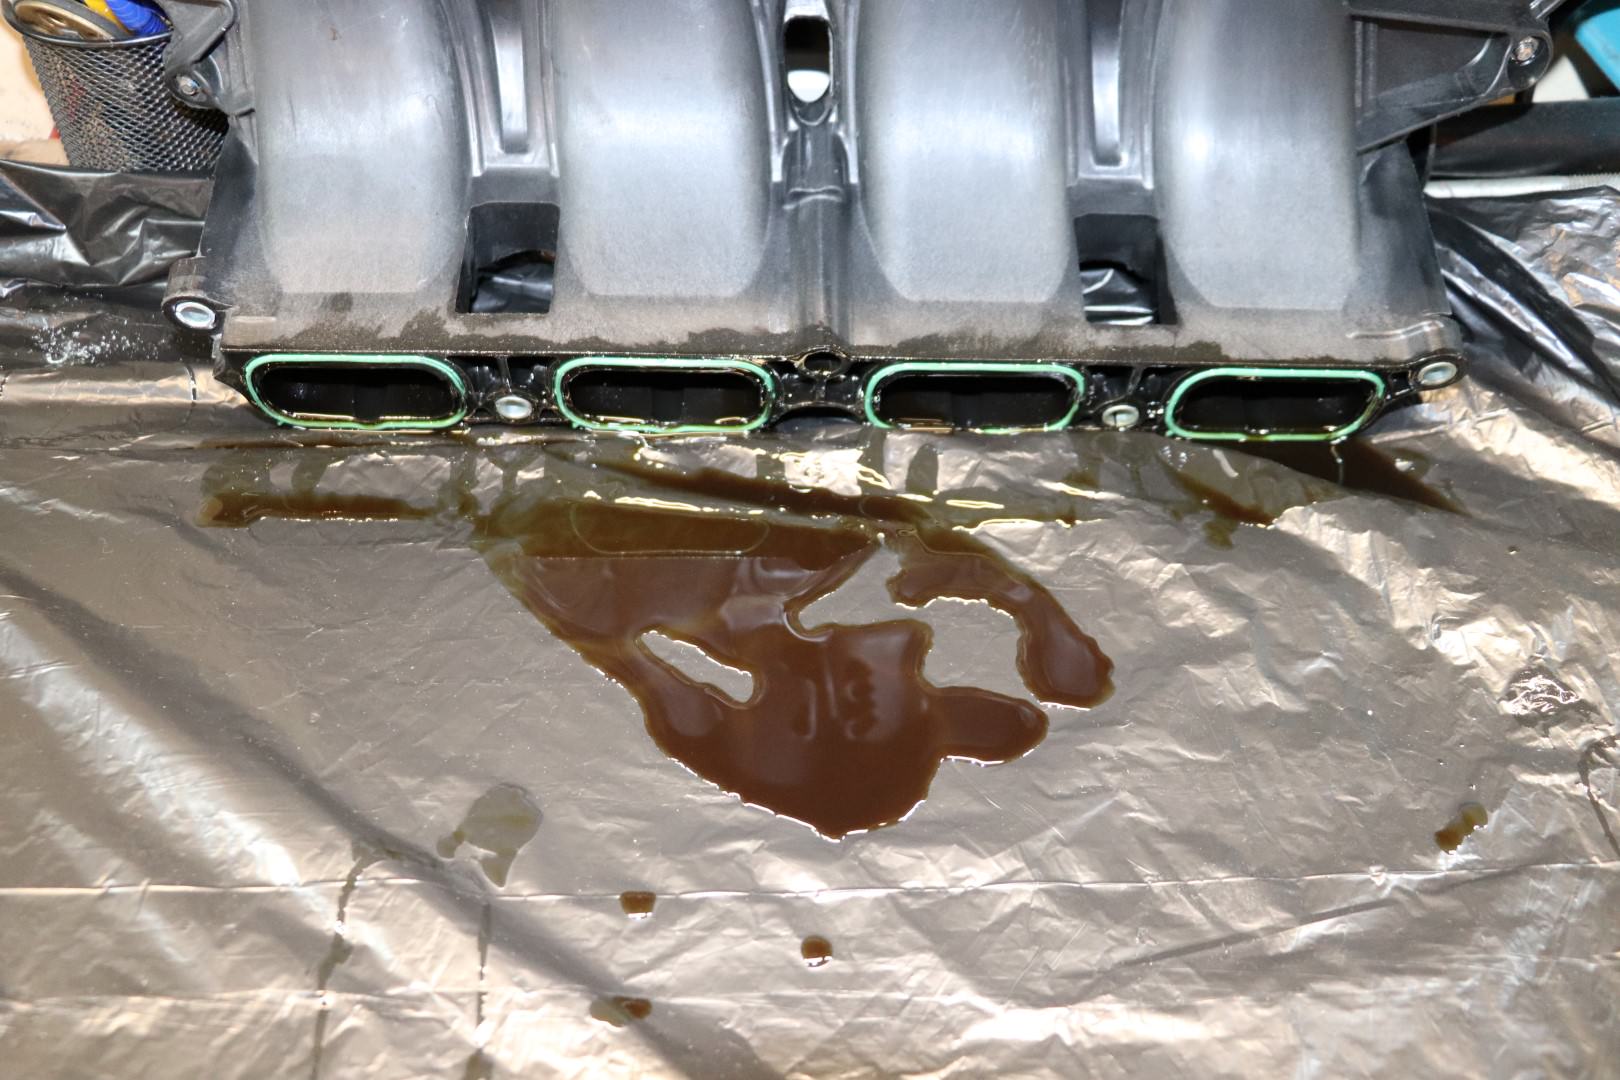
I previously had a JLT catch can on the driver’s side until the forged motor and Ford Racing Intake went into the car in May 2013, but because the original hoses were no longer suitable the JLT was left off. I put the driver’s side JLT Oil Separator back on in July 2017.
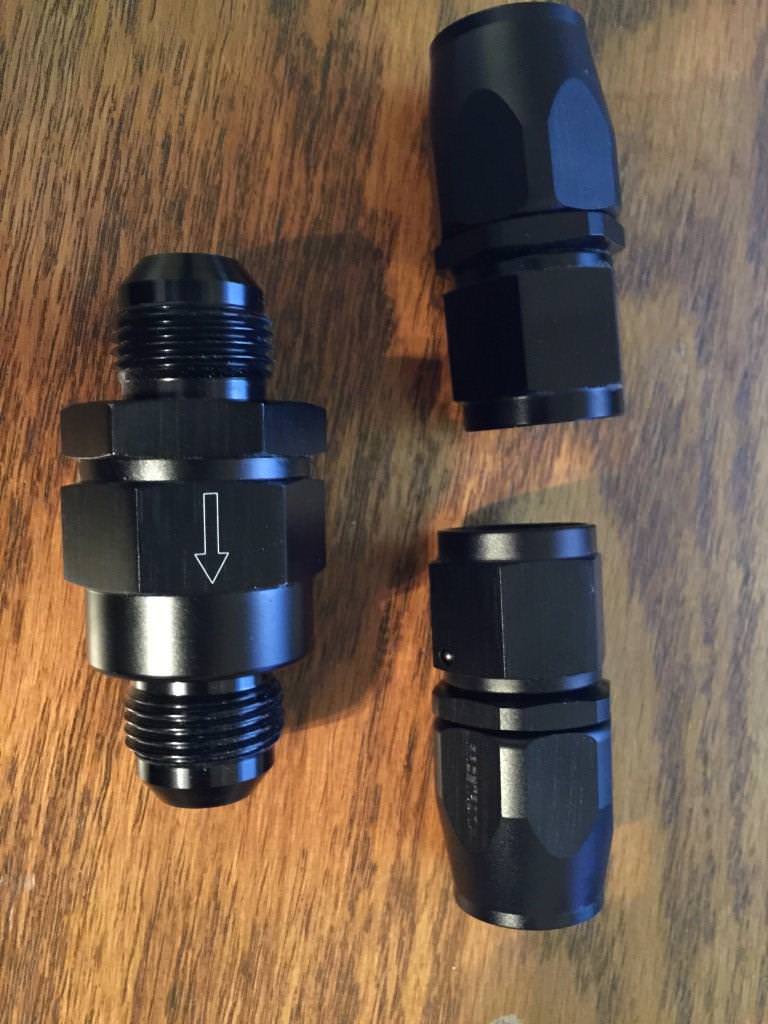
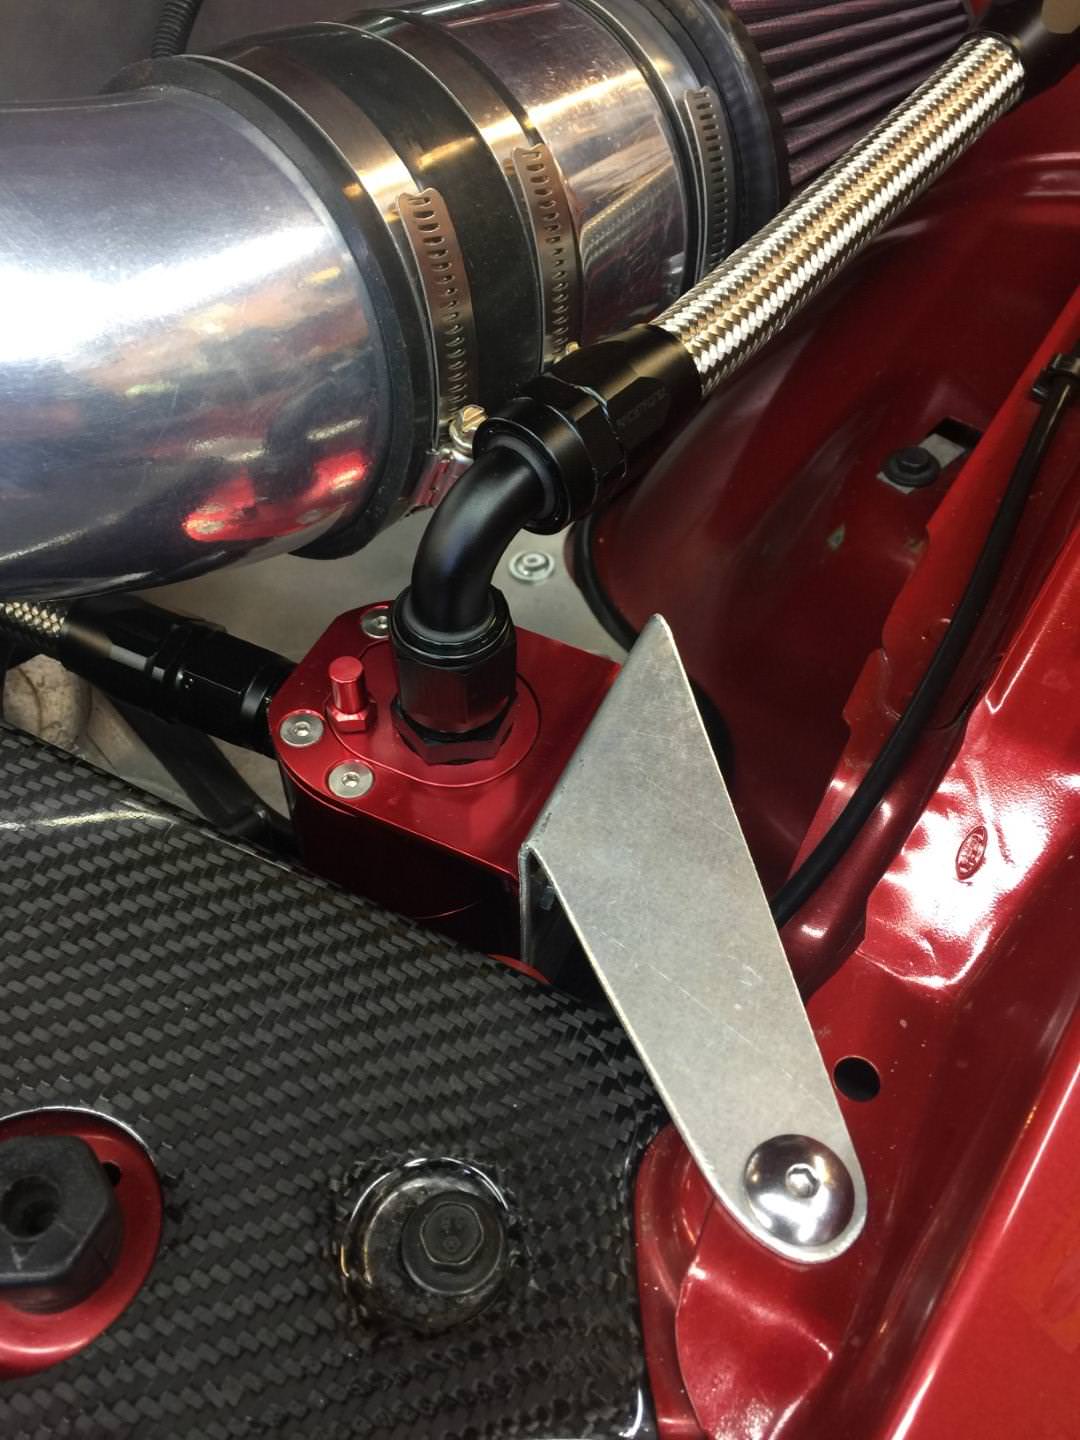
Picked up a Racetronix separator and one way check valve and installed them in place of the JLT yesterday. Still have to clean up the install a little by better securing the lines.
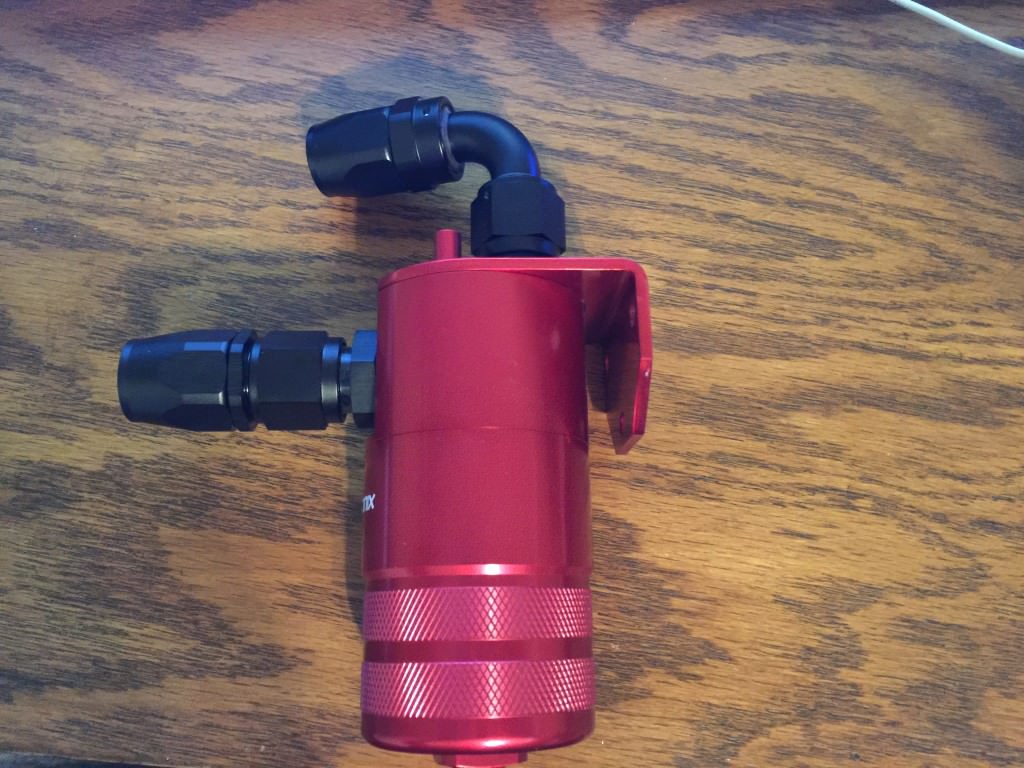
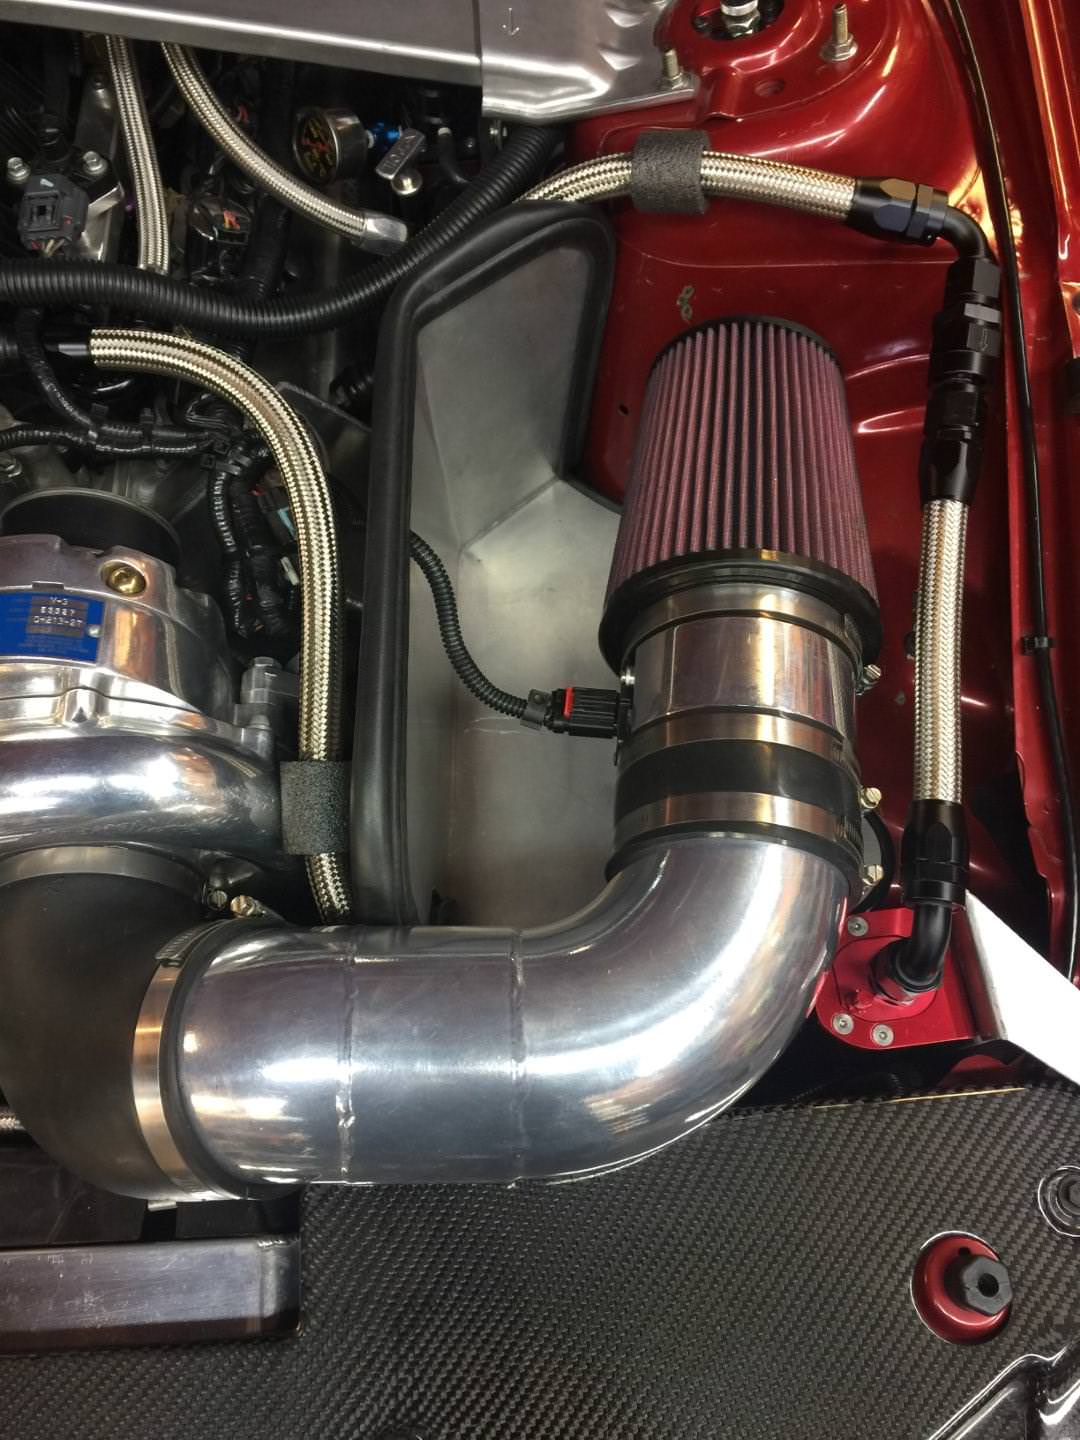
I previously had a JLT catch can on the driver’s side until the forged motor and Ford Racing Intake went into the car in May 2013, but because the original hoses were no longer suitable the JLT was left off. I put the driver’s side JLT Oil Separator back on in July 2017.
Picked up a Racetronix separator and one way check valve and installed them in place of the JLT yesterday. Still have to clean up the install a little by better securing the lines.
AndrewNagle
Senior Member
Very nice install. I should check my JTLWhen I pulled my Ford Racing intake to relocate the IAT sensor from the MAF location to an intake runner I was very shocked at the amount of oil that had accumulated in the intake.
I previously had a JLT catch can on the driver’s side until the forged motor and Ford Racing Intake went into the car in May 2013, but because the original hoses were no longer suitable the JLT was left off. I put the driver’s side JLT Oil Separator back on in July 2017.
Picked up a Racetronix separator and one way check valve and installed them in place of the JLT yesterday. Still have to clean up the install a little by better securing the lines.
Similar threads
- Replies
- 6
- Views
- 587
- Replies
- 10
- Views
- 671
- Replies
- 6
- Views
- 3K
- Replies
- 9
- Views
- 1K
Support us!
Support Us - Become A Supporting Member Today!
Click Here For Details