
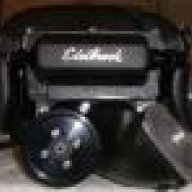
FWIW, this kit is also fairly easy to install... aside from some connector repinning, which was a PITA, the rest is just basic part removal/installation. I installed mine in about 13 hours and my only help was lowering the supercharger on the motor.

You are using an out of date browser. It may not display this or other websites correctly.
You should upgrade or use an alternative browser.
You should upgrade or use an alternative browser.
Edelbrock E-FORCE looking for some input.
- Thread starter 08stang
- Start date
UltraKla$$ic
PERENNIAL WAXXER
FWIW, this kit is also fairly easy to install... aside from some connector repinning, which was a PITA, the rest is just basic part removal/installation. I installed mine in about 13 hours and my only help was lowering the supercharger on the motor.
I followed your build from the shadows. I was relieved when you got the tune worked out.
I'm seriously considering this setup. I was wanting a more aggressive look, but I think the "sleeper" look is growing on me, not to mention the ease of installation it looks like it is.
N
navbtcret
Guest
My car is a daily driver and a track car. I love this kit on the street, I run 15 psi on the street and 16.5 at the track with a two minute pulley swap. I always drive my car to the track and the nearest track to me is over two hours away. The kit has very good street manners and I could be more aggressive with my track tune. I have lots of data logs, but it is just fine the way it is. I do not have to worry about running on the ragged edge and hurting the motor, even though it is forged, I still am running the stock crank and am probably getting close to its limit. Ripping off ten second passes and then driving home is fun.
My car is a daily driver and a track car. I love this kit on the street, I run 15 psi on the street and 16.5 at the track with a two minute pulley swap.
So you are able to make the pulley swap using the same belt? What size pulleys are you running?
N
navbtcret
Guest
So you are able to make the pulley swap using the same belt? What size pulleys are you running?
Yes I am. I run the 3.0 pulley on the street and the 2.75 at the track. I also have an 18% overdrive pulley on the car.

shanec
Member
- Joined
- Sep 24, 2008
- Posts
- 306
- Reaction score
- 0
Like my E-Force. Very much regret being an early adopter though (purchased Sept 2009, serial number 160). I've had a boatload of nagging problems all associated with production issues at Edelbrock.
My current PIA is trying to get a vaccum leak sealed. This fitting at the back of the manifold (right up against the firewall, driver side) was completely loose and unsealed right out of the box. I discovered it recently and its a real bear to try and get sealed since it is in a very tight space.
Here, I pulled the fitting out of the hole (slid right out) to snap this pic and apply some locktite to it...which secured the fitting but failed to get it sealed.

I have to give Edelbrock props on tech support. They are knowledgeable and helpful. Unfortunately it doesn't come with labor. And with all the shit I've been through I think I deserve some labor support. No, I'm not really kidding. May have to pull off the supercharger to handle this fitting properly.
The install instructions are very good and it is all straightforward - provided that Edlebrock supplies all the parts that are supposed to be there, doesn't include any incorrect parts, has all the screw holes tapped, and provides a throttle body that works.
My current PIA is trying to get a vaccum leak sealed. This fitting at the back of the manifold (right up against the firewall, driver side) was completely loose and unsealed right out of the box. I discovered it recently and its a real bear to try and get sealed since it is in a very tight space.
Here, I pulled the fitting out of the hole (slid right out) to snap this pic and apply some locktite to it...which secured the fitting but failed to get it sealed.
I have to give Edelbrock props on tech support. They are knowledgeable and helpful. Unfortunately it doesn't come with labor. And with all the shit I've been through I think I deserve some labor support. No, I'm not really kidding. May have to pull off the supercharger to handle this fitting properly.
The install instructions are very good and it is all straightforward - provided that Edlebrock supplies all the parts that are supposed to be there, doesn't include any incorrect parts, has all the screw holes tapped, and provides a throttle body that works.
Last edited:

redstangs9308gt
Senior Member
- Joined
- Dec 8, 2008
- Posts
- 1,251
- Reaction score
- 2
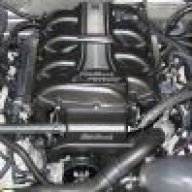
Well, I love mine too.
KDT
Member
I have had my E Force since January of this year. I have had no issues whatsoever. I have the Brenspeed Stage 1 kit. It is a very well engineered kit that installs easily and looks great under the hood. The wire pinning was somewhat aggravating but after I figured out how to do it, it really wasn't all that bad. I still get good fuel mileage and the car makes great power and has a ton of low end torque. The heat exchanger does a good job at keeping the inlet air temp down even in the summer heat. I can't think of anything negative to say about it. I plan to eventually go forged and take it up to around 550rwhp.
Last edited:

gus
Member
- Joined
- Dec 23, 2009
- Posts
- 154
- Reaction score
- 0
KDT: Do you know what your average AIT is? Did you datalog it at various times? Before a run, after a run , during normal cursing, in city traffic etc?
Has anyone had problem with belts, pulleys or check engine lights?
Has anyone had problem with belts, pulleys or check engine lights?

dysan
Dis-Member
I'll be starting my e-force install this Friday after work. I'm hoping that a small eye-glass screwdriver will work for the de-pinning. Hopefully Chris Rose will sent me a temporary email tune this week so I can at least drive the car and then the following weekend I'll get it dyno tuned and be good to go.
dysan
Dis-Member
Quick question for you e-force guys, do any of you have a link to the thread that shows how to tap into the built in boost sensor? I plan on getting the dual gauge aeroforce interceptor set-up and would love to be able to view vac/boost.
Thanks!
Thanks!

They are two places to run a boost gauge on the e-force, It should be in your instructions, but anyways one is for a mechanical guage. You have to remove a pipe plug on the back of the unit like shown in the picture above a few posts, the other is for a electonic gauge which is on top of the unit.
The insrtruction tells you to never tap in the vaccum line that goes to the fuel pressure switch.
Hope this helps.
The insrtruction tells you to never tap in the vaccum line that goes to the fuel pressure switch.
Hope this helps.
Last edited:
shanec
Member
- Joined
- Sep 24, 2008
- Posts
- 306
- Reaction score
- 0
The map is boost only. No vac. I recommend the 1/4 inch npt fitting for a separate boost/vac guage.
Sent from my HERO200 using Tapatalk
Sent from my HERO200 using Tapatalk
KDT
Member
I have an Aeroforce and keep a close eye on my IATs. Back in the winter when it was in the 50s and 60s, my IAT would hold around 80 degrees while driving around normally. Under full throttle boost through the 1/4 mile, it would climb to around 120-125 degrees. In the summer heat, like we are having now (95-100 degrees), my IAT usually stays around 115-120 degrees while cruising around with the AC on. In stop and go traffic it sometimes clims to 130. Under boost, it goes up to the mid 130s. I think the highest I have seen it is around 140. I have had no issues with belts, pulleys, etc. I always check for belt dust around the snout (indication of slippage) and have seen none thus far.KDT: Do you know what your average AIT is? Did you datalog it at various times? Before a run, after a run , during normal cursing, in city traffic etc?
Has anyone had problem with belts, pulleys or check engine lights?
I have mine set up to read boost from the TMAP sensor that comes on the Aeroforce. Here is a writeup that I did explaining how to do it.Quick question for you e-force guys, do any of you have a link to the thread that shows how to tap into the built in boost sensor? I plan on getting the dual gauge aeroforce interceptor set-up and would love to be able to view vac/boost.
Thanks!
There has been a few of us on the forum trying to figure out exactly how to hook up 0-5V analog signal from the TMAP on the E-Force supercharger to the Aeroforce Interceptor. This info applies to anyone trying to use a 0-5V MAP sensor with an Aeroforce. I have been working on this for several days and finally got the information. First, I will say that Edelbrock's customer service is as good as their supercharger. They are outstanding and will go out of there way to help you. I talked with an engineer there and he dug up the info that I needed. Here how it works. First, you will need a pigtail from your Ford parts dept. It is part number 3U2Z-14S411-SSA. It costs around $25.00. You will unpin 2 wires from it and repin them into slots 1 and 2 in the TMAP connector that Edelbrock sends in their kit. These slots are empty. You then need to take the wire from pin 1 (1st slot) and run it to one of the anolog inputs on the back of the Interceptor. The wire from pin 2 is your 5v source wire. It needs to be spliced into the wire going into pin 2 on the fuel rail sensor. It is very important to solder and heatshrink this connection. You can see in the pictures I posted how this is done. Once this is done, take a voltmeter and make sure you have the 5V source on terminal 2 of the fuel rail connector as well as pin 2 on the TMAP connector. Once this is confirmed, you can plug up the connectors and wrap up all the wires. Now the Interceptor has to be programmed to read the signal and display the information properly. You need to enable the analog input that you are using in the setup menu. It will ask you to put in the Slope and Intercept values. The slope value is 6.5. The Intercept value is -1.5 - atmospheric pressure. If your at sea level that would -1.5-14.7 or -16. If you are at 1000 feet then it would be -1.5-14.3 or -15.8. you may have to play around with the values a little to get it perfect. You will know you are right when the boost reading is around -10 at idle. Mine is working perfectly. I have about 6lbs of boost until I get in the upper rpms. It then climbs a little to almost 7. It work great. If anyone needs more info, just pm me. Attached Thumbnails


Last edited:
dysan
Dis-Member
Thanks for the info! Now I just need to decide if I want to use that and not have a true vaccum reading or just get the Aeroforce 3bar boost/vac sensor.
KDT
Member
Just for the record, my Aerofroce boost reading was dead on with the mechanical gauge used on the dyno. The Aeroforce wideband was also accurate. I did solder and heat shrink every connection, then secured all my wiring with wire loom. Good connections and a solid ground are needed for accuracy when dealing with millivolt signals.
Last edited:
KDT
Member
Oh yea, Here is my post concerning the pinning and unpinning of the TMAP connector and Ford pigtail.


Attached ThumbnailsWhen you take the new pigtail out of the pack, you will notice that there is a plastic red ring around the little terminal cavities in the end of the plug. It is this red ring that you have to disengage. I used a large paperclip and bent a "hook" on one end with a pair of needle nose pliers. I used it to pull this ring up. Be sure to pull on it where the plastic is thickest. You will have to hook it around the edge between it and the outside shell of the connector. Once it pops up you then have to take the other end of the paper clip and insert it straight in to the slot beside the terminal. There is a tab down in there holding the individual wire. once you "hit" the tab correctly, the wire with it terminal end will pull right out. You only need two of them out to put in the TMAP plug. When you unplug to connector from the TMAP sensor, you will have to disengage the ring just like you did on the pigtail. You can insert the wires that you removed from the pigtail right in. They will only go one way and once you get them lined up correctly, they will slid right in and lock. Once you have both of them in, you can push the locking ring back down and connect the wires to the 5V source and the analog input on the back of the Aeroforce. I attached the pages from the installation manual that explains the process.


dysan
Dis-Member
Just for the record, my Aerofroce boost reading was dead on with the mechanical gauge used on the dyno. The Aeroforce wideband was also accurate. I did solder and heat shrink every connection, then secured all my wiring with wire loom. Good connections and a solid ground are needed for accuracy when dealing with millivolt signals.
Is the vaccum reading with the TMAP sensor or just boost. I know you said -10 was reading on yours at idle but if I remember correctly there should be greater vaccum than that at idle right? Or just when decelerating?
Similar threads


- Replies
- 19
- Views
- 4K

- Replies
- 1
- Views
- 988


- Replies
- 35
- Views
- 6K

- Replies
- 0
- Views
- 4K


Support us!
Support Us - Become A Supporting Member Today!
Click Here For Details