All,
I decided to replace the speakers in my doors and decks with a quality speaker as the Shaker 500 sounds like crap in my opinion. After installing Infinity Kappa 682.11's in the doors and rear deck I was amazed out how good the sound was from Mid's up. This change really brought the subs in the doors in to question so knew they had to be replaced as well. I have been researching which subs I wanted for a few weeks and decided on the CDT HD800CF's. I wanted to keep the factory look so went another route than the Shelby Kicker upgrade. The total upgrade will be done in two parts, the first part being the replacement of the door subs with a quality piece. The second stage will be adding a sub to the rear deck and adding an amp to the sub and door subs. This write up is for stage 1 only.
I did not put any pictures in showing the removal of the door skin as there are numerous resources to see this.
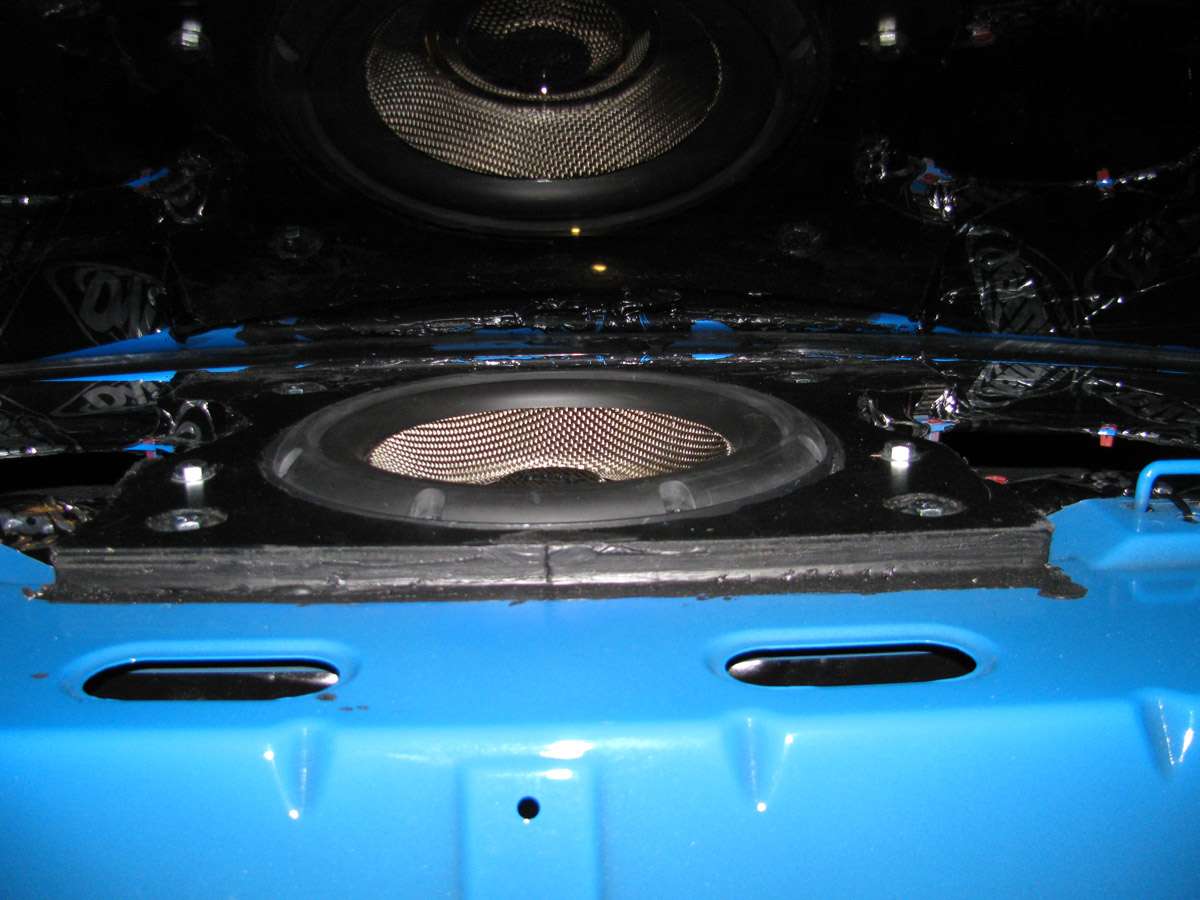
#1 - Here is the stock door sub with the grille removed. As others have mentioned there is a bolt in the rear of the sub holding it in to the enclosure.
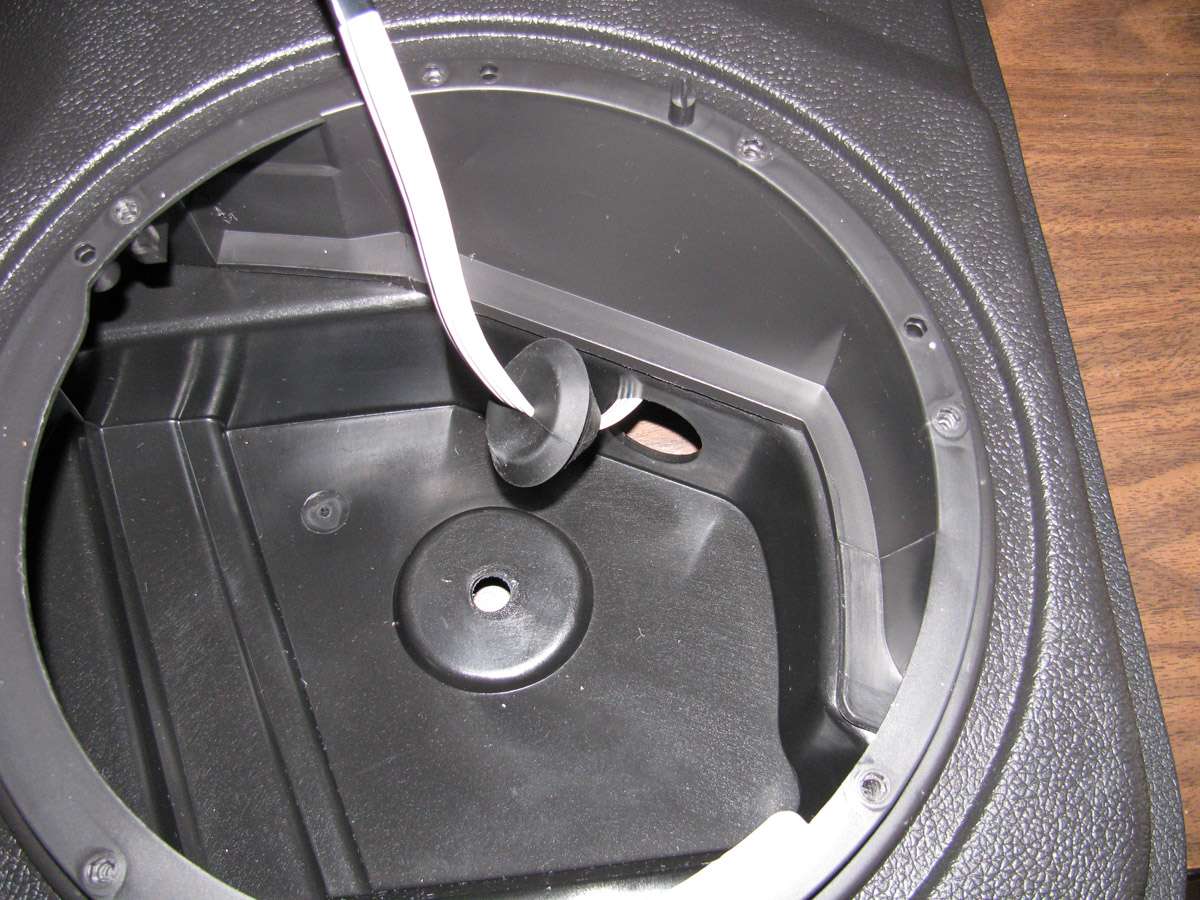
#2 - Remove the bolts (fronts and rear) and lift sub from door skin. To finish removal you must pull the rubber grommet holding the wires from the opening.
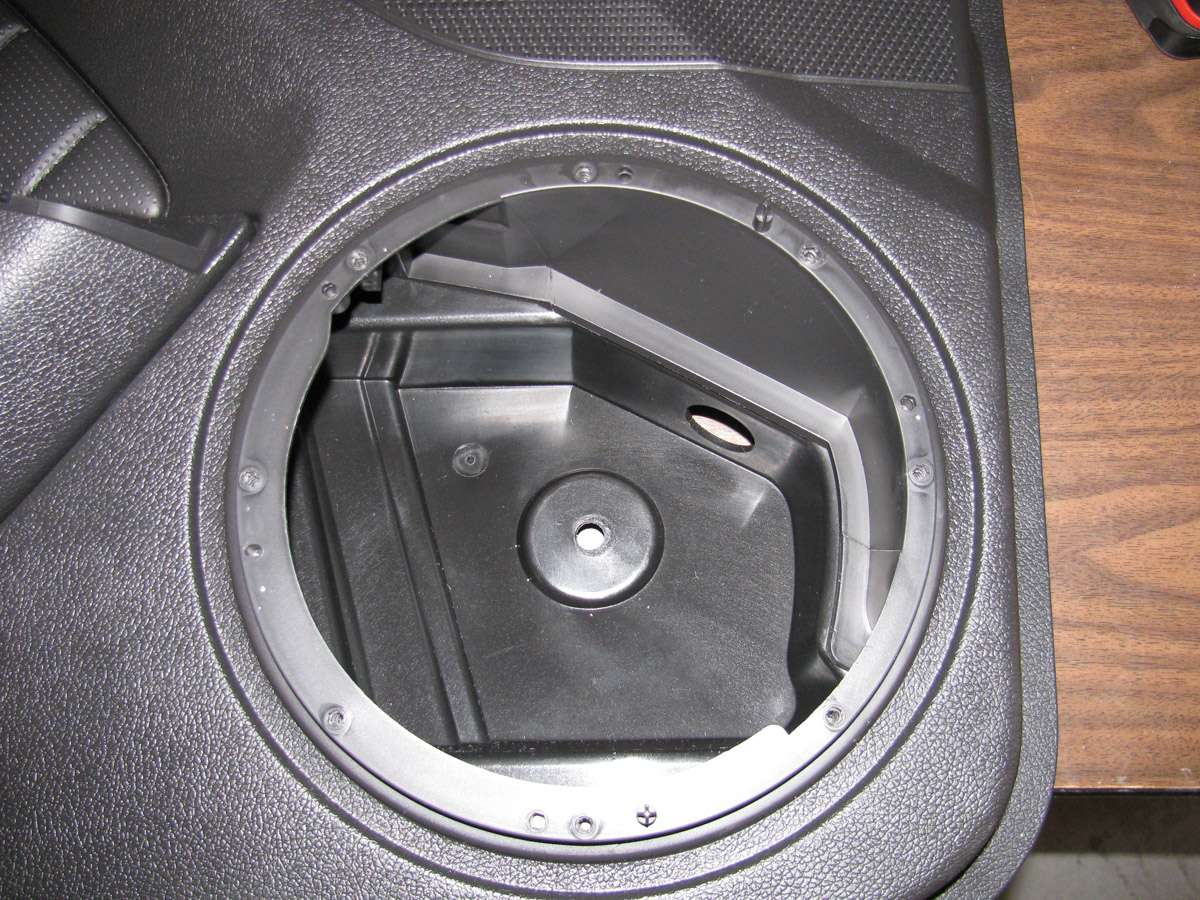
#3 - Here is the empty enclosure
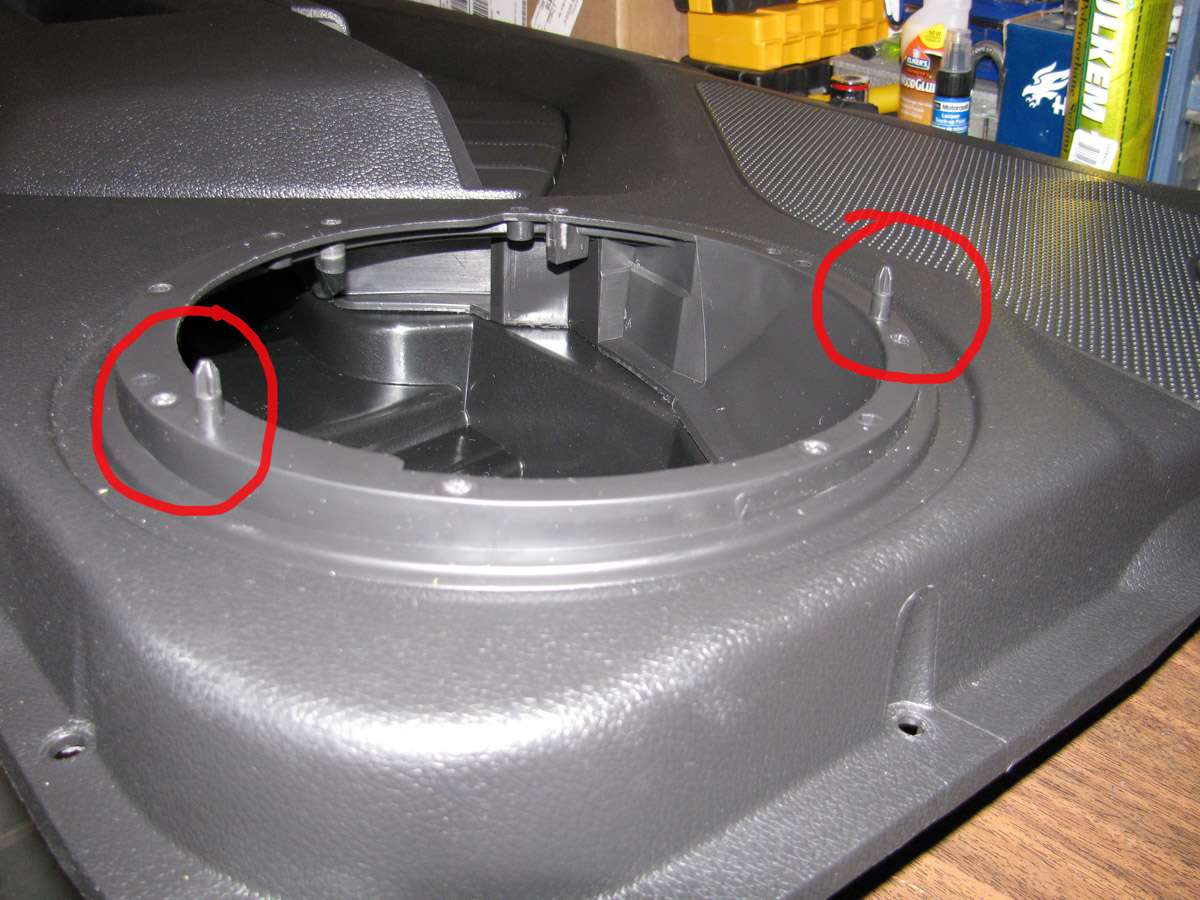
#4 - You will need to remove the two factory guides
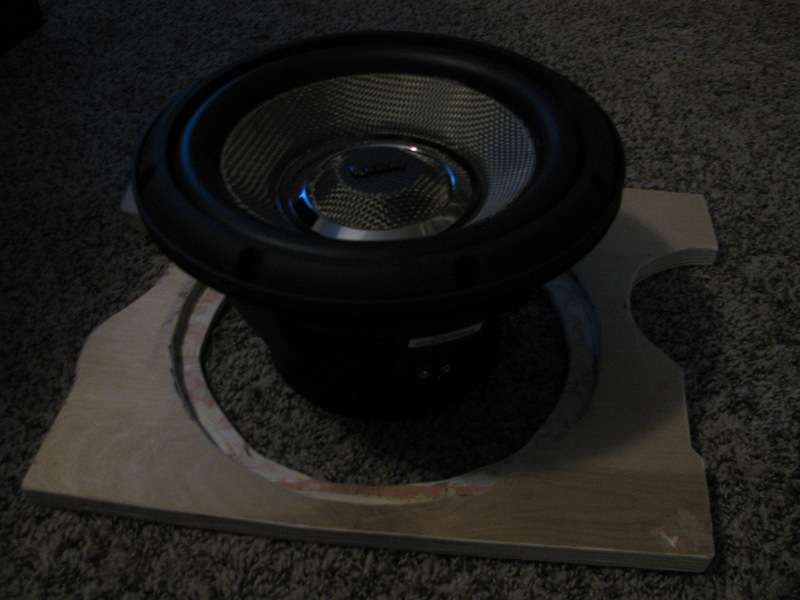
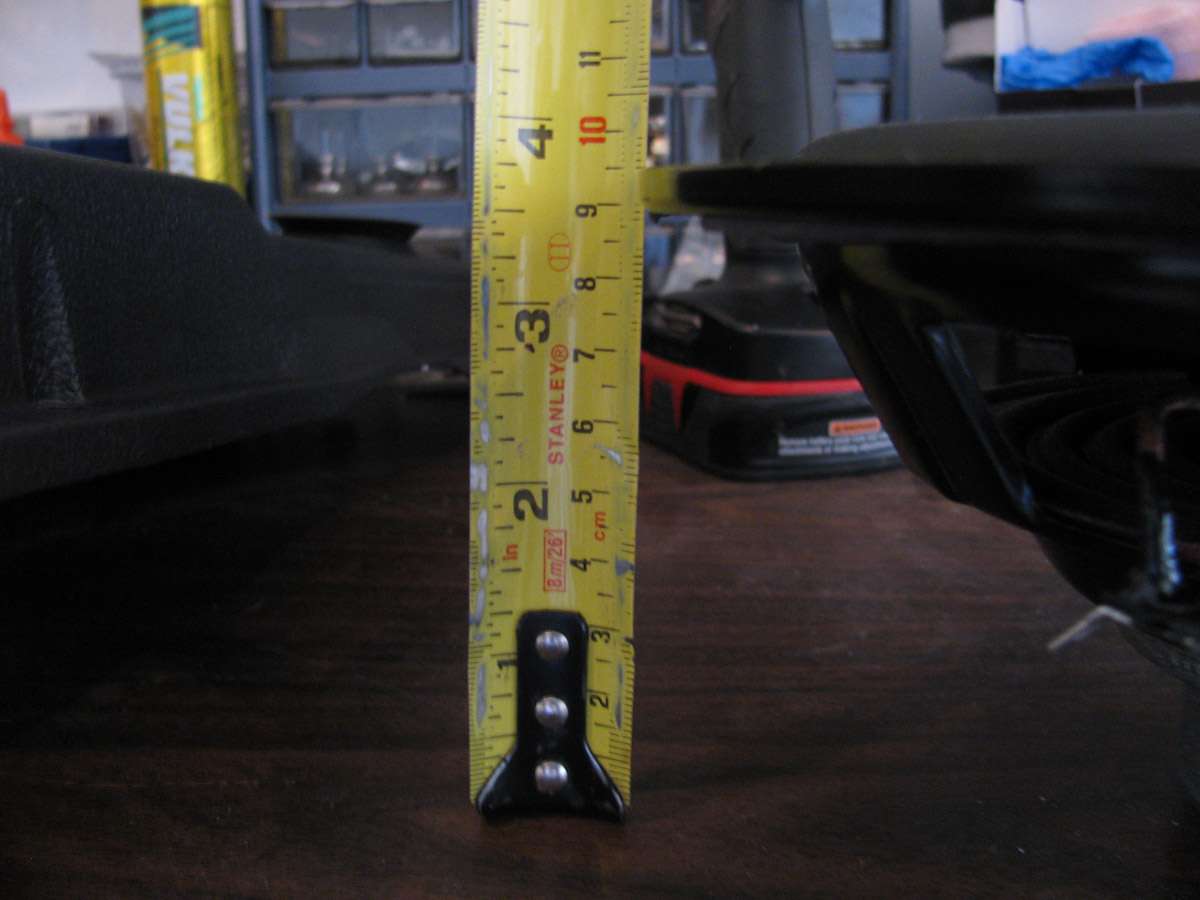
#5 - Old sub versus new one... The factory sub has a top mount depth of 3.5". This is an acceptable depth but as others have mentioned and I will again... the depth is not the issue, it is the shape of the enclosure. The speaker I chose (CDT HD800CF) is 3.69" in depth so I knew I was in for a little remodeling of the factory box. I want to preface that I do not have a heat gun which is why I cut my box. If I had a heat gun I could have most likely remolded the plastic to fit the sub. That being said here are the factory and new subs. Kicker has some low profile subs in the dual 1ohm and dual 2ohm solutions that I hear sound great. I wanted a warmer speaker that was more modeled for rock, heavy metal, reggae, and occasionally top 40. I didn't want something to just thump, I wanted something to accentuate the Infinity Kappa's I installed in the doors and deck.

#6 - I started with a dremel and a cutting wheel and started with small area's I knew I would need to remove. I test fit the speaker and then would cut a little more, test/repeat, etc. Once I got it fairly close I switched to a sanding extension so I could fine tune the opening and remove any of the plastic fragments from cutting.
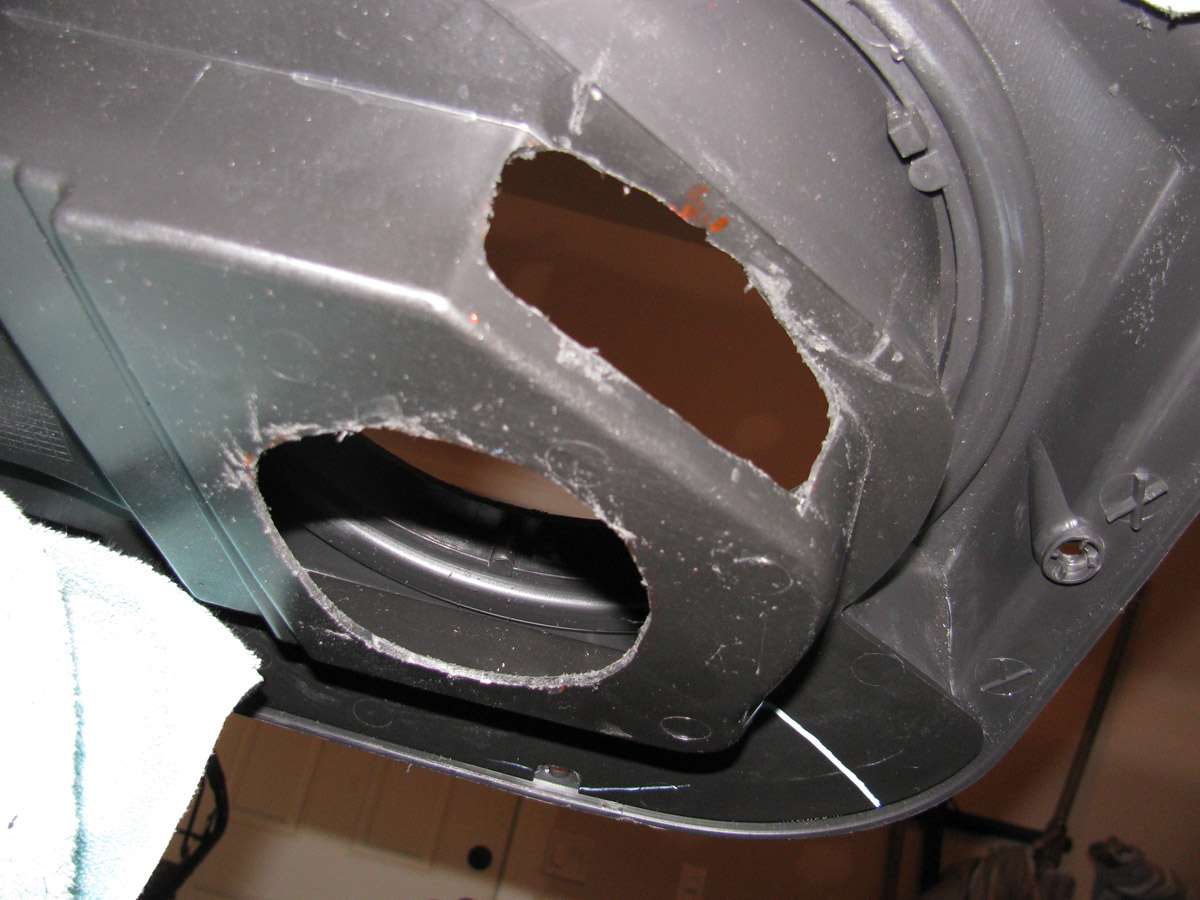
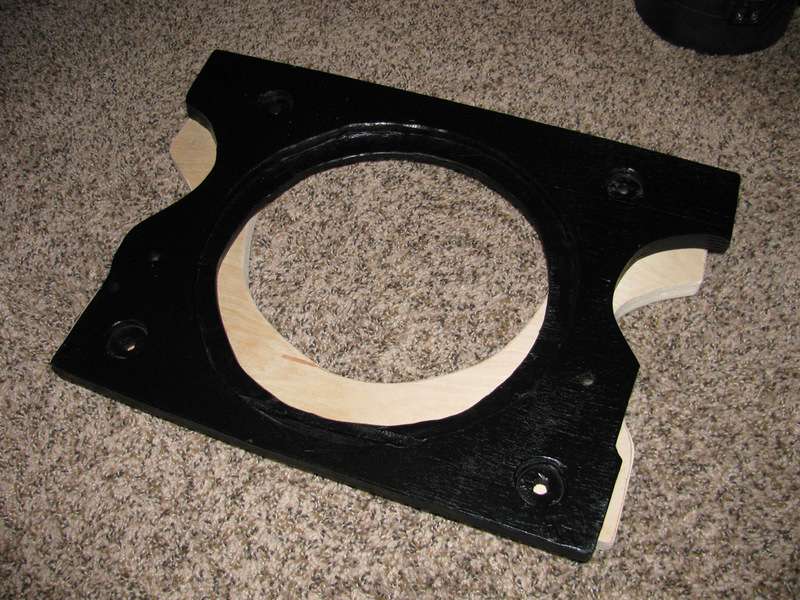
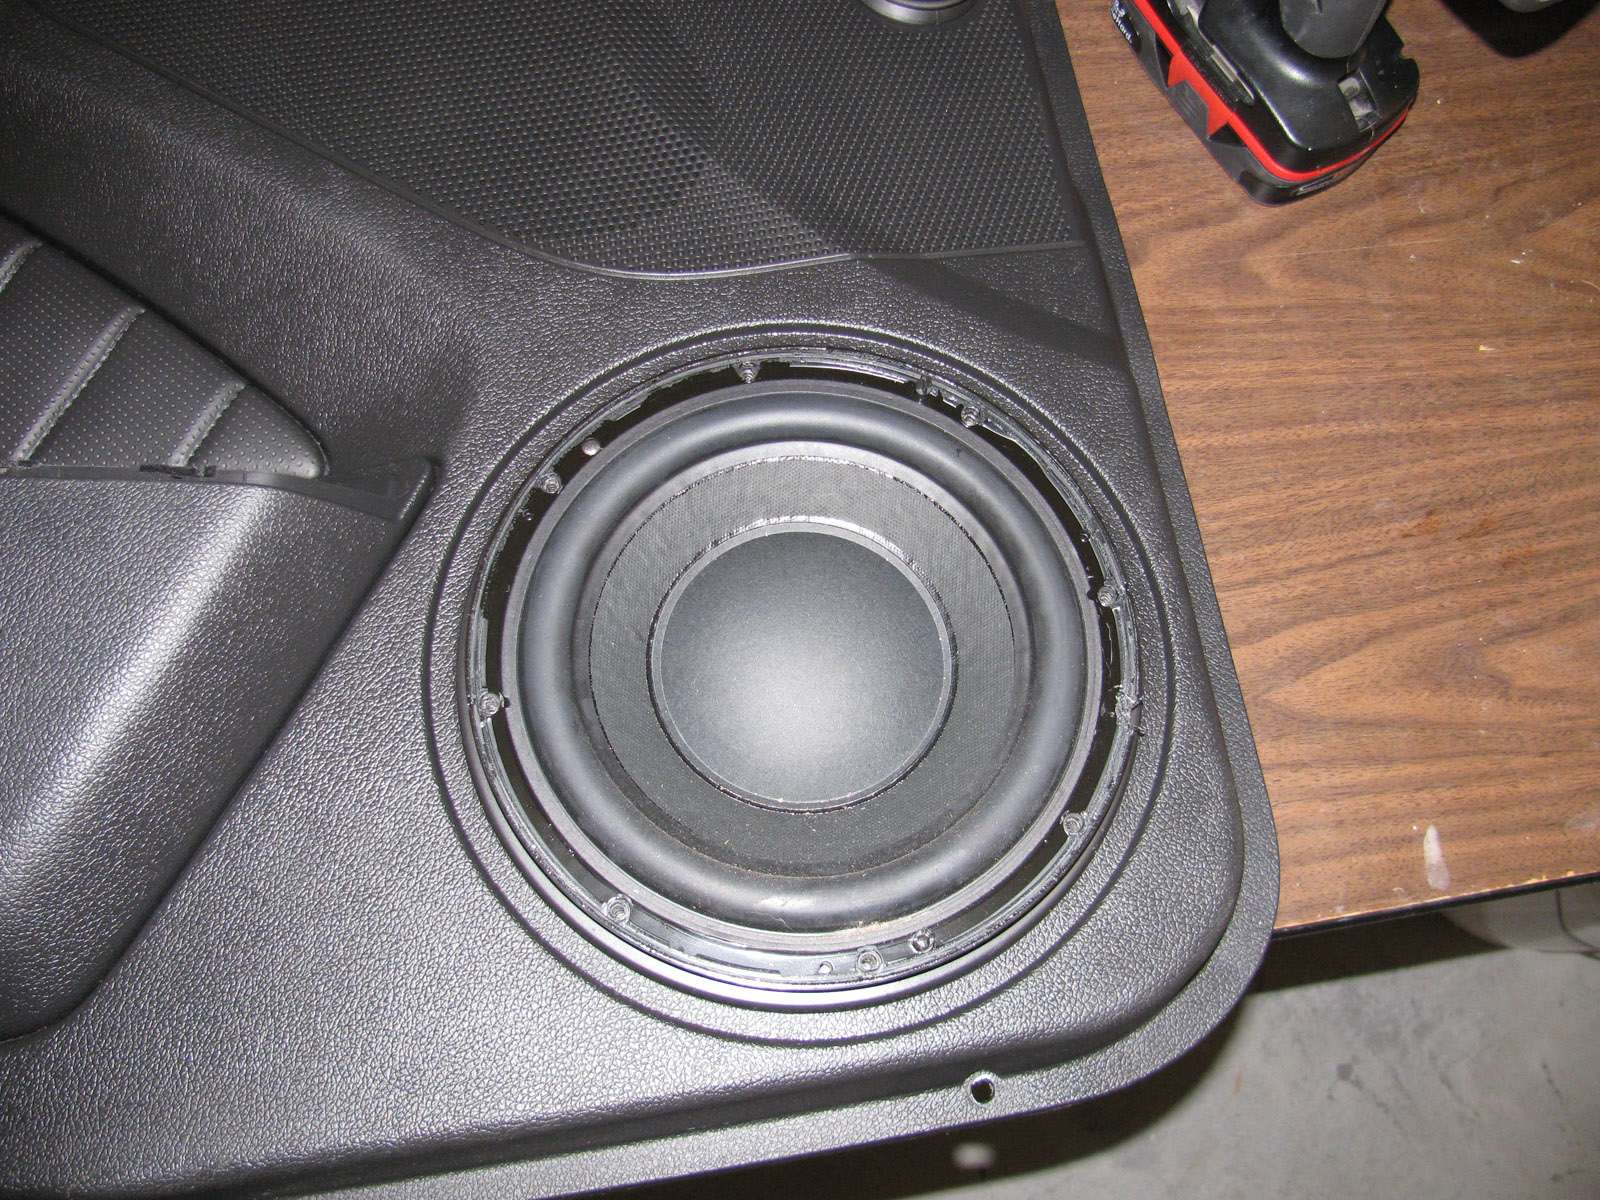
#7 - Final fit. After I got the enclosure trimmed to my liking I started working on the speaker. Originally I modified the plastic speaker grill to match the holes on the sub itself. After doing this I placed the sub on the door skin and realized the sub holes were inset about 1/8" from the door skin. I didn't want to half ass the install and risk stripping the door skin so I modified the speakers... this is not for the faint of heart and YOU MUST BE EXTREMELY CAREFUL!!!! I took my dremel and cutting wheel and removed the exterior edge of the basket at each screw hole. I forgot to take a picture but just imaging the hole being extended outward with no basket edge. You can see it in the last picture below before the beauty rings... If this was a competition setup I would not have done this as you need the rigidity of the basket. I am merely using mine as a midbass so was not concerned. I also cut the fiber gasket on the top of the sub down so it as about a 1/16th of an inch taller than the basket. You can see it in the picture of the sub above. I had to do this or the factory beauty ring would have been almost an inch from the door skin.
After I got the sub screwed in I let it sit for about a half hour just to let the plastic of the enclosure stretch/move to its final resting place. Once done I used a thick bead of silicone around the magnet structure an the bottom of the door enclosure. This should prevent any air leaks and will stay flexible so it won't crack down the road.
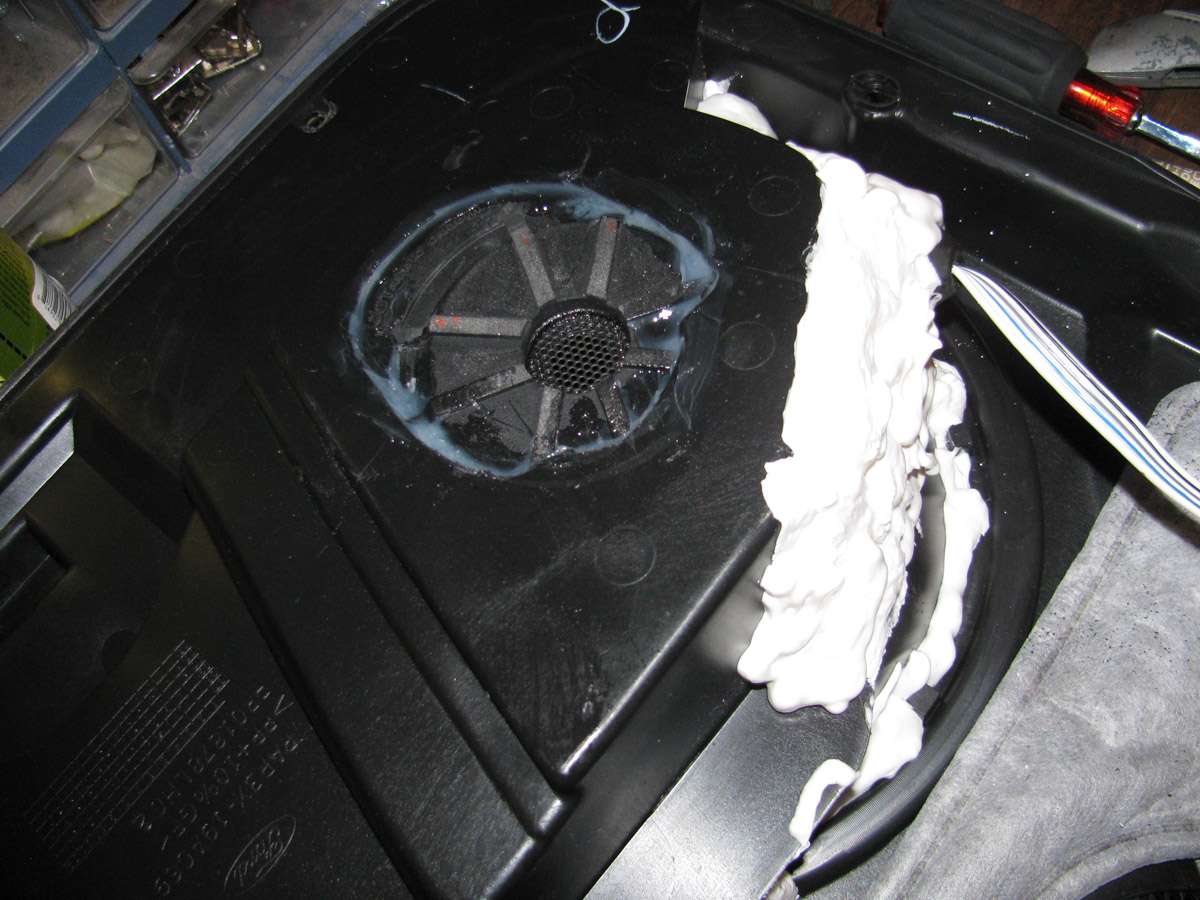
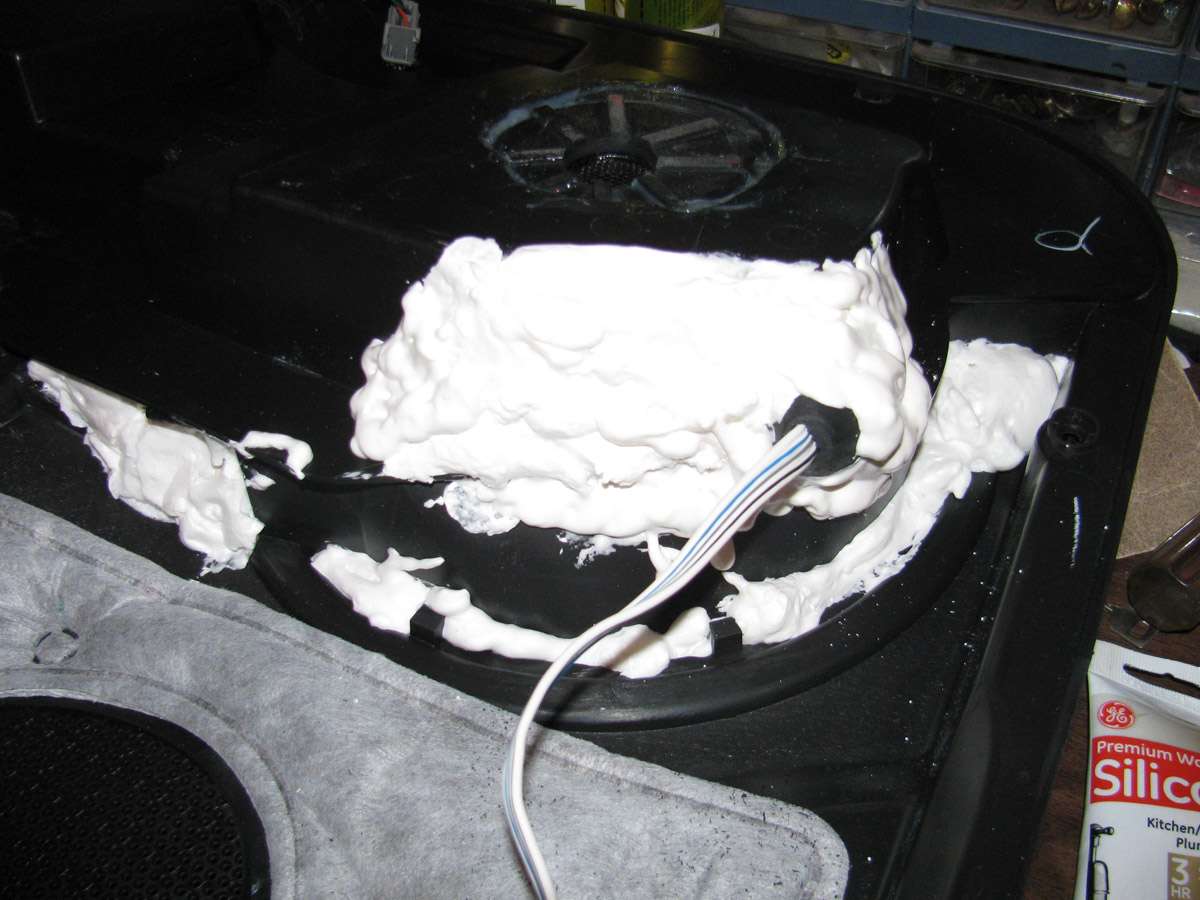
#8 - With the side of the enclosure I could not simply squirt some silicone on it. For this I used spray foam. Please note this is a temporary fix as I will need to remove the sub for Stage 2 when I put an amp to it. Once amplified I will be using fiberglass to seal the enclosure permanently.
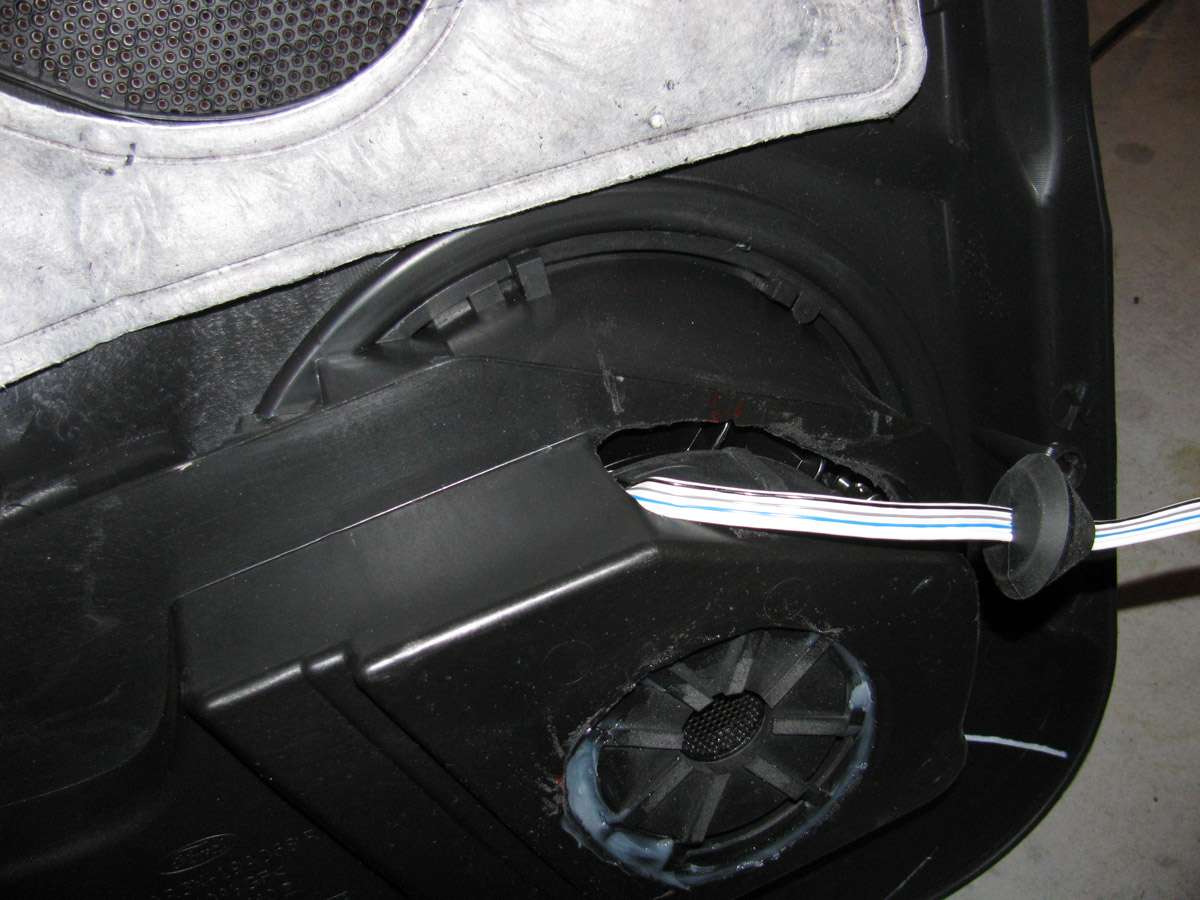
To ensure I did not get any foam in to the speaker woofer area I folded the speaker wire over and ran it along the bottom of the magnet to act as a barrier. I let the foam dry over night and then covered it with HVAC tape to ensure it was air tight.
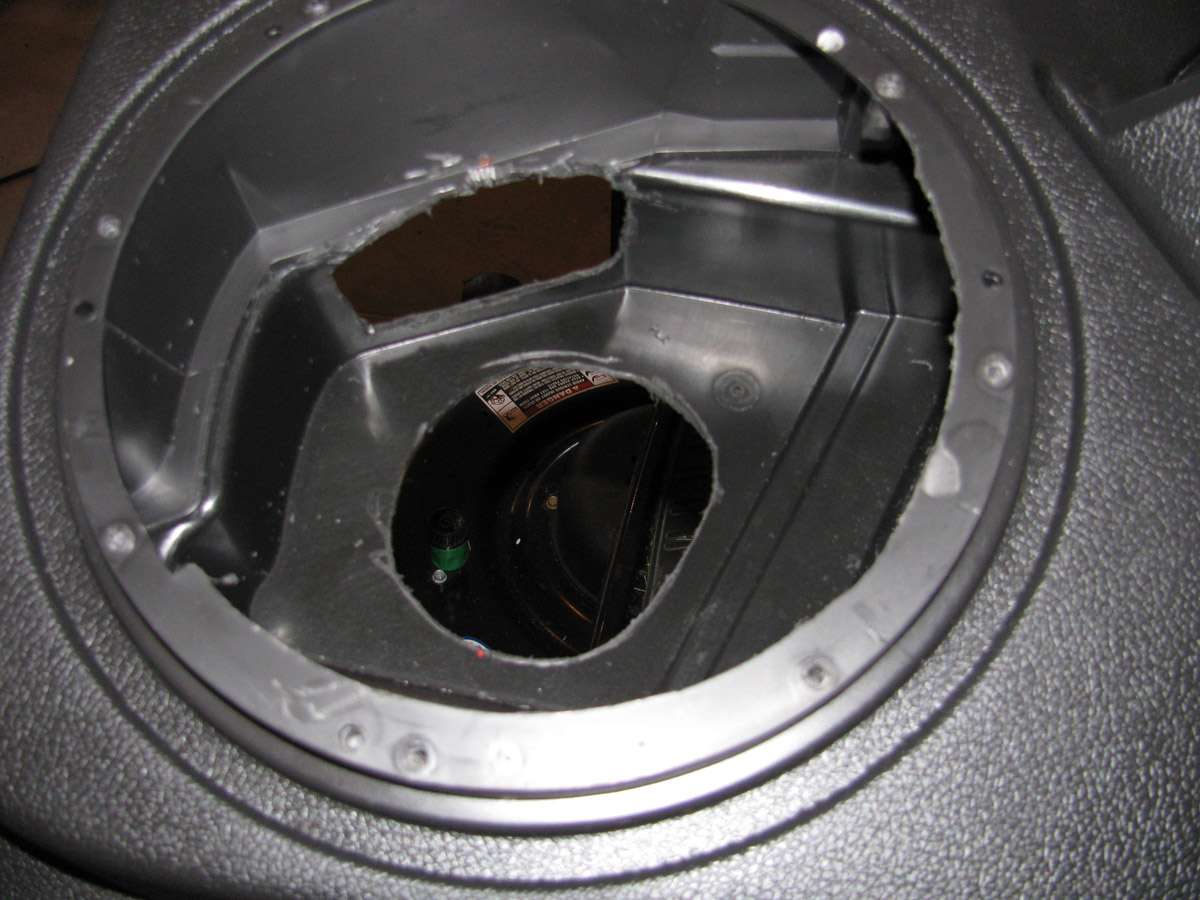
#9 - After everything was sealed I flipped the door skin over so I could see the top of the sub. I took clear silicone (black would be better) and filled in the openings I cut in the sub frame for the screws. probably not necessary but I was not taking chances of having a leak or rattle.
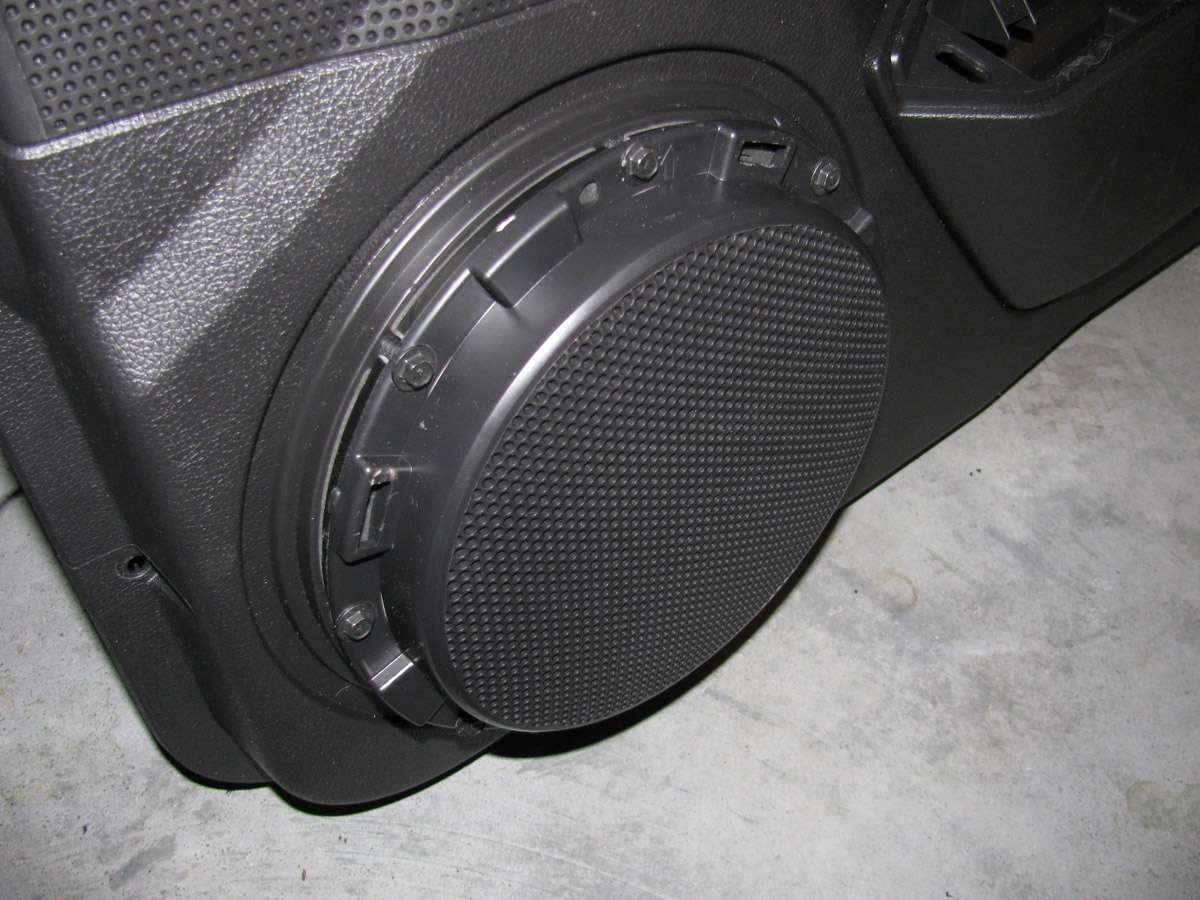
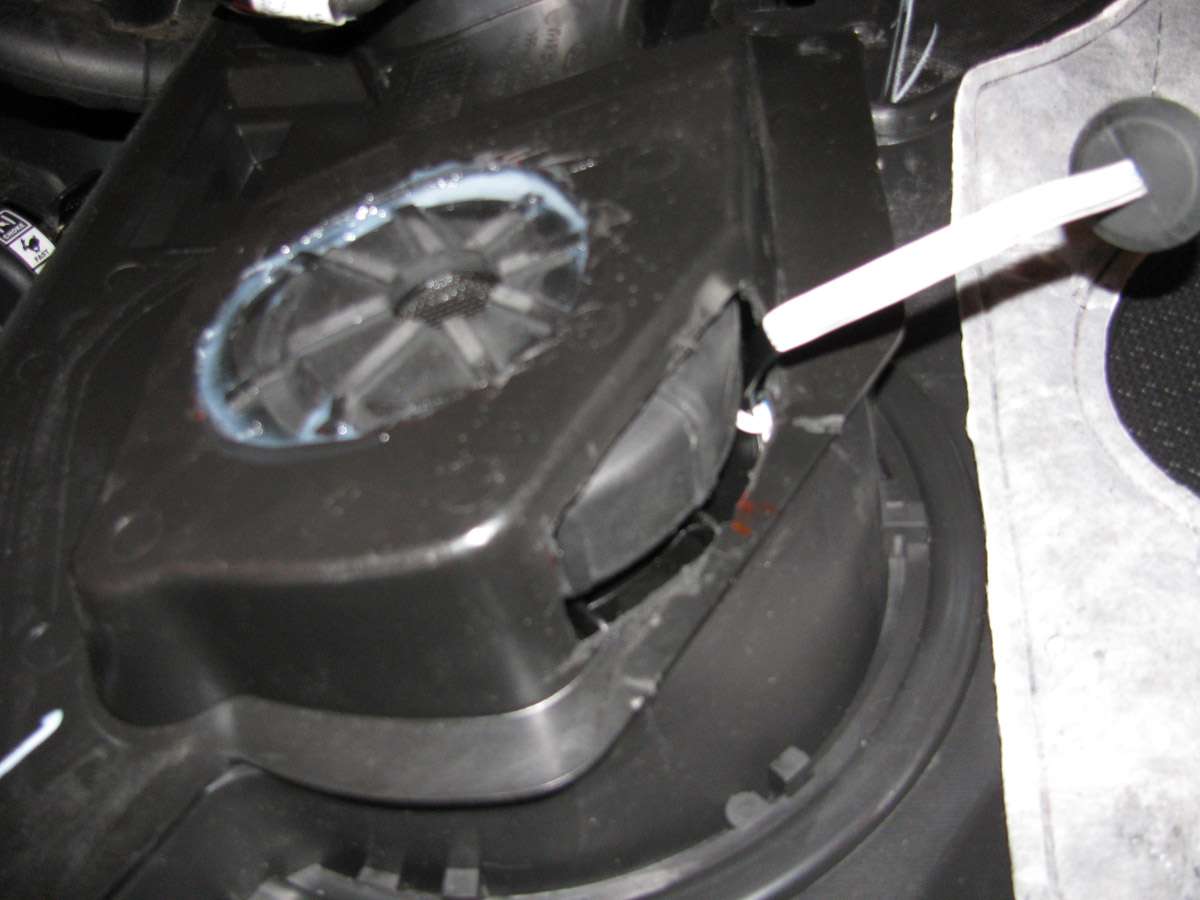
Final Step was to pop on the factory trim rings...

After everything was done I put the beauty rings on so I could see how the finished product would look. The skin sits about a half inch farther out than factory but without staring at it or knowing the speakers were swapped I doubt anyone would ever notice.
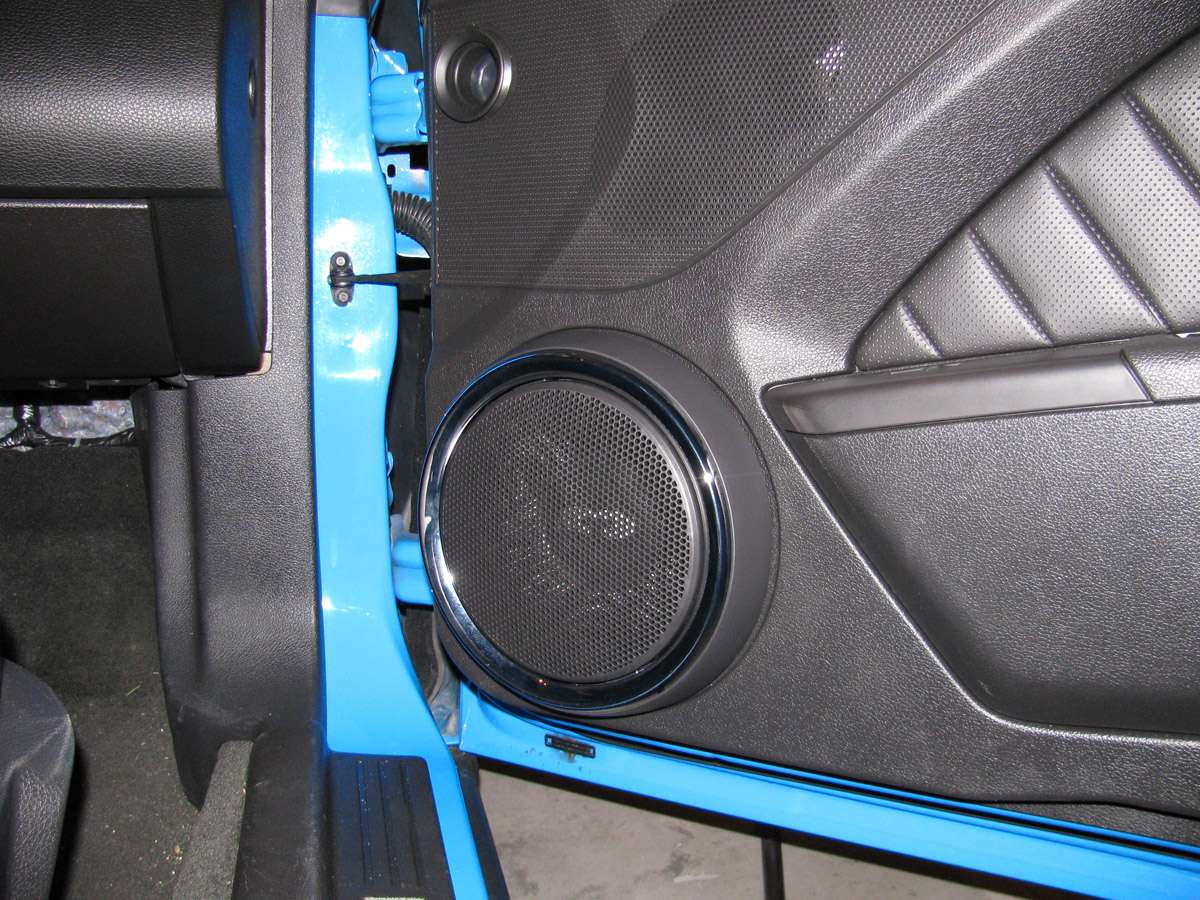
With the skins back on the car (did not screw them on yet) I could test for rattles and or issues... There was a small rattle in the rear of the drivers door skin but when I screwed the skin down everything was sealed and rattle free. I moved to the passenger side and did the same. As with the drivers side there was a small amount of rattling that went away when the skin was screwed back on. All in all, I am very happy with the sound. I flipped through channels and everything sounded clearer with more mids and some depth to the music that was not there previously. Scrolled through Volbeat's "Beyond Hell-Above Heaven" and it sounded much better! Fallen, 7 Shots, New Day, and Still Counting sounded amazing! It definitely needs to have a sufficient amp and to have the crossover point lowered so it can fill in more bass.
I am still running off the factory amps so two things are certain... I am not running as clean of a signal as I could be, and I am severely underpowering the subs. I have all of 15 minutes of break in time on these and can already notice a vast improvement in sound quality... can't wait until they are fully broken in to see how great they sound!!!
I decided to replace the speakers in my doors and decks with a quality speaker as the Shaker 500 sounds like crap in my opinion. After installing Infinity Kappa 682.11's in the doors and rear deck I was amazed out how good the sound was from Mid's up. This change really brought the subs in the doors in to question so knew they had to be replaced as well. I have been researching which subs I wanted for a few weeks and decided on the CDT HD800CF's. I wanted to keep the factory look so went another route than the Shelby Kicker upgrade. The total upgrade will be done in two parts, the first part being the replacement of the door subs with a quality piece. The second stage will be adding a sub to the rear deck and adding an amp to the sub and door subs. This write up is for stage 1 only.
I did not put any pictures in showing the removal of the door skin as there are numerous resources to see this.
#1 - Here is the stock door sub with the grille removed. As others have mentioned there is a bolt in the rear of the sub holding it in to the enclosure.
#2 - Remove the bolts (fronts and rear) and lift sub from door skin. To finish removal you must pull the rubber grommet holding the wires from the opening.
#3 - Here is the empty enclosure
#4 - You will need to remove the two factory guides
#5 - Old sub versus new one... The factory sub has a top mount depth of 3.5". This is an acceptable depth but as others have mentioned and I will again... the depth is not the issue, it is the shape of the enclosure. The speaker I chose (CDT HD800CF) is 3.69" in depth so I knew I was in for a little remodeling of the factory box. I want to preface that I do not have a heat gun which is why I cut my box. If I had a heat gun I could have most likely remolded the plastic to fit the sub. That being said here are the factory and new subs. Kicker has some low profile subs in the dual 1ohm and dual 2ohm solutions that I hear sound great. I wanted a warmer speaker that was more modeled for rock, heavy metal, reggae, and occasionally top 40. I didn't want something to just thump, I wanted something to accentuate the Infinity Kappa's I installed in the doors and deck.
#6 - I started with a dremel and a cutting wheel and started with small area's I knew I would need to remove. I test fit the speaker and then would cut a little more, test/repeat, etc. Once I got it fairly close I switched to a sanding extension so I could fine tune the opening and remove any of the plastic fragments from cutting.
#7 - Final fit. After I got the enclosure trimmed to my liking I started working on the speaker. Originally I modified the plastic speaker grill to match the holes on the sub itself. After doing this I placed the sub on the door skin and realized the sub holes were inset about 1/8" from the door skin. I didn't want to half ass the install and risk stripping the door skin so I modified the speakers... this is not for the faint of heart and YOU MUST BE EXTREMELY CAREFUL!!!! I took my dremel and cutting wheel and removed the exterior edge of the basket at each screw hole. I forgot to take a picture but just imaging the hole being extended outward with no basket edge. You can see it in the last picture below before the beauty rings... If this was a competition setup I would not have done this as you need the rigidity of the basket. I am merely using mine as a midbass so was not concerned. I also cut the fiber gasket on the top of the sub down so it as about a 1/16th of an inch taller than the basket. You can see it in the picture of the sub above. I had to do this or the factory beauty ring would have been almost an inch from the door skin.
After I got the sub screwed in I let it sit for about a half hour just to let the plastic of the enclosure stretch/move to its final resting place. Once done I used a thick bead of silicone around the magnet structure an the bottom of the door enclosure. This should prevent any air leaks and will stay flexible so it won't crack down the road.
#8 - With the side of the enclosure I could not simply squirt some silicone on it. For this I used spray foam. Please note this is a temporary fix as I will need to remove the sub for Stage 2 when I put an amp to it. Once amplified I will be using fiberglass to seal the enclosure permanently.
To ensure I did not get any foam in to the speaker woofer area I folded the speaker wire over and ran it along the bottom of the magnet to act as a barrier. I let the foam dry over night and then covered it with HVAC tape to ensure it was air tight.
#9 - After everything was sealed I flipped the door skin over so I could see the top of the sub. I took clear silicone (black would be better) and filled in the openings I cut in the sub frame for the screws. probably not necessary but I was not taking chances of having a leak or rattle.
Final Step was to pop on the factory trim rings...
After everything was done I put the beauty rings on so I could see how the finished product would look. The skin sits about a half inch farther out than factory but without staring at it or knowing the speakers were swapped I doubt anyone would ever notice.
With the skins back on the car (did not screw them on yet) I could test for rattles and or issues... There was a small rattle in the rear of the drivers door skin but when I screwed the skin down everything was sealed and rattle free. I moved to the passenger side and did the same. As with the drivers side there was a small amount of rattling that went away when the skin was screwed back on. All in all, I am very happy with the sound. I flipped through channels and everything sounded clearer with more mids and some depth to the music that was not there previously. Scrolled through Volbeat's "Beyond Hell-Above Heaven" and it sounded much better! Fallen, 7 Shots, New Day, and Still Counting sounded amazing! It definitely needs to have a sufficient amp and to have the crossover point lowered so it can fill in more bass.
I am still running off the factory amps so two things are certain... I am not running as clean of a signal as I could be, and I am severely underpowering the subs. I have all of 15 minutes of break in time on these and can already notice a vast improvement in sound quality... can't wait until they are fully broken in to see how great they sound!!!