I got 2 holes rusted through my driver's side floorpan :(

DieHarder

Senior Member
Joined
Nov 9, 2019
Posts
1,445
Reaction score
745
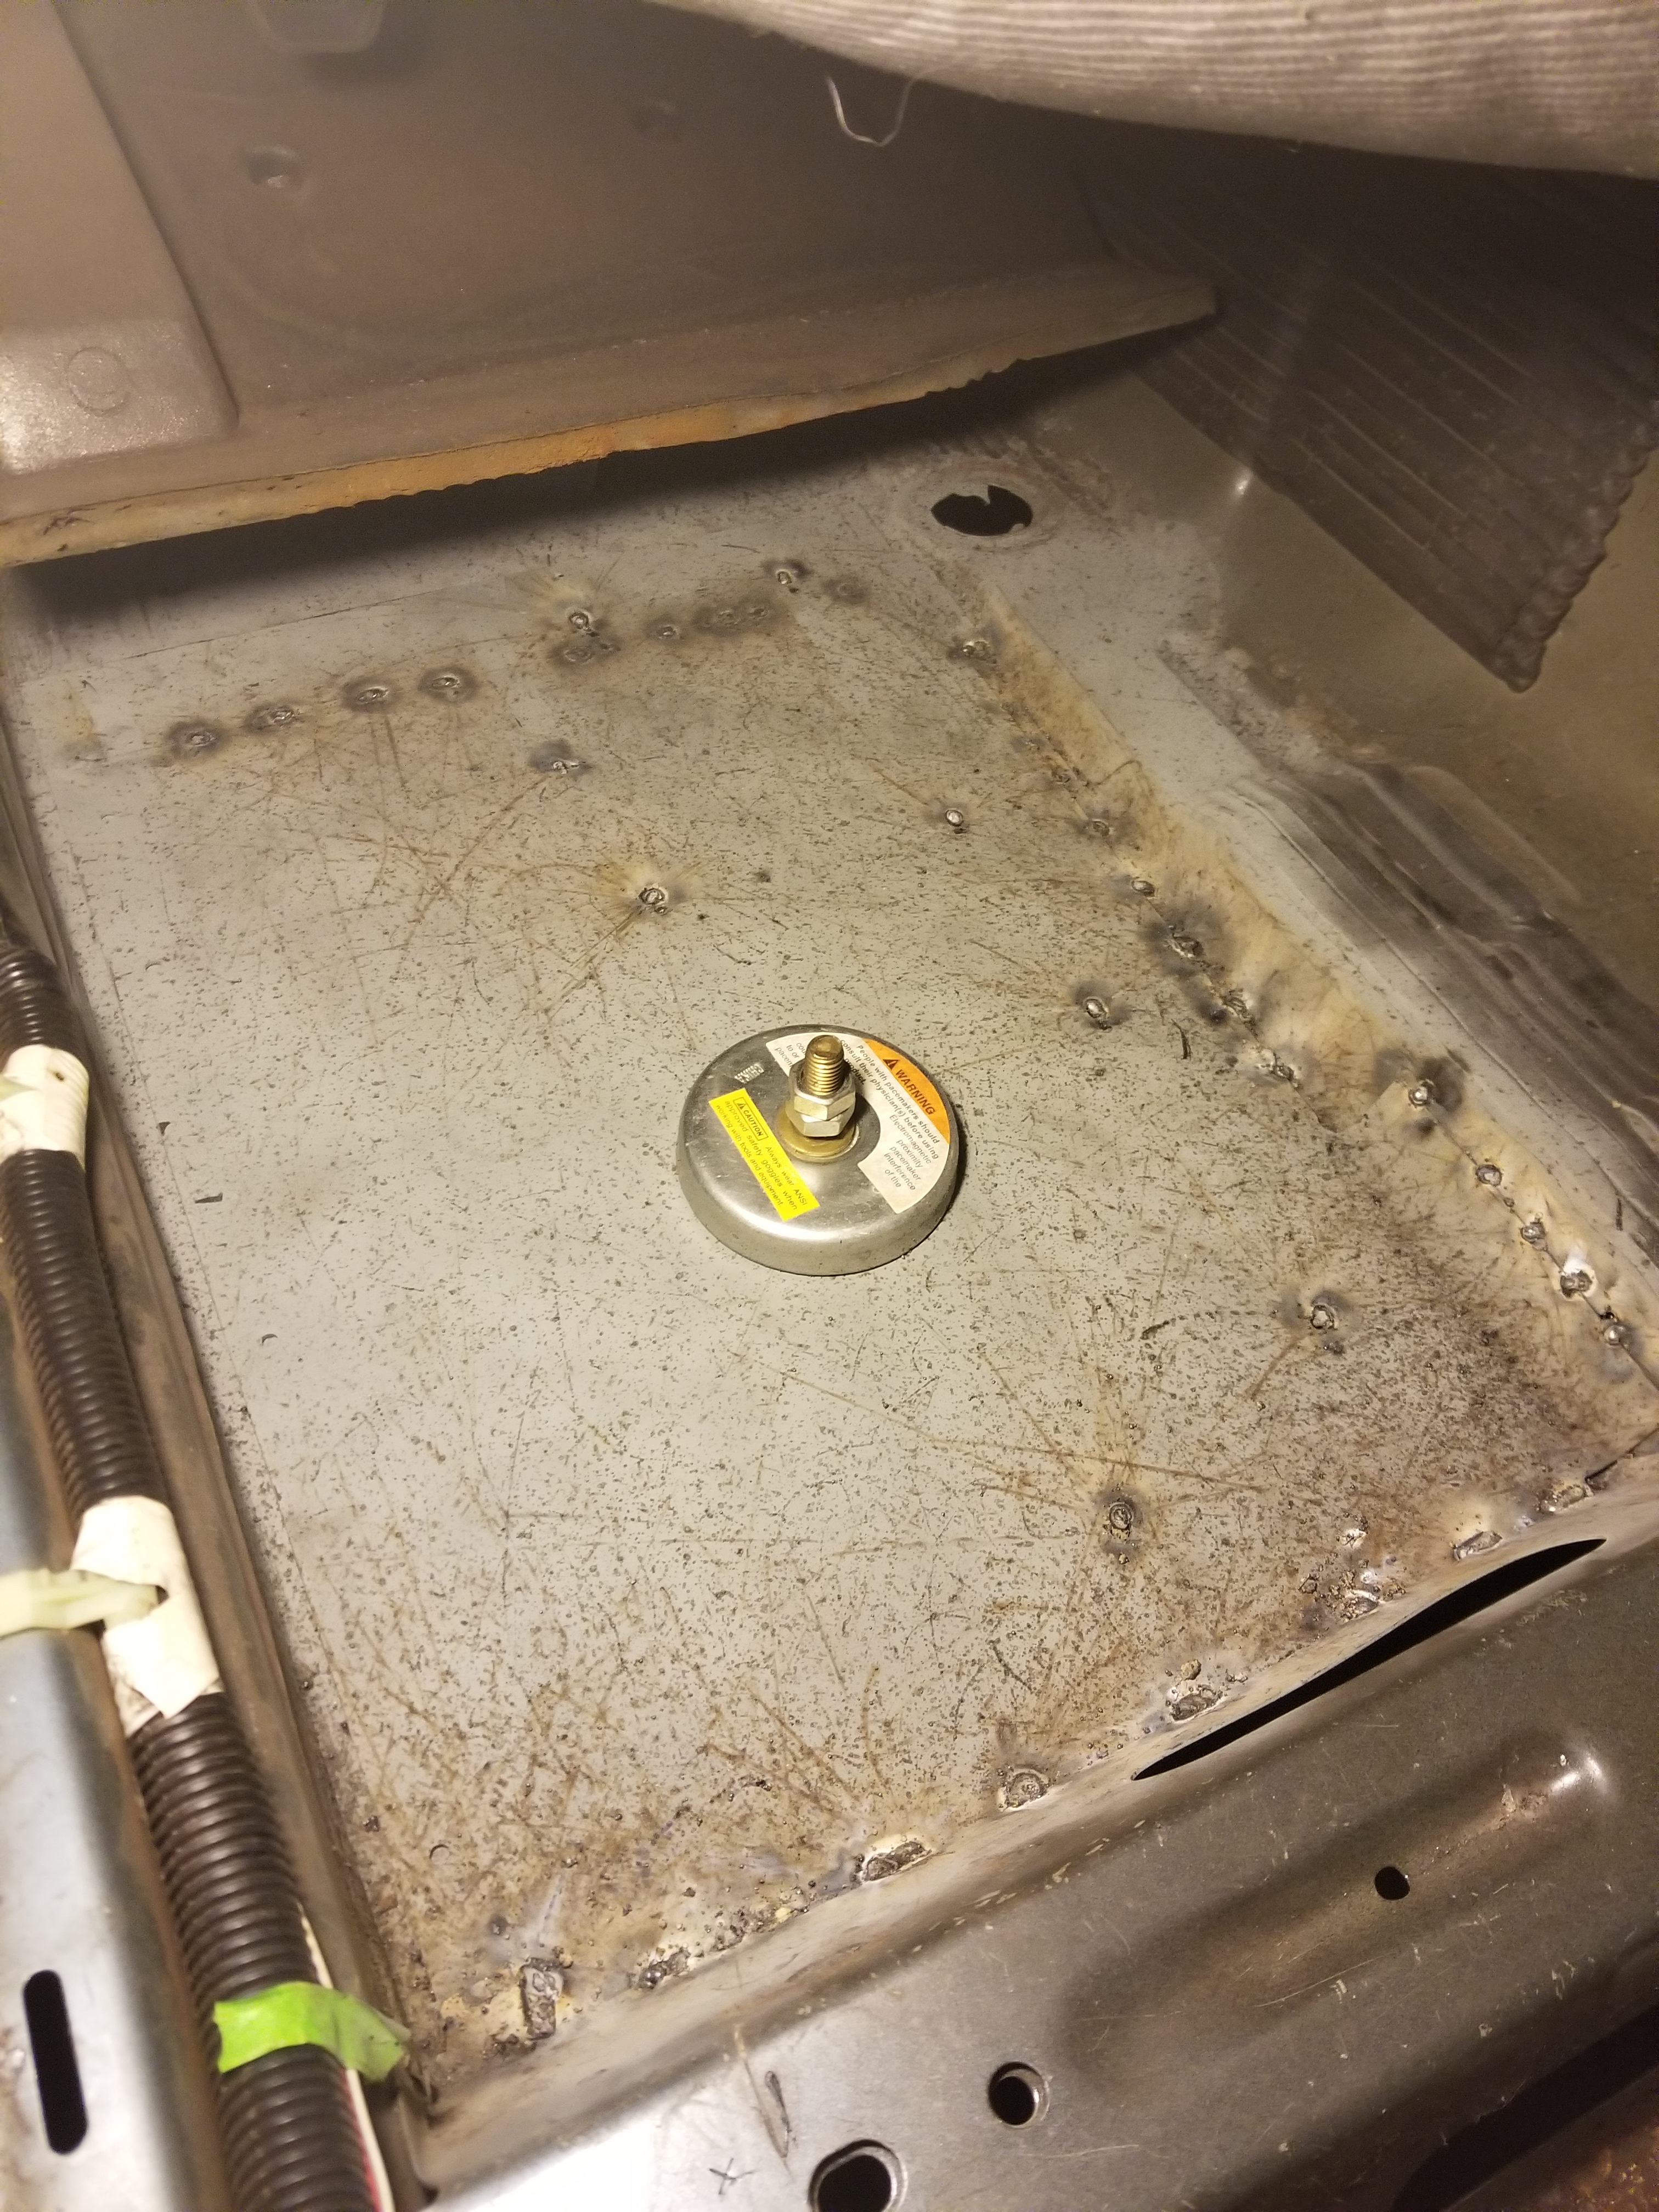
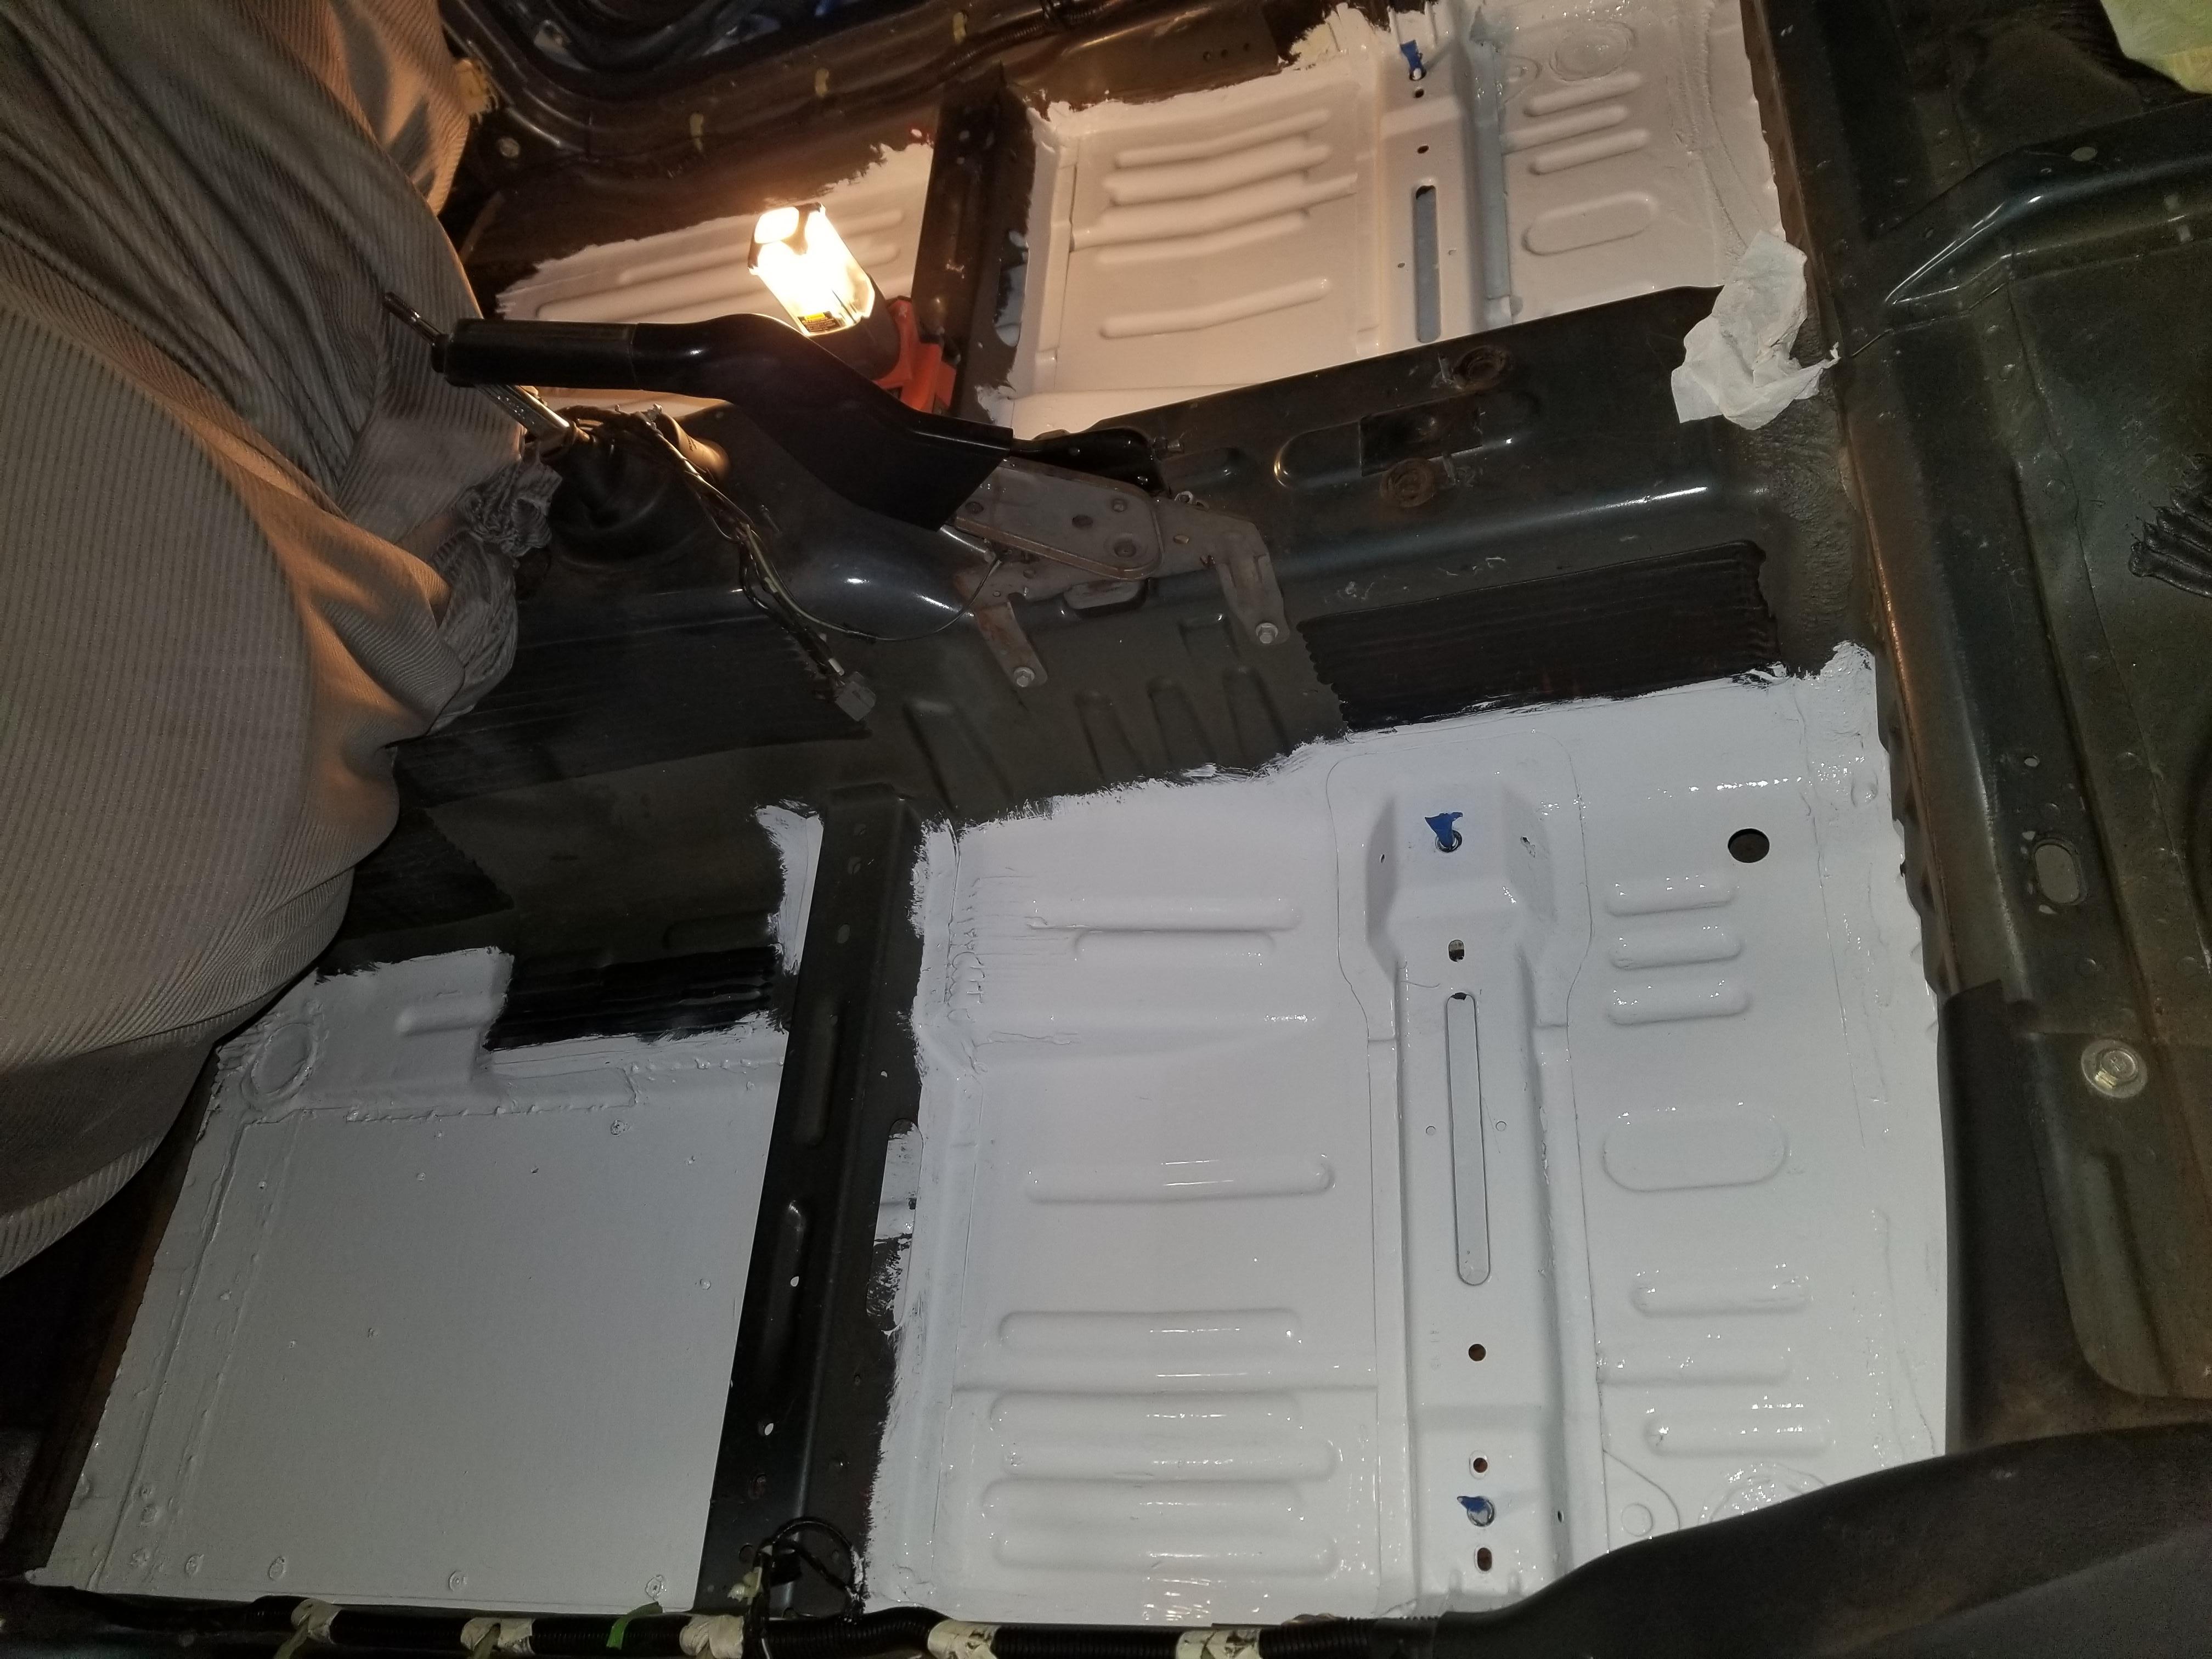
I'm surprised. The subframe is not as bad as I would have thought judging by what the floor looked like. Just a suggestion...you might consider hiring someone with the right equipment to do the detail welding. Shouldn't be too much and I've found a few examples of guys who do that on Craig's list. Might be worth it.
 

ghunt81

New parts on old junk!
S197 Team Member
Joined
Jan 20, 2016
Posts
1,074
Reaction score
160
Location
Clarksburg, WV
There was a fair bit of rust on the forward section of the top flange of the subframe, where it was against the very rusty part of the floor. In this pic I had already done some work with the grinder.

And...nah. This car is already 16 years old, I'm going to do this repair to the best of my abilities and I'm sure it will last the remainder of the lifetime that this car will give me. I'm not too concerned about it being completely welded in.
 

DieHarder

Senior Member
Joined
Nov 9, 2019
Posts
1,445
Reaction score
745
Recommend welding it as solid as possible and you might want to consider adding subframe connectors. I installed Hotchkiss on mine. Not for the floor of course but more for strength and it doubles as a jacking rail.

https://www.hotchkis.net/product/20...me-connectors-from-hotchkis-sport-suspension/
Cheapest I've seen it is around $255 - https://www.jegs.com/i/Hotchkis/515/4016/10002/-1

BMR - $150 - https://www.jegs.com/i/BMR+Fabricat...MIsfvVmbTY7wIVLAJMCh227Q7EEAQYCCABEgLY2vD_BwE

BMR Boxed - best - $350 - https://www.americanmuscle.com/bmr-...VLAJMCh227Q7EEAQYAiABEgJP2PD_BwE&gclsrc=aw.ds
 

DieHarder

Senior Member
Joined
Nov 9, 2019
Posts
1,445
Reaction score
745
Finally ran across a TSB that covers all of the likely problem areas for water leaking into the cabin and floor boards.
 

Attachments

  • 07-14-06.pdf
    133.9 KB · Views: 18

ghunt81

New parts on old junk!
S197 Team Member
Joined
Jan 20, 2016
Posts
1,074
Reaction score
160
Location
Clarksburg, WV
I should probably check that bulkhead pinch weld while I'm doing all this...seems like a weird place for water to leak in but who knows, this car is 16 years old.
 

DieHarder

Senior Member
Joined
Nov 9, 2019
Posts
1,445
Reaction score
745
Keep us updated w/pics on progress. Looking forward to seeing how your floor turns out.

For leak sealing in addition to sealing all of the grommets and that pinch weld I also ran a bead/filled in the space at the base of the windshield. It may not have been necessary but I figured I might as well since I had removed the cowls and able to get to it.
 

ghunt81

New parts on old junk!
S197 Team Member
Joined
Jan 20, 2016
Posts
1,074
Reaction score
160
Location
Clarksburg, WV
No pics today but I got my new patch panel cut and shaped and drilled a few holes for plug welds along the subframe. I went a little overboard, I bought 16 gauge plate for the replacement panel not even thinking about how thick it was- well, at least I know it'll be strong?

Also went over the repair area with a flap wheel to get most of the remaining rust and get areas to bare metal where I will weld, and sprayed it and the patch panels down with weld-through primer.
 

DieHarder

Senior Member
Joined
Nov 9, 2019
Posts
1,445
Reaction score
745
Picked up my son's car from the body shop. Turns out their fix was sheet metal screwed to the good parts of the rear floor and then encapsulated between several sheets of fiberglass. Appears to be pretty strong and probably good enough to last my son through college.

I then put down 80mil butyl sound deadener both front and rear so it's quiet as well. Given it's got fiberglass in all of the trouble spots I expect it'll last a while. A couple more checks and I'll take it back to the car wash and check everything again for leaks. If I can't find anything I'll call it good. Lastly, I'll add it the list of items to check in the spring.

IMG-1976.jpg IMG-1970.jpg
Rear driver's side Underneath

IMG-1974.jpg IMG-1975.jpg
Driver's floor

IMG-1982.jpg IMG-1983.jpg
Butyl sound deadener

IMG-1982.jpg
 

DieHarder

Senior Member
Joined
Nov 9, 2019
Posts
1,445
Reaction score
745
Man, you did nick that brake line pretty deep. Not sure I'd trust it...
 

ghunt81

New parts on old junk!
S197 Team Member
Joined
Jan 20, 2016
Posts
1,074
Reaction score
160
Location
Clarksburg, WV
Well I got my patch panel at least partially tacked in tonight. Please forgive the ugly ass welds, I have a flux core mig and it's also hard to find a good setting that gives good penetration without burning through the base sheetmetal (that stuff is pretty thin). Probably will add a few more as I go on especially along the crossmember for the seat mount, I had to cut the bottom front flange off it as it was a rusty mess so I want to tie this in fairly well. Probably going to rivet the left and front sides as I don't need much stregth there- then have to go over the whole thing with primer, seam sealer inside and out, and then paint. At least it is getting there!
czGcbcM.jpg
 

DieHarder

Senior Member
Joined
Nov 9, 2019
Posts
1,445
Reaction score
745
Looks pretty good. One hell of an improvement over what you started with...Any concerns with the floor flexing? After you get it nailed down completely I'd recommend a couple of layers of fiberglass mat over the entire thing. It'll strengthen the floor and any future leaking won't be able to get to the metal.
 

ghunt81

New parts on old junk!
S197 Team Member
Joined
Jan 20, 2016
Posts
1,074
Reaction score
160
Location
Clarksburg, WV
Not concerned about flex...I doubt this floor would flex much and even if it did I used 16 gauge sheet metal which was admittedly overkill.

Anyway...I don't have any fibgerglass mat, I'm just going to be very liberal with the seam sealer and make sure it has a couple good coats of paint on it. I didn't even know fiberglass mat was that commonly used in auto body work.
 

DieHarder

Senior Member
Joined
Nov 9, 2019
Posts
1,445
Reaction score
745
I've been using it for 4 decades. Got into it when I owned a '74 Lotus Europa. The body and all of the panels are made out of fiberglass so doing any bodywork required you to learn how to work with it. Not hard at all. It's very easy and really fast.

As far as getting fiberglass mat/resin you can pick up a basic kit at HomeDepot for less than $20 which is enough to do the entire front floor with three or more layers. Get a box of disposable gloves as well. Just follow the directions. YouTube has tons of videos but it's really basic. Just cut a couple of sheets out of the mat w/scissors to fit the floor; mix up some resin & catalyst in a disposable plastic bowl; put a layer of resin down first with a chip brush; add the mat; lay more resin down; lay down more mat (repeat until you're satisfied) and follow with a final coat of resin. Let dry. I guarantee if you put down two or three layers you'll never have to worry about rust or leaks (or having to use anything else to prevent rust in the future) and it'll be very solid for years to come. In fact you'll probably never have to think about again.

I think if I were you I'd complete whatever welding/other floor work you're going to do. Then I'd use rust reformer on any bad spots followed by cold galvanize on the new metal. Then I'd lay down 2-3 layers of fiberglass over all of the bad or repaired areas. You can also lay down mat on any other areas which will seal them completely too. The floor will be strong but better water cannot ever get to the metal again no matter if it those grommets leak or not.
Regarding the underside you can fiberglass that too but it's more difficult to work upside down with fiberglass. Maybe better to clean the rust off of everything as best you can; use rust converter; cold galvanize followed by a few liberal coats of undercoating/truck bed liner. Then monitor every once in a while to see how it's doing.

Fiberglass.jpg
 

DieHarder

Senior Member
Joined
Nov 9, 2019
Posts
1,445
Reaction score
745
As pictured cloth is easier to work with and conforms better to curves; I just happen to call most fiberglass mat...;D
 

ghunt81

New parts on old junk!
S197 Team Member
Joined
Jan 20, 2016
Posts
1,074
Reaction score
160
Location
Clarksburg, WV
First coat of primer is down on the floors and repaired section. Next is to install rivets and seam sealer.
 

ghunt81

New parts on old junk!
S197 Team Member
Joined
Jan 20, 2016
Posts
1,074
Reaction score
160
Location
Clarksburg, WV
Rivets and seam sealer installed, first coat of paint put on tonight. I really need to take some pics.

I decided not to go the fiberglass route because of the fact I had 3 spots where it had rusted through the floor and extensive surface rust elsewhere. I want to be able to check on it in a year or two and make sure it's still good, if I had fiberglass on there I'd have no way of knowing if there was rust forming under the fiberglass.
 

DieHarder

Senior Member
Joined
Nov 9, 2019
Posts
1,445
Reaction score
745
As discussed you may want to use rust reformer/rust primer and cold galvanize to slow progress as best you can. Regarding worrying about rust under the fiberglass if you encapsulate the rust (preventing oxygen access) that'll stop the oxidation & rust in its tracks. It'll also last longer and be stronger in the long run. I've never had to modify/rework any of the rust repairs that I've used fiberglass on. Other benefits include it's lightweight, easy to work with and can last 30 years.

Here's a couple of videos of a few different approaches in case you're interested:

https://www.google.com/url?sa=t&rct...=Zp5gmDC7KQI&usg=AOvVaw1BI6iHul4I63--4kdeR1Eh

https://www.google.com/url?sa=t&rct...=aK3td7wL8fM&usg=AOvVaw1-WPyU1qJj3aFWsuIZ8kRf

https://www.google.com/url?sa=t&rct...=KZ_EG-0FQf0&usg=AOvVaw36uCmSx_wAQ0PScLy1cETi

https://www.google.com/url?sa=t&rct...-Fiberglass/&usg=AOvVaw2iuNwZG62wkDRXKTFXXGoX


ghunt81

New parts on old junk!
S197 Team Member
Joined
Jan 20, 2016
Posts
1,074
Reaction score
160
Location
Clarksburg, WV
Well that is why I am using Rustoleum rusty metal primer and paint. Haven't really used it like this before but I'm hoping water inside the car won't be an issue anymore. I ended up not even using the POR15 I bought because the kit came with like half a pint of paint and that's not enough to do all this. Might put some under the car, I dunno.

Edit: I did use weld through primer on the patch plate because it was bare steel and I was welding it in, so hopefully that helps also.
 
Last edited:

ghunt81

New parts on old junk!
S197 Team Member
Joined
Jan 20, 2016
Posts
1,074
Reaction score
160
Location
Clarksburg, WV
Got one coat of Rustoleum rusty metal primer and two coats of white Rustoleum on there. I wanted to get gray but they didn't have any when I was buying paint, so I figured white would be best to see any imperfections. Also have two coats of POR15 on the spots on the bottom.

So once this is set up it's on to applying the sound deadener and hopefully getting this thing put back together.
j40rWxt.jpg
 

DieHarder

Senior Member
Joined
Nov 9, 2019
Posts
1,445
Reaction score
745
Have you been able to seal all of the grommets/windshield/pinch welds?
 

Latest posts

Support us!

Support Us - Become A Supporting Member Today!

Click Here For Details

Sponsor Links

Banner image
Back
Top