jdlatil
Twin Srew Driver
- Joined
- Sep 16, 2007
- Posts
- 75
- Reaction score
- 7
MrClean have you installed system yet? Still waiting on those pictures.
Welcome to the forum! That was your 1st post!MrClean have you installed system yet? Still waiting on those pictures.
I have one too! Worked just fine, but this way I get to wait 1800 miles between emptyings.... FOR SALE: $50 +shipping, with all the fittings/hoses (less the quick disconnects to valve cover and intake)Nice setup.
I still like my "Ghetto" version.
Lot cheaper and I am a tightass so it fits me personality.
:beat:
I have one too! Worked just fine, but this way I get to wait 1800 miles between emptyings.... FOR SALE: $50 +shipping, with all the fittings/hoses (less the quick disconnects to valve cover and intake)
MrClean have you installed system yet? Still waiting on those pictures.

Welcome to the forum! That was your 1st post!
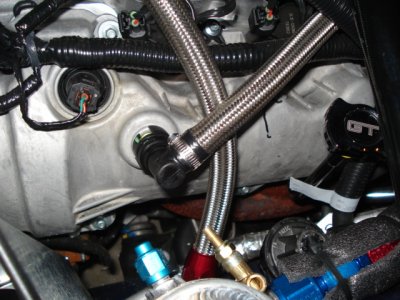
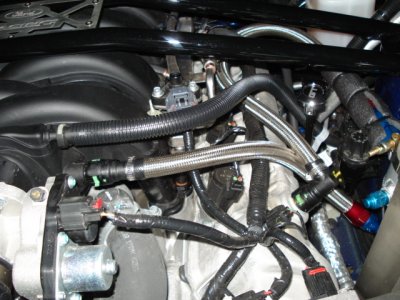
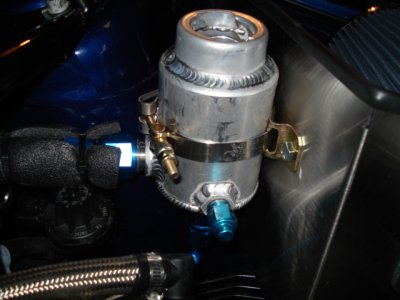
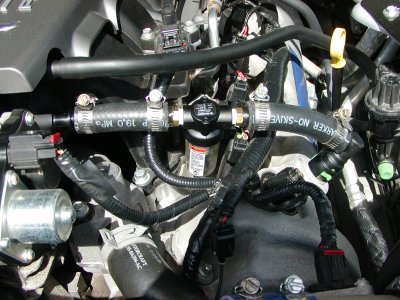
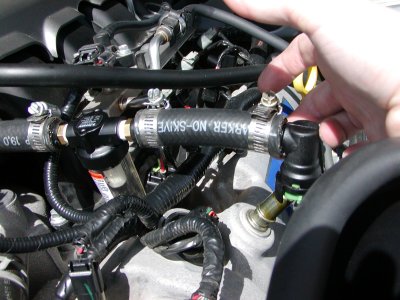
Sorry, I wasn't aware that anyone was waiting for them....here they are...
One of the pics was taken today...after I added a piece of hard hose from the OEM/stock PCV hose as an extension.....it was a little too short, but once you get a hose over one of those Earl barbs...well it ain't coming off! So the only solution was to cut the hose in the middle and add the extension, which worked out really well.
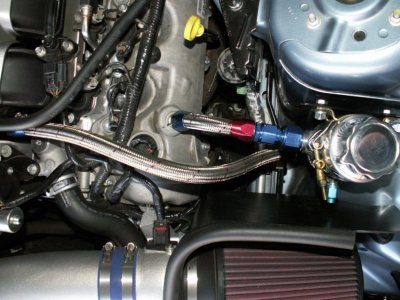
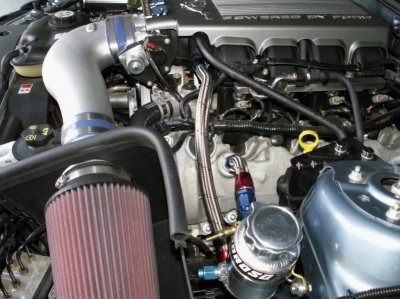
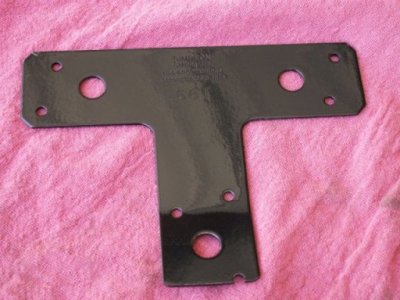
Ahh, you have the Moroso unit. How did you secure the bracket? Did you screw it into the shock tower? Did the shaker make your power more consistent, in terms of feeding cool air, or no noticeable effect?I moved mine over the strut tower to make room for the shaker hose. I decided to go with braided hose too since I wanted some more bling.

Ahh, you have the Moroso unit. How did you secure the bracket? Did you screw it into the shock tower? Did the shaker make your power more consistent, in terms of feeding cool air, or no noticeable effect?