8WOOD
forum member
P1SC Stage II Install Experience and Review

Product purchased
Evolution 675 HP KIT comes with Ford Racing 47lb injectors and NGK Spark plugs “1 Heat Range Colder.” 7psi pulley, 91 octane tune, helical gears for sound reduction.
Link: to product: http://www.evoperform.com/shop/index.php?main_page=product_info&cPath=267_334_335&products_id=1105
Total Cost: 5,900 for supercharger
+250 for Jon Lund Dyno Tune
+160 for 2 hours on the Dyno
6310 for total completed product
+100 dollars in Wall-Mart tools
6410 installed and completed in a carport.
Other Mods: NONE

DyonJet readings. HP 551 TQ 451 rpm SAE: HP 586 TQ 471
Total install time for this mechanic about 15 hours in a car port. Could probably install it in about 4-6 hours now that I’ve done it once.
So these are my first impression after opening the box. The kit comes in a extremely well packed box with plenty of protection so thumbs up to pro charger for that. The box is over 100 shipping weight. I know some people have said that the Procharger system is most likely lighter than a twin screw set up. Having installed Whipple systems on other cars I'll have to say they are probably within 10-15 lbs of each other. The main reason for this is the heavy piping used for the intercooler. I don't have a scale but I guesstimate they are about 5 pounds each, so that's a total of 20 pounds. The turbo system I had on my Evo used aluminum pipes and they were much lighter. It would have been nice if they would have utilized some lighter metal for these pipes.
The intercooler is very thick and fairly tall, I'm still wondering how it's suppose to fit") . I'm disappointing in lack of care to keep the intercooler clean. The one I have almost looks like it was installed on a vehicle and then removed. It's dirty has some paint scuffs on it, and the inside of the tanks are covered in dust, which means dust will be going into my engine. I'm most likely will spray the thing out and then let it dry before i put it on.
. I'm disappointing in lack of care to keep the intercooler clean. The one I have almost looks like it was installed on a vehicle and then removed. It's dirty has some paint scuffs on it, and the inside of the tanks are covered in dust, which means dust will be going into my engine. I'm most likely will spray the thing out and then let it dry before i put it on.
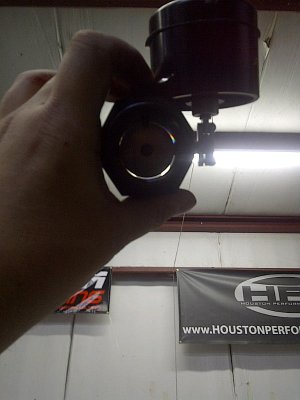
Here is the most disappointing part about the actual centri charger. The casting has not been cleaned up from the factory. I looked at the outlet hole to find metal shavings just sitting there. I then proceeded to use my finger nails to scratch off several more casting shavings from the outlet side. If anyone had just thrown this supercharger on those shavings would have either been stuck in the intercooler or found their way into the engine! It could also be the culprit of the "bad seals" in these units everyone has been having. Additionally, the outlet is very rough from the casting and needs to be smooth/polished up. This is something Procharger needs to check on their quality control. They just need to clean the casting edges up before they put the charger together. I will be cleaning it up myself now.
I'm not hating on Procharger, I just think they need to improve quality control, so units don't go out that will additional prepping from the user/installer.
Overall though, this product is very nice. All the sections come individually bagged: intercooler parts and clamps are all together, mounting bolts are with the the mounting plate, etc... This makes finding things very easy.
Here are some pictures I took of the items out of the box.


metal shavings above

Unpleasant surprises:
The “tuning from Evolution performance” is a get the car to your tuner tune only.
Removing Procharger pulley will “void the warranty,” which makes installation a *****. This was never mentioned or shown on Procharger’s website.

Excessive casting flakes in the superchargers inlet, which had to be removed and smoothed out, otherwise they would have gone into my engine!
Fitment issues with intercooler mounts
Extremely loud cooling fan
Higher than normal idle which can be fixed with tuning.
Spark plugs had to be spaced, which is easy, but I figured a custom kit like this would be completely prepared and ready to install.
PROS
Extremely smooth and quiet supercharger while cruising and under WOT pulls.
Much more torque than expected even at lower RPM’s. Rips tires loose at any rpm in 1st and 2nd and chirps them in high rpm’s in third.
Cool intake temperatures while under WOT and moving.
Highway mileage is surprisingly better than stock
7psi pulley put out 9.5 PSI
http://youtu.be/jKKtxHVYXYc?t=40s
Cons:
Very loud while at idle because the fan immediately goes to max after about 10 seconds at idle despite low coolant temperatures. I think that maybe hot IAT must trigger the fan to help keep the intercooler cool. Idles at 1000 rpm but can be lowered by tuner.

Hot IAT at idle. I’ve seen 130 degrees so far in 55 degree weather. This is mainly due to where Procharger’s air inlet is located. However once you get moving IAT cool right down to ambient.
Despite having 550 WHP, I’m pretty sure my stock 2006 z06 (sold it) with about 420 rwhp would destroy this mustang in a race, my goal was to have a DD vehicle that was as fast as my z06. I need to just find one and get them to do some pulls to see the outcome. I’ll get back to you when this happens.
In town mileage is not surprisingly much worse than stock, just can’t keep my foot out of it!
Installation Difficulties.
It’s paramount that you follow the instructions and don’t try to outthink them. I did this in two locations when mounting the supercharger.
1. Mount the supercharger to the mounting bracket before mounting the bracket to the block. You have to do this because the fitment for the supercharger is too tight between the valve covers and the mounting bracket. It would be possible if you could remove the pulley; however because you can’t remove the pulley, you have to painstakingly mount the supercharger to the bracket first. This makes getting the bracket lined up to mount very difficult and will require two people.
2. Put the rubber IC hose on the supercharger before you mount the supercharger and bracket to the vehicle. Otherwise you’re going to have to pull the bracket with the supercharger back off the car. The outlet on the supercharger is directly against the valve cover, if you don’t have the hose premounted, you will not be able to fit the hose onto the supercharger outlet.

Make sure you understand and mount the Procharger crank pulley correct. It is very easy to mount the pulley wrong with its provided cam locks. The instructions are extremely vague on this most important detail. It mentions that the pulley should have “minimal play.” When in reality there is actually quite a bit of side-to-side play. I thought that it was too much play and somehow found a position where there was zero play. When I first cranked over the motor, I threw the belt. I knew immediately that the pulley was the problem. I rechecked it as saw that it was not flush against the stock crank pulley. I had to remove the IC piping and fan shroud in order to remount it correctly. The best advice I can give regarding this part is to make sure the pulley is parallel and flat against the factory crank pulley, and has about an 1/8 of a turn of play.

As you can see in this next photo. The pulley is not flush and angles slightly up. I thought this was odd but thought "hey it doesn't have any play."

The intercooler mounting brackets were to narrow for the mounting holes. I had to grind down the bracket so I could get the bolts in.

You have to bend a coolant tube to make room for the bolt and spacer for the supercharger bracket. I can see this being a potential issue if it were to crack or break when bending it. The manual says “might require slight bending” when in reality YOU WILL have to bend it and much more than slightly.

Here is the bracket and supercharger installed.

I read a write up for the procharger and it said, you have to cut the OEM fan connectors to get them to hook up with the aftermarket fan. This is not so. You just have to remove the connector from the Procharger fan and slide the connectors into the OEM connector and then use electrical tape to get them to stay in place.
The connectors removed from Procharger connector

The connectors in the OEM connector

And tape and install!

Front Fascia: “may require minor trimming” is a complete understatement. You have to cut the **** out of it. You have to cut the 30% of the fascia, 50% of the front air deflector, and 40% of the plastic undercarriage tray. If you want it to look great. Make sure you have all the right tools. I had a hacksaw and a really sharp butter knife. It will pass at 5 feet, but looks like **** close up. I am planning on getting a new aftermarket fascia, so I didn’t put a lot of effort in making it perfect.
(pictures to come)
With the 7 PSI pulley there is a bolt that is very difficult to tighten. If you could remove the pulley, then it would be not problem. I only was able to tighten the bolt finger tight and the use a screw driver to get it little bit more tight. Shame on Procharger for placing this bolt under the pulley, and then not allowing customers to remove the pulley.

Here is an install that Muscle Mustang did of the HO system to complement some of the pictures I’ve taken.
http://www.musclemustangfastfords.c...gt_procharger_supercharger_install/index.html
Additional Pictures

Massive IC

2,000 dollars of plastic
http://www.youtube.com/watch?v=RyKHoRoPDWA&context=C397f012ADOEgsToPDskJ8lPw-1kcueheCQ3umTWnu
a pull to 6,000 rpms
Product purchased
Evolution 675 HP KIT comes with Ford Racing 47lb injectors and NGK Spark plugs “1 Heat Range Colder.” 7psi pulley, 91 octane tune, helical gears for sound reduction.
Link: to product: http://www.evoperform.com/shop/index.php?main_page=product_info&cPath=267_334_335&products_id=1105
Total Cost: 5,900 for supercharger
+250 for Jon Lund Dyno Tune
+160 for 2 hours on the Dyno
6310 for total completed product
+100 dollars in Wall-Mart tools
6410 installed and completed in a carport.
Other Mods: NONE
DyonJet readings. HP 551 TQ 451 rpm SAE: HP 586 TQ 471
Total install time for this mechanic about 15 hours in a car port. Could probably install it in about 4-6 hours now that I’ve done it once.
So these are my first impression after opening the box. The kit comes in a extremely well packed box with plenty of protection so thumbs up to pro charger for that. The box is over 100 shipping weight. I know some people have said that the Procharger system is most likely lighter than a twin screw set up. Having installed Whipple systems on other cars I'll have to say they are probably within 10-15 lbs of each other. The main reason for this is the heavy piping used for the intercooler. I don't have a scale but I guesstimate they are about 5 pounds each, so that's a total of 20 pounds. The turbo system I had on my Evo used aluminum pipes and they were much lighter. It would have been nice if they would have utilized some lighter metal for these pipes.
The intercooler is very thick and fairly tall, I'm still wondering how it's suppose to fit
. I'm disappointing in lack of care to keep the intercooler clean. The one I have almost looks like it was installed on a vehicle and then removed. It's dirty has some paint scuffs on it, and the inside of the tanks are covered in dust, which means dust will be going into my engine. I'm most likely will spray the thing out and then let it dry before i put it on.Here is the most disappointing part about the actual centri charger. The casting has not been cleaned up from the factory. I looked at the outlet hole to find metal shavings just sitting there. I then proceeded to use my finger nails to scratch off several more casting shavings from the outlet side. If anyone had just thrown this supercharger on those shavings would have either been stuck in the intercooler or found their way into the engine! It could also be the culprit of the "bad seals" in these units everyone has been having. Additionally, the outlet is very rough from the casting and needs to be smooth/polished up. This is something Procharger needs to check on their quality control. They just need to clean the casting edges up before they put the charger together. I will be cleaning it up myself now.
I'm not hating on Procharger, I just think they need to improve quality control, so units don't go out that will additional prepping from the user/installer.
Overall though, this product is very nice. All the sections come individually bagged: intercooler parts and clamps are all together, mounting bolts are with the the mounting plate, etc... This makes finding things very easy.
Here are some pictures I took of the items out of the box.
metal shavings above
Unpleasant surprises:
The “tuning from Evolution performance” is a get the car to your tuner tune only.
Removing Procharger pulley will “void the warranty,” which makes installation a *****. This was never mentioned or shown on Procharger’s website.
Excessive casting flakes in the superchargers inlet, which had to be removed and smoothed out, otherwise they would have gone into my engine!
Fitment issues with intercooler mounts
Extremely loud cooling fan
Higher than normal idle which can be fixed with tuning.
Spark plugs had to be spaced, which is easy, but I figured a custom kit like this would be completely prepared and ready to install.
PROS
Extremely smooth and quiet supercharger while cruising and under WOT pulls.
Much more torque than expected even at lower RPM’s. Rips tires loose at any rpm in 1st and 2nd and chirps them in high rpm’s in third.
Cool intake temperatures while under WOT and moving.
Highway mileage is surprisingly better than stock
7psi pulley put out 9.5 PSI
http://youtu.be/jKKtxHVYXYc?t=40s
Cons:
Very loud while at idle because the fan immediately goes to max after about 10 seconds at idle despite low coolant temperatures. I think that maybe hot IAT must trigger the fan to help keep the intercooler cool. Idles at 1000 rpm but can be lowered by tuner.
Hot IAT at idle. I’ve seen 130 degrees so far in 55 degree weather. This is mainly due to where Procharger’s air inlet is located. However once you get moving IAT cool right down to ambient.
Despite having 550 WHP, I’m pretty sure my stock 2006 z06 (sold it) with about 420 rwhp would destroy this mustang in a race, my goal was to have a DD vehicle that was as fast as my z06. I need to just find one and get them to do some pulls to see the outcome. I’ll get back to you when this happens.
In town mileage is not surprisingly much worse than stock, just can’t keep my foot out of it!
Installation Difficulties.
It’s paramount that you follow the instructions and don’t try to outthink them. I did this in two locations when mounting the supercharger.
1. Mount the supercharger to the mounting bracket before mounting the bracket to the block. You have to do this because the fitment for the supercharger is too tight between the valve covers and the mounting bracket. It would be possible if you could remove the pulley; however because you can’t remove the pulley, you have to painstakingly mount the supercharger to the bracket first. This makes getting the bracket lined up to mount very difficult and will require two people.
2. Put the rubber IC hose on the supercharger before you mount the supercharger and bracket to the vehicle. Otherwise you’re going to have to pull the bracket with the supercharger back off the car. The outlet on the supercharger is directly against the valve cover, if you don’t have the hose premounted, you will not be able to fit the hose onto the supercharger outlet.
Make sure you understand and mount the Procharger crank pulley correct. It is very easy to mount the pulley wrong with its provided cam locks. The instructions are extremely vague on this most important detail. It mentions that the pulley should have “minimal play.” When in reality there is actually quite a bit of side-to-side play. I thought that it was too much play and somehow found a position where there was zero play. When I first cranked over the motor, I threw the belt. I knew immediately that the pulley was the problem. I rechecked it as saw that it was not flush against the stock crank pulley. I had to remove the IC piping and fan shroud in order to remount it correctly. The best advice I can give regarding this part is to make sure the pulley is parallel and flat against the factory crank pulley, and has about an 1/8 of a turn of play.
As you can see in this next photo. The pulley is not flush and angles slightly up. I thought this was odd but thought "hey it doesn't have any play."
The intercooler mounting brackets were to narrow for the mounting holes. I had to grind down the bracket so I could get the bolts in.
You have to bend a coolant tube to make room for the bolt and spacer for the supercharger bracket. I can see this being a potential issue if it were to crack or break when bending it. The manual says “might require slight bending” when in reality YOU WILL have to bend it and much more than slightly.
Here is the bracket and supercharger installed.
I read a write up for the procharger and it said, you have to cut the OEM fan connectors to get them to hook up with the aftermarket fan. This is not so. You just have to remove the connector from the Procharger fan and slide the connectors into the OEM connector and then use electrical tape to get them to stay in place.
The connectors removed from Procharger connector
The connectors in the OEM connector
And tape and install!
Front Fascia: “may require minor trimming” is a complete understatement. You have to cut the **** out of it. You have to cut the 30% of the fascia, 50% of the front air deflector, and 40% of the plastic undercarriage tray. If you want it to look great. Make sure you have all the right tools. I had a hacksaw and a really sharp butter knife. It will pass at 5 feet, but looks like **** close up. I am planning on getting a new aftermarket fascia, so I didn’t put a lot of effort in making it perfect.
(pictures to come)
With the 7 PSI pulley there is a bolt that is very difficult to tighten. If you could remove the pulley, then it would be not problem. I only was able to tighten the bolt finger tight and the use a screw driver to get it little bit more tight. Shame on Procharger for placing this bolt under the pulley, and then not allowing customers to remove the pulley.
Here is an install that Muscle Mustang did of the HO system to complement some of the pictures I’ve taken.
http://www.musclemustangfastfords.c...gt_procharger_supercharger_install/index.html
Additional Pictures
Massive IC
2,000 dollars of plastic
http://www.youtube.com/watch?v=RyKHoRoPDWA&context=C397f012ADOEgsToPDskJ8lPw-1kcueheCQ3umTWnu
a pull to 6,000 rpms
Last edited: