Servicing phasers

shikwann

forum member
Joined
Sep 19, 2009
Posts
640
Reaction score
1
Location
Madera, CA
For the past year or two I've had an CEL P0345 & P0349 which is a cam position sensor code on bank 2 (drivers side head). I've tried replacling the alternator and sensor with no luck of getting the CEL off. So I finally--because Im overdue of smogging my car, to pull the phaser for inspection.
I believe I've read somewhere on the F150 forums that someone had the same CEL and pulled the phaser and saw that one of the dowels where the cam bolt is located sheared off. What they did is they found some dowels and replaced them.
Here's my phaser:
e79148e4.jpg


This is what it looks like normally.

Here's what it looks like when I hold the front of it down:
af1c3aed.jpg


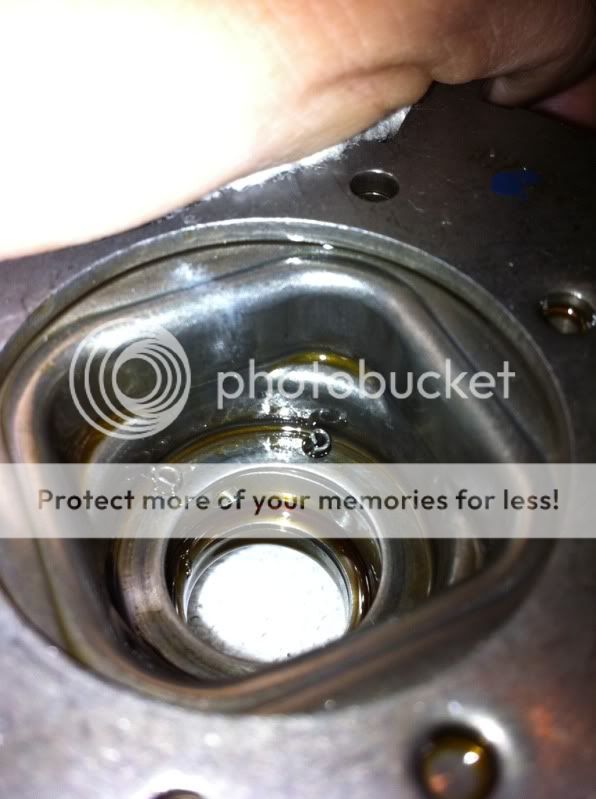
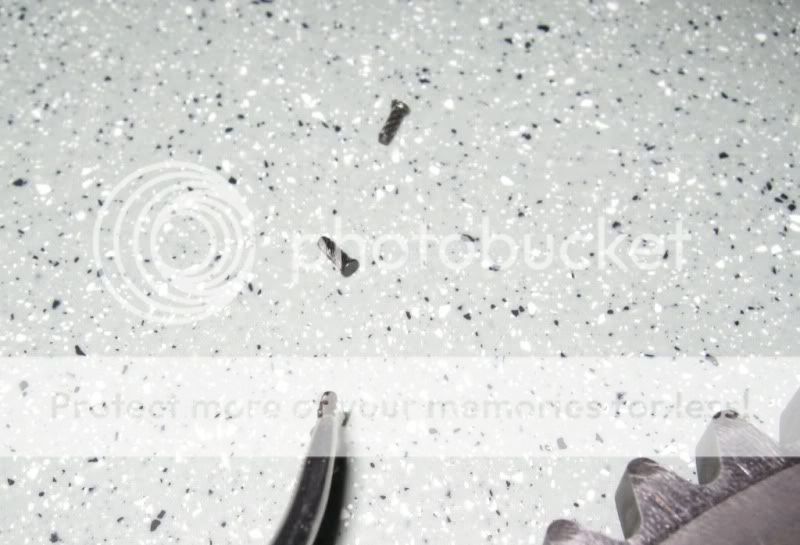
The pins stick out and is not holding the front of the phaser to the assembly. The dowels seem to be just rolled up flat metal and not a solid piece of metal like these:

2622bc22.jpg


I now understand why ford has had so many revisions to these phasers.

So my question is if I can find or fabricate new pins, what exactly does these pins hold together or better yet keep in line? Update looks like they hold the front cover and spring down. I managed to pressed them in but they release the tension. Any ideas?
I'm trying to avoid buying a new phaser because they are super expensive...
 

shikwann

forum member
Joined
Sep 19, 2009
Posts
640
Reaction score
1
Location
Madera, CA
I've been doing some more reading. Is it possible I skipped a tooth on bank 2 that's giving me the po345 code? I've had cams done on this before I'm back to stock cams...
 

gtcs07

Im just kinda here
Joined
May 29, 2010
Posts
2,937
Reaction score
0
Location
New Jersey
Have you had the code since one of the cam swaps? It's very easy to put a cam in a tooth off if your not careful.
 

shikwann

forum member
Joined
Sep 19, 2009
Posts
640
Reaction score
1
Location
Madera, CA
Have you had the code since one of the cam swaps? It's very easy to put a cam in a tooth off if your not careful.
Yep ever since I went back to stock cams... : /

I've searched for a timing tutorial but I can never find a solid one, can anyone direct me to a write-up?
 

gtcs07

Im just kinda here
Joined
May 29, 2010
Posts
2,937
Reaction score
0
Location
New Jersey
Damn till like 2 days ago I had the timing mark pic on my phone ill look for it
 

05stroker

Never enough power guy!
Joined
Mar 2, 2008
Posts
13,058
Reaction score
77
Location
Bullard Tx.
Yep ever since I went back to stock cams... : /

I've searched for a timing tutorial but I can never find a solid one, can anyone direct me to a write-up?


This should help a little.
 
Last edited:

shikwann

forum member
Joined
Sep 19, 2009
Posts
640
Reaction score
1
Location
Madera, CA
So I'm at a stand still for finding those pins, I'm going to have to cut some pins I found to length and hope they work. I'm also going to have to unspring the phaser to remove a stuck pin... : /
This has become a pain! And I haven't even removed the timing cover just yet for timing...
 

shikwann

forum member
Joined
Sep 19, 2009
Posts
640
Reaction score
1
Location
Madera, CA
Update:
So I decided to go with a new cam phaser for the drivers side. I have removed the timing cover and removed the two chAins, 4 chain sliders and the two cam tensioners, and all spark plugs. I got the bottom sprocket dot pointed at 6 o clock. Now when I get to the phasers I cannot get them into position (ie at eleven o clock and at 12.) due to the cam kicking over. So now must I remove the three followers; on each side, to get the position of the phasers to spec? I haven't read anyone running into this, is there something I'm missing? This is my first time doing this btw, please help me out.
 

Justagt

Junior Member
Joined
Jul 26, 2011
Posts
31
Reaction score
0
Location
kansas
I wish i would have read all of your thread before taking my car into the dealership yesterday. I would have attempted to replace my phasers as well. Good luck with your project man!
 

shikwann

forum member
Joined
Sep 19, 2009
Posts
640
Reaction score
1
Location
Madera, CA
Thanks man, but I have the entire front end torn apart as I am re-timing the engine. I'm now running into a problem with the phasers not staying put at the 11 o clock position and the 12 o clock. I believe they're not staying put due to the "rockers" putting a load from the cams lobes. When I put the cams into position they tend to spin back rapidly. So I'm assuming the only way is to remove the "rockers" with a spring compressor so I don't have to remove the the cam caps and possibly messing up this new phaser from using it as leverage to seat the cam.
Heres the situation:

[PHOTOB]http://s2.photobucket.com/albums/y2/shikwann/?action=view&current=e8bf63da.mp4[/PHOTOB]


I think maybe the best way is to remove the rockers allowing me to position the phaser and cam at the desired location. Is this the way everyone does their timing as well? or is there anything Im missing?

I'd like to the freedom racings 3v spring tool since I've used the OTC tool and hate that piece of junk! lol

Now is there anyone out there besides freedom racing that owns one of their tools willing to loan me one/ rent one?
 

Alfiedagr8

forum member
Joined
Apr 24, 2011
Posts
523
Reaction score
0
Location
Bakersfield CA
Removal
  1. If servicing the RH camshaft phaser and sprocket, remove the RH camshaft. For additional information, refer to Camshaft — RH in this section.
  1. If servicing the LH camshaft phaser and sprocket, remove the LH camshaft. For additional information, refer to Camshaft — LH in this section.
  1. NOTICE: Damage to the camshaft phaser and sprocket assembly will occur if mishandled or used as a lifting or leveraging device.
    NOTE: Do not remove the Timing Chain Locking Tool at any time during assembly. If the Timing Chain Locking Tool is removed or out of placement, the engine front cover must be removed and the engine must be retimed. For additional information, refer to Timing Drive Components in this section.
    Remove the camshaft phaser and sprocket from the timing chain.
  1. Inspect the front of the camshaft phaser and sprocket for missing or damaged roll pins.
    • If the roll pins are missing or damaged, a new camshaft phaser and sprocket must be installed.
  • N0047399.jpg
  1. Inspect the rear of the camshaft phaser and sprocket for a deformed or damaged location pin.
    • If the location pin is deformed or damaged, a new camshaft phaser and sprocket must be installed.
  • N0047297.jpg
  1. Visually inspect the camshaft phaser and sprocket for squareness (A). If the trigger wheel or spring is deformed or damaged (B), install a new camshaft phaser and sprocket.
  • N0047574.jpg
Installation
  1. NOTICE: Damage to the camshaft phaser and sprocket assembly will occur if mishandled or used as a lifting or leveraging device.
    If installing a new camshaft phaser and sprocket, transfer the original scribe mark to the new camshaft phaser and sprocket.
  1. NOTICE: The timing chain must be installed in its original position onto the camshaft phaser and sprocket using the scribed marks, or damage to valves and pistons will result.
    NOTICE: Damage to the camshaft phaser and sprocket assembly will occur if mishandled or used as a lifting or leveraging device.
    Align the scribe marks and position the camshaft phaser and sprocket into the timing chain.
  • A0074612.jpg
  1. If servicing the RH camshaft phaser and sprocket, install the RH camshaft. For additional information, refer to Camshaft — RH in this section.
  1. If servicing the LH camshaft phaser and sprocket, install the LH camshaft. For additional information, refer to Camshaft — LH in this section.
 

Alfiedagr8

forum member
Joined
Apr 24, 2011
Posts
523
Reaction score
0
Location
Bakersfield CA
hope this helps homie.. member if you guys need help on anything,, ford repairs or custom tuning let me know.. im in bakersfield area..
 

Alfiedagr8

forum member
Joined
Apr 24, 2011
Posts
523
Reaction score
0
Location
Bakersfield CA
here is one more post..

  1. Install the camshaft phaser sprockets and new camshaft phaser bolts finger tight.
    A0081897.jpg
  2. ani_caut.gif
    CAUTION: Damage to the camshaft phaser sprocket assembly will occur if mishandled or used as a lifting or leveraging device.

    ani_caut.gif
    CAUTION: Only use hand tools to remove the camshaft phaser sprocket assembly or damage may occur to the camshaft or camshaft phaser unit.

    NOTE: LH shown, RH similar.
    Using the special tool, tighten the LH and RH camshaft phaser sprocket bolts in 2 stages.
    1. Stage 1: Tighten to 40 Nm (30 lb-ft).
    2. Stage 2: Tighten an additional 90 degrees.
  • N0010187.jpg
  1. Install the crankshaft sprocket, making sure the flange faces forward.
  • N0011527.jpg
  1. Rotate the crankshaft to position the crankshaft sprocket timing mark in the 6 o'clock position.
  • N0010527.jpg
  1. ani_caut.gif
    CAUTION: If one or both tensioner mounting bolts are loosened or removed, the tensioner-sealing bead must be inspected for seal integrity. Any cracks, tears, cuts or separation from the tensioner body, or permanent compression of the seal bead, will require replacement of the tensioner.

    Inspect the RH and LH timing chain tensioners.
    • Install new tensioners as necessary.
  1. ani_caut.gif
    CAUTION: Timing chain procedures must be followed exactly or damage to valves and pistons will result.

    Compress the tensioner plunger, using a vise.
  • A0029146.jpg
  1. Install a retaining clip on the tensioner to hold the plunger in during installation.
  • A0029147.jpg
  1. Remove the tensioner from the vise.
  1. If the copper links are not visible, mark one link on one end and one link on the other end and use as timing marks.
  • A0038719.jpg
  1. Install the 4 bolts and the LH and RH timing chain guides.
    • Tighten to 10 Nm (89 lb-in).
  • N0006303.jpg
  1. Position the lower end of the LH (inner) timing chain on the crankshaft sprocket, aligning the timing mark on the outer flange of the crankshaft sprocket with the single copper (marked) link on the chain.
  • N0011528.jpg
  1. NOTE: Make sure the upper half of the timing chain is below the tensioner arm dowel.
    Position the LH timing chain on the camshaft sprocket. Make sure the camshaft sprocket timing mark is aligned with the copper (marked) chain link.
  • N0010529.jpg
  1. NOTE: The LH timing chain tensioner arm has a bump near the dowel hole for identification.
    Position the LH timing chain tensioner arm on the dowel pin and install the LH timing chain tensioner and bolts.
    • Tighten to 25 Nm (18 lb-ft).
  • A0062443.jpg
  1. Remove the retaining clip from the LH timing chain tensioner.
  • A0029150.jpg
  1. Position the lower end of the RH (outer) timing chain on the crankshaft sprocket, aligning the timing mark on the sprocket with the single copper (marked) chain link.
  • N0011520.jpg
  1. NOTE: The camshaft phaser and sprocket will be stamped with one of the illustrated timing marks for the RH camshaft.
    NOTE: The lower half of the timing chain must be positioned above the tensioner arm dowel.
    Position the RH timing chain on the camshaft sprocket. Make sure the camshaft sprocket timing mark is aligned with the copper (marked) chain link.
  • N0052196.jpg
  1. Position the RH timing chain tensioner arm on the dowel pin and install the RH timing chain tensioner and bolts.
    • Tighten to 25 Nm (18 lb-ft).
  • A0062446.jpg
 

Alfiedagr8

forum member
Joined
Apr 24, 2011
Posts
523
Reaction score
0
Location
Bakersfield CA
  1. Remove the retaining clip from the RH timing chain tensioner.
  • A0029150.jpg
  1. NOTE: The RH and LH camshaft phaser sprockets are similar. Refer to the single timing mark to identify the RH camshaft phaser sprocket and the L timing mark to identify the LH camshaft phaser sprocket.
    As a post-check, verify correct alignment of all timing marks. Make sure the timing marks on the sprockets correspond to the above note.
  • N0010532.jpg
  1. Install the crankshaft sensor ring on the crankshaft.
  • A0032166.jpg
  1. NOTE: It is necessary to rotate the engine to position the camshaft lobes at base circle to install the roller followers.
    Using the special tool, install all of the camshaft roller followers.
    • Lubricate the roller followers with clean engine oil prior to installation.
  • N0010191.jpg
  1. Install the engine front cover. For additional information, refer to Engine Front Cover in this section.
 

Support us!

Support Us - Become A Supporting Member Today!

Click Here For Details

Sponsor Links

Banner image
Back
Top