
Figured I would post a mini diy of installing a new valve spring. First thing, clean your engine off above the cam covers. I really wish that I had taken that step first as I have little bits of crap all over my cams etc.
I used taco bills writeup on how to remove the cam covers.
After removing the followers with the freedom tool, it is time to do the springs.
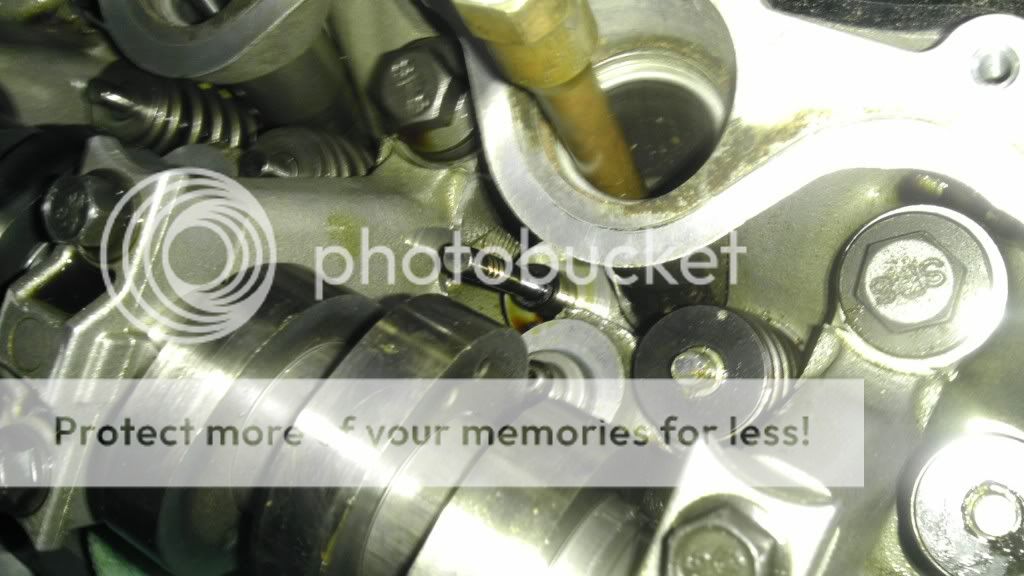
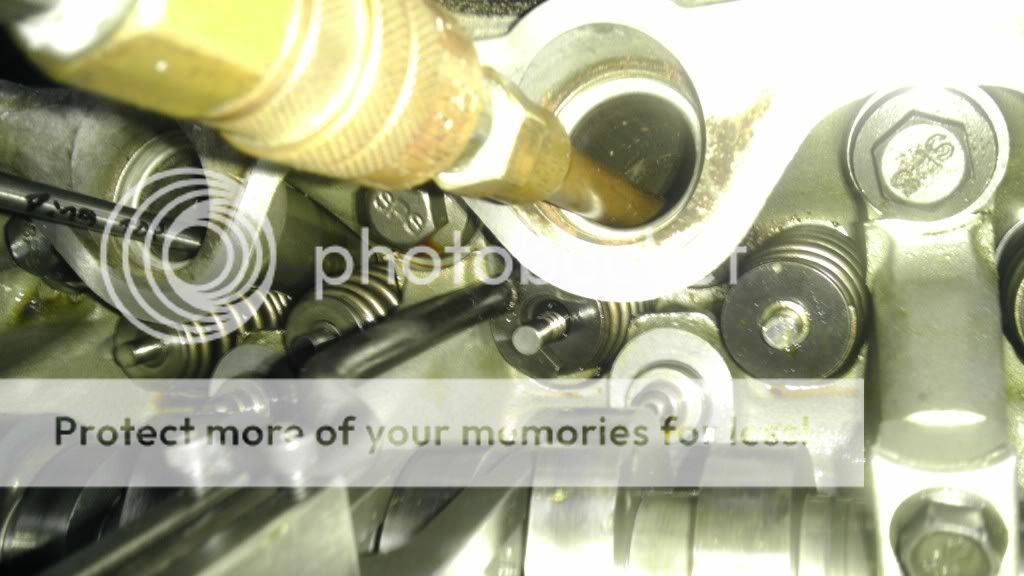
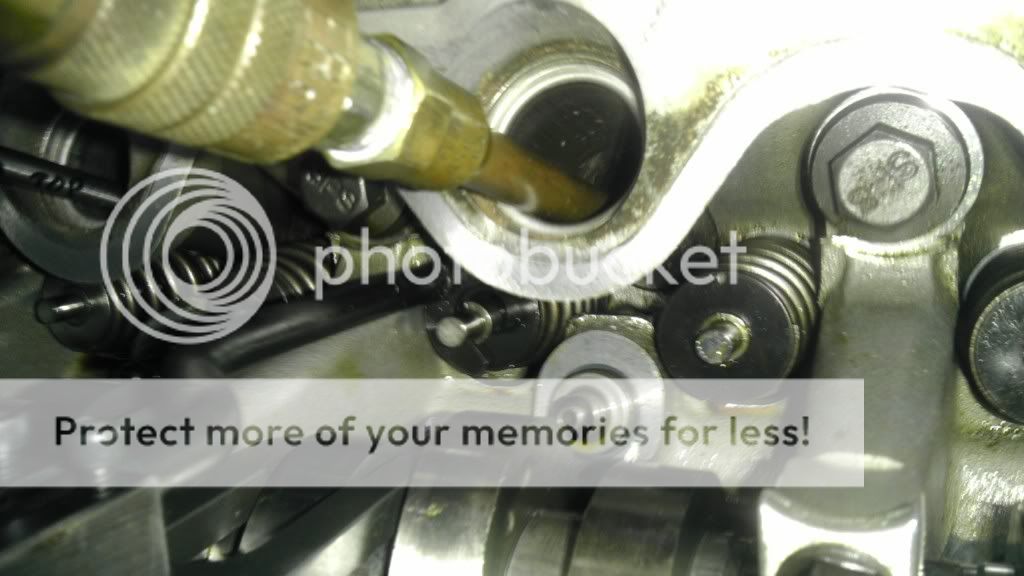
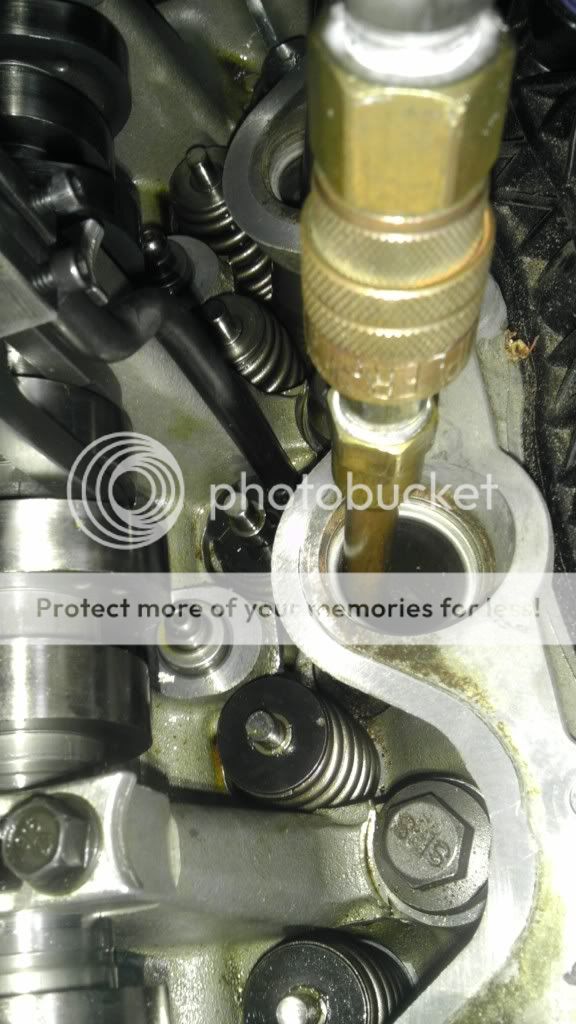
**important** make sure that you put whatever cylinder you are working on at tdc. Before putting air to your cylinder, put your car in 5th. You can use another gear, but 1st has enough torque to run over your foot for a second when you hook up 80psi of air. If your cylinder is at tdc, you cannot lose a valve. There will be a time that you will lose air pressure. My hose came off during the middle of one of mine.
Use the next steps in reverse to remove the old valve. The removal is the easy part and the most nerve racking as you figure out suddenly how difficult this really can be.
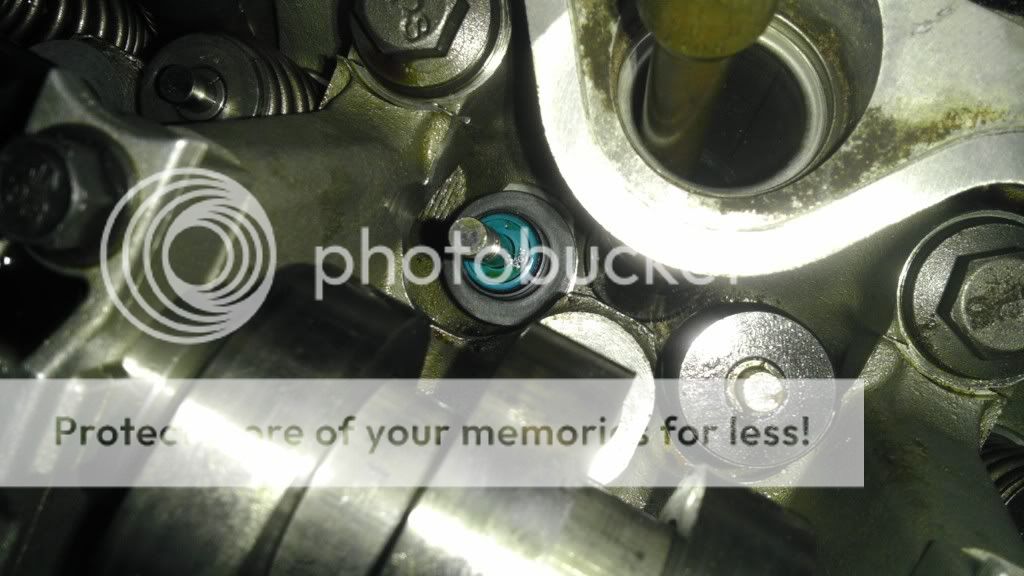
So here is a bare valve stem after you remove the old spring and seal.
New valve stem seals from Livernois. Much much tighter than the oem. Couldn't get to two exhaust ones though......Use a socket to push it down over the valve. If they make a special tool to remove these, buy it. I used multiple types of needle nose pliers. FML
Valve spring
Retainer
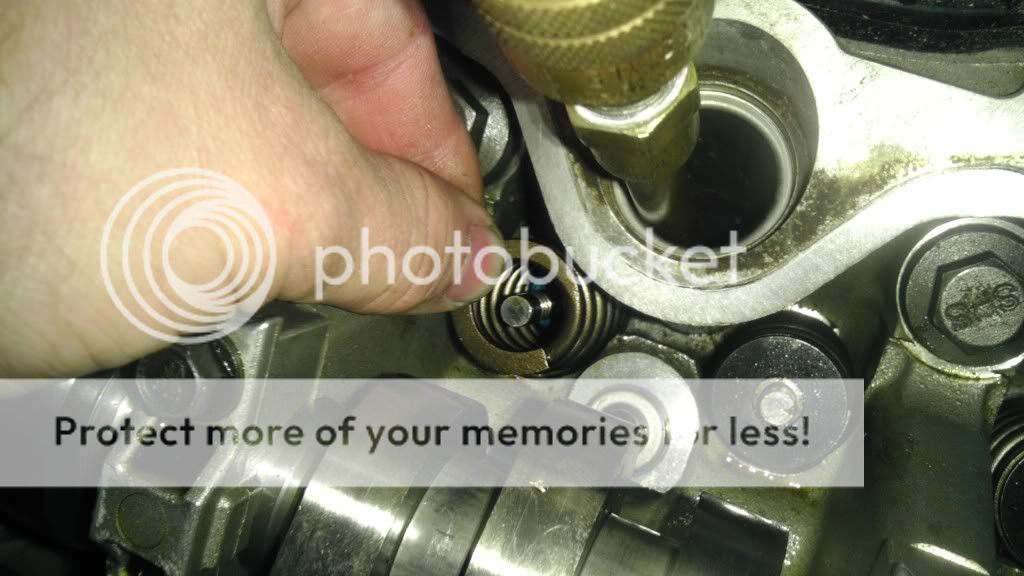
Setting up the tool and compressing to expose grooves in the valve. You will want to lock the tool into place with the allen wrench. You could not do this with locking it down.
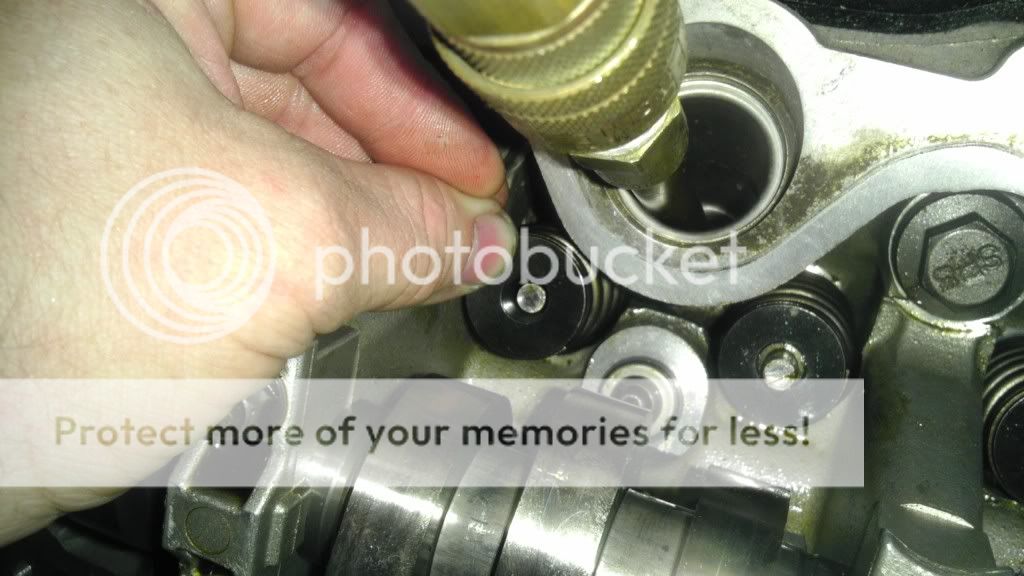
One keeper on.....these little guys are tough. Tiny and small. Buy extra. I lost one on the k member somewhere and one shot off under the intake. If they are not aligned correctly or you release the tool to quick, they become airborne.
Both Keepers on and pressed together. Put a dab of grease and use a magnetic tipped screwdriver to put them on. Some of the valves won't compress far enough. You'll spend two to twenty minutes on these alone. Keep a bottle of patience and od on it.
You can see an already done and the one that is about to be finished next to each other. The exhaust are truly the hard ones. Gravity is not your friend. The upside is the set screw on the tool is exposed which is awesome.
I used taco bills writeup on how to remove the cam covers.
After removing the followers with the freedom tool, it is time to do the springs.
**important** make sure that you put whatever cylinder you are working on at tdc. Before putting air to your cylinder, put your car in 5th. You can use another gear, but 1st has enough torque to run over your foot for a second when you hook up 80psi of air. If your cylinder is at tdc, you cannot lose a valve. There will be a time that you will lose air pressure. My hose came off during the middle of one of mine.
Use the next steps in reverse to remove the old valve. The removal is the easy part and the most nerve racking as you figure out suddenly how difficult this really can be.
So here is a bare valve stem after you remove the old spring and seal.
New valve stem seals from Livernois. Much much tighter than the oem. Couldn't get to two exhaust ones though......Use a socket to push it down over the valve. If they make a special tool to remove these, buy it. I used multiple types of needle nose pliers. FML
Valve spring
Retainer
Setting up the tool and compressing to expose grooves in the valve. You will want to lock the tool into place with the allen wrench. You could not do this with locking it down.
One keeper on.....these little guys are tough. Tiny and small. Buy extra. I lost one on the k member somewhere and one shot off under the intake. If they are not aligned correctly or you release the tool to quick, they become airborne.
Both Keepers on and pressed together. Put a dab of grease and use a magnetic tipped screwdriver to put them on. Some of the valves won't compress far enough. You'll spend two to twenty minutes on these alone. Keep a bottle of patience and od on it.
You can see an already done and the one that is about to be finished next to each other. The exhaust are truly the hard ones. Gravity is not your friend. The upside is the set screw on the tool is exposed which is awesome.
Last edited: