
You are using an out of date browser. It may not display this or other websites correctly.
You should upgrade or use an alternative browser.
You should upgrade or use an alternative browser.
Install has begun!
- Thread starter JoshK
- Start date


UltraKla$$ic
PERENNIAL WAXXER
Excellent work so far!!!! Keep it up and thanks for the pics!!
BruceH
BBB Big Bore Boss 322
Cool. Thanks for posting up the pics. Keep them coming.
Mike K
WANNA BE FAST
I'm in for this. If you could just post up some tips and tricks you figure out during the install seeing as I want to toss this kit in next winter. Keep the pics coming
Nice, mine is starting on weds. I did the coolant hose and power steering relocation today. Weds is when all the pipes go on.
Yeah as you can probably see i just kind of jumped into this. I have yet to take car of the two things that you have mentioned. Also, I am going to have to try to get a different oil filter relocation kit as you have probably already read in my other post. If I had any advice so far it is probably just to take your time and not get frustrated if it looks like the pipes aren't lining up like they should. WIth a little muscle and the getting the clamps on it starts to pull together nicely. I would probably also seriously consider getting a slim fan like Lightblade did but it isn't a have to. I also took a lot of time to punch the oil pan since it is a one time deal unless you want to make a lot of extra work for yourself.
JeremyH
3V Fuel Guru
The most important thing to remember for the install is to leave the header bolts and all the vbands loose until everythings in place. Then go back and fine align everything and start evenly tightening things up.
Oh and a week later go back and check/tighten again. After a few heat cycles stuff will be a little loose.
Oh and a week later go back and check/tighten again. After a few heat cycles stuff will be a little loose.
Yeah as you can probably see i just kind of jumped into this. I have yet to take car of the two things that you have mentioned. Also, I am going to have to try to get a different oil filter relocation kit as you have probably already read in my other post. If I had any advice so far it is probably just to take your time and not get frustrated if it looks like the pipes aren't lining up like they should. WIth a little muscle and the getting the clamps on it starts to pull together nicely. I would probably also seriously consider getting a slim fan like Lightblade did but it isn't a have to. I also took a lot of time to punch the oil pan since it is a one time deal unless you want to make a lot of extra work for yourself.
The oil tap is probably what I will take a long time also. I've been reading on installing a turbo since last march, lol. I was looking at a slim fan as well, but I will probably do that later on. Did you do the spark plugs and injectors already? Yea it does get hard not to get frustrated.
Marc s
NASA AIX
Looks really good so far. Keep us updated.
Is that blood splatter on the wall?
Is that blood splatter on the wall?
Looks really good so far. Keep us updated.
Is that blood splatter on the wall?
No not blood, lol. I painted some doors there for my folks' house. the paint was a kind of burgandy or deep red. DIdn't really care about my wall so that was where I was spraying to check the pattern on my paint gun.
Marc s
NASA AIX
No not blood, lol. I painted some doors there for my folks' house. the paint was a kind of burgandy or deep red. DIdn't really care about my wall so that was where I was spraying to check the pattern on my paint gun.
I know it wasn't blood, just messing with you. Good luck on the project!
jodadejss06gt
TEAM DELETE SHIT
I actually took my pan to a professional welder and let put the bung in.
More progress pics for you guys. I decided to move the powersteering res. and coolant tank like so of the others have on here. It really gives things more clearance. I should be able to put the bumper back on it today and get it back on the ground. I haven't been working at this too hard but me are starting to get some nice days here and there so I am wanting to get it done.


drilled and tapped the compressor housing to get the boost signal for the wg
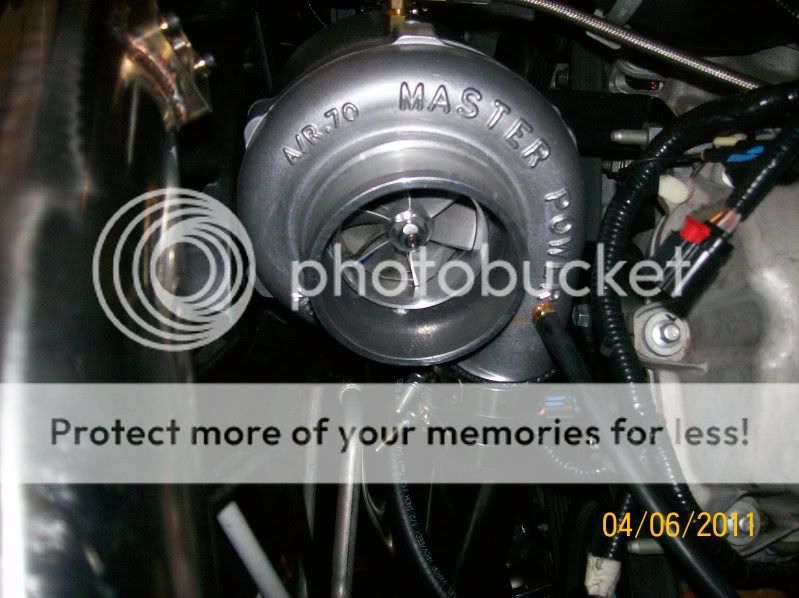
drilled and tapped the compressor housing to get the boost signal for the wg
calispecial08
Senior Member
- Joined
- Apr 30, 2010
- Posts
- 2,750
- Reaction score
- 0
Can't wait to see it done!
Subscribed
Subscribed
Similar threads
- Replies
- 6
- Views
- 557
- Replies
- 3
- Views
- 405
- Replies
- 7
- Views
- 756
- Replies
- 6
- Views
- 435
Support us!
Support Us - Become A Supporting Member Today!
Click Here For Details