GlassTop09
Senior Member
Finished up w\ the install of my SHR Ford 05-09 S197 Front Bumper Cover Lower Grille Honeycomb Inserts this morning..............thanks JC SSP & cavero!
This project turned out to be a marathon..........started on this yesterday around 12:00pm.........
1st off, if anyone is thinking of installing these as they come in the box then no issues.........but if you already have other items installed in\on\around lower grille section (like I had w\ my Chin Spoiler Curb Alert sensor & CDC Chin Spoiler--which butts up against the lower grille at the bottom) that you'll have to make mods to the insert to clear them........you'll need to remove the lower grille to do them well--in which you'll also need to remove the chin spoiler as well (the extra 1\8" you need to raise the grille to clear the lip of the chin spoiler will bind the latches in the bumper & also bind the lower grille into the bumper so you can't remove it w\o help..........didn't have enough hands on tap.......) to facilitate grille removal which added extra work to R&R chin spoiler.
Since I had to make modifications to upper left corner of DS grille insert to clear my Chin Spoiler Curb Alert sensor & it's mount........I decided to go ahead & drill out & install pop rivets to make permanent installation of all of this onto lower grille (already had some 3\16" dia x 5\16" L aluminum pop rivets in hand from doing some gutter spout repairs last year.......) after trying to make the 2-sided tape work reattaching my CA sensor bracket (had to reposition this bracket 1\2" inward to clear the insert to facilitate R&R of sensor bolt & nut--sensor sensing height\distance adjusts by raising\lowering sensor angle--which reduced the area available for solid 2-sided tape adherence to lower grille surface thus had no choice but to use pop rivets.....so I just used them to permanently install the rest......what SHR recommends to do if permanent installation is preferred......). Fought this piece for some time trying to get this to line up & square the sensor to front of car while also moving it rearward as mentioned earlier......but I finally got it where I was satisfied w\ it. Then I had to clearance the top inner edge of bumper cover in areas where the pop rivets heads\crimps protruded thru to allow the lower grille to mount flush to bumper cover when reinstalled........bottom had no issues w\ clearance.......only the top inner edge (no problem doing this as you can't see any of this clearance work to inner edge of bumper cover once the lower grille is reinstalled......). I used my white marker pen to color the pop rivets heads\crimps, installed grille then pulled grille back out & clearance where the white marker paint showed where.........don't need a lot.......Dremel w\ cutting arbor makes short work of this.
Also noticed that a rock had punched a hole in a section of PS lower grille area......but when I removed the grille, I found the piece of grille spalling that had broken away was still captured behind grille, so I got some Gorilla Super Glue & reattached this spalling plug back into the section where it came out from so repaired this damage while it was out of bumper.
Once I got all this squared away, I then applied some Ford Tuexdo Black touchup paint to pop rivet heads\crimps that stuck up above inserts to blend them into the background..............came out good IMHO.
Then reinstalled my CDC Chin Spoiler after cleaning off all the old 2-sided tape & associated glue to bumper & spoiler.........3M General Adhesive Remover\Cleaner is your huckleberry if you don't want to spend several hrs w\ a heat gun & scrapers trying clean all this stuff off (another reason why this took so long......after spending several hrs trying to clean this off, I gave up & went to parts store & bought a can of this adhesive remover).......spray this stuff on........wait 5 mins then run your scrapers..........crap just comes right off in minutes then follow up w\ some alcohol & a microfiber towel to clean off all left over residue & leave no residue once it evaporates so surfaces are ready for immediate adhesive promoter application prior 2-sided tape installation to spoiler center section then install spoiler back on bumper cover then just grab pigtail off 2-sided tape & press while pulling the red cover off the tape.......done.
Gonna pick up a new lower grille & new inserts to put together for the future new replacement front bumper cover when I get ready for repaint of car to repair the sun damage to clear coat\paint pigment (I got this process down now..........just need to find some black anodized pop rivets so I don't need to use touchup paint. If you put your pop rivets into the insert's outer corners, this will help hide them the best--along w\ a little matching color to blend them nicely into the background.
From seeing all of the fin damage to lower AC condenser from rocks & large bugs slamming into this section for 17+ yrs, I wish I'd have done this sooner.........just didn't cross my mind until JC SSP posted pictures of his.........also wondered why Ford left this section open like this...........didn't do this w\ the OEM upper grille.........really can't see any good justification for leaving this lower section wide open like they did.......but it don't matter in the end as to why--all hind sight & spilled milk at this juncture............they sold them anyway thus saved some money in the process. Glad the aftermarket provided a remedy..............
This section is for those so interested................
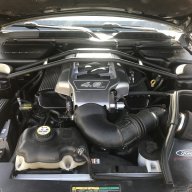
Also, in the end I took a picture of my 08-09 Bullitt CAI after I had made some 4 datalogged WOT runs into OL PE\WOT thru this Bullitt replica grille prior after finish of lower grille inserts install........2 rolling WOT throttle hits & 2 flat footed WOT throttle hits then compared to picture of same Bullitt CAI configuration except using the 09 OEM GT grille w\ fog lights..........the dust sock condition is clearly showing the improved ram air performance into the Bullitt CAI when it is paired up w\ the 08-09 Ford Bullitt grille design vs the OEM 05-09 Ford GT grille w\ fog lights as no dust can stay on the sock surface any more due to increased air velocity flowing across the surface of air filter & datalogs showed the airload% increasing by .01 when compared to prior datalogs comparative IAT\MAP data & at the same engine RPM's using the same VCT mapping thus engine pumping characteristics were identical & the rate of airload% decline flattened out somewhat as well........the MAF curve backed this up thus IMHO validates Ford engineering & their work w\ the Bullitt........this is the part that wasn't noted in the article by Ford SVT lead engineer Paul Randle.........but is clearly an advantage there which can't be replicated on anybody's dyno (except maybe thru Gale Banks dyno fans......he simulates ram air at speed w\ all of his dyno testing as well as body drag coeff.....) .........is definitely present when hood is closed & car is moving forward at speed thru the Bullitt's upper grille design.
In closing, I'm very pleased w\ how all of this is turning out to be...........gaining some looks while also gaining some real performance enhancement in the process..........can't wait to see how much this setup will add when run under good air density conditions.......
Just need fresh paint to clean it all up............


This project turned out to be a marathon..........started on this yesterday around 12:00pm.........
1st off, if anyone is thinking of installing these as they come in the box then no issues.........but if you already have other items installed in\on\around lower grille section (like I had w\ my Chin Spoiler Curb Alert sensor & CDC Chin Spoiler--which butts up against the lower grille at the bottom) that you'll have to make mods to the insert to clear them........you'll need to remove the lower grille to do them well--in which you'll also need to remove the chin spoiler as well (the extra 1\8" you need to raise the grille to clear the lip of the chin spoiler will bind the latches in the bumper & also bind the lower grille into the bumper so you can't remove it w\o help..........didn't have enough hands on tap.......) to facilitate grille removal which added extra work to R&R chin spoiler.
Since I had to make modifications to upper left corner of DS grille insert to clear my Chin Spoiler Curb Alert sensor & it's mount........I decided to go ahead & drill out & install pop rivets to make permanent installation of all of this onto lower grille (already had some 3\16" dia x 5\16" L aluminum pop rivets in hand from doing some gutter spout repairs last year.......) after trying to make the 2-sided tape work reattaching my CA sensor bracket (had to reposition this bracket 1\2" inward to clear the insert to facilitate R&R of sensor bolt & nut--sensor sensing height\distance adjusts by raising\lowering sensor angle--which reduced the area available for solid 2-sided tape adherence to lower grille surface thus had no choice but to use pop rivets.....so I just used them to permanently install the rest......what SHR recommends to do if permanent installation is preferred......). Fought this piece for some time trying to get this to line up & square the sensor to front of car while also moving it rearward as mentioned earlier......but I finally got it where I was satisfied w\ it. Then I had to clearance the top inner edge of bumper cover in areas where the pop rivets heads\crimps protruded thru to allow the lower grille to mount flush to bumper cover when reinstalled........bottom had no issues w\ clearance.......only the top inner edge (no problem doing this as you can't see any of this clearance work to inner edge of bumper cover once the lower grille is reinstalled......). I used my white marker pen to color the pop rivets heads\crimps, installed grille then pulled grille back out & clearance where the white marker paint showed where.........don't need a lot.......Dremel w\ cutting arbor makes short work of this.
Also noticed that a rock had punched a hole in a section of PS lower grille area......but when I removed the grille, I found the piece of grille spalling that had broken away was still captured behind grille, so I got some Gorilla Super Glue & reattached this spalling plug back into the section where it came out from so repaired this damage while it was out of bumper.
Once I got all this squared away, I then applied some Ford Tuexdo Black touchup paint to pop rivet heads\crimps that stuck up above inserts to blend them into the background..............came out good IMHO.
Then reinstalled my CDC Chin Spoiler after cleaning off all the old 2-sided tape & associated glue to bumper & spoiler.........3M General Adhesive Remover\Cleaner is your huckleberry if you don't want to spend several hrs w\ a heat gun & scrapers trying clean all this stuff off (another reason why this took so long......after spending several hrs trying to clean this off, I gave up & went to parts store & bought a can of this adhesive remover).......spray this stuff on........wait 5 mins then run your scrapers..........crap just comes right off in minutes then follow up w\ some alcohol & a microfiber towel to clean off all left over residue & leave no residue once it evaporates so surfaces are ready for immediate adhesive promoter application prior 2-sided tape installation to spoiler center section then install spoiler back on bumper cover then just grab pigtail off 2-sided tape & press while pulling the red cover off the tape.......done.
Gonna pick up a new lower grille & new inserts to put together for the future new replacement front bumper cover when I get ready for repaint of car to repair the sun damage to clear coat\paint pigment (I got this process down now..........just need to find some black anodized pop rivets so I don't need to use touchup paint. If you put your pop rivets into the insert's outer corners, this will help hide them the best--along w\ a little matching color to blend them nicely into the background.
From seeing all of the fin damage to lower AC condenser from rocks & large bugs slamming into this section for 17+ yrs, I wish I'd have done this sooner.........just didn't cross my mind until JC SSP posted pictures of his.........also wondered why Ford left this section open like this...........didn't do this w\ the OEM upper grille.........really can't see any good justification for leaving this lower section wide open like they did.......but it don't matter in the end as to why--all hind sight & spilled milk at this juncture............they sold them anyway thus saved some money in the process. Glad the aftermarket provided a remedy..............
This section is for those so interested................
Also, in the end I took a picture of my 08-09 Bullitt CAI after I had made some 4 datalogged WOT runs into OL PE\WOT thru this Bullitt replica grille prior after finish of lower grille inserts install........2 rolling WOT throttle hits & 2 flat footed WOT throttle hits then compared to picture of same Bullitt CAI configuration except using the 09 OEM GT grille w\ fog lights..........the dust sock condition is clearly showing the improved ram air performance into the Bullitt CAI when it is paired up w\ the 08-09 Ford Bullitt grille design vs the OEM 05-09 Ford GT grille w\ fog lights as no dust can stay on the sock surface any more due to increased air velocity flowing across the surface of air filter & datalogs showed the airload% increasing by .01 when compared to prior datalogs comparative IAT\MAP data & at the same engine RPM's using the same VCT mapping thus engine pumping characteristics were identical & the rate of airload% decline flattened out somewhat as well........the MAF curve backed this up thus IMHO validates Ford engineering & their work w\ the Bullitt........this is the part that wasn't noted in the article by Ford SVT lead engineer Paul Randle.........but is clearly an advantage there which can't be replicated on anybody's dyno (except maybe thru Gale Banks dyno fans......he simulates ram air at speed w\ all of his dyno testing as well as body drag coeff.....) .........is definitely present when hood is closed & car is moving forward at speed thru the Bullitt's upper grille design.
In closing, I'm very pleased w\ how all of this is turning out to be...........gaining some looks while also gaining some real performance enhancement in the process..........can't wait to see how much this setup will add when run under good air density conditions.......
Just need fresh paint to clean it all up............