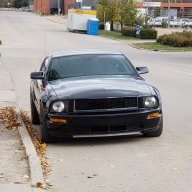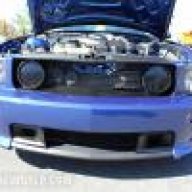

M90 install

stanger1944

Member
Joined
Aug 6, 2013
Posts
164
Reaction score
0
Hopefully I am finally going to get around to installing the M90 kit that I bought from Badpiggy back in the summer. I will be installing it as it came from him with what I understand to be the 2.49" pulley. I will also be installing Detroit Rocker supercharger cams, and some Kook's longtubes with catted x pipe. What do you think of this combo? Does anyone have an install thread they have seen or videos of some of the install? What is the most troublesome part of the install?
 

justinsstang

Member
Joined
Oct 26, 2013
Posts
730
Reaction score
3
Most troublesome part of the install is making sure you have all the pieces before you start lol. Make sure you have every connector on the harnesses, all the brackets (alternator bracket, intercooler pump bracket, etc.), and generally just go over it all or you'll be waiting on shipping.

Install was a breeze otherwise. Make sure you solder the correct wires. And one major piece of advice I can give you is this. There's a metal heater hose that runs under the intake that slides over a water fitting. (This is the heater hose that is supposed to be modified for the install, BadPiggy probably included his modified one in the kit. Look for it, it's black and metal lol)

That fitting has a o-ring gasket on it from ford, it's about $12 if I remember right.
REPLACE IT, or you will probably be draining the coolant out, taking the supercharger and intake manifold off, and replacing the o-ring after it leaks on start up. Source: Been there. Lol

Let me know if you need help during the install, I'd be happy to help where I can. I did the M90 install on my 2006. Just follow the instructions and you shouldn't have a problem in the world. It was fun for a while but I ended up wanting more like everyone said and traded in for a 14 to twin turbo lol. Can't beat that blower whine though man, it screameddd.
 
Last edited:

eighty6gt

Senior Member
Joined
May 9, 2011
Posts
4,306
Reaction score
417
3 summers with an M90 for me. It's great, especially with my 3.73's.

If you are missing constant tension hose clamps for the ic system try to get more instead of worm clamps.

Check all of the threaded holes on all of the brackets.
 

stanger1944

Member
Joined
Aug 6, 2013
Posts
164
Reaction score
0
The wiring and like you said taking inventory are the two most worrying parts. I am ready. I know a guy with a 99 z28 and a. 2011 SS that are dying to see my taillights.
Could probably give the SS a run now. The Z28 has a bit of work running low to mid 12s on street tires.
 

stanger1944

Member
Joined
Aug 6, 2013
Posts
164
Reaction score
0
Most troublesome part of the install is making sure you have all the pieces before you start lol. Make sure you have every connector on the harnesses, all the brackets (alternator bracket, intercooler pump bracket, etc.), and generally just go over it all or you'll be waiting on shipping.

Install was a breeze otherwise. Make sure you solder the correct wires. And one major piece of advice I can give you is this. There's a metal heater hose that runs under the intake that slides over a water fitting. (This is the heater hose that is supposed to be modified for the install, BadPiggy probably included his modified one in the kit. Look for it, it's black and metal lol)

That fitting has a o-ring gasket on it from ford, it's about $12 if I remember right.
REPLACE IT, or you will probably be draining the coolant out, taking the supercharger and intake manifold off, and replacing the o-ring after it leaks on start up. Source: Been there. Lol

Let me know if you need help during the install, I'd be happy to help where I can. I did the M90 install on my 2006. Just follow the instructions and you shouldn't have a problem in the world. It was fun for a while but I ended up wanting more like everyone said and traded in for a 14 to twin turbo lol. Can't beat that blower whine though man, it screameddd.
Did you install new intake gaskets or o rings whatever you want to call them?
Same question for cam covers when doing a cam install.
 

justinsstang

Member
Joined
Oct 26, 2013
Posts
730
Reaction score
3
Nope I reused my intake manifold gaskets, one was cracked a little so I replaced that one. Just check them real good and make sure there aren't any cracks and you should be fine. Also double check injector o-rings if you're using used injectors. Where are you located?
 
Last edited:

BadPiggy

Hooligan Ahole
Joined
Oct 26, 2012
Posts
3,503
Reaction score
3
Location
Knoxville, TN
Kevin, you're just now installing this?
LOL!

On a serious note, if you haven't finger-fucked everything and left most everything as I shipped it, you should knock this out with ease! Don't forget, I loosened the blower bolts so those need to be tightened back down. If you gotta buddy that'll help you, you should be able to set the manifold/blower on as a unit. Then one of you would have to lift one side while the other connects the hoses.

Also, in case you haven't downloaded, here are the installation directions:

http://www.roushperformance.com/par...arger-M90-Roushcharger-2009-420116-manual.pdf

Good luck!

EDIT: Yes, it has the 2.49 pulley installed. Also, you MAY have 1 bolt leftover. I recall putting bolts in the Ziplock and labeling where they went...I had one bolt I kept giving that WTF stare. I've since found where it's missing from my car, it's a water pump bolt. Just letting you know so you won't be scratching your head wondering WTF you did wrong.
 
Last edited:

justinsstang

Member
Joined
Oct 26, 2013
Posts
730
Reaction score
3
Yea I was going to say if you're local I wouldn't mind helping at all, but that's a long shot. Nobody on here lives near me :tdown:
 

stanger1944

Member
Joined
Aug 6, 2013
Posts
164
Reaction score
0
Kevin, you're just now installing this?
LOL!

On a serious note, if you haven't finger-fucked everything and left most everything as I shipped it, you should knock this out with ease! Don't forget, I loosened the blower bolts so those need to be tightened back down. If you gotta buddy that'll help you, you should be able to set the manifold/blower on as a unit. Then one of you would have to lift one side while the other connects the hoses.

Also, in case you haven't downloaded, here are the installation directions:

http://www.roushperformance.com/par...arger-M90-Roushcharger-2009-420116-manual.pdf

Good luck!

EDIT: Yes, it has the 2.49 pulley installed. Also, you MAY have 1 bolt leftover. I recall putting bolts in the Ziplock and labeling where they went...I had one bolt I kept giving that WTF stare. I've since found where it's missing from my car, it's a water pump bolt. Just letting you know so you won't be scratching your head wondering WTF you did wrong.
Yeah I know fucking around too much. But really wanted to get cams and longtubes. Going to bite the bullet and have the headers installed. Just ordered the wedge tool and am going to tackle the cams myself. Probably get those two mods and see how it runs then do the blower. Hopefully I will make that 430 HP at the wheels with those mods. Then save for the upgrade to come.
P.s. BadPiggy I did not "finger fuck" it in the sense of changing anything, but I did fondle it a little.
 
Last edited:

stanger1944

Member
Joined
Aug 6, 2013
Posts
164
Reaction score
0
Nope I reused my intake manifold gaskets, one was cracked a little so I replaced that one. Just check them real good and make sure there aren't any cracks and you should be fine. Also double check injector o-rings if you're using used injectors. Where are you located?

South Arkansas
 

Mattamus

Member
Joined
Jan 13, 2011
Posts
188
Reaction score
0
I myself did not find the install at all too difficult. I just followed the instructions to a T and really took my time with it. The only part that took me a while was the wiring. I tried to make it look like factory with electrical tape and looms. I had to redo several of my solderings because I was not happy with them.
 

Aandf1978

M90 SUPPORTER!!
Joined
Mar 22, 2010
Posts
3,264
Reaction score
6
Location
Virginia Beach, VA
This is a very easy install. Some following of directions, attention to detail and some soldering skills (NOT wire nuts, electrical tape or splices) and all is good. Easily done with a buddy in a day or two max!
 

808muscle

Senior Member
Joined
Nov 1, 2009
Posts
4,039
Reaction score
7
Location
Maui
Take your time with it all and you'll be good. Upgrading to a afco dual fan HE and larger Degas tank improved my track times 4-5 tenths. I have the stock pulley and my car was still badly heat soaked. Enjoy the new power.
 

stanger1944

Member
Joined
Aug 6, 2013
Posts
164
Reaction score
0
Is this wire splicing for the key on trigger for the Intercooler pump? Could I use an add a circuit in the fuse panel with a 15 amp fuse instead of cutting the harness?
 

stanger1944

Member
Joined
Aug 6, 2013
Posts
164
Reaction score
0
Is this wire splicing for the key on trigger for the Intercooler pump? Could I use an add a circuit in the fuse panel with a 15 amp fuse instead of cutting the harness?
Page 58 of the 2009 roush m90 install instructions says splice into the red wire with yellow tracer. Off of 16 pin connector on driver side of pcm bracket. Could not get picture of the page to load
 

Pentalab

Senior Member
Joined
Mar 5, 2013
Posts
5,507
Reaction score
1,327
Take your time with it all and you'll be good. Upgrading to a afco dual fan HE and larger Degas tank improved my track times 4-5 tenths. I have the stock pulley and my car was still badly heat soaked. Enjoy the new power.

What was your IAT's with the oem setup ? Throw the 2.49 pulley into the mix, and I can see with the oem HE + de-gas.... you would have a flamethrower on your hands.
 

BadPiggy

Hooligan Ahole
Joined
Oct 26, 2012
Posts
3,503
Reaction score
3
Location
Knoxville, TN
Page 58 of the 2009 roush m90 install instructions says splice into the red wire with yellow tracer. Off of 16 pin connector on driver side of pcm bracket. Could not get picture of the page to load


Are you asking for someone to take a screen shot for you?

dd66a143634ade5ff1146a38eda2afc8.jpg

bf577ab1c0a1aee0fe18ed0b2d0a3561.jpg
 

Support us!

Support Us - Become A Supporting Member Today!

Click Here For Details

Back
Top