Morris
forum member
- Joined
- Jan 19, 2012
- Posts
- 822
- Reaction score
- 1
So I changed out the stock seats on my 2012 gt with the 401a package. Never liked them so I went to some corbeau's. I got the vx2000's, they are not very racy and they don't hold you in much better than stock seats how-ever they are far more comfortable on my back for the 100 mile a day shit commute I have to do.
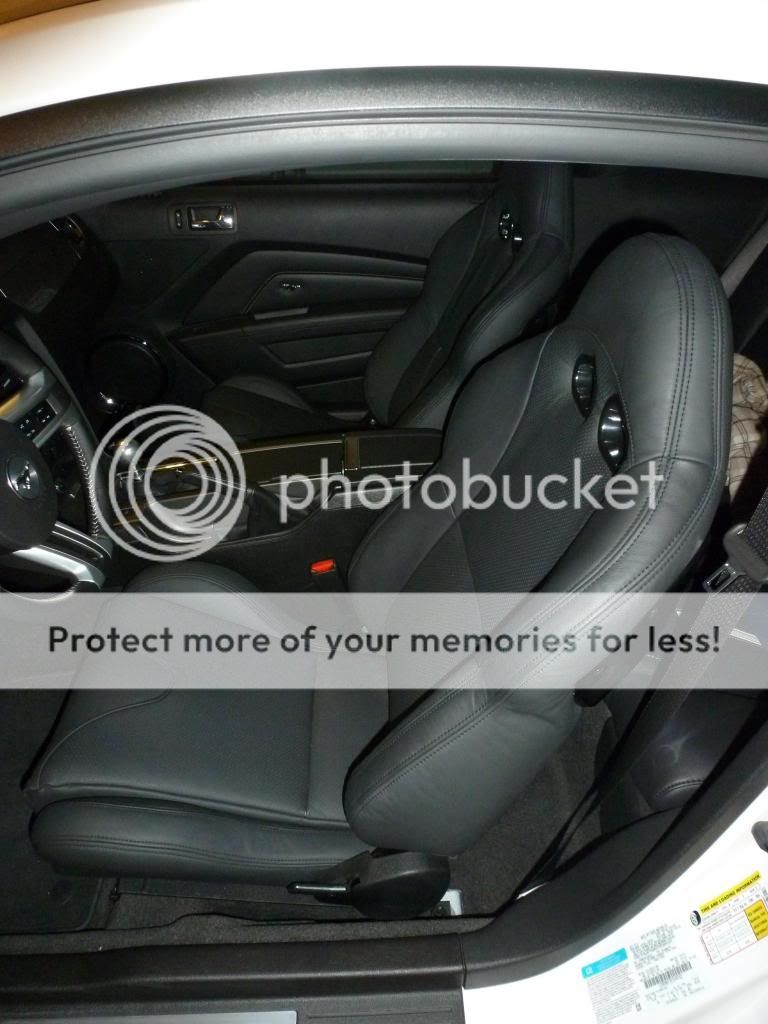
Taking the seats out, and replacing them with the Corbeau's is not hard at all. With a little searching I was able to find a few threads that showed how to unbolt them, take out the harness and deal with the air bag light. Every thing went smooth up to the air bag light and thats why I thought I would post a few more things in regards to the resistors.
When I ran into trouble I hit up DevilDog1679 who had also installed some new seats and solved the air bag issue. Big thanks to him as he even had a very informative DIY on how to do this. Still I managed to screw it up the first few times.
As he informed me I needed a 1.7 to 2.2 ohm resistance on the plug that went to the now non existent side air bag to remove the light from the dash. First mistake was going and getting a 2.2 k ohm resistor, I didn't even note the K on the bag or on the multi meter when I was testing. Stupid mistake number one.
Second mistake was reading about how another guy had purchased five 10 ohm 1/4 watt resistors and soldered them in parallel to make the proper resistance. It didn't make sense to me, as that was 50 ohms but I wasn't sure about the watts and how that played into it so what the hell for two bucks I tried it. As you might suspect that didn't work, perhaps he placed them in parallel, I don't know?
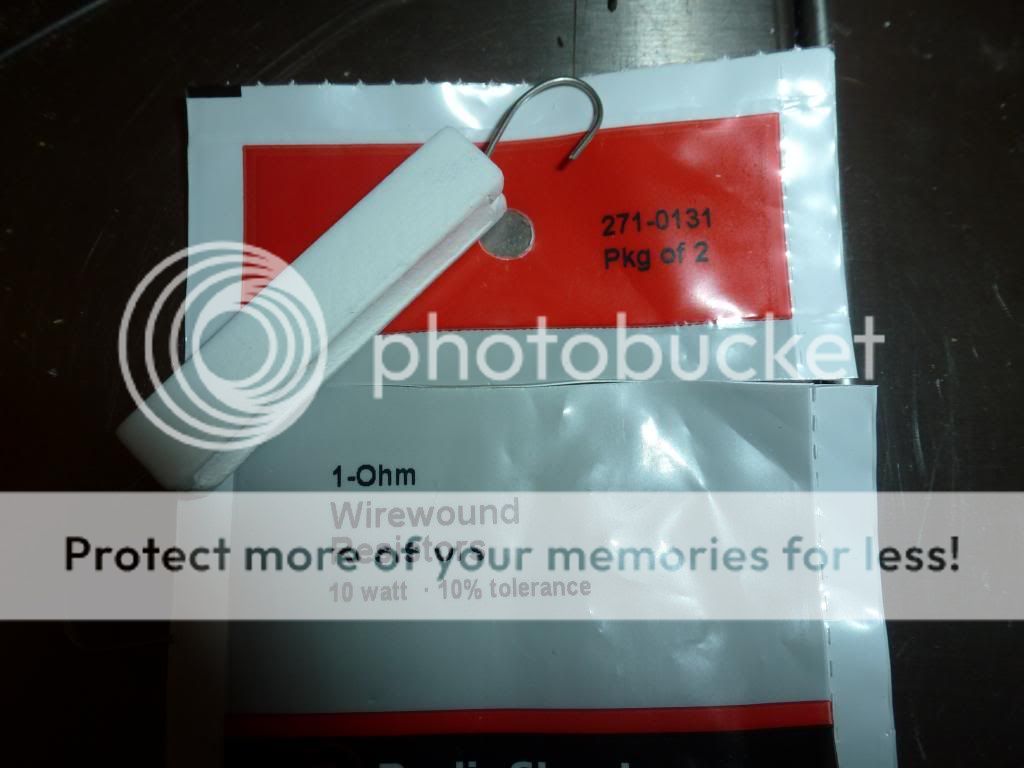
Any way, again thanks to devildog for helping me out and I made another trip to radio shack. Of course they didn't have what I was looking for which the the smaller (1/2 to 1 watt style resistors) to make 2 ohms. They did have some 1 ohm 10 watt resistors and I figured they might work even though they were bigger than I wanted to use. Here is what they look like (that's not the resistor but it looks just like it) and that is the bag they came in with the part number.
So these come two to a pack (you need two packs) and here is how they look once I soldered them together.
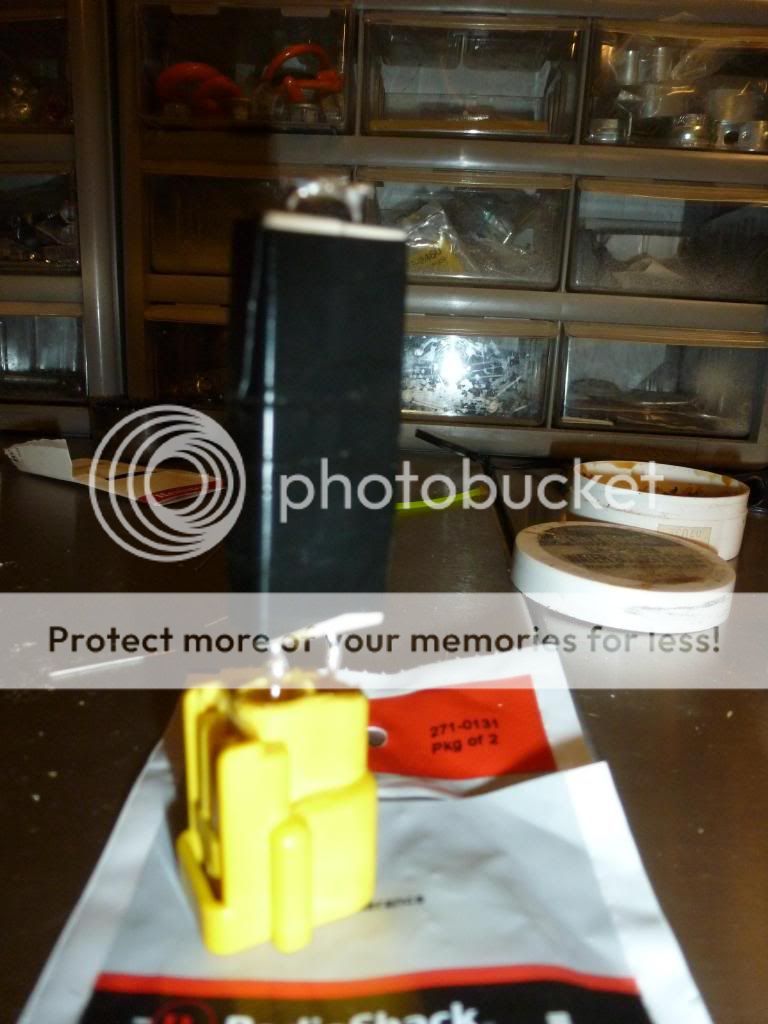
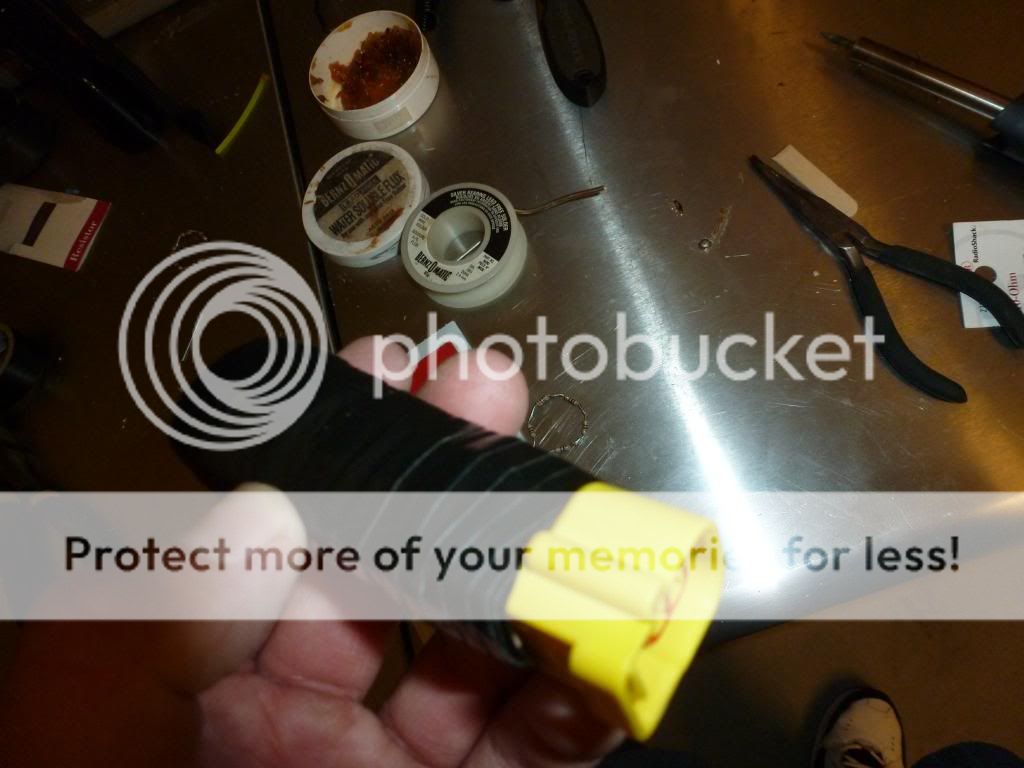
If you don't have the part number for that connector it's ford part # XF2Z-14B022-AA. If you chose to use this plug connector rather than soldering to the female side then you will have to modify it. To do that you cut off the top with a dremel, cut off the resistor (it's too high and for the older model mustangs) and then solder on the two resistors as shown.
The wires in the ford connector where you cut out the old resistor are fairly thin and with the heavier higher watt resistors that I used I figured I needed to support them from moving. I did that with some Popsicle sticks. I had a box of them from my kids school project so what the hell, why not. Here is what I did (I put another on the side but left it off for the picture. Also you may have to adjust the sticks but you get the point, its just to keep it ridged)
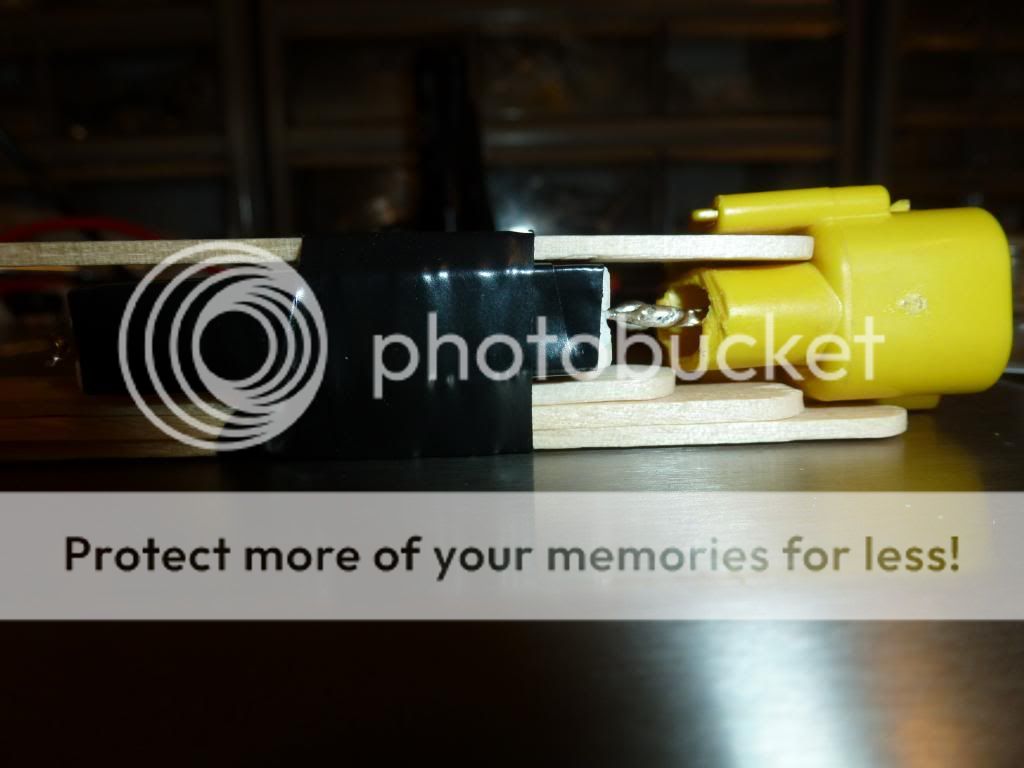
After I wrapped it up with electrical tape it seemed solid enough to with stand some bouncing around. I plugged it in to both sides and no more light.
I figured I would just post this up for the guys who are looking to do the seat change and wanted a part number for a resistor that worked. As well as to let you guys know that so long as you get 2 ohms it doesn't matter if you have 1/2 watt resistors (like devildog used) or the 10 watt ones that I used, both will work.
Taking the seats out, and replacing them with the Corbeau's is not hard at all. With a little searching I was able to find a few threads that showed how to unbolt them, take out the harness and deal with the air bag light. Every thing went smooth up to the air bag light and thats why I thought I would post a few more things in regards to the resistors.
When I ran into trouble I hit up DevilDog1679 who had also installed some new seats and solved the air bag issue. Big thanks to him as he even had a very informative DIY on how to do this. Still I managed to screw it up the first few times.
As he informed me I needed a 1.7 to 2.2 ohm resistance on the plug that went to the now non existent side air bag to remove the light from the dash. First mistake was going and getting a 2.2 k ohm resistor, I didn't even note the K on the bag or on the multi meter when I was testing. Stupid mistake number one.
Second mistake was reading about how another guy had purchased five 10 ohm 1/4 watt resistors and soldered them in parallel to make the proper resistance. It didn't make sense to me, as that was 50 ohms but I wasn't sure about the watts and how that played into it so what the hell for two bucks I tried it. As you might suspect that didn't work, perhaps he placed them in parallel, I don't know?
Any way, again thanks to devildog for helping me out and I made another trip to radio shack. Of course they didn't have what I was looking for which the the smaller (1/2 to 1 watt style resistors) to make 2 ohms. They did have some 1 ohm 10 watt resistors and I figured they might work even though they were bigger than I wanted to use. Here is what they look like (that's not the resistor but it looks just like it) and that is the bag they came in with the part number.
So these come two to a pack (you need two packs) and here is how they look once I soldered them together.
If you don't have the part number for that connector it's ford part # XF2Z-14B022-AA. If you chose to use this plug connector rather than soldering to the female side then you will have to modify it. To do that you cut off the top with a dremel, cut off the resistor (it's too high and for the older model mustangs) and then solder on the two resistors as shown.
The wires in the ford connector where you cut out the old resistor are fairly thin and with the heavier higher watt resistors that I used I figured I needed to support them from moving. I did that with some Popsicle sticks. I had a box of them from my kids school project so what the hell, why not. Here is what I did (I put another on the side but left it off for the picture. Also you may have to adjust the sticks but you get the point, its just to keep it ridged)
After I wrapped it up with electrical tape it seemed solid enough to with stand some bouncing around. I plugged it in to both sides and no more light.
I figured I would just post this up for the guys who are looking to do the seat change and wanted a part number for a resistor that worked. As well as to let you guys know that so long as you get 2 ohms it doesn't matter if you have 1/2 watt resistors (like devildog used) or the 10 watt ones that I used, both will work.
Last edited:
")