
Just a reminder, I know Springsteen wrote it, the Sisters covered it....Ah man, I'M SO EXCITED!

You are using an out of date browser. It may not display this or other websites correctly.
You should upgrade or use an alternative browser.
You should upgrade or use an alternative browser.
Cams and timing
- Thread starter rattleanake
- Start date
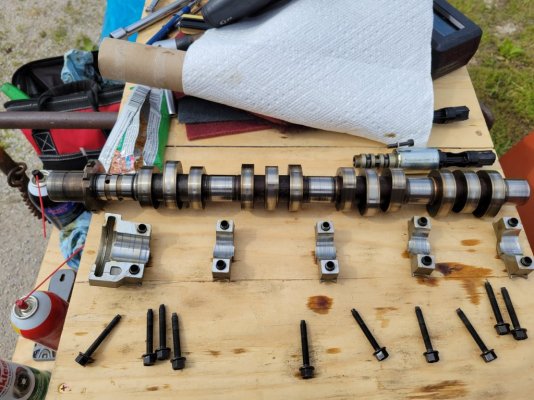
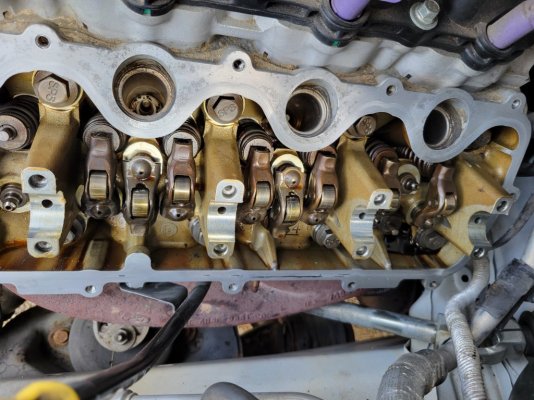
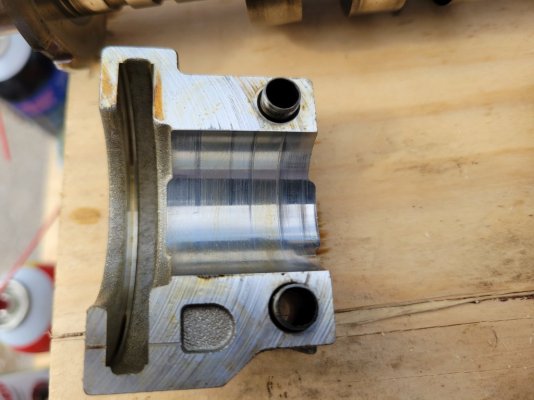
Thanks! So far, so good...Great pics and write up. I owe you a cold beer.
Actually, I don't drink! But you could send one MrBHPs way, he's probably watching Pointer Sisters videos on YouTube right now and could use one!
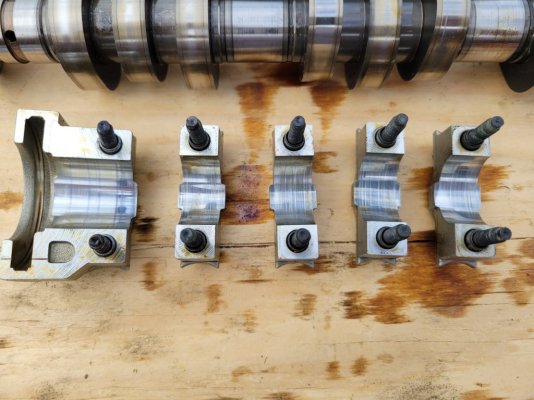
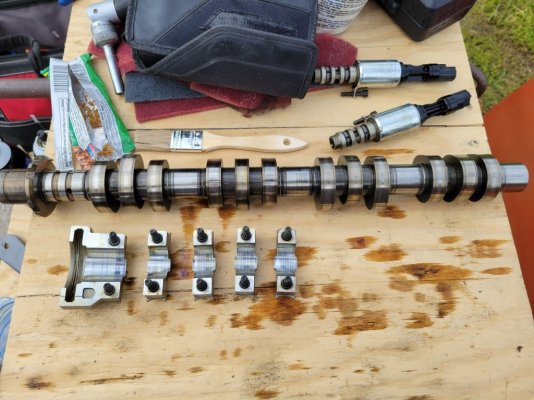
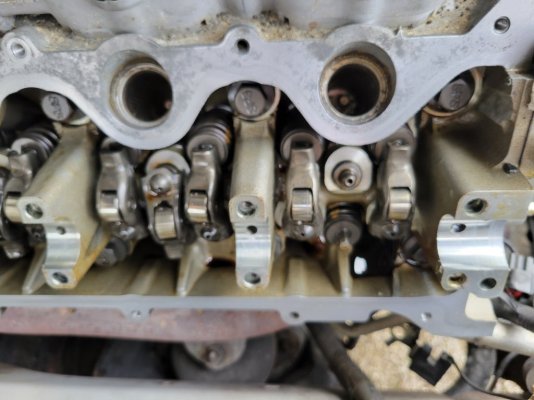
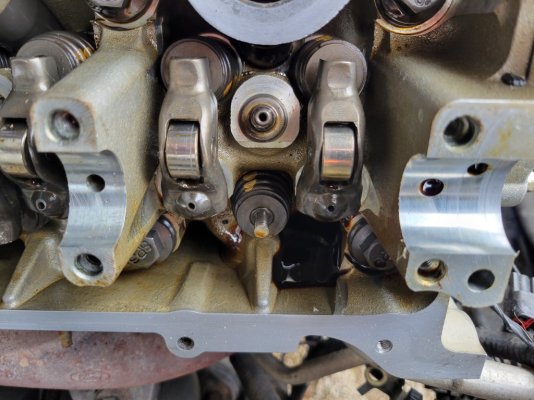
Pulled all the rockers and adjusters. All of them felt fine.
Debating on trying to put rockers in before cams or after. I put them in on the drivers side and when I sat the cam in place it was high and didn't sit all the way down in the cam towers.
I pumped up the adjusters in oil before installing them, so that may be the difference. According to some sources, pumping them up prevents it all from being loose when the engine gets cranked and have a rocker jump around or out. Makes sense to me.
When you pump them up they get rock hard. The piston doesn't move at all....unless you very slowly push it in. Then goes all the way down. That is the adjuster function in operation.
Debating on trying to put rockers in before cams or after. I put them in on the drivers side and when I sat the cam in place it was high and didn't sit all the way down in the cam towers.
I pumped up the adjusters in oil before installing them, so that may be the difference. According to some sources, pumping them up prevents it all from being loose when the engine gets cranked and have a rocker jump around or out. Makes sense to me.
When you pump them up they get rock hard. The piston doesn't move at all....unless you very slowly push it in. Then goes all the way down. That is the adjuster function in operation.

StockishS197
Member
When I have done my cams, I just did lash adjusters + rockers before putting the cam in and walked the cam down slowly using the cam tower bolts.Pulled all the rockers and adjusters. All of them felt fine.
Debating on trying to put rockers in before cams or after. I put them in on the drivers side and when I sat the cam in place it was high and didn't sit all the way down in the cam towers.
I pumped up the adjusters in oil before installing them, so that may be the difference. According to some sources, pumping them up prevents it all from being loose when the engine gets cranked and have a rocker jump around or out. Makes sense to me.
When you pump them up they get rock hard. The piston doesn't move at all....unless you very slowly push it in. Then goes all the way down. That is the adjuster function in operation.
Not technically correct and some risk if you don’t walk it down gently and evenly, but worked fine for me.
That's what I was trying to avoid. Used to do that on Alfas, 1/4-1/2 turns to prevent distortion of the caps, but there wasn't any breakage risk. Really don't want to risk breaking the front thrust cap. So its the hardway for me.When I have done my cams, I just did lash adjusters + rockers before putting the cam in and walked the cam down slowly using the cam tower bolts.
Not technically correct and some risk if you don’t walk it down gently and evenly, but worked fine for me.
A few notes from today:
-oil pump did not come with a new tube seal. Had to reuse the old one which was in pretty good condition.
-Rockauto seal was the wrong size, 4.0 probably. But my foresight bought two...
- rain coming, so had to stop. But I put the phasers on the cams and the bolts are finger tight. Installation sheet has quite a bit to say about improper installations damaging the pin. Nice pics and descriptions of the damage in each pic to let you know what you did wrong. A little concerned about getting that wrong. So I slipped one on to see how snug of a fit and looking for a telltale that I have it wrong. Eh....nothing. Nice fit, not loose, not tight. Seats all the way down when you get the pin aligned. How anyone could not get that right, I'll never know. It's like putting your shoes on the wrong feet. Except most people don't put their shoes on with an impact wrench.
-oil pump did not come with a new tube seal. Had to reuse the old one which was in pretty good condition.
-Rockauto seal was the wrong size, 4.0 probably. But my foresight bought two...
- rain coming, so had to stop. But I put the phasers on the cams and the bolts are finger tight. Installation sheet has quite a bit to say about improper installations damaging the pin. Nice pics and descriptions of the damage in each pic to let you know what you did wrong. A little concerned about getting that wrong. So I slipped one on to see how snug of a fit and looking for a telltale that I have it wrong. Eh....nothing. Nice fit, not loose, not tight. Seats all the way down when you get the pin aligned. How anyone could not get that right, I'll never know. It's like putting your shoes on the wrong feet. Except most people don't put their shoes on with an impact wrench.
A question.....maybe somebody has an answer.
When I was swapping out the spring for the oil pump, pump was in my hand with spring out, I would swear I felt something small hit my shoe. Checked the ground and found nothing. Couldn't think of anything it could be. Bypass cap was on the work surface. No nuts, screws or sockets or anything. Compared the pump to the old pump, everything looks identical.
I was just on Rockauto to look again at the pickup tube o-rings (the small one I got is listed for the Bullitt?). So i looked at the oil pumps. Some came with the o-ring. Some not. Some come with two O-rings, one large and one small. Some come with two o-rings....and a small metal pin.
Any ideas on why they would supply that pin? Is it possible that a pin dropped out of the oil pump?
When I was swapping out the spring for the oil pump, pump was in my hand with spring out, I would swear I felt something small hit my shoe. Checked the ground and found nothing. Couldn't think of anything it could be. Bypass cap was on the work surface. No nuts, screws or sockets or anything. Compared the pump to the old pump, everything looks identical.
I was just on Rockauto to look again at the pickup tube o-rings (the small one I got is listed for the Bullitt?). So i looked at the oil pumps. Some came with the o-ring. Some not. Some come with two O-rings, one large and one small. Some come with two o-rings....and a small metal pin.
Any ideas on why they would supply that pin? Is it possible that a pin dropped out of the oil pump?
It is a GT500 pump. I swapped the 60psi spring from my regular 3v pump into it. Thr GT500 has an 80psi spring. Too much pressure can cause faster bearing wear. It seems like more pressure is better, but only up to a point.
Imagine using a pressure washer and the upping its psi by 33%.
But I have a couple of questions now (great time for it, eh?), so I may have to run the 80psi spring.
Imagine using a pressure washer and the upping its psi by 33%.
But I have a couple of questions now (great time for it, eh?), so I may have to run the 80psi spring.
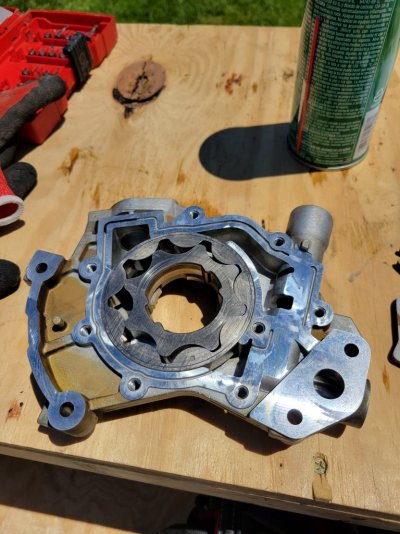
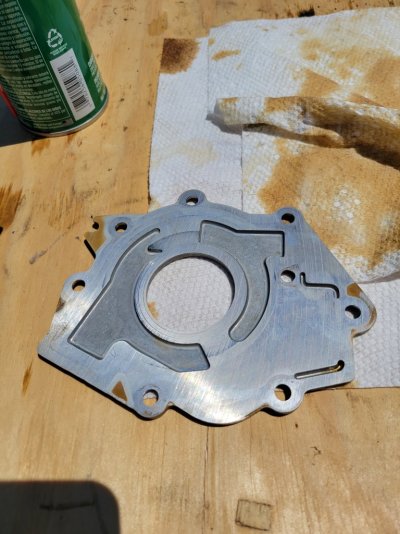
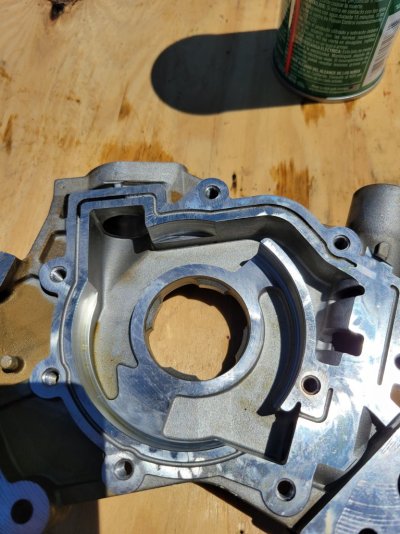
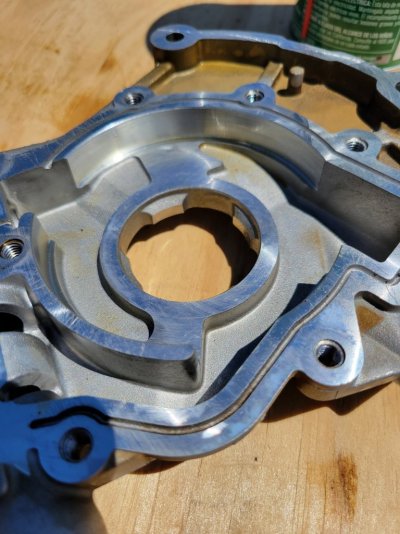
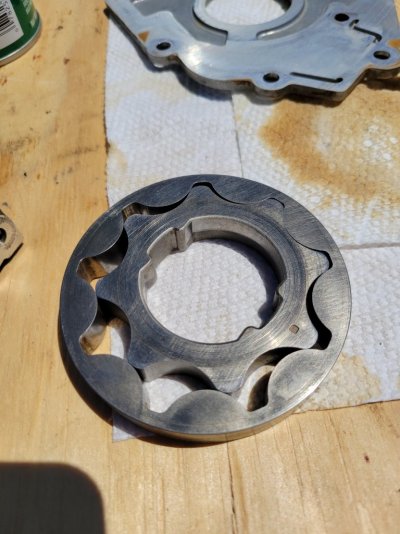
Some measurements of the cap/cup/spring of stock 3V bypass.
Cap: .490 from underside of head to spring seat surface.
Spring (old 240k): 2.510
Cup: 2.305 tip to spring seat surface
Bore depth to cup spring seat surface:
2.350
Spring protrusion beyond bore (no compression): 0.170
Measurements are approximate as my nice digital caliper battery is dead. This is with rather cheap plastic dial caliper.
Wish I had measured the GT500 parts.
I do have the new GT500 spring: 2.720
Took two 4.6 3V pumps apart, no pins anywhere. I guess I am good. Nothing I have come across has mentioned any pins.
Cap: .490 from underside of head to spring seat surface.
Spring (old 240k): 2.510
Cup: 2.305 tip to spring seat surface
Bore depth to cup spring seat surface:
2.350
Spring protrusion beyond bore (no compression): 0.170
Measurements are approximate as my nice digital caliper battery is dead. This is with rather cheap plastic dial caliper.
Wish I had measured the GT500 parts.
I do have the new GT500 spring: 2.720
Took two 4.6 3V pumps apart, no pins anywhere. I guess I am good. Nothing I have come across has mentioned any pins.
Last edited:
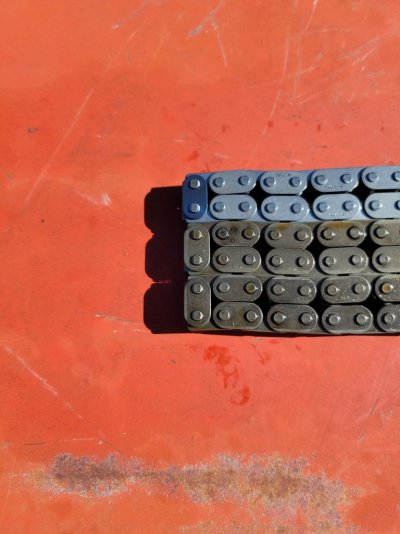
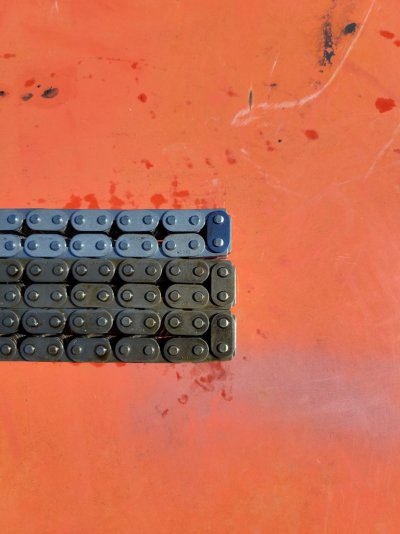
Chains on. Timing marks all lined up.
A word of note.. the crank holding tool that fits over the crank snout and keyway and engages on the down in the block, I have a cheap one. It did not want to go on due to the paint/ powder coating. I had to clean all of it off the inside and then file the little dowel hole until it slid on snugly. Even the keyway slot needed the paint removed and a little filing. Not much and it won't affect anything, but I still had to do it.
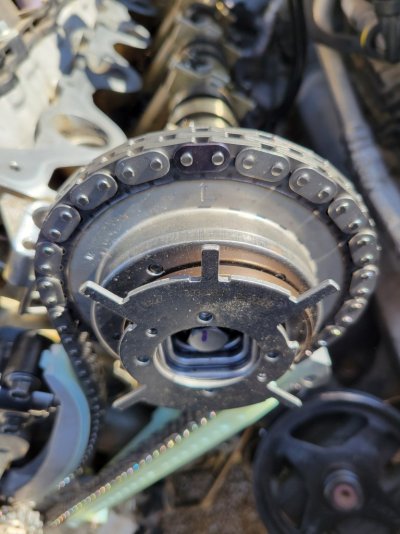
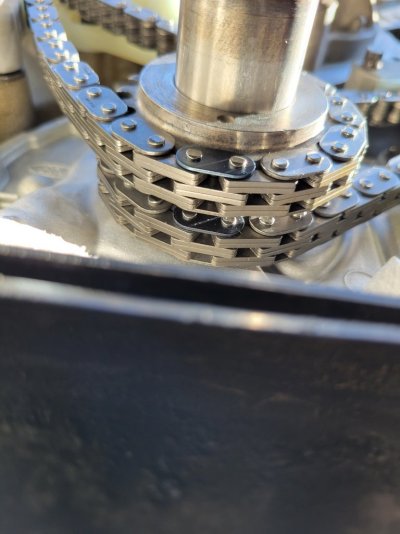
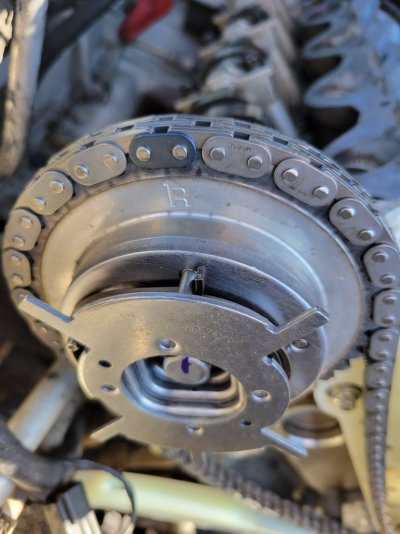
A word of note.. the crank holding tool that fits over the crank snout and keyway and engages on the down in the block, I have a cheap one. It did not want to go on due to the paint/ powder coating. I had to clean all of it off the inside and then file the little dowel hole until it slid on snugly. Even the keyway slot needed the paint removed and a little filing. Not much and it won't affect anything, but I still had to do it.
Last edited:
All 24 rockers are in! It was tedious and fussy just as Whitman Ink (and others...) warned me. But I did it!
The finger on top of the valve thing us helpful for two reasons. One is the obvious one, the keepers don't move up and release the valve. Two, use that finger to tell you the valve is compressing. If the knob on the tool is turning but the valve isn’t moving, STOP! Back off and see where the tool is hung up. Knob turns and valve/spring go down is good. Knob turns and valve/spring not moving is bad.
Compress the valve spring as much as you can without increasing effort. That gives you the most room. And no tools! Do not put a wrench on that knob. If you do, now that you've read this, you deserve what happens next!
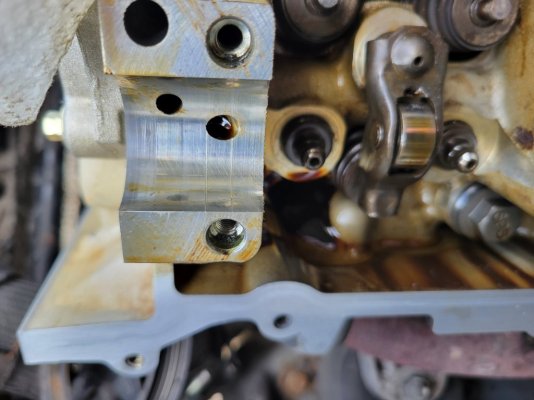
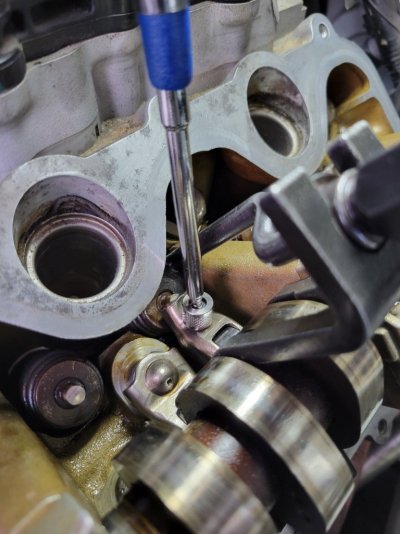
All the rockers go in from the valve side, not the adjuster side. Try to do the exhaust valves first as you go. They are harder to get in place as they come up from underneath, but without intake rockers next to them, it gives you some room for your fingers. The intakes are much easier since they drop in from above. My magnet worked pretty good at that. See the pic.
Also, if the rockers seem too tight going in, you can gently/slowly depress the plunger on the adjuster to get a little more room.
A little hint...do the very back drivers side intake rocker at the beginning. With the other two out of the way, its easier to get that one in place. Do the exhaust on that cylinder when it comes up as you do others for the same reason and then do the other intake rocker dead last because it will go in easier from above.
Magnet:
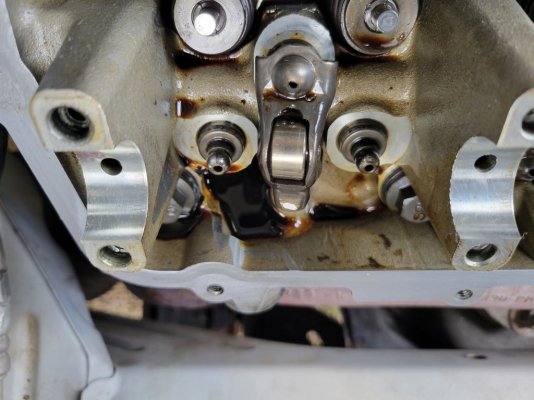
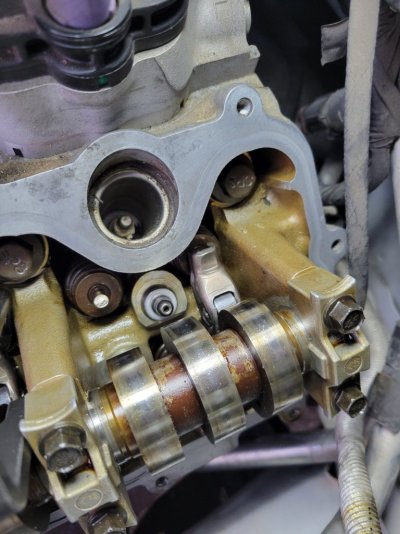
Last cylinder on drivers side:
The finger on top of the valve thing us helpful for two reasons. One is the obvious one, the keepers don't move up and release the valve. Two, use that finger to tell you the valve is compressing. If the knob on the tool is turning but the valve isn’t moving, STOP! Back off and see where the tool is hung up. Knob turns and valve/spring go down is good. Knob turns and valve/spring not moving is bad.
Compress the valve spring as much as you can without increasing effort. That gives you the most room. And no tools! Do not put a wrench on that knob. If you do, now that you've read this, you deserve what happens next!
All the rockers go in from the valve side, not the adjuster side. Try to do the exhaust valves first as you go. They are harder to get in place as they come up from underneath, but without intake rockers next to them, it gives you some room for your fingers. The intakes are much easier since they drop in from above. My magnet worked pretty good at that. See the pic.
Also, if the rockers seem too tight going in, you can gently/slowly depress the plunger on the adjuster to get a little more room.
A little hint...do the very back drivers side intake rocker at the beginning. With the other two out of the way, its easier to get that one in place. Do the exhaust on that cylinder when it comes up as you do others for the same reason and then do the other intake rocker dead last because it will go in easier from above.
Magnet:
Last cylinder on drivers side:
Last edited:
Similar threads

- Replies
- 98
- Views
- 3K


- Replies
- 6
- Views
- 587

Latest posts
-
Should I stay away from 2005 to 2008 (spark plugs)?
- Latest: 2019Chieftain-no-more
-

-

-


Support us!
Support Us - Become A Supporting Member Today!
Click Here For Details