Vorshlag-Fair
Official Site Vendor
M3 REAR TRAILING ARMS: BENT, RUSTED, BROKEN, & GOOD!
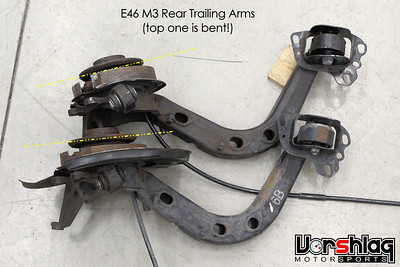
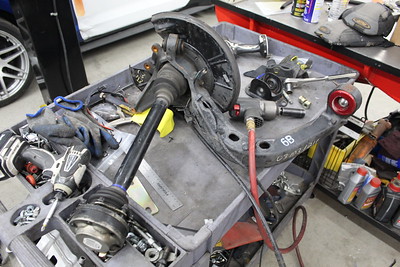
It didn't take long to see the issue with our first of FOUR different left rear trailing arms - it was bent (see right vs left pics below). This arm was from a rear subframe I had purchased along with a car more than a year previous, so it was too late to cry sour grapes.
With the naked eye you couldn't see any wrinkle or bend in the hollow cast steel arm - it wasn't until we had a replacement arm next to this one that the bend was obvious. Not a part you try to "fix", either. That bent arm is scrap at this point.
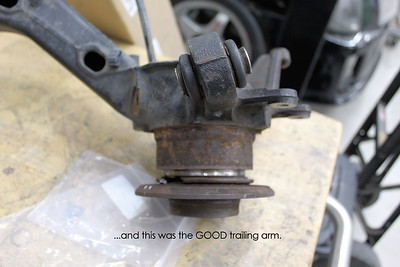
Luckily I had another E46 M3 rear subframe assembly I had bought in late 2019, so that arm was pulled for use on the team car. But the bad luck just kept coming. As the rear wheel hubs were being removed for a rear wheel bearing replacement, it just broke. Yes, we know how to do this job and have done it many times... it was a somewhat rusty arm, so that didn't make it far. Wasted probably 2 hours on this one before we got to this point.

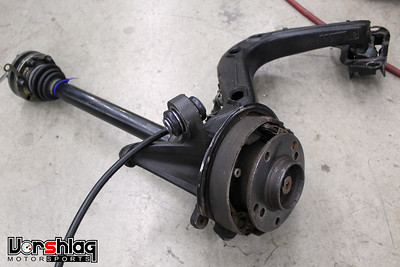
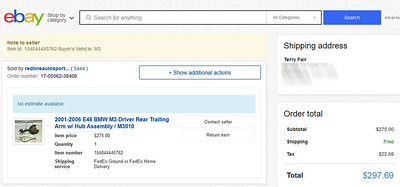
So I bought another E46 M3 trailing arm, and this one *came with the axle. It also came with a single Ground Control spherical RTAB, which Tim removed - we're trying to test the Sealed Spherical we had installed on the previous bent trailing arm. (*NOTE - if it comes with the axle it is because they couldn't get it off!)
 View attachment 78842
Tim and Magan fought with this 3rd trailing arm on the bench - the axle didn't want to come out. They got the upper and lower sphericals replaced and the sealed spherical RTAB, and I told them to put it on the car and we could use a slide hammer and heat on the axle...
 View attachment 78845
Once on the car a couple of weeks later (remember: we're only working on this one night a week for a few hours, at best) they tried heat, slide hammers, but that axle will NOT come out of the hub. The end was ruined before it got to us (at the junkyard that sold it to me). I've since learned of a trick to get this out - soaking the axle in some "magic sauce" (50/50 mix of Acetone and ATF fluid), which we will do later to salvage this trailing arm.
 View attachment 78844
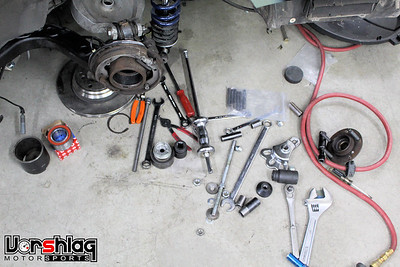
But at the time I was getting sick of this damn trailing arm holding up the build and burning up hours - the bearings and RTABs were moved to each arm, the brake backing plate modified each time, etc. So I kept "throwing money at the problem", and bought bigger tools and more trailing arms until we had a setup that worked.
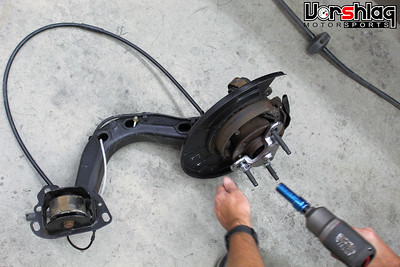
Forth time's the charm! This was the best looking used trailing arm so far, and one night Tim got that one swapped to the new bushings, RTAB, hub removed, and on the car. Then he and I got the snap ring extracted, then the wheel bearing pulled.
Next up the arm comes off the car, the new wheel bearing gets pressed in, then the snap ring, then the hub is pressed in, then it goes on the car, then it gets the new axle for that side. THEN the car can go on the ground and get ride heights set. Whew! That whole process was some nonsense, but we should get at least 2 spare hubs and a full spare trailing arm assembly out of the spare parts, once we soak arm #3 with the "magic sauce" and get that rusty axle out.
SPHERICAL BUSHINGS
On the upper arms there are rubber bushings on the inboard side. Rubber bushings are the Devil - they allow lots of deflection under lateral and braking loads, which we don't want. So we invested in these Rogue Engineering spherical bushed housings for this location, shown below left.
 View attachment 78840
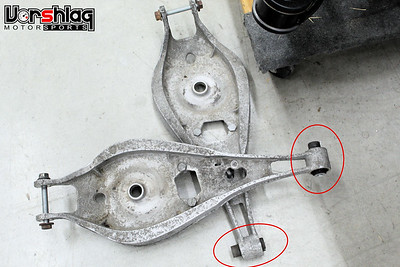
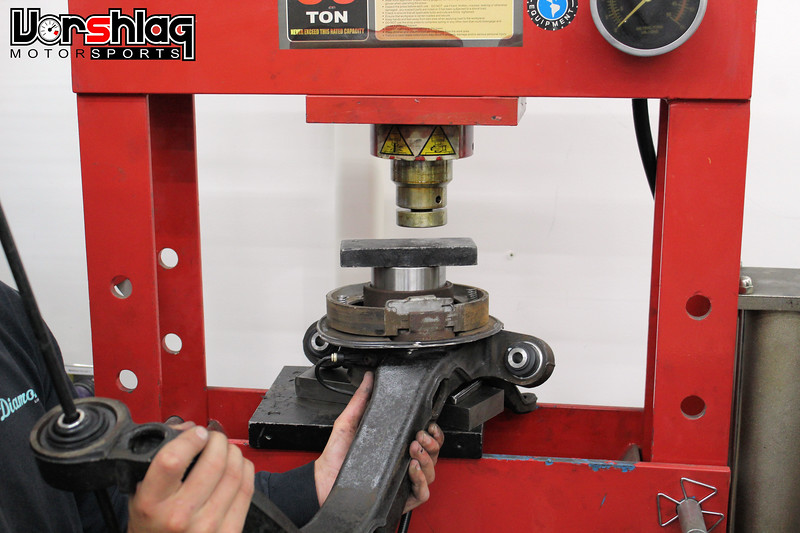
Tim used some sockets and the 20 ton press to push out the old rubber bushings and housings, then used an old mechanic's trick - tossed the Rogue spherical housings in the freezer for a few hours.

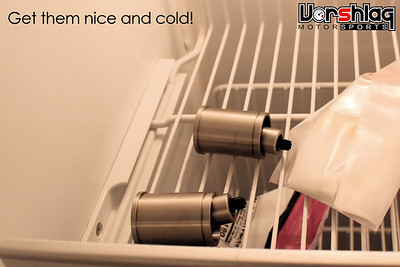
That shrinks up the bushing and allows it to slide into place in the upper control arms nicely.

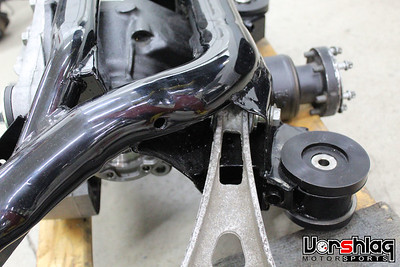
The Rogue housings have a face on one end that you press to the control arm. The other end has a groove for a snap ring, which secures into the arm. Inside this housing is the spherical bearing, with bushings that press inside that to allow the bolt to fit and provide articulation. Above right is this end of the re-bushed upper arm bolted into the E46 M3 subframe.
It didn't take long to see the issue with our first of FOUR different left rear trailing arms - it was bent (see right vs left pics below). This arm was from a rear subframe I had purchased along with a car more than a year previous, so it was too late to cry sour grapes.

With the naked eye you couldn't see any wrinkle or bend in the hollow cast steel arm - it wasn't until we had a replacement arm next to this one that the bend was obvious. Not a part you try to "fix", either. That bent arm is scrap at this point.


Luckily I had another E46 M3 rear subframe assembly I had bought in late 2019, so that arm was pulled for use on the team car. But the bad luck just kept coming. As the rear wheel hubs were being removed for a rear wheel bearing replacement, it just broke. Yes, we know how to do this job and have done it many times... it was a somewhat rusty arm, so that didn't make it far. Wasted probably 2 hours on this one before we got to this point.


So I bought another E46 M3 trailing arm, and this one *came with the axle. It also came with a single Ground Control spherical RTAB, which Tim removed - we're trying to test the Sealed Spherical we had installed on the previous bent trailing arm. (*NOTE - if it comes with the axle it is because they couldn't get it off!)

 View attachment 78842
Tim and Magan fought with this 3rd trailing arm on the bench - the axle didn't want to come out. They got the upper and lower sphericals replaced and the sealed spherical RTAB, and I told them to put it on the car and we could use a slide hammer and heat on the axle...
 View attachment 78845
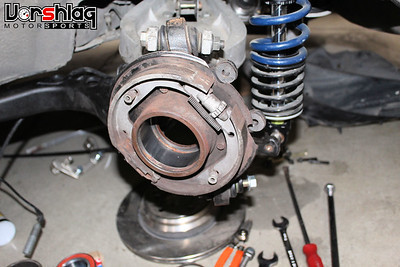
Once on the car a couple of weeks later (remember: we're only working on this one night a week for a few hours, at best) they tried heat, slide hammers, but that axle will NOT come out of the hub. The end was ruined before it got to us (at the junkyard that sold it to me). I've since learned of a trick to get this out - soaking the axle in some "magic sauce" (50/50 mix of Acetone and ATF fluid), which we will do later to salvage this trailing arm.
 View attachment 78844
But at the time I was getting sick of this damn trailing arm holding up the build and burning up hours - the bearings and RTABs were moved to each arm, the brake backing plate modified each time, etc. So I kept "throwing money at the problem", and bought bigger tools and more trailing arms until we had a setup that worked.


Forth time's the charm! This was the best looking used trailing arm so far, and one night Tim got that one swapped to the new bushings, RTAB, hub removed, and on the car. Then he and I got the snap ring extracted, then the wheel bearing pulled.

Next up the arm comes off the car, the new wheel bearing gets pressed in, then the snap ring, then the hub is pressed in, then it goes on the car, then it gets the new axle for that side. THEN the car can go on the ground and get ride heights set. Whew! That whole process was some nonsense, but we should get at least 2 spare hubs and a full spare trailing arm assembly out of the spare parts, once we soak arm #3 with the "magic sauce" and get that rusty axle out.
SPHERICAL BUSHINGS
On the upper arms there are rubber bushings on the inboard side. Rubber bushings are the Devil - they allow lots of deflection under lateral and braking loads, which we don't want. So we invested in these Rogue Engineering spherical bushed housings for this location, shown below left.
 View attachment 78840
Tim used some sockets and the 20 ton press to push out the old rubber bushings and housings, then used an old mechanic's trick - tossed the Rogue spherical housings in the freezer for a few hours.


That shrinks up the bushing and allows it to slide into place in the upper control arms nicely.


The Rogue housings have a face on one end that you press to the control arm. The other end has a groove for a snap ring, which secures into the arm. Inside this housing is the spherical bearing, with bushings that press inside that to allow the bolt to fit and provide articulation. Above right is this end of the re-bushed upper arm bolted into the E46 M3 subframe.